

Single opt-in subscription banner


Use case description
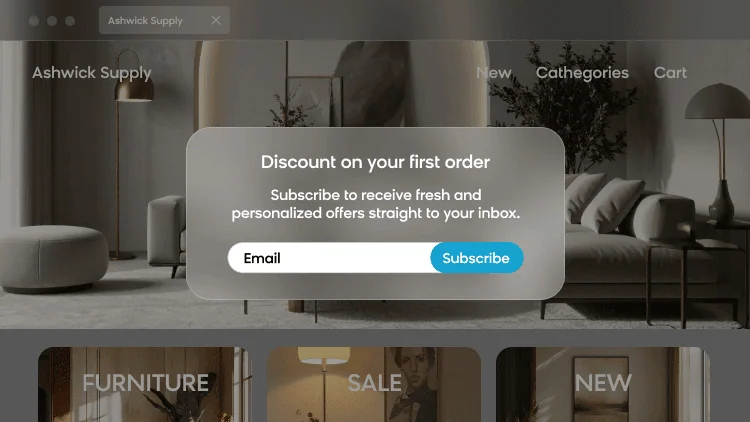
The single opt-in subscription banner shows website visitors an email signup form that grows your newsletter list. The banner checks that visitors enter a correctly formatted email address and explains what they're signing up for, including the benefits. Bloomreach clients using this banner have seen up to a 69% improvement in leads captured.
Key features
- Validates the email format before submission to keep your subscriber list clean.
- Explains the value of subscribing directly in the banner copy.
- Updates the visitor's email property and newsletter consent automatically after they subscribe.
Use case items
With this use case, you'll get a:
- Banner: Single opt-in subscription banner, a weblayer shown to visitors who haven't given newsletter consent.
- Evaluation dashboard: Email Single Opt-In Banner Evaluation Dashboard, which tracks consents collected, current subscribers, and banner performance.
How to deploy the use case
Meet the requirements
Check if the data in your project meets the requirements. The Use Case Center lists requirements for each use case during the deployment process.
Understand the use case logic
The banner appears to visitors who haven't given newsletter consent. To limit how often it shows, the banner only displays to visitors who haven't closed it that day and haven't seen it more than twice already that day, up to a maximum of 5 times per 30 days. To target visitors more likely to subscribe, the banner only shows to visitors who have viewed at least 3 products during their current session. The banner works on both desktop and mobile devices.
When a visitor subscribes, Bloomreach automatically updates their email property and newsletter consent. The banner also tracks the event attribute data_source with the value single opt-in weblayer. No change is needed for this tracking.
This use case runs without an A/B test, since the goal is to maximize the number of new subscribers rather than compare banner variants.
Adjust the use case
Now that you understand the use case logic, you can set up the use case according to your needs.
Banner settings
Access the banner and go to the Settings tab to adjust the banner settings. Pay attention to:
- Consent category: Match the naming exactly to your project's Project settings > Privacy management > Consents > Consent management.
- Audience: Exclude visitors who already gave newsletter consent, and add frequency capping so visitors aren't shown the banner too often.
Design and copy
Access the banner and go to Design > Editor to customize the banner visuals and copy to reflect your company's brand identity, including the header text, body text, placeholder, success messages, and privacy policy link.
Test and run the use case
Test the use case before deploying it. Testing ensures you don't show an unfinished or imperfect banner to your visitors.
Once testing is over, run the use case. Open the banner and click Start to launch the campaign.
Evaluate the results
Run the use case for a few days to see the impact.
After this initial period, use the prebuilt evaluation dashboard to measure and analyze relevant data:
- Open the Email Single Opt-In Banner Evaluation Dashboard.
- Check the consents collected, current subscribers, and click rate metrics against your own historical data.
- Adjust the comparison time frame in the dashboard if needed.
Other resources
Learn how to enhance and optimize your banner with tips from Bloomreach experts.
Additionally, learn more about weblayers and consent management.
Updated 20 days ago