

Widget webhooks in scenarios
Widget webhooks let you connect Bloomreach scenarios to external systems hosting custom widget interfaces. Once you add a widget webhook to a scenario, you can edit its parameters, tailor messages, add Jinja expressions, and verify the connection between Bloomreach and the widget interface.
Prerequisites
Before you start, make sure you have:
- At least Campaign editor access to your Bloomreach account.
- A widget webhook already created and configured. See Configure and implement widget webhooks for setup instructions.
- The widget URL from your external application.
Add a widget webhook to a scenario
Create or open a scenario
Create a new scenario or open an existing one. See the Scenario building guide for instructions on how to set up a scenario before proceeding.
Add the widget webhook
- Go to Campaigns > Scenarios and open your scenario.
- In the Design tab, click Other under Actions to open the action nodes wizard.
Find your widget webhook and click it to load its interface into the scenario editor.
Widget webhook interface
Before editing, review the controls. The general interface layout is the same for all widget webhooks, regardless of the connected application.
The interface has two panels and a set of action buttons.
Panels
- Editor: The loaded widget interface where you edit text, messages, and parameters.
- Settings: Where you configure authentication, throughput policies, and custom campaign tracking.
Action buttons
- Cancel — discards your edits.
- Test — sends a test request to verify the connection. Bloomreach retrieves the widget's current state when you click this.
- Done — saves and applies your changes to the scenario node. Bloomreach retrieves the widget's current state when you click this.
Jinja expression wizard
Use the Jinja expression wizard to add dynamic content to your widget webhook parameters. See Jinja for syntax guidance.
Edit widget webhook parameters
Once the widget webhook loads in the scenario editor, you can edit its parameters directly in the Editor panel.
The available parameters depend entirely on how the widget webhook was built — interfaces can range from a single input field to a complex multi-parameter form. Adjust text, messages, and any configurable parameters to match your use case.
When you're done, click Test to verify the connection, then click Done to save your changes.
Widget webhook interface examples
The widget webhook interface varies based on the connected application. The example below shows the default Bloomreach widget webhook.
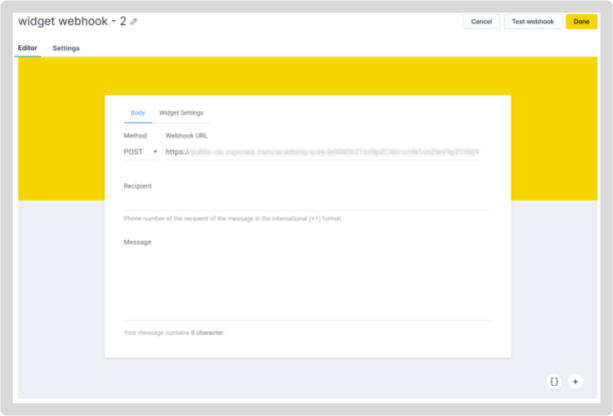
Example of a default Bloomreach widget webhook interface in the scenario editor.
Next steps
- Scenarios overview: Learn more about scenarios and how to work with them.
- Widget webhooks: Understand how widget webhooks work and what prerequisites apply.
Updated 3 months ago