

Set up Gorgias integration
Connect Gorgias to Bloomreach Engagement and give your support team real-time access to customer data — right inside every ticket. For an overview of the integration and its use cases, refer to the Gorgias article.
Prerequisites
1. Bloomreach widget
To display a Bloomreach widget in Gorgias, at least one customer attribute must exist in the Bloomreach Engagement app for that customer.
2. Project identifiers
Ensure your Bloomreach project has the following hard and soft IDs set up:
email_id: A hard ID that is lowercased and trimmed. The email address is the primary identifier for customers in Bloomreach Engagement.ticket_id: A soft ID that represents the Gorgias ticket ID.gorgias_id: A soft ID that represents the Gorgias customer ID.
These IDs will be available for selection during the integration setup. If you don’t see them, contact your Customer Success Manager or the account admin.
Set up the Gorgias integration
To integrate Gorgias with Bloomreach Engagement, follow the steps below or watch the video walkthrough.
Authenticate the application
After you verify your prerequisites, set up authentication:
- In Bloomreach Engagement, go to Data & Assets > Integrations.
- Click + Add new integration.
- Search for Gorgias and click + Add integration.
- Type your Gorgias subdomain into the Gorgias subdomain field. For example, if your login URL is
www.your_store.gorgias.com, enter onlyyour_store. - Click Connect your Gorgias account with Bloomreach and log in to your account.

(Optional) Sync SMS conversations
Gorgias SMS Conversational Support lets you deliver customer support via SMS, managed by human agents. When support agents respond to a ticket in Gorgias, their responses are sent via the same SMS number the initial message came through.
To enable this, check the Sync SMS Conversations checkbox. This creates a new Gorgias ticket for every customer who replies to your Bloomreach Engagement SMS number. Learn more in the Gorgias documentation.
Note:
Customers must text your Bloomreach Engagement number first to start an SMS ticket.
Automated messages sent directly from Bloomreach Engagement don't appear in Gorgias. Here's the expected behavior:
- Customer replies to a text: the reply is sent to both Bloomreach Engagement and Gorgias.
- Agent replies via Gorgias: the reply appears on both sides.
- Automated message sent via Bloomreach Engagement: the reply doesn't appear in Gorgias.
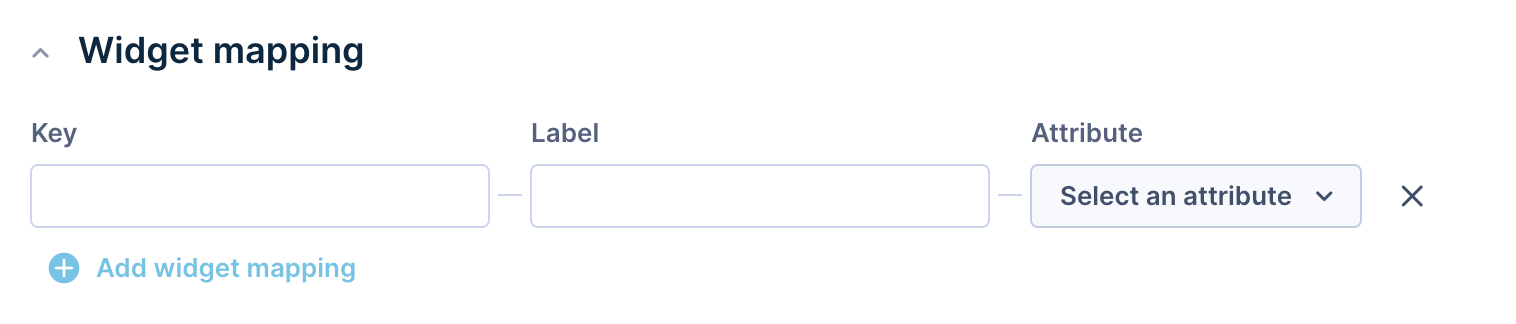
(Optional) Widget mapping
Decide which customer information to export from Bloomreach Engagement to Gorgias for each support ticket. The attributes you select appear inside each support ticket under the Bloomreach Engagement widget on the right.
- Attribute: Select the attributes to export from Bloomreach Engagement.
- Label: Define the name for each attribute as it appears inside Gorgias.
- Key: Define the name for each attribute when used in Gorgias macros. The key value must not contain special characters, numbers, or spaces.
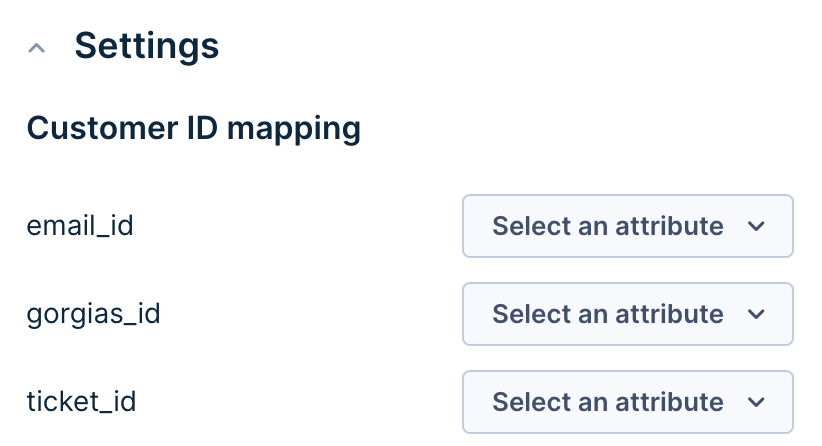
Customer ID mapping
Define how to display Gorgias identifiers — email_id, gorgias_id, and ticket_id — in the Bloomreach Engagement app.
Save the integration
Click Save to finish the configuration. From this point forward, an open or closed status in Gorgias appears in your Bloomreach Engagement project.
Verify the Gorgias view
After you create the integration, two integrations appear under the HTTP integration tab in the Settings section of your Gorgias account: Bloomreach_Engagament_Ticket_Created and Bloomreach_Engagament_Ticket_Closed. Both are enabled by default. If you delete one or both of these integrations in Gorgias, the integration stops working correctly.

If you merge two support tickets — for example, ticket A into ticket B — the merged ticket (ticket A) won’t receive further status updates in Bloomreach Engagement.
When sending data to Gorgias, properties update after a ticket is updated. For tickets created before you installed Bloomreach Engagement, attributes may not appear initially — they update the next time the ticket is modified.
Updated 4 months ago