

Set up external deliverability data integrations
Connect Google Postmaster Tools, Microsoft SNDS, or both to bring external sender reputation and inbox-placement data into the email deliverability dashboard.
WarningMicrosoft SNDS integration is temporarily unavailable. Use Google Postmaster Tools only to connect external deliverability data.
For guidance on what to look for once connected, see Monitor email deliverability dashboard.
Prerequisites
- Email channel enabled on the project
- Analyses Viewer role
- Permission to manage project integrations
Connect Google Postmaster Tools
Verify your sending domains
Before connecting, verify your sending domains in Google Postmaster Tools. You only need to do this once per organization.
- Open Google Postmaster Tools and log in using your Google account.
- Add your main sending domain first—for example,
your-brand.com. Verifying this domain means you won't need a separate verification step for each subdomain. - Copy the TXT record Google generates and add it to your domain's DNS settings, or share it with your IT team to add. Google's domain verification guide covers the steps for different DNS providers.
- Once the TXT record is live, return to Google Postmaster Tools and click Verify.
- Add any sending subdomains you use—for example,
mail.your-brand.com. They're verified automatically once the main domain is verified.
NoteIf a subdomain doesn't appear in the dropdown later, add it in Google Postmaster Tools. It'll show up in the dashboard at the next data sync.
Add the integration
- Go to Data & Assets > Integrations > Add integration.
- Select Google Postmaster Tools.
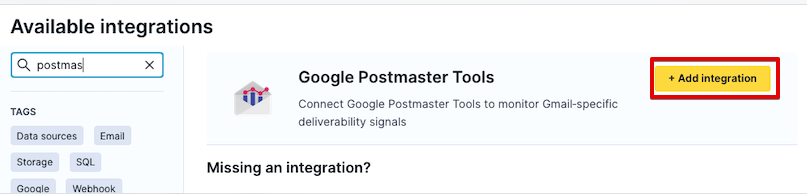
- Click Connect with Google and sign in with the Google account that manages your Google Postmaster Tools profile.
- Select the domains you want to monitor.
- Click Save.
Data doesn't appear right away—it fills in at the next scheduled sync.
- Sync window: 02:00–06:00 UTC. Google typically publishes data 1–3 hours after midnight UTC.
- Historical data: Up to 120 days available when you first connect.
- Project limit: 50 domains and IPs combined, shared across all external data integrations.
You can update your selected domains at any time. To use a different Google account, create a new integration—you can't update the account on an existing one. If the same domain appears in more than one Postmaster integration, it only shows once in the dashboard.
Reconnect after your access expires
If the connection to Google expires—for example, because the account owner removed access—only the external deliverability data section stops updating. Email sending isn't affected.
To reconnect:
- Go to Data & Assets > Integrations, open the Google Postmaster Tools integration, and click Disconnect.
- Follow the steps in Add the integration.
Data history and retention
| Source | History at first connect | Kept while connected |
|---|---|---|
| Google Postmaster Tools | Up to 120 days | Up to 13 months |
| Microsoft SNDS | Up to 90 days | Up to 13 months |
If you disconnect an integration, data already collected stays in the dashboard for up to 13 months. Reconnecting restores the full available history.
Troubleshooting
Connection expired
Email sending continues normally. Disconnect the integration and reconnect following the steps above.
Sending subdomain doesn't appear in dropdown
Add it in Google Postmaster Tools first, then reopen the integration to pick it from the refreshed list.
Microsoft SNDS won't save—time zone error
Copy the exact time zone from your SNDS account settings and try again. Don't change the time zone in SNDS to make it match—that invalidates your access key.
Microsoft SNDS panels are empty
Your IPs may send fewer than 100 emails per day to Hotmail or Outlook addresses, they may not yet be accepted by Microsoft, or the date range you selected is older than 90 days.
No data after saving the integration
The sync runs between 02:00 and 06:00 UTC—not in real time. Check back after the next sync window.
Summary cards show N/A
The date range you selected is only partially covered by available data—common right after connecting a new integration. Scroll down to the chart to see which days have data, then narrow the date range to a fully covered window.
Integration section blank or shows notification
If an integration is disconnected or has an expired credential, that section shows an inline message with a link to fix it. The other integration section continues to work normally.
Dashboard slow to load
Contact Bloomreach Support with your project ID and the integration name.
Best practices
- Use a separate subdomain for each type of email. For example, keep transactional and marketing sends on different subdomains. This makes it easier to spot delivery issues by stream.
- Label your IPs before connecting SNDS. It takes a few minutes and saves a lot of time reading charts later.
- Don't change your SNDS time zone without a plan. It breaks the connection and requires you to set up the integration from scratch.
- Add a campaign identifier to your email headers. This is the only way to see campaign-level data in the feedback loop panel.
Updated 9 days ago