

Create a division
Create a division for region and brand access, define its customer filter, and assign users and roles to it.
Prerequisites
- Project Admin role or higher with global scope access. Necessary to:
- Create divisions
- Manage user assignments
- Manage imports/exports
- Access integrations project-wide
- The customer attribute you'll filter on (for example,
regionorbrand) already present on your customer profiles, with accurate, up-to-date values.
Create a division
-
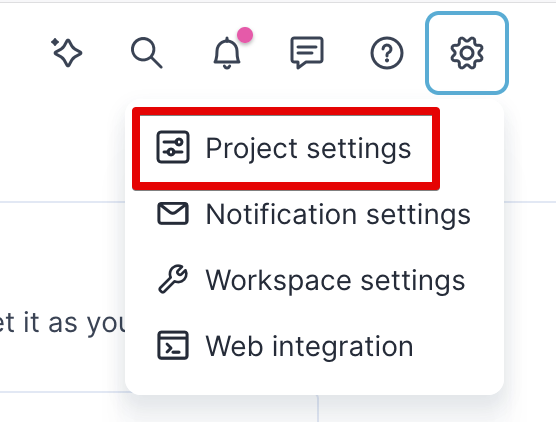
Go to Settings > Project settings.
-
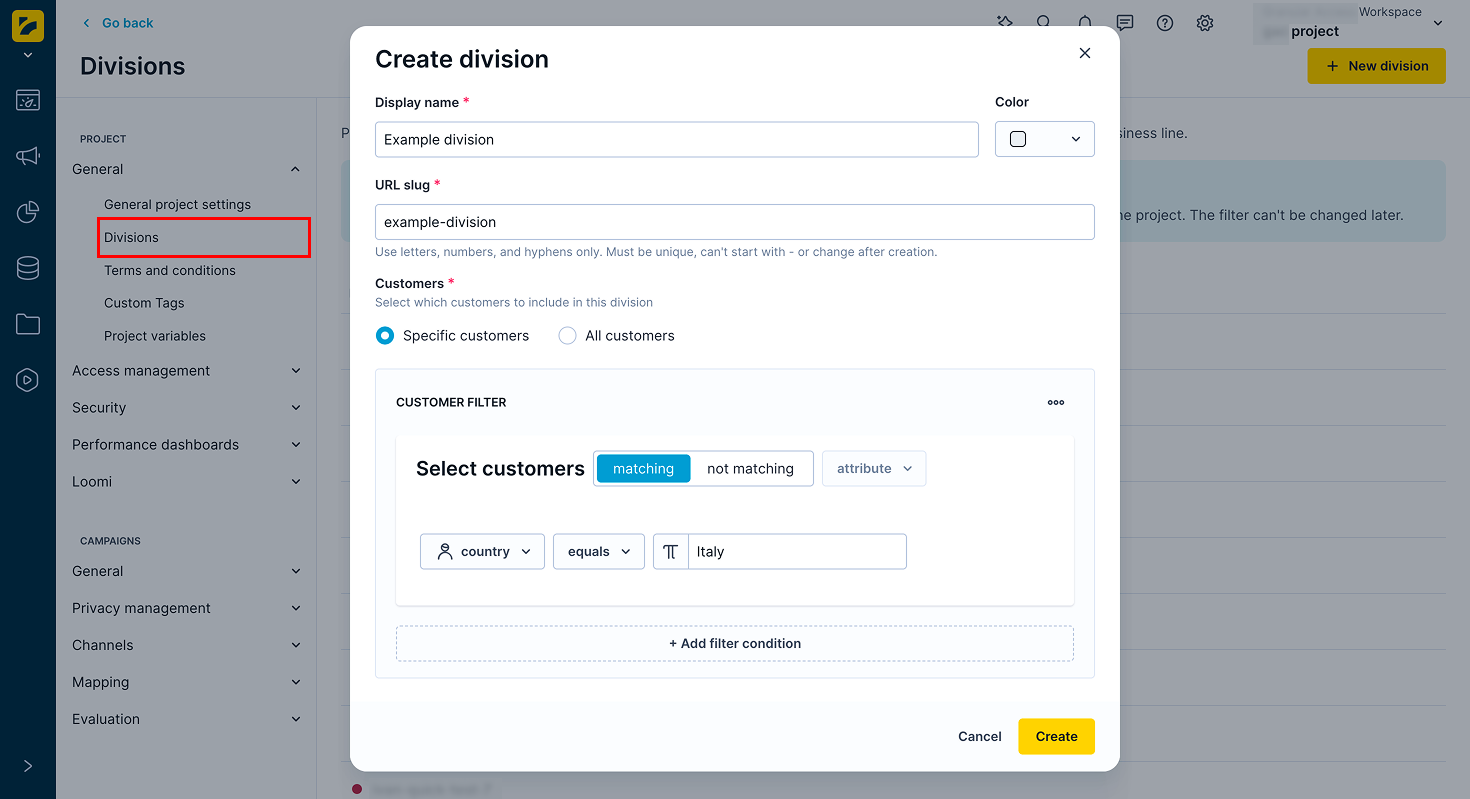
In the General section, select Divisions, then click + New division.
-
Give the division a display name and URL slug.
-
Choose a color for the division. The color is used as its icon in the project switcher and as the badge color on the division's entities (for example, scenarios).
-
Choose whether the division includes All customers or Selected customers to filter customers.
-
Save the division.
ImportantWait a few minutes to finish the division setup before assigning users or testing filtered data. Switching in immediately can produce temporary "Forbidden" errors while the division's permissions finish propagating.
Once a division is set up, switch into it from the account/project selector in the top-right corner — a project with multiple divisions lists them there, and the URL reflects the active division (.../p/project-name/v/division-name). Divisions you have access to are also listed on the homepage.
Customer filter
To define which Selected customers belong to this division, use customer filters. The filter supports customer attributes stored on the customer's profile (string or number) with AND, OR, or IN logic — for example:
region == "DE"to match one of several allowed values:
region IN ("DE", "FR")or combining properties:
region == "DE" AND brand == "Nike"
ImportantAttributes that hold multiple values per customer (a customer belonging to more than one region or brand at once) aren't supported. Segmentations and aggregates aren't supported as filter criteria either — only a single customer attribute.
Assign users and roles
To assign users and roles, ensure you have the Project Admin role or higher.
NoteAssigning a user access to the global scope gives them access to every division in the project, including divisions you create later.
Selecting every existing division one by one is not the same thing and doesn't grant global-scope access. If you add a new division later, you need to grant those users access to it.
-
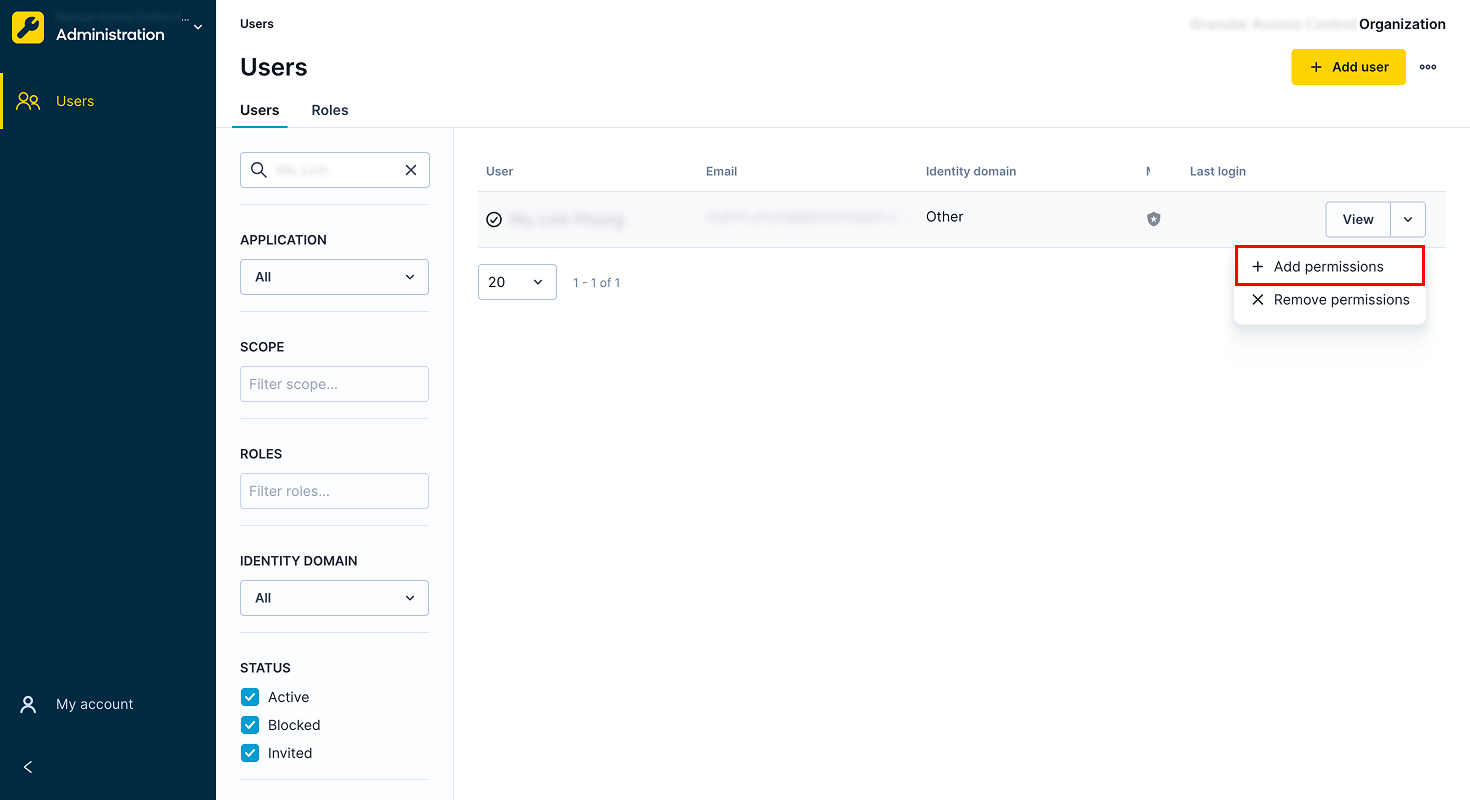
Go to the Administration app.
-
Hover over the tile of a selected user and open the menu that appears. Select + Add permissions.
-
Select the application (for example, Marketing).
-
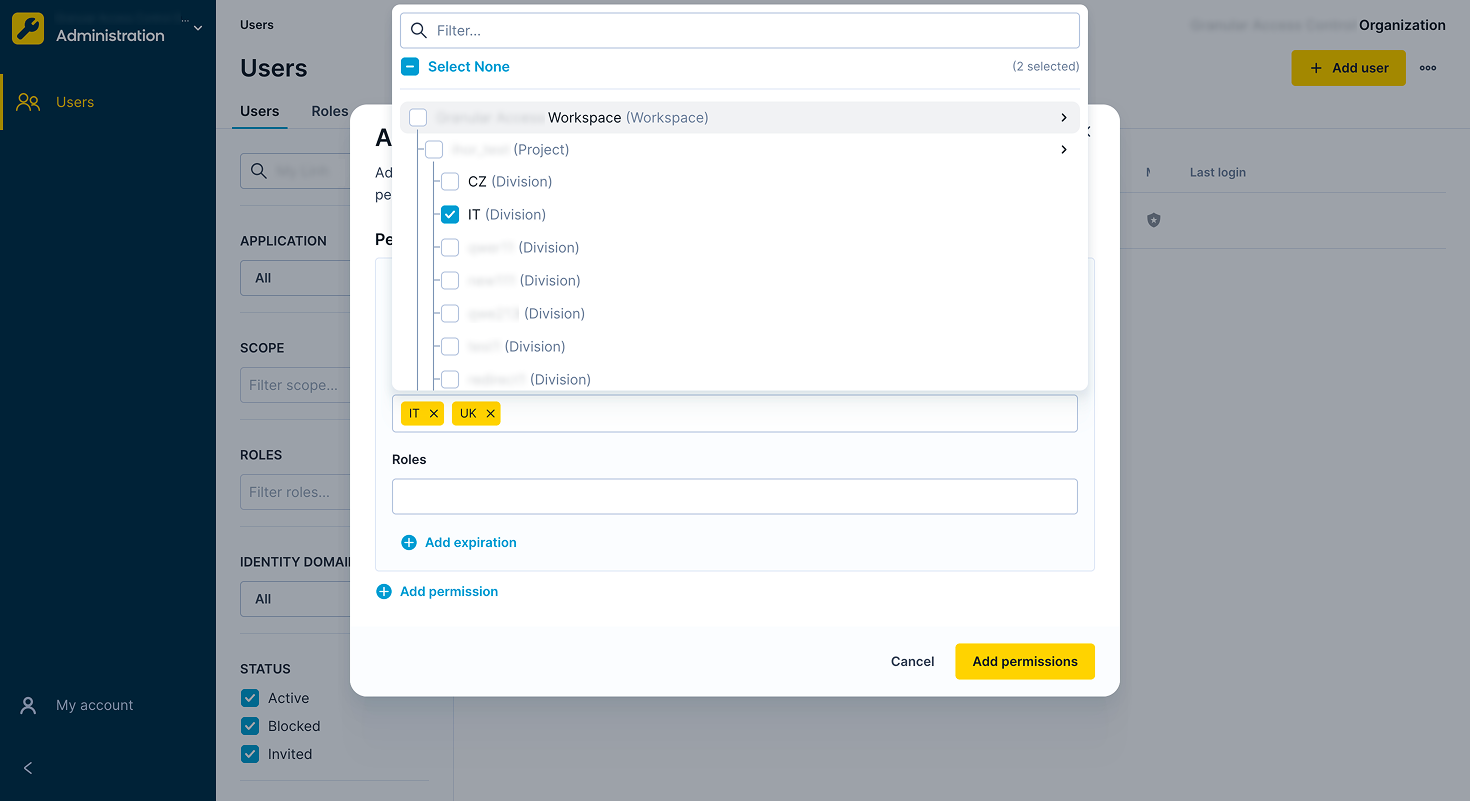
Under Scope, select the projects and divisions the user should have access to. Selecting a project automatically grants access to every division in it.
-
Under Roles, select the permissions the user will have in that project or division, the same way you would for a project (see Role-based access management). Divisions support campaign and analytics roles.
NoteA global-scope user can view any division's campaigns, segments, and reports as read-only. To edit or run something created in a specific division, switch into that division first.
Identify and access division-scoped entities
Entities tied to a specific division — a scenario, or catalog, for example — show a badge in that division's color and name. From the global scope, you can filter entity lists by division tag to see a specific division's items without switching into it. For example, scenarios shared from the global scope carry a separate shared badge, visible when you toggle shared from global on.
Viewing an entity from outside its own division is always read-only — switch into that division to edit or run it.
Limitations
- Deleting or duplicating a division isn't supported.
- You can't move or copy assets between divisions.
- Imports and exports run from the global scope only, you can't export data from a division.
See Divisions for region and brand access for the full list of current limitations.
Best practices
- Keep the attribute you filter customers on accurate and current in your data pipeline, since Bloomreach routes customers based on that attribute alone. See Divisions for region and brand access.
- If a customer's routing attribute changes mid-journey, they exit the scenario at the next evaluation point rather than through a dedicated exit path — build your scenario logic with this behavior in mind.
Updated about 15 hours ago