

Configure smart triggering
Smart triggering decides when a weblayer appears, based on live engagement signals the Web SDK measures in the browser — active time, scroll position, exit intent, and more. Add smart triggering conditions to a weblayer, and explore examples for combining signals to reach the right visitor at the right moment.
Prerequisites
Ensure your tracking snippet runs Web SDK version v3.57.0 or later. Older SDK versions ignore smart triggering, they show the weblayer as soon as the page loads, as though no conditions were set.
Configure smart triggering
-
Open your weblayer and go to the Settings tab.
-
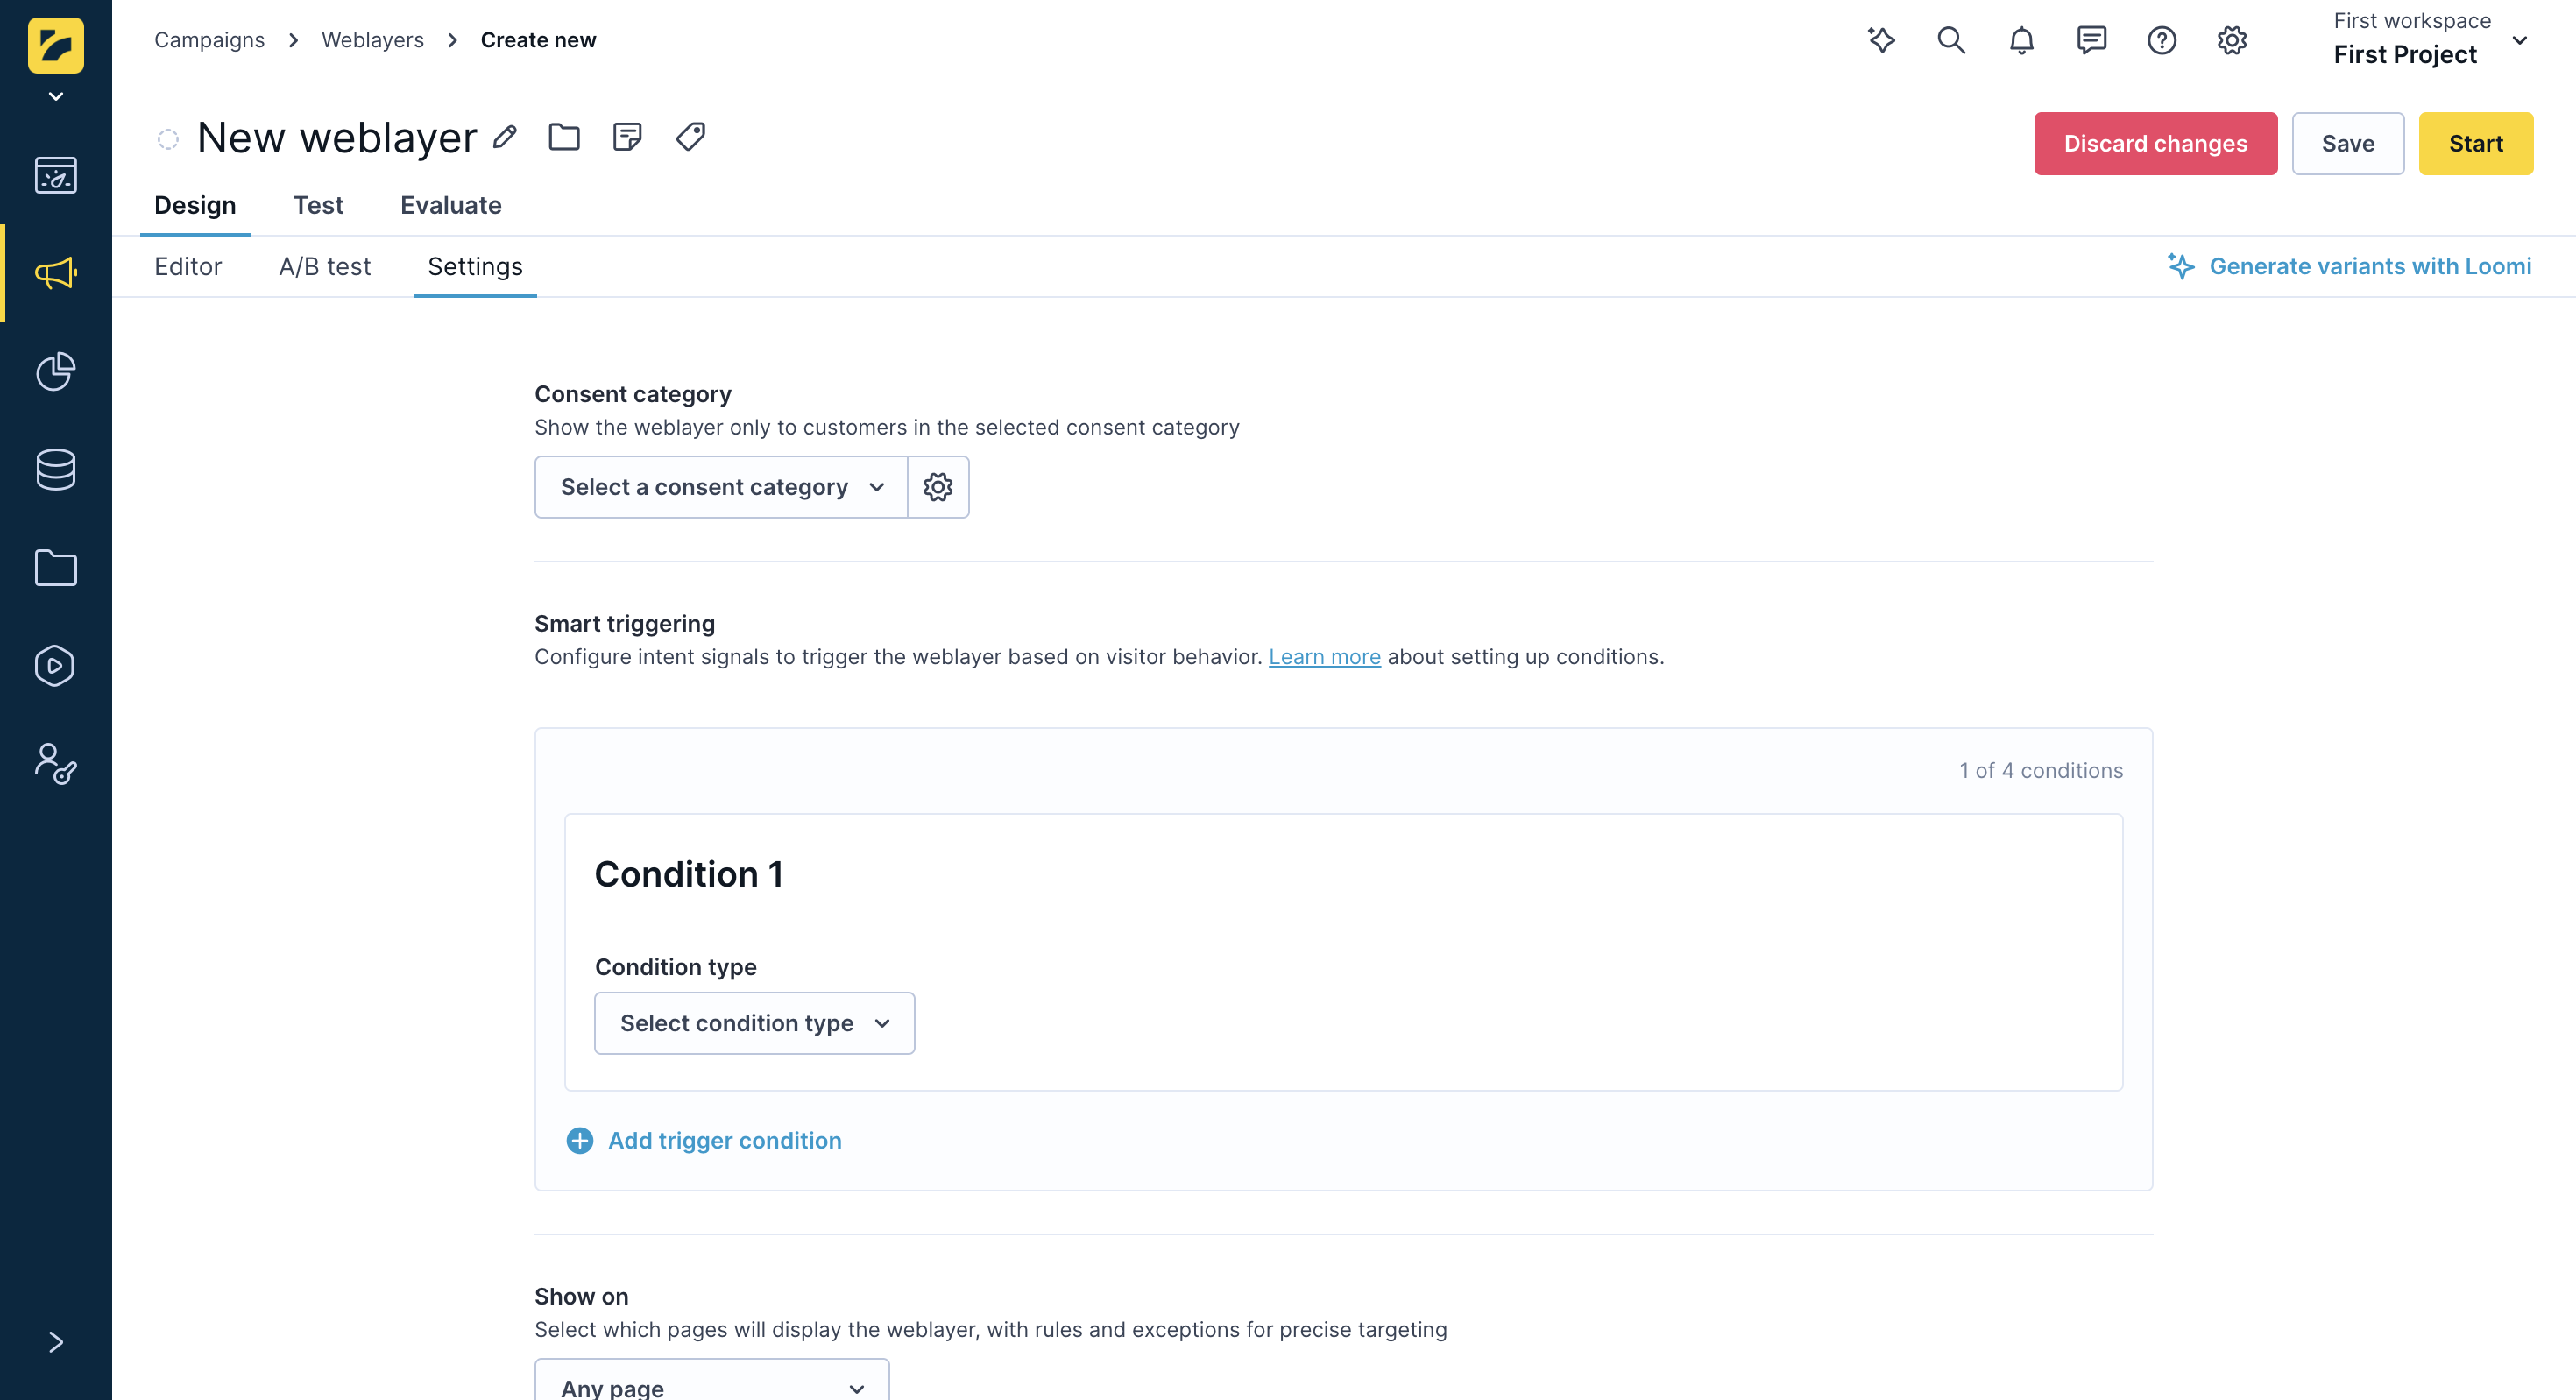
Find the Smart triggering section.
-
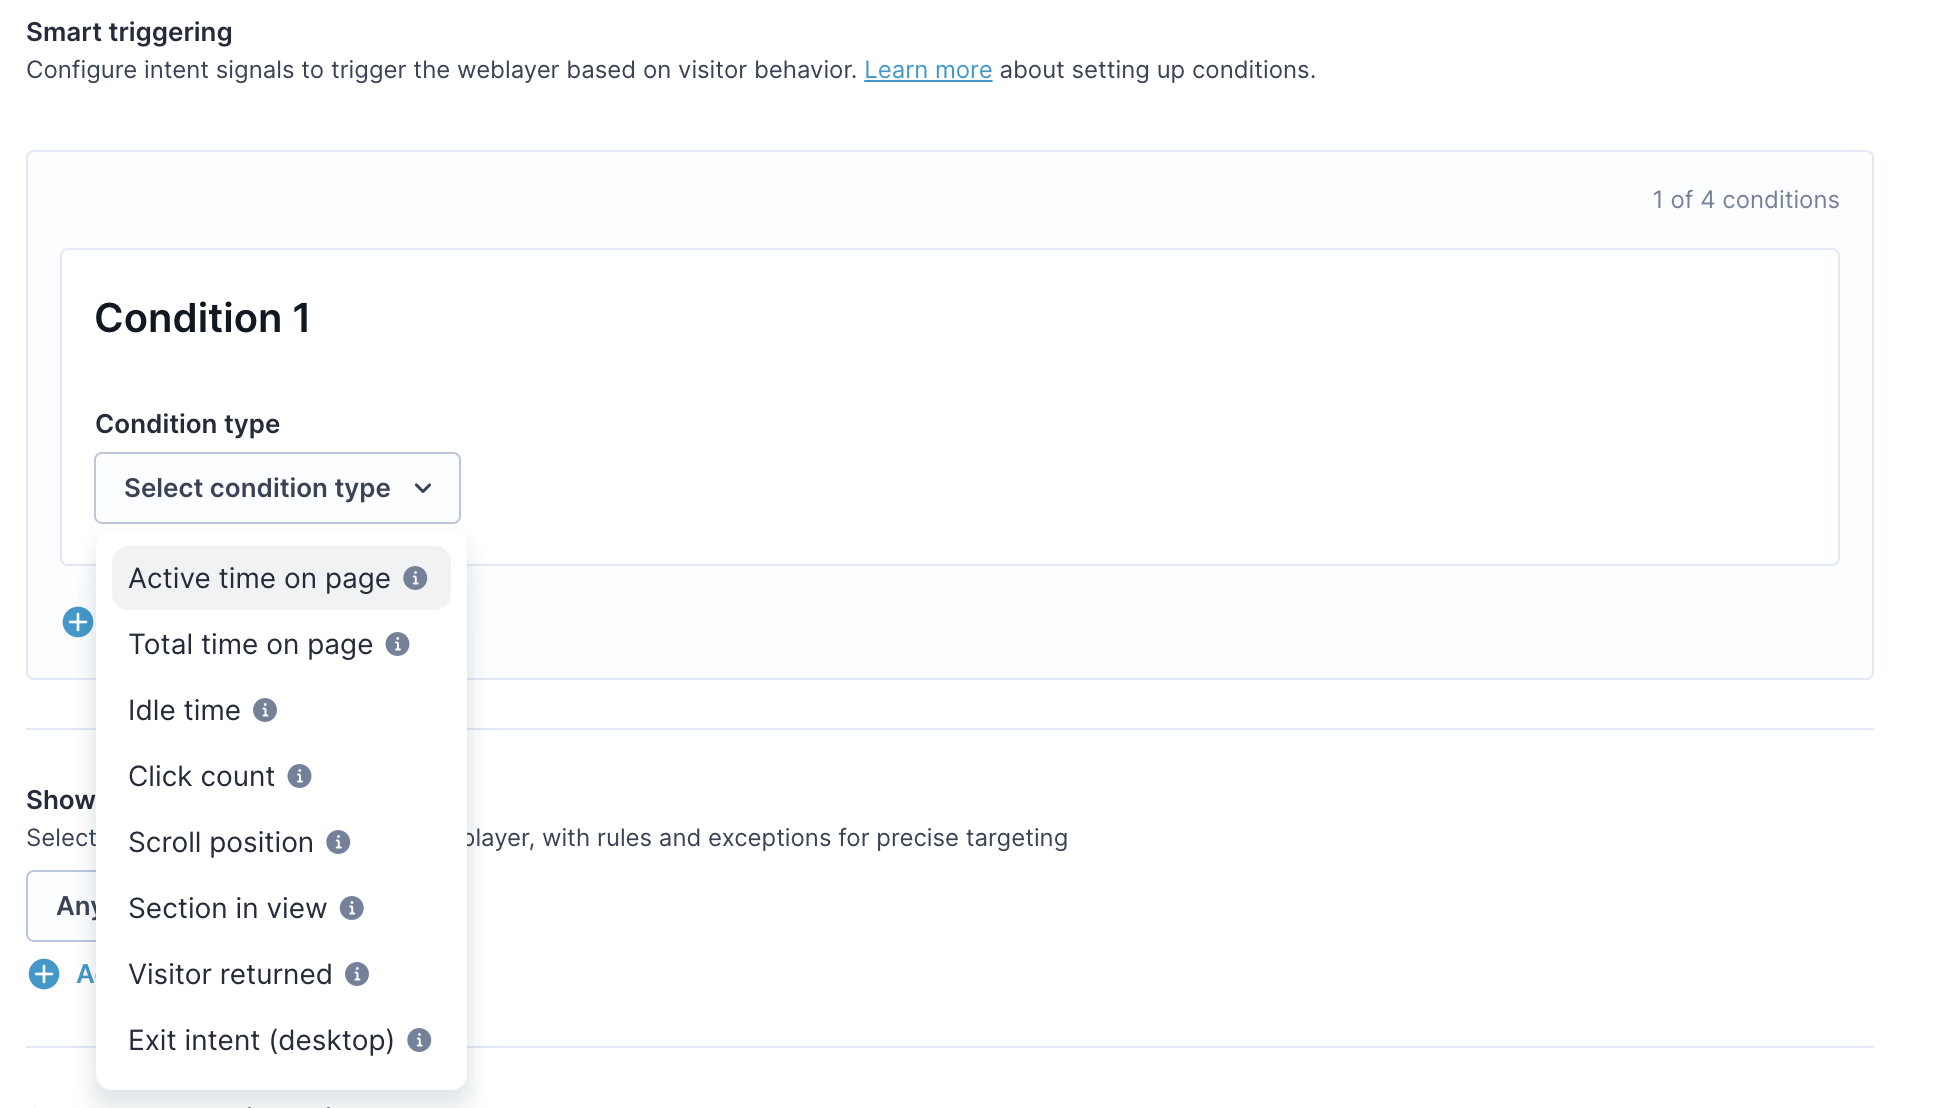
Add a condition and select a condition type.
-
Select an operator — greater than or equal to or less than. Yes-or-no signals skip this step.
-
Enter a value. Time values are in seconds or minutes, and scroll position is in pixels.
-
Save the weblayer.
NoteSmart triggering is an optional setting. Leave the section empty and the weblayer shows as soon as your other settings allow.
Smart triggering in scenarios
The Smart triggering section also appears on the weblayer node in the scenario editor. Signals, operators, and the four-condition limit work the same way there.
For more information, see Weblayers in scenarios.
Best practices
One condition is often enough to catch the right moment. Combine two or more when you want to tell genuine interest apart from a tab someone left open — for example, pairing an intent signal with a minimum amount of engagement. The examples below set up conditions for four common goals.
Help visitors who are evaluating a product
Someone reading a product page for half a minute without adding to the cart may be weighing a decision. Offer a size guide or shipping details once they've shown that much attention.
Set:
- Active time on page
>= 30
Active time is the right signal in this use case. Total time would also count a page sitting untouched in a background tab, which active time excludes.
Catch visitors who are about to leave
On its own, exit intent fires for anyone who moves toward the address bar — including someone who arrived two seconds ago. Pair it with a minimum amount of engagement so your offer reaches people who showed real interest first.
Set:
- Exit intent
- Active time on page
>= 20
Reach visitors who read your reviews
Trigger a weblayer once a visitor scrolls far enough to bring your reviews into view, so the offer appears right as social proof does.
Set:
- Section visible
= #reviews
If you don't have a stable selector to point at, use scroll position instead:
- Scroll position
>= 3000
Spot visitors who seem stuck
Active engagement followed by a pause can mean someone can't find what they need. Combine the two signals to catch that pattern.
Set:
- Active time on page
>= 10 - Idle time
>= 15
This combination flags visitors who started looking around, then stalled — a good moment to offer help.
Things to know before you combine signals
- Active time or total time: active time measures attention. Total time answers a simpler question — has this page been open for a minute?
- Pixels, not percentages: scroll position uses pixels because percentages are unreliable on pages that grow as you scroll, such as infinite listings.
- Check that your conditions can both be true:
Total time on page < 10andActive time on page >= 30can never happen together, so the weblayer never shows. - One-time signals: exit intent and visitor returned each happen at most once per page view.
Updated about 2 months ago