

Build and edit scenarios
Use the Design tab to build automated customer journeys. Add nodes to the canvas, connect them into a flow, and arrange your scenario. To learn what each node does, see Scenario triggers and Scenario actions and operators.
To open the scenario editor, go to Campaigns > Scenarios > Create new. The Design tab of your new scenario opens.
Build scenarios with nodes
Every scenario is built from components called nodes. Connect nodes to create a flow that guides customers through your campaign.
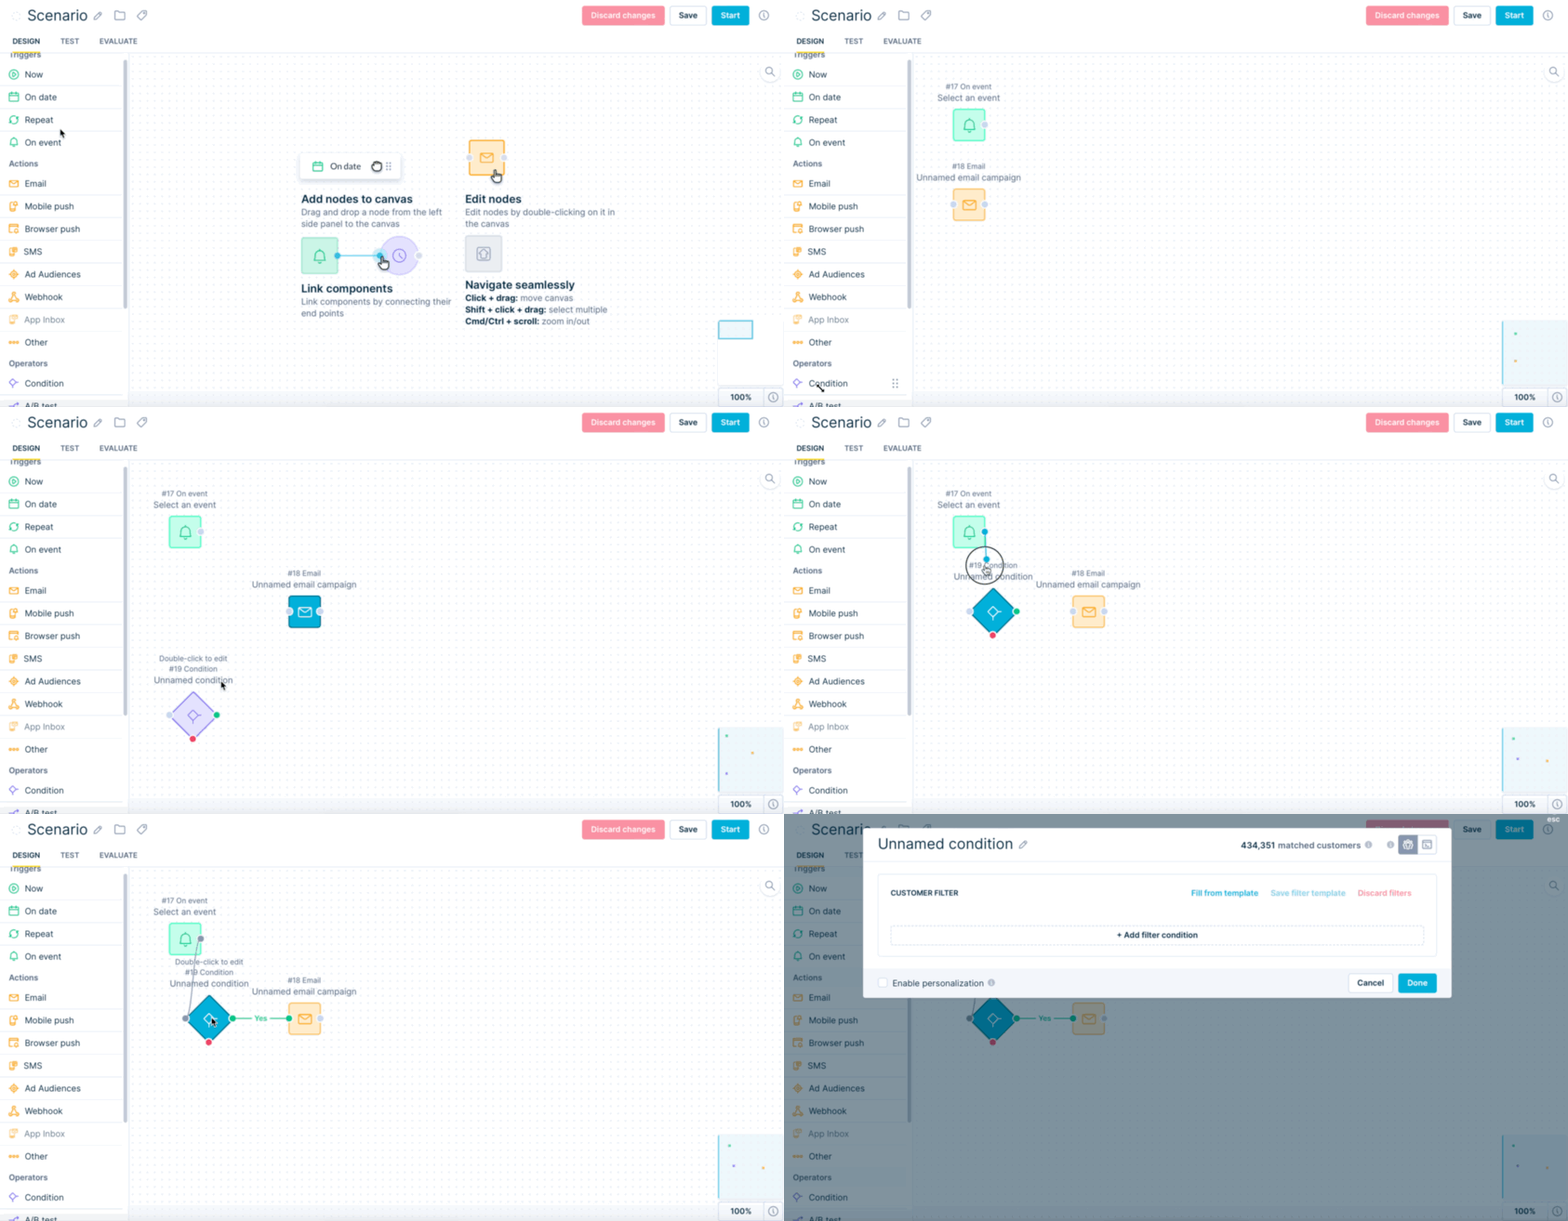
Add nodes
- In the sidebar, click the node you want to add.
- Drag it onto the canvas with your left mouse button.
Edit nodes
Double-click a node to open its settings. Click Save when you're done.
Remove nodes
- Click the node to select it.
- Click the trash icon, or press Backspace or Delete on your keyboard.
Connect nodes
- Click the output connector on the right side of the first node.
- Drag the line to the input connector on the left side of the second node.
- Release the mouse button.
Customers move through the flow from triggers, such as On date, to operators, such as condition, and then to actions, such as email.
NoteEvery meaningful scenario needs at least one trigger, one action, and usually one condition node. You can have multiple flows in one scenario.
Copy and paste nodes
Copy nodes and their connections within one scenario or between scenarios.
- Select the nodes you want to copy. To select multiple nodes, hold Shift.
- Press Cmd/Ctrl + C to copy.
- Press Cmd/Ctrl + V to paste.
The first time you copy between scenarios, your browser might ask for permission to access the clipboard.
To copy a whole scenario, see Save and clone scenarios.
Find and label nodes
Node names
Each node name shows:
- The node's action ID
- The node type
- Your custom name for the node
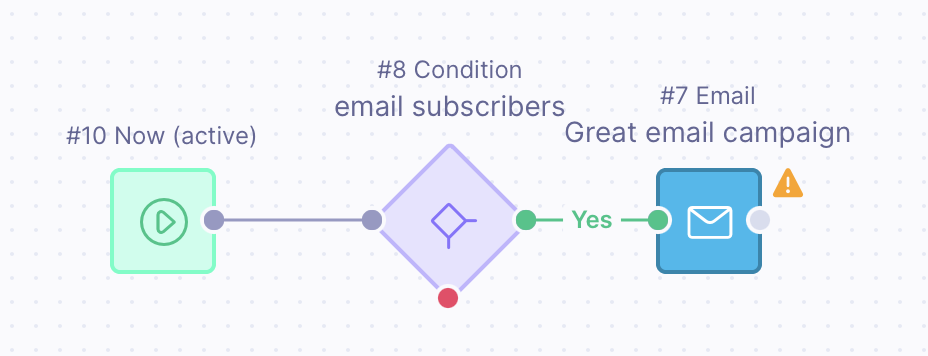
Search for nodes
Search for nodes by action ID, type, or name.
Format labels
Format labels with standard markdown such as bold, italic, headings (H1–H6), lists, and links.
Navigate the canvas
Mouse controls
- Move your view: Click empty space and drag.
- Select multiple nodes: Hold Shift and drag.
- Move selected nodes: Drag any selected node to move the whole selection.
- Delete selected nodes: Press Backspace.
- Zoom: Use your mouse wheel.
Touchpad controls
- Move: Slide with 2 fingers.
- Zoom: Pinch with 2 fingers.
Keyboard shortcuts and minimap
- 1: Fit the scenario to the screen.
- 2: Zoom into the selection.
- 0: Reset zoom.
- Minimap: Click the minimap in the bottom-right corner to navigate.
Scenario size limits
There's a hard limit on how much data one scenario can store. These recommendations help you stay within it:
- Don't use more than 100 nodes. To avoid lag, keep the number below 30.
- Don't use more than 25 email nodes, including language versions. Shorter emails let you use more nodes or translations.
- The maximum scenario size is 7.9 MB.
NoteIf you reach these limits, split your scenario into smaller, simpler ones. You can also move parts of your email into HTML blocks. Content in HTML blocks doesn't count toward the size limit.
Bloomreach also warns you about scenarios that could slow down your campaigns. Learn more in Save and clone scenarios.
Save and start your scenario
- Save your work: Click Save in the top-right corner. This saves your scenario without starting it.
- Launch your scenario: Click Start to begin streaming customers through your flow.
Triggers, actions, and operators
- Scenario triggers: Choose when customers enter your scenario.
- Scenario actions and operators: Send campaigns and control how customers move through the flow.
Updated 20 days ago