

Weblayer settings
The Settings tab controls how and when your weblayer appears. This article covers all available settings, display frequency options, and how to configure display conditions for specific pages.
The display conditions depend on the tracking of the
bannerevent with attributesaction = showandinteraction = true/false. If you modify this structure in the JavaScript editor, these conditions may not work correctly.
Settings overview
| Setting | Description |
|---|---|
| Consent category | Selects which consent category a customer must have to receive this campaign. See Consent categories. If you don't use consents, this setting shows campaign groups instead. |
| Show on | Choose which pages to show the weblayer on. |
| Show on pages with variables | Displays the weblayer on pages that match conditions based on page variables. |
| Target devices | Show on any device, or limit to desktop or mobile only. |
| Display control | Controls how often the weblayer appears. For details, see Display control options. |
| Schedule | Display the weblayer immediately or set a specific launch date. |
| Conversion goal | The basis for automatic A/B test optimization and the auto-generated evaluation report. |
| Audience | Defines the custom audience that receives this weblayer. Use standard customer and event filters. |
Show on specific pages
Use the Show on setting to specify which pages the weblayer appears on. Click + Add rule to add multiple conditions for a single weblayer. Click + Add exception to exclude specific pages when your rule is too broad.
Any page: The weblayer appears on all pages of your website.
Page with URL: The weblayer appears only on the specific URL you enter.

Page URL containing: The weblayer appears on any page whose URL contains the string you define.

NoteTo test your weblayer, set this condition to
#test. After launching the campaign, visitwww.yourwebsite.com/#testto preview the weblayer in your live environment. You can share this link with others. It stays active until you stop the campaign.
Page matching regexp: Use regular expressions to define a precise set of URLs. For example, the pattern below matches pages whose URLs contain a digit between 0 and 9 preceded by / and followed by +.

URL Global Lists: Use the Global URL lists feature to create and manage your URL lists in one place.
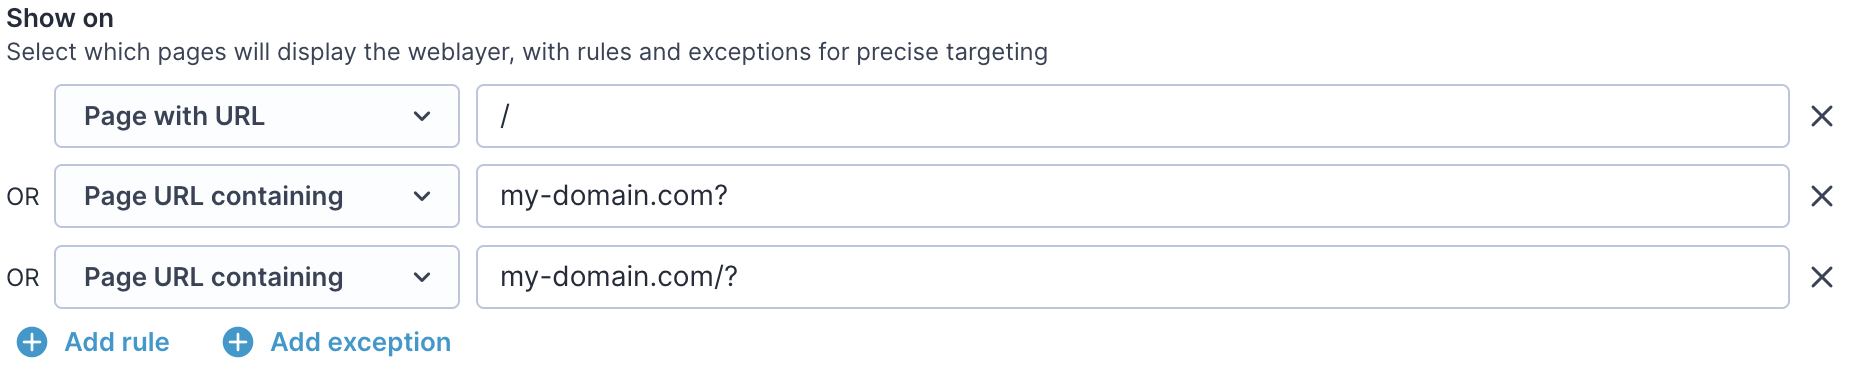
Show only on home page
To display a weblayer only on the home page, regardless of any UTM parameters in the URL, use one of the following methods.
Using regular expressions (advanced): Select Page matching regexp and enter the following expression. Replace my-domain\.com with your actual domain name, escaping any dots with a backslash:
^https?:\/\/my-domain\.com\/?(\?.*)?$- This expression matches the home page with or without HTTPS, trailing slashes, or query parameters, while excluding any subpages.
Using display conditions (simpler): Add the following three conditions:
- Page with URL equals
/— covers home page visits without any query parameters. - Page URL containing equals
my-domain.com/?— covers visits with URL parameters following a/. - Page URL containing equals
my-domain.com?— covers visits with URL parameters directly after the domain.
Show on pages with variables
Show on pages with variables extends the standard Show on setting by targeting pages based on what's happening on the page rather than its URL.
Page variables are data values defined in Project Settings > Page Variables and read from the page at runtime — for example, the product being viewed, page type, price range, or stock status. There are four types of variables:
- URL parameter
- Data layer variable
- JavaScript variable
- custom JavaScript
In the Show on pages with variables section, build rules using those variables with constraints such as equals, contains, matches regex, or in between.
Note that URL conditions and page variable conditions are evaluated separately. If the URL condition doesn't match, page variables aren't checked.
For full setup instructions, see Enhanced Web Targeting.
Display control options
The Display setting controls how often the weblayer appears to each customer.
Until interaction: The weblayer appears every time the page loads — including after a refresh — until the customer interacts with it. Interaction is recorded when the banner event has interaction = true, which by default means closing, subscribing, or clicking.
Once: The weblayer appears only once during the campaign. This is tracked when the banner event records action=show.
Once per visit: The weblayer appears once per session. After action=show is tracked, it reappears only in the customer's next session.
Always: The weblayer appears on every page load and every refresh, even after the customer has closed it.
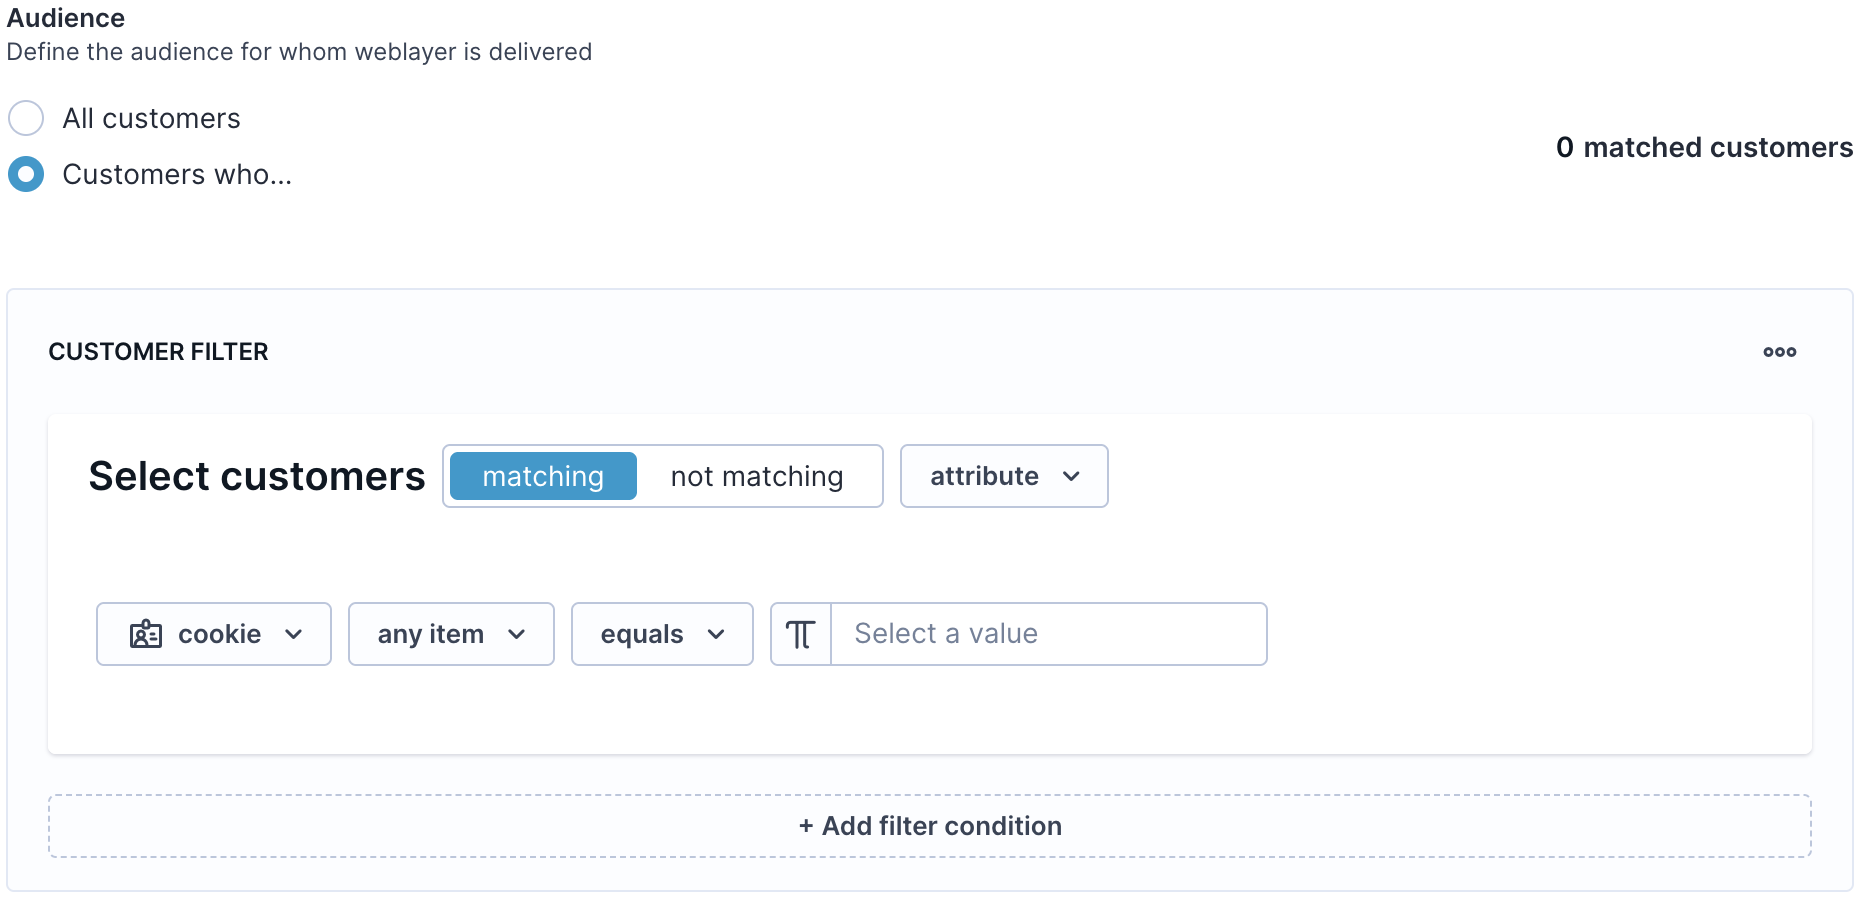
Audience setting
Weblayers don't use frequency capping, so multiple weblayers can appear on the same page at once and may overlap. To show only one weblayer at a time, configure the Audience setting:
- For the weblayer with a specific audience, select Save filter template.
- For the second weblayer:
- Click the three dots in the top-right and select with Fill from template.
- Select the template you saved from the first weblayer.
- To negate the first weblayer customer filter, click the not matching option.
Updated 3 months ago