

Set up data exports
This guide walks you through creating and configuring Data exports in Bloomreach. Learn how to select a data source, apply filters, define your data structure, choose a format, and send the output to your target storage.
Prerequisites
To set up a data export, ensure you have:
- The Exports Module Admin and Personal Data Viewer permissions.
- A configured integration for your target storage: SFTP, Google Cloud Storage, Amazon S3, or Azure Storage.
- The target folder already created in your storage. Bloomreach creates files, not folders.
Create a data export
1. Access data exports
Navigate to Data and Assets > Exports and click + New export.
2. Select a data source
Choose whether to export Customers or a specific Events.
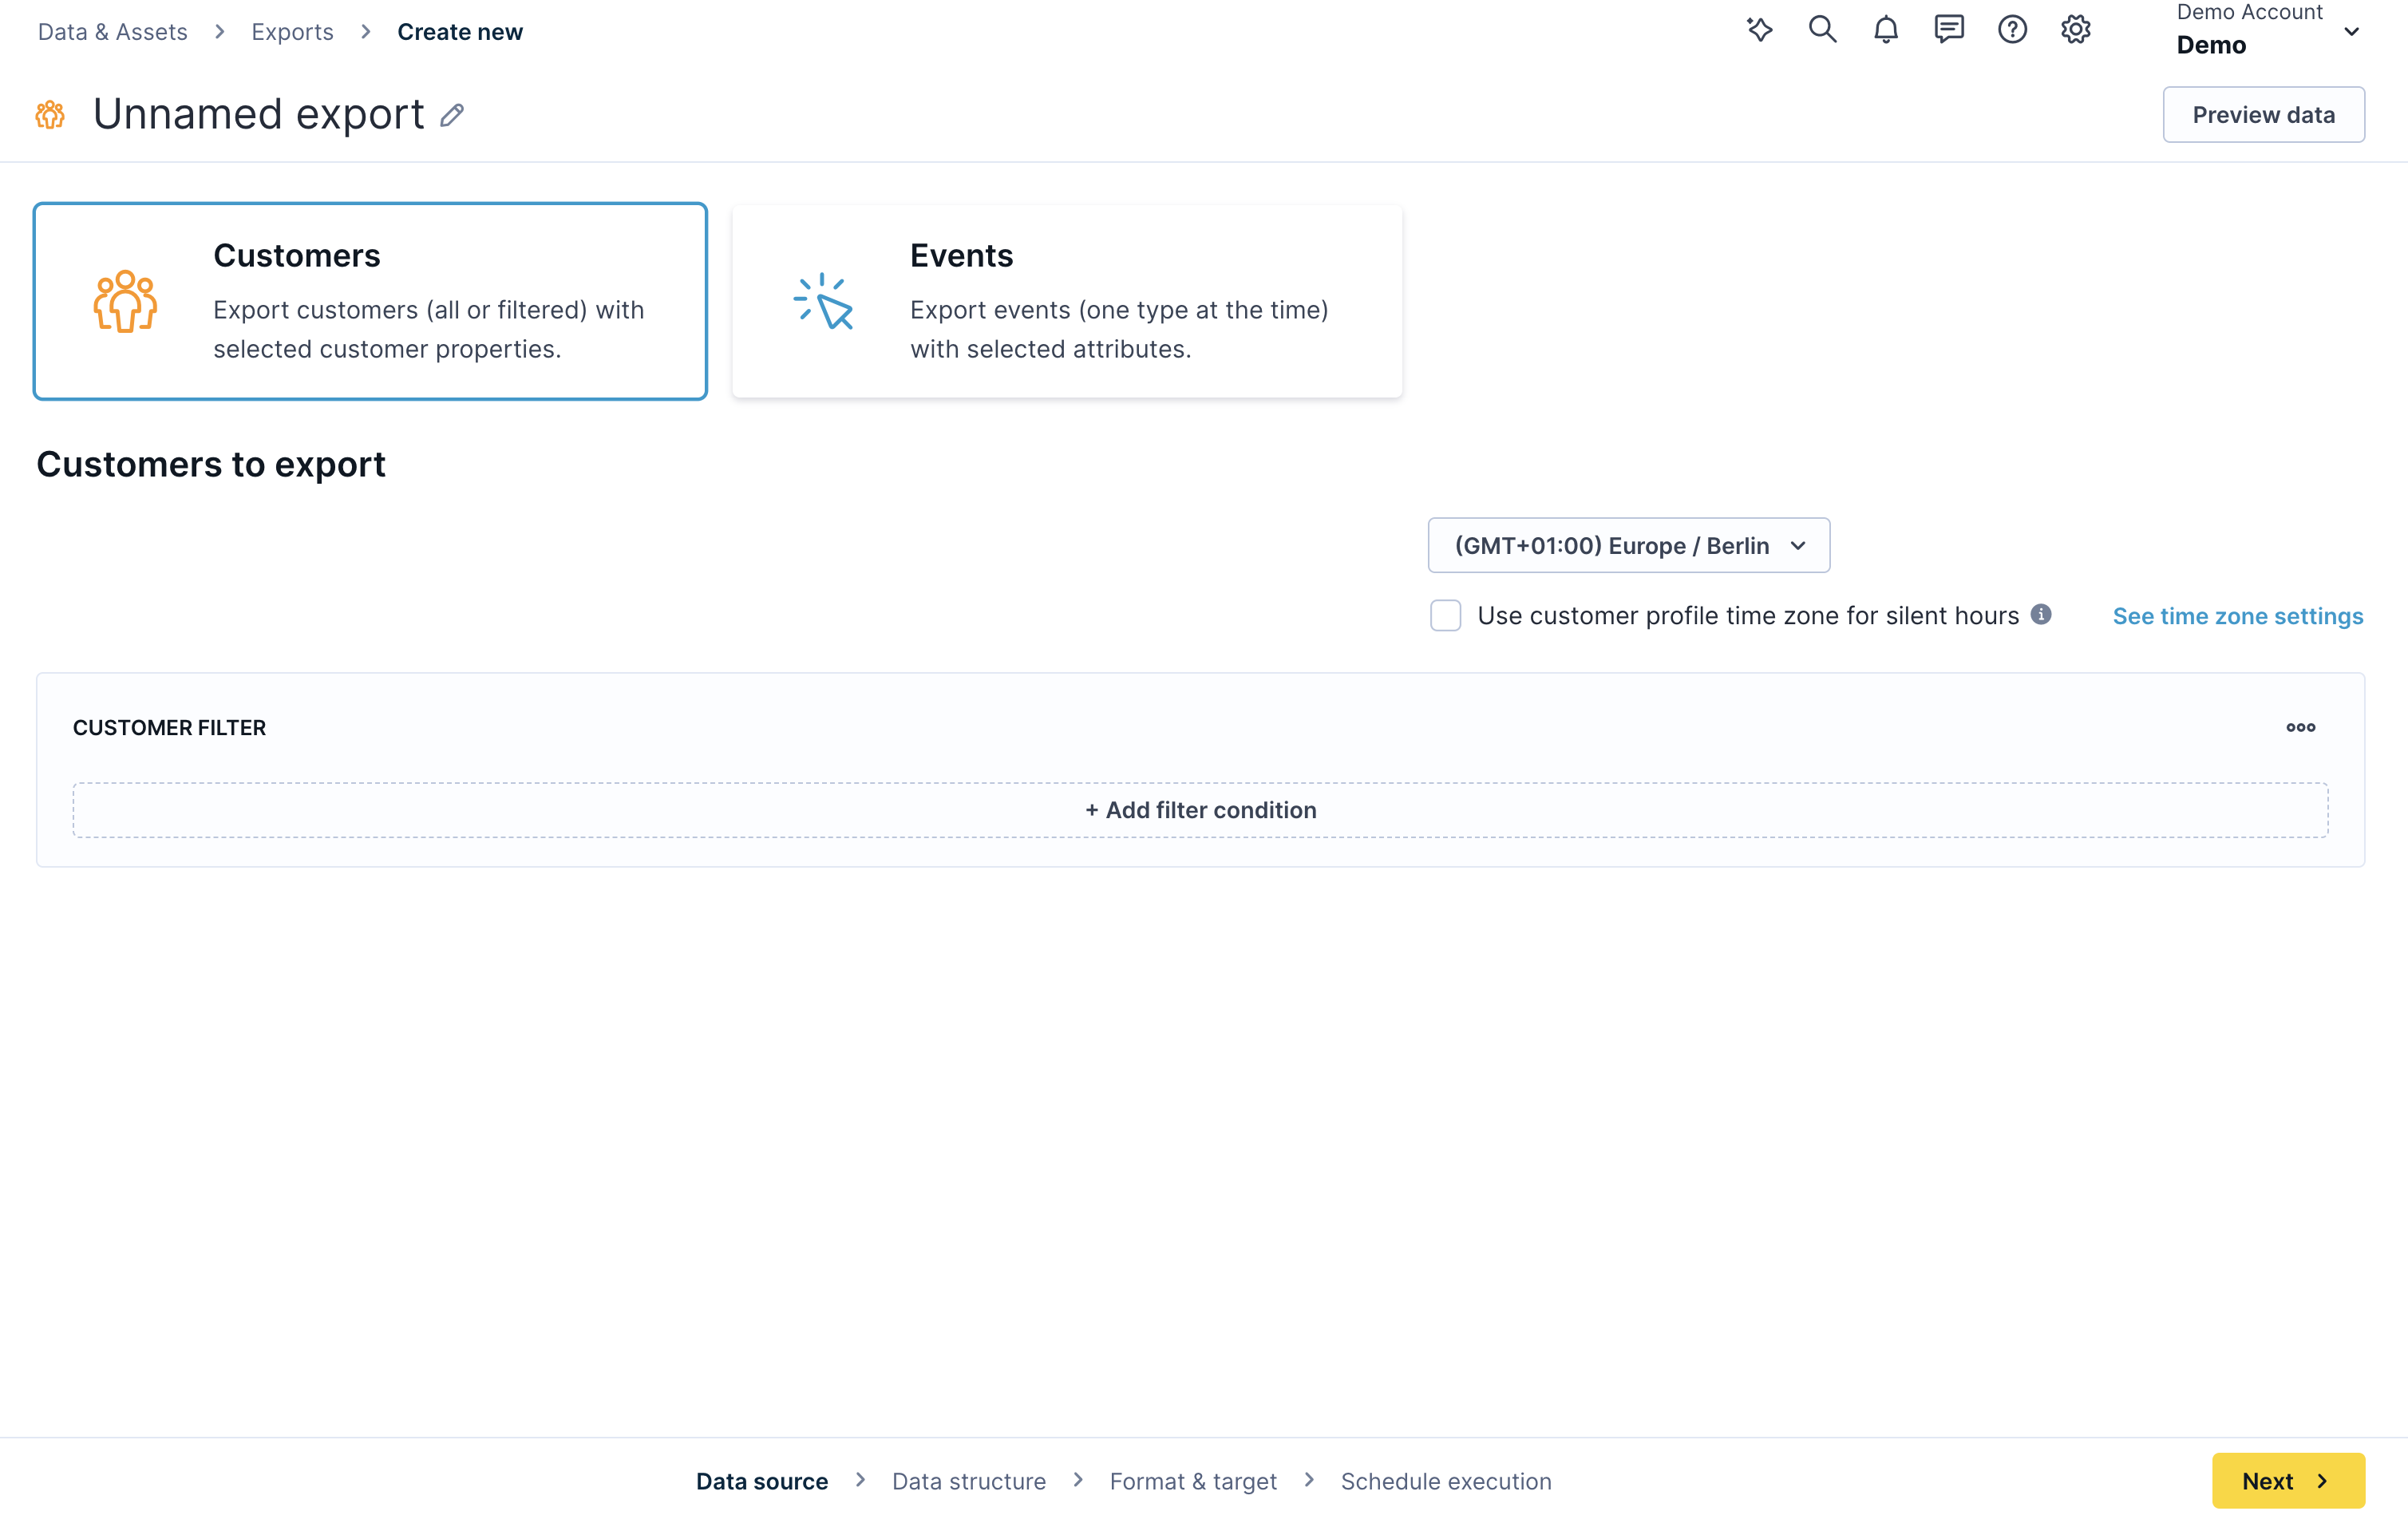
Select customers or a specific event type as your data source
NoteFor event exports, events are exported based on their
timestampattribute, not the time they were tracked. These two values may differ — for example, if an event was recorded later with a past timestamp.
You can view all previous and upcoming configuration steps at the bottom of the page.
3. Add filters
Add filter conditions to define which data to include in the export. For detailed guidance, see filtering data.
4. Define the data structure
Select the fields you want to include and name them for the export file.
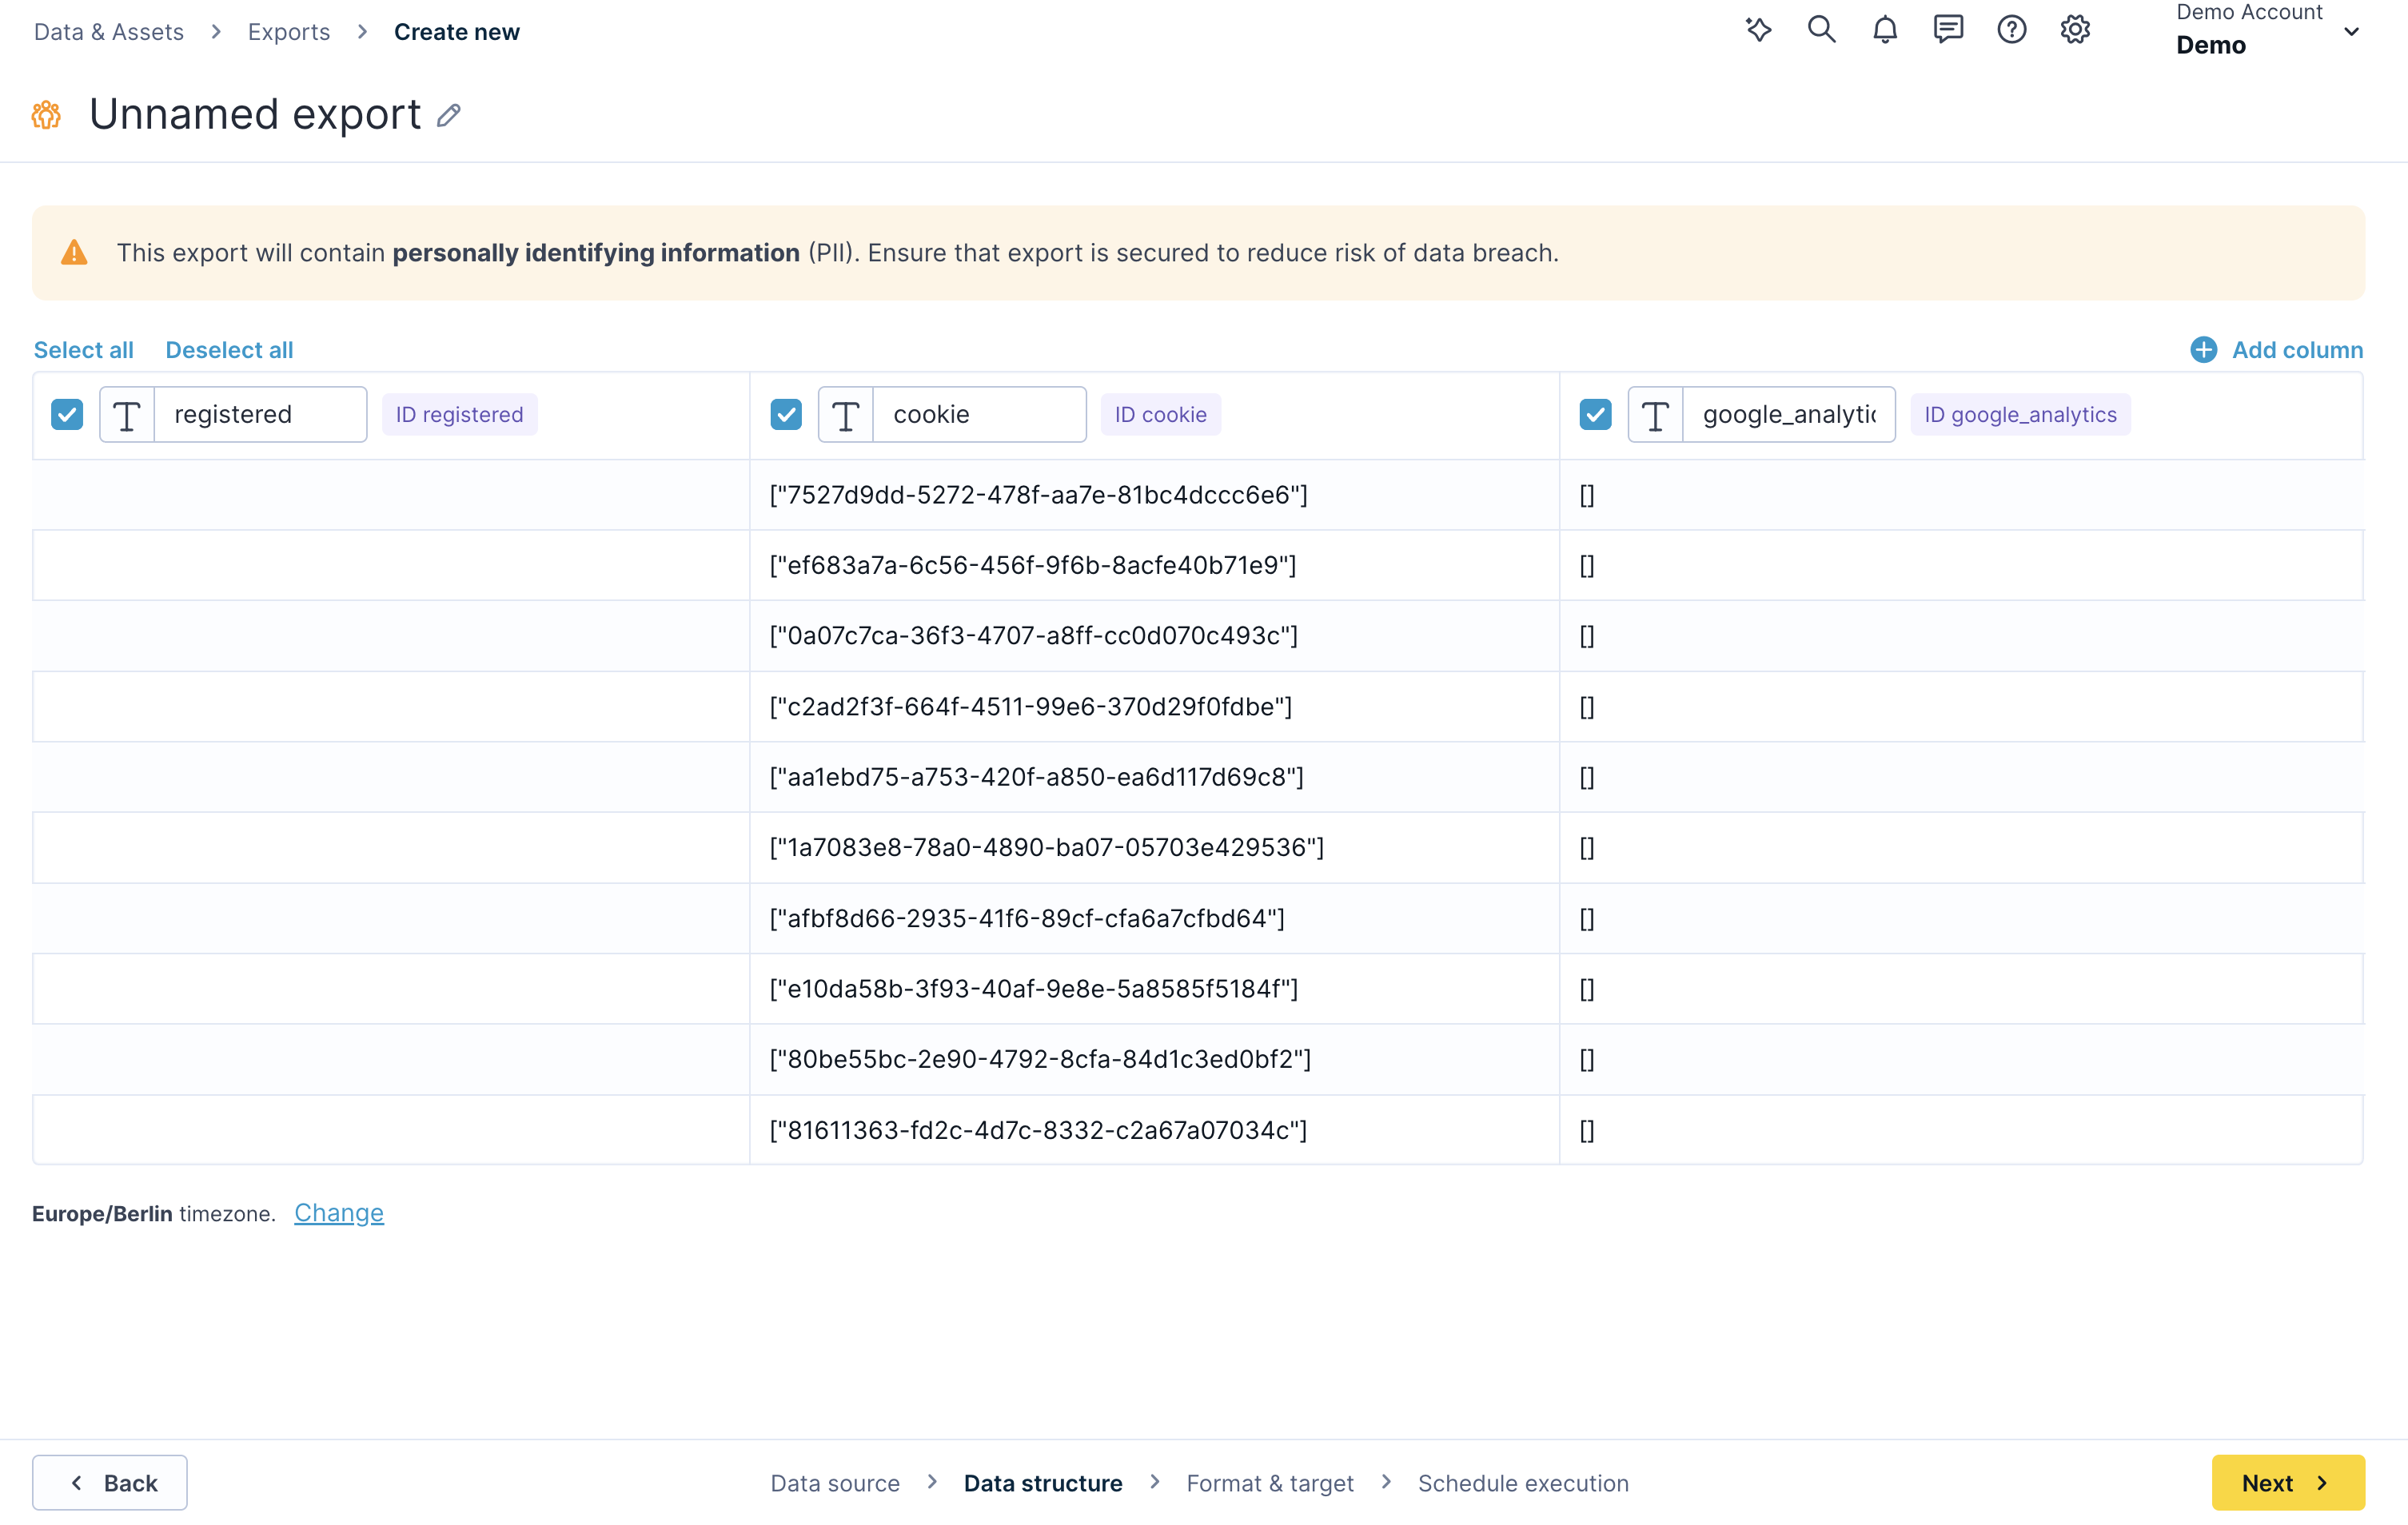
Select and name the fields to include in your export file
5. Customize and rename columns
Name your export and reorder attributes in the Data manager to match your needs.
- For event exports, the timestamp is always the last column.
- Avoid duplicate column names. Two columns with the same name cause an export error.
- Some exports may contain personally identifiable information (PII). Ensure exports are secured to minimize the risk of a data breach.
6. Choose format and target
Select the format, target destination, filename, and security options for your export.
Format options
Choose the format that best fits your downstream system:
- CSV: Set your preferred delimiter and text encoding. When naming the file, include the file extension — for example,
filename.csv. To open a CSV correctly in Microsoft Excel, follow this formatting guide. To preview CSV files, use Notepad++ on Windows or Sublime on Mac. - JSON: Writes data in a comma-separated array format — for example,
[{"a":1},{"a":2}]. - JSON Lines: Writes each record on a new line — for example,
{"a":1}followed by{"a":2}. Set your preferred text encoding for both JSON formats.
Target destination
Select the storage integration where Bloomreach sends your exported file: SFTP, Google Cloud Storage, Amazon S3, or Azure Storage.
Set the path to the parent directory and choose a filename. Bloomreach supports dynamic file naming — adding %r after the filename displays its timestamp, for example, filename_1589460477.9546165. Find all dynamic naming options on the Linux strftime reference page.
NoteWith custom software, you can transmit almost any data source via SFTP. Be aware that Bloomreach may not support your specific data source.
7. Execute the export
Schedule the export as a one-time or recurring action. Once configured, your export is ready to run.
NoteExported data isn't modified by Bloomreach. It contains the data exactly as it was sent to the platform. Validate the format of individual fields before final processing.
Monitor export runs
From the main Exports screen, you can view all running, scheduled, and completed exports. Click any export to view its individual runs and details:
- Scheduled time.
- Run duration.
- Exported filename.
- Status.
- Number of rows exported or scheduled.
Updated 4 days ago