Catalogs V2 (Beta) Setup Guide
This guide explains how to set up and manage Catalogs V2.
Note
Catalogs V2 is in Beta. Contact your Customer Success Manager (CSM) to get access.
Create a catalog
-
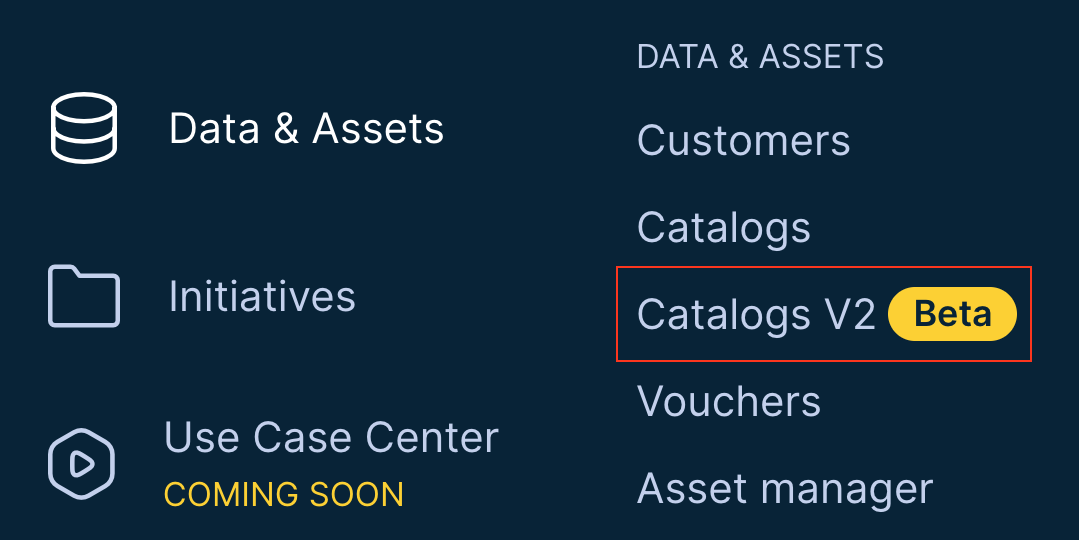
To access catalogs in your Bloomreach dashboard, navigate to the left-hand menu, select Data & Assets, and select Catalogs V2 (Beta).
-
On the Catalogs V2 page, click Create catalog.
-
Enter a display name for your catalog, for example, Test_catalog. A unique identifier is automatically generated. You can modify the identifier but can't change it after it's created. The identifier references the catalog in Jinja templates and throughout the system.
-
Select the catalog type:
- Product: For ecommerce and retail use cases. Product catalogs have reserved attributes with special semantic meanings, such as price, color, and category.
- General: For any non-product business data. General Catalogs don't have reserved attributes and can be fully customized.
-
Add a description for your catalog (optional).
-
Click Create to create the catalog.

Add and manage catalog records
After creating your catalog, you'll need to add records. Records can be added through imports, manually, or directly via the Catalogs API.
Importing Records
-
In your catalog, go to the Feed tab, which will initially indicate that your catalog has no records in its feed.
-
Click the + Record, then select Set up a new import.
-
Give the import a name.
-
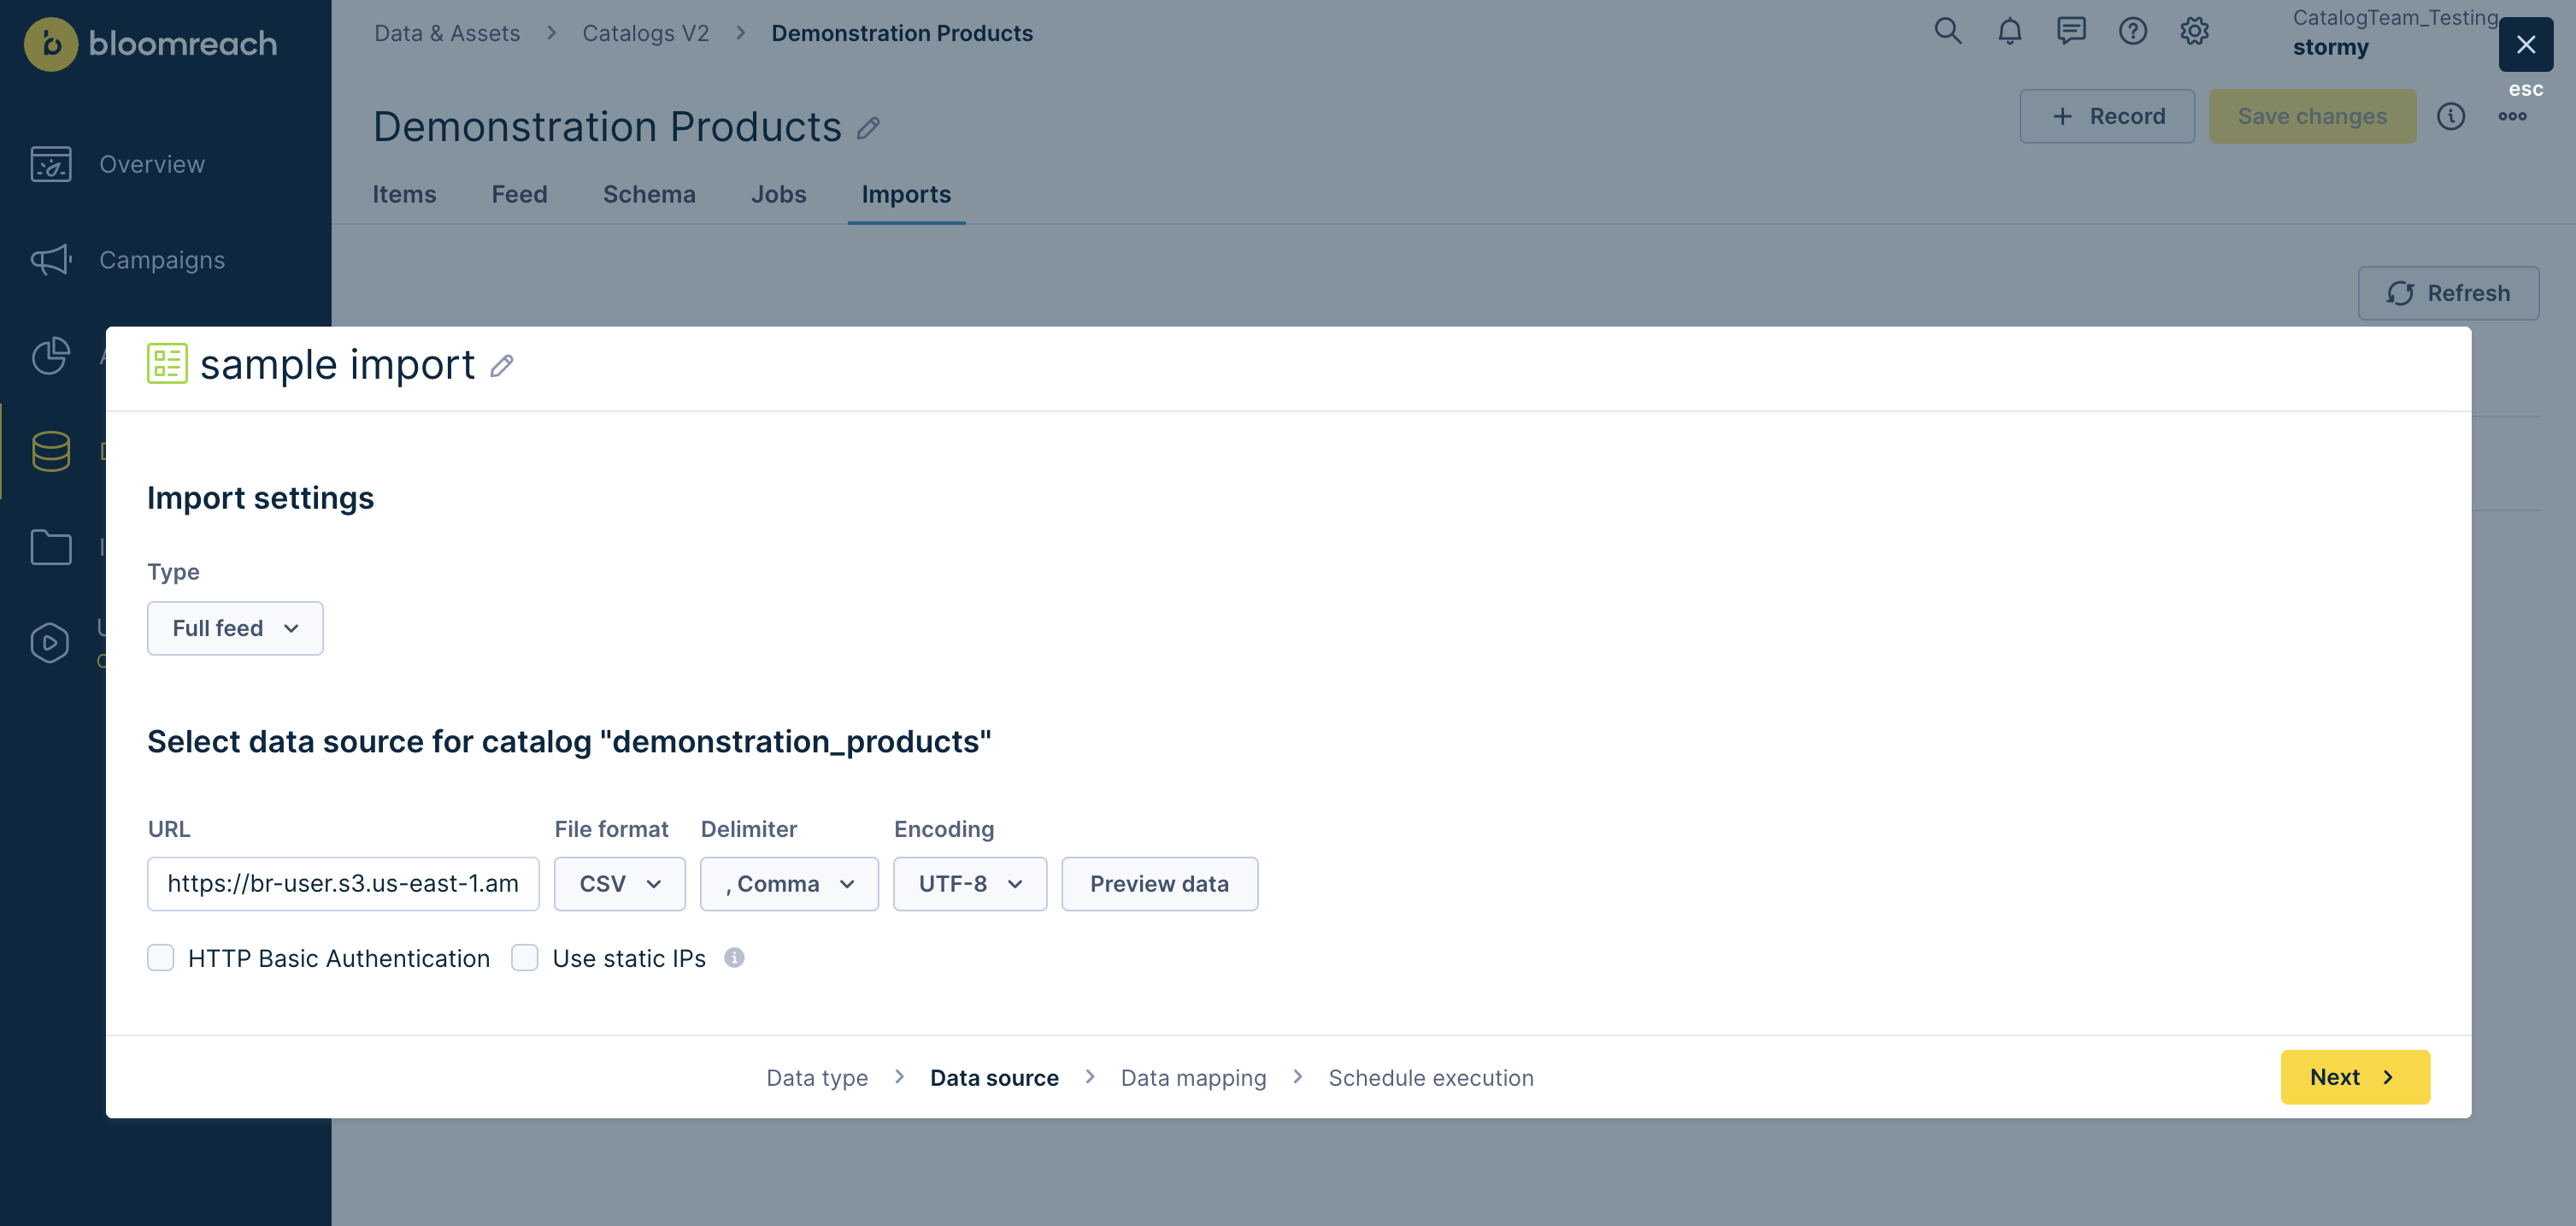
Select the import type:
- Full feed: Replaces all existing records with the imported data.
- Delta feed (Replace items/rows): Replaces existing records based on matching IDs or adds new records.
- Delta feed (Partial): Updates specific columns without overwriting existing data. If no matching column exists, it adds new records.
-
For the source, only URL imports are supported. Enter a publicly facing URL. Other types of sources will be added later.
-
Click Next.
-
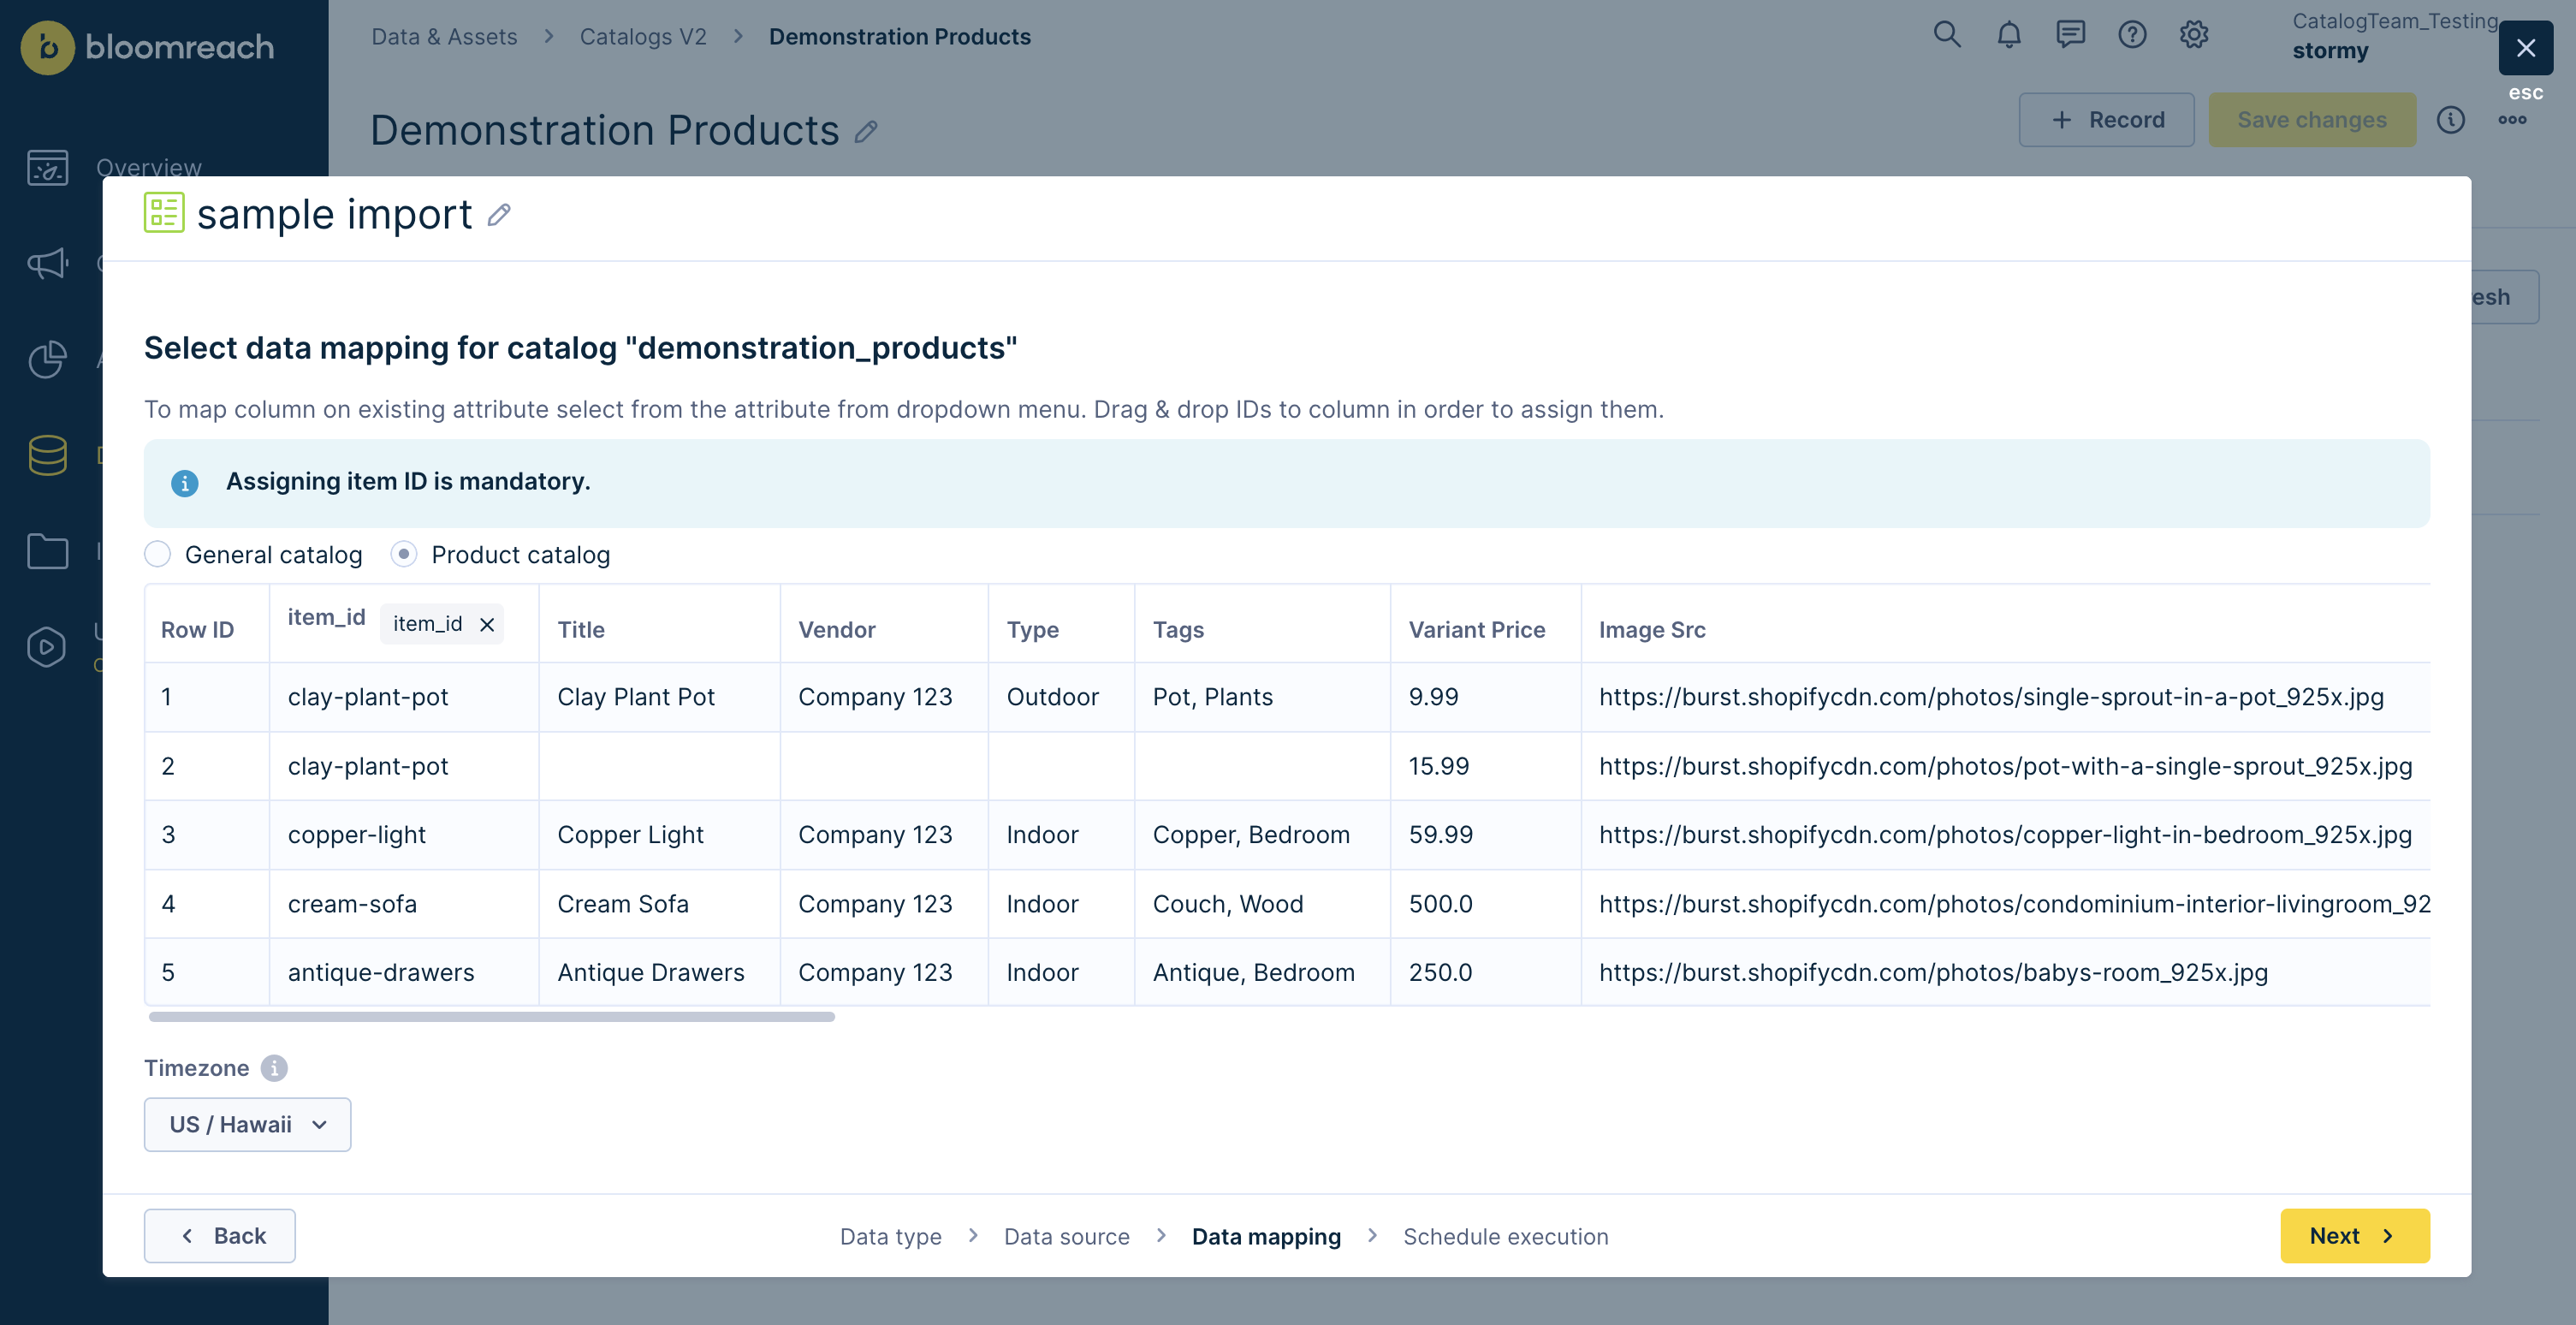
In the Data mapping step, validate that the data source is correct by previewing its columns.
-
Select the column that contains your item ID and drag it to the item_id field. This also becomes the record identifier.
-
Click Next.
-
Choose an import type: one-time or scheduled.

-
After setting up the import, you can monitor its status in the Imports tab. After the import completes, an items update job will start, transforming the records into items. Depending on the size of the imported data, the import job and items update job may take some time to complete.
-
Once complete, the Feed tab of the catalog will display the records in the catalog.
View records
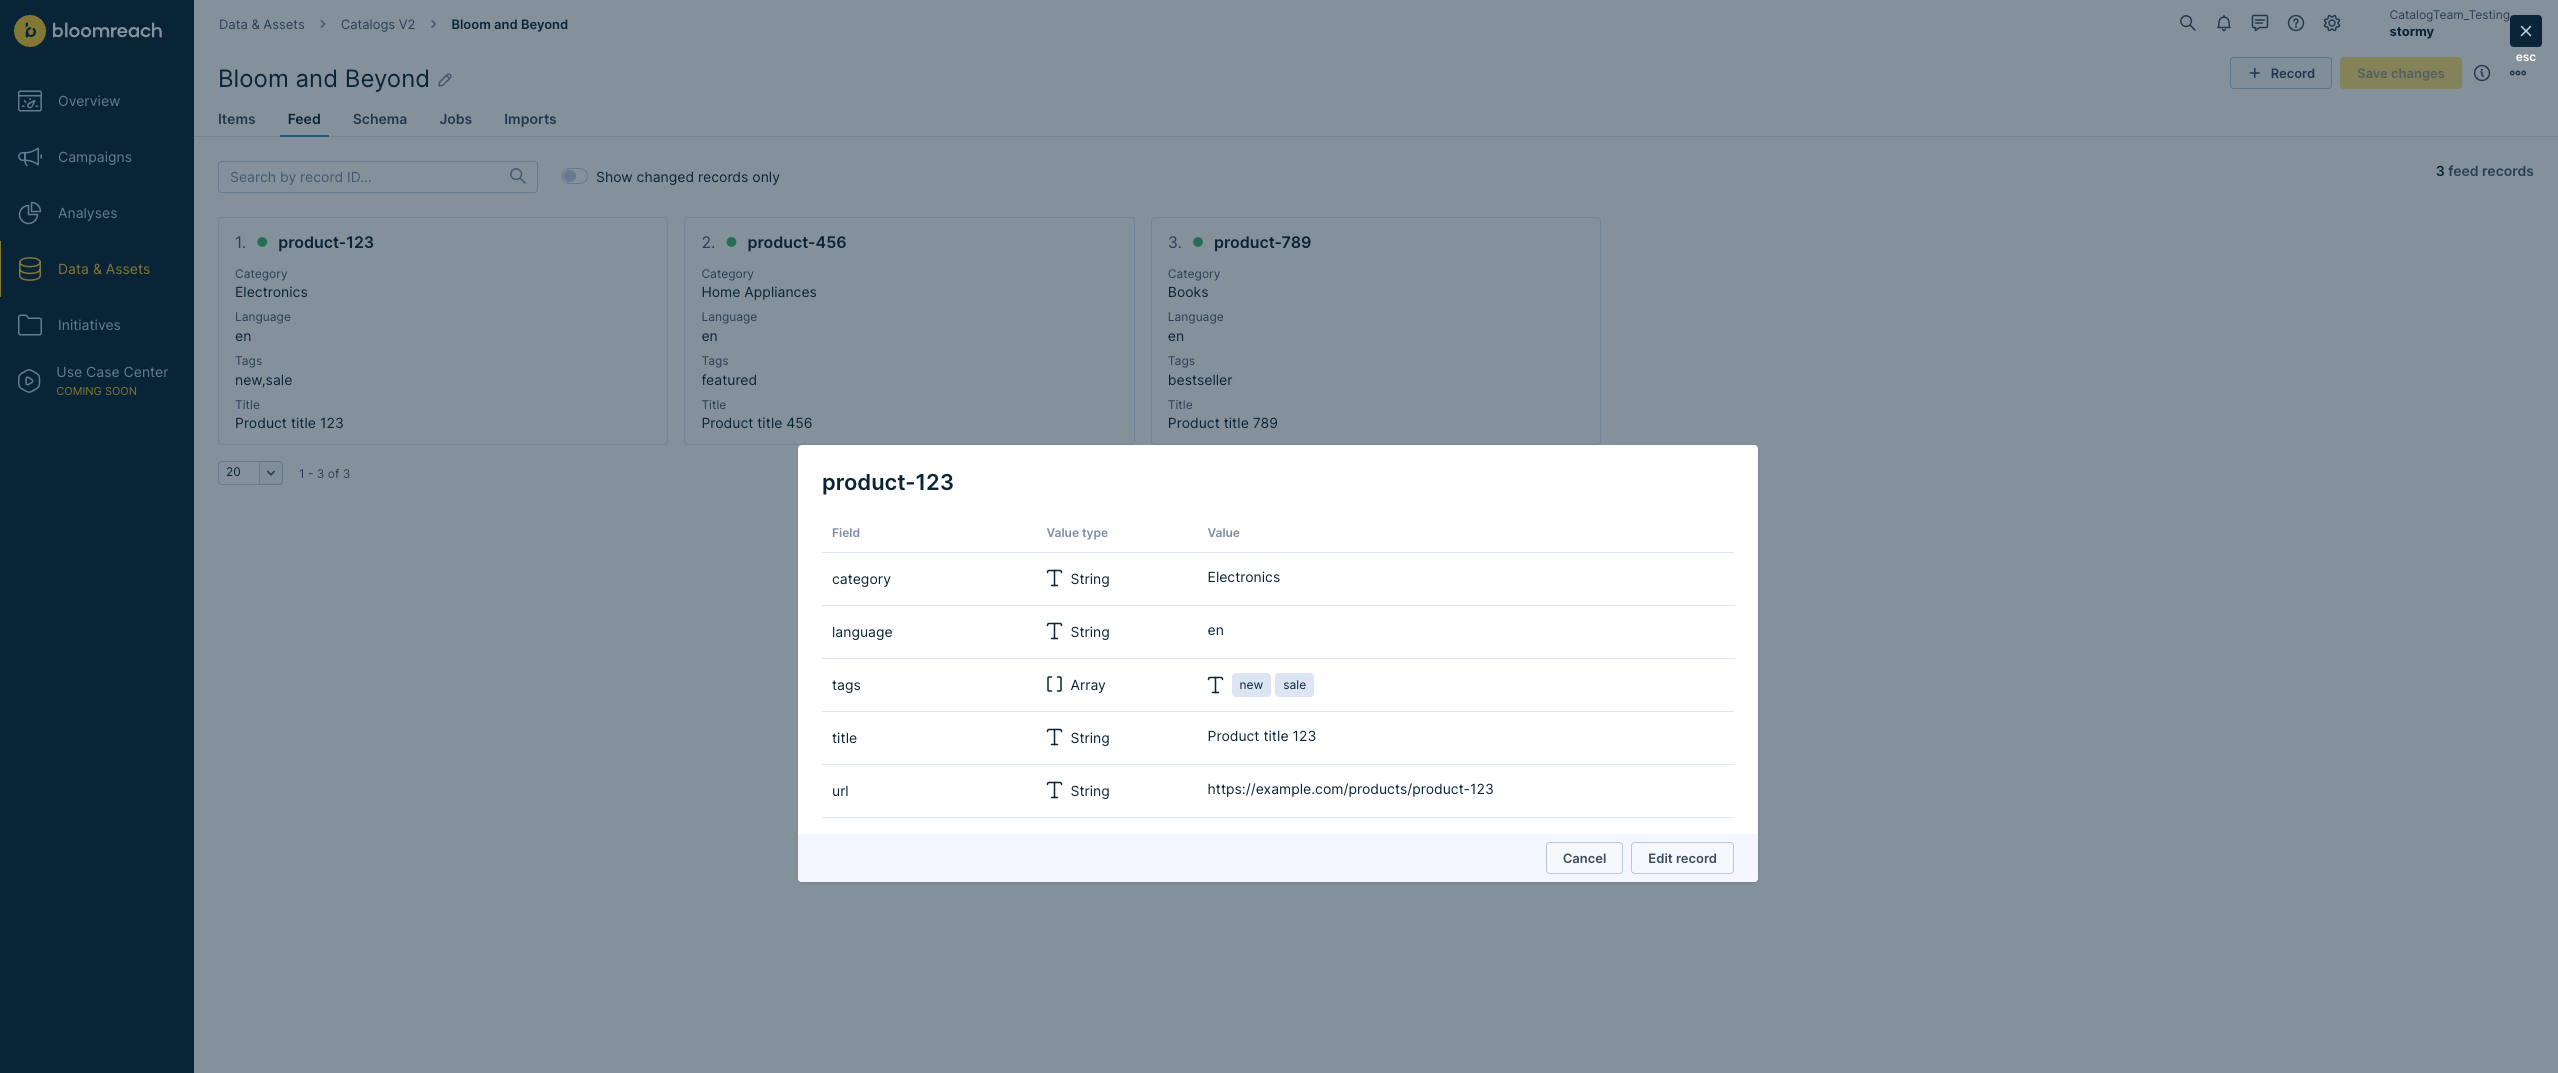
In the Feed tab, you can view all of your records. You can search for specific records using their identifier. Click a record to view its fields, types, and values.
Manual record creation
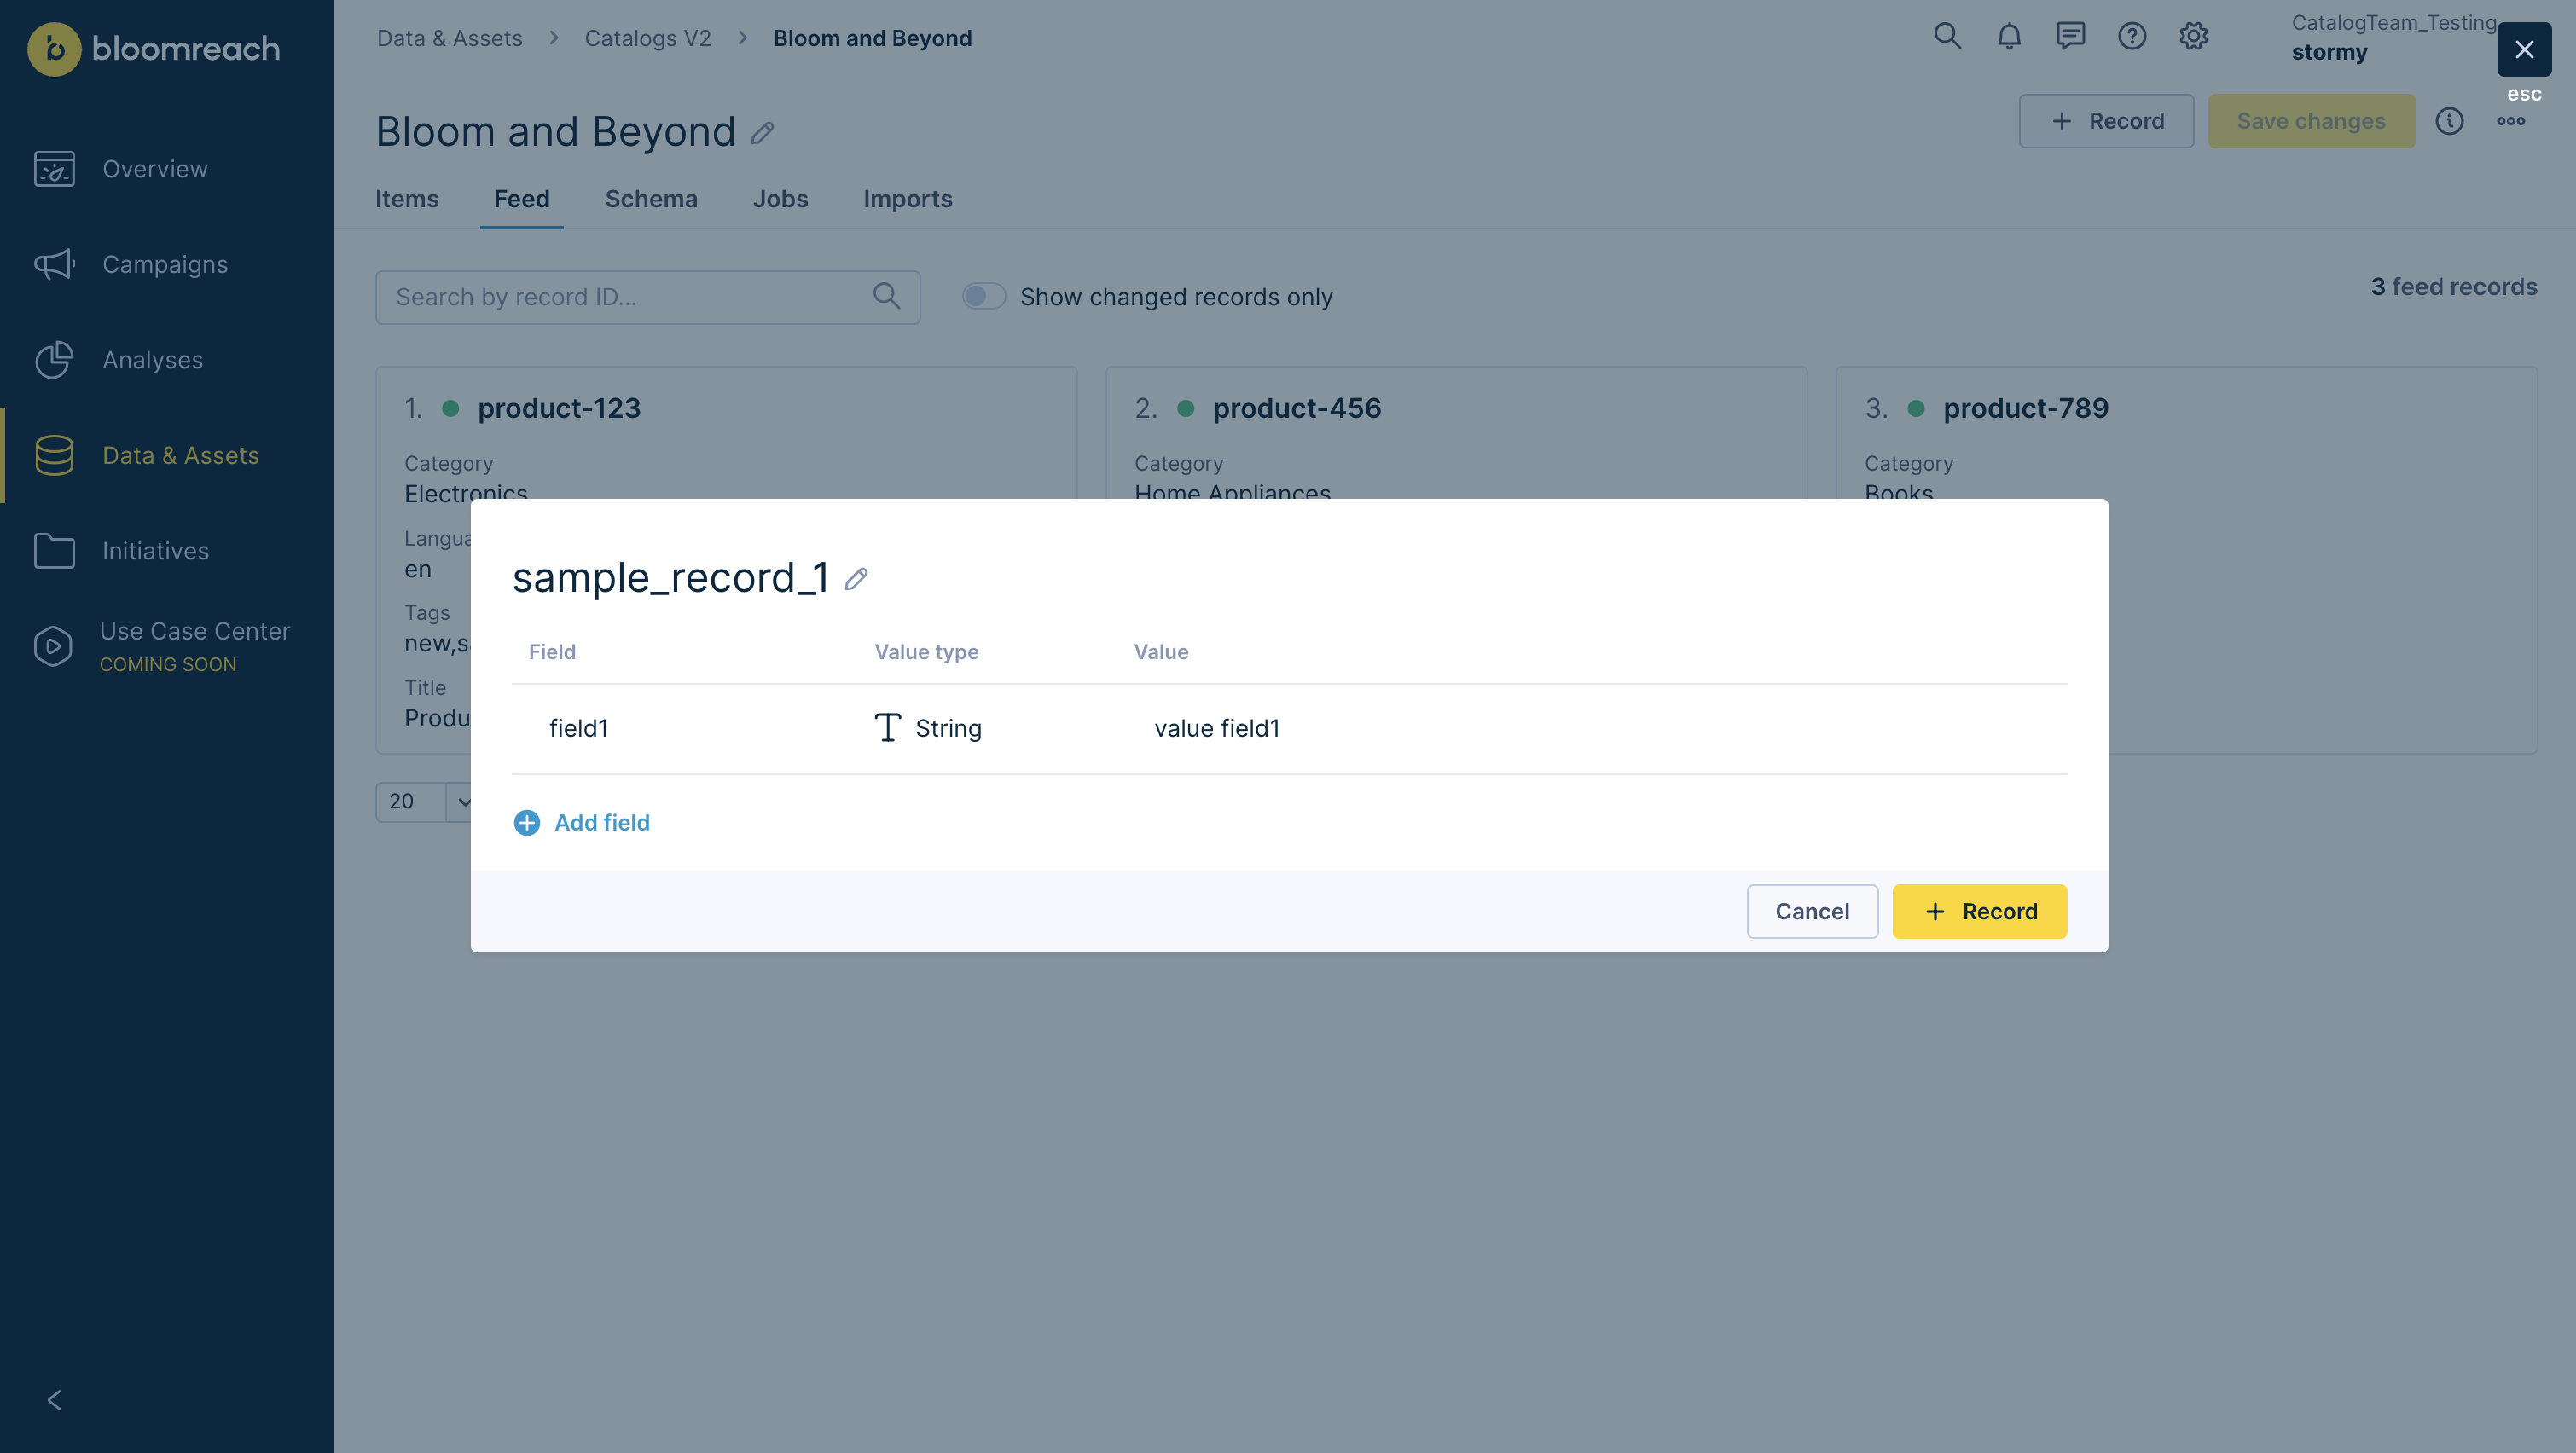
- In the Feed tab, click the + Record button, then click the Manually add record button.
- Enter a unique Record ID (also the item ID).
- Add fields to the record by using existing attributes or creating new ones and assigning them a data type and a value.
- Click + Record.
Local record changes
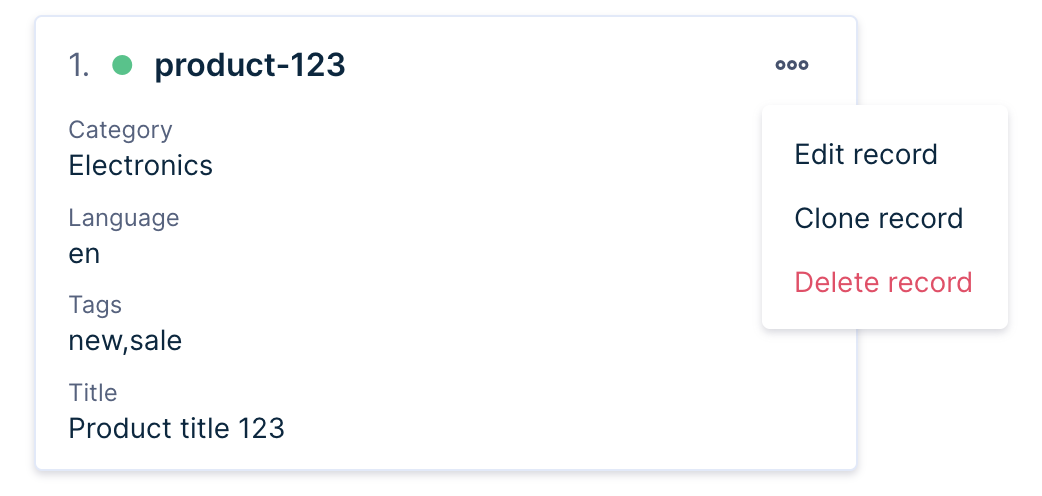
You can edit records directly in the feed view. Use the Show changed records only button to display modified records. Duplicate a record with the Clone record option, ensuring the new one has a unique identifier. Click on a record to edit it or select Delete record to remove it. Click the Save Changes to apply updates.
Configure the schema
In the Schema tab, define how records transform into items. This is where you define mappings of Record fields to item attributes.
Modifying a catalog's schema immediately triggers a reprocessing of all existing Records, resulting in a complete regeneration of items based on the new schema. This action can have immediate and significant effects on Engagement application usage. For example, changing the data type of an attribute used in a campaign or recommendation may cause those campaigns to behave unexpectedly or fail.
Always test schema changes in a non-production environment to prevent unexpected issues in dependent applications.
Reserved attribute mappings
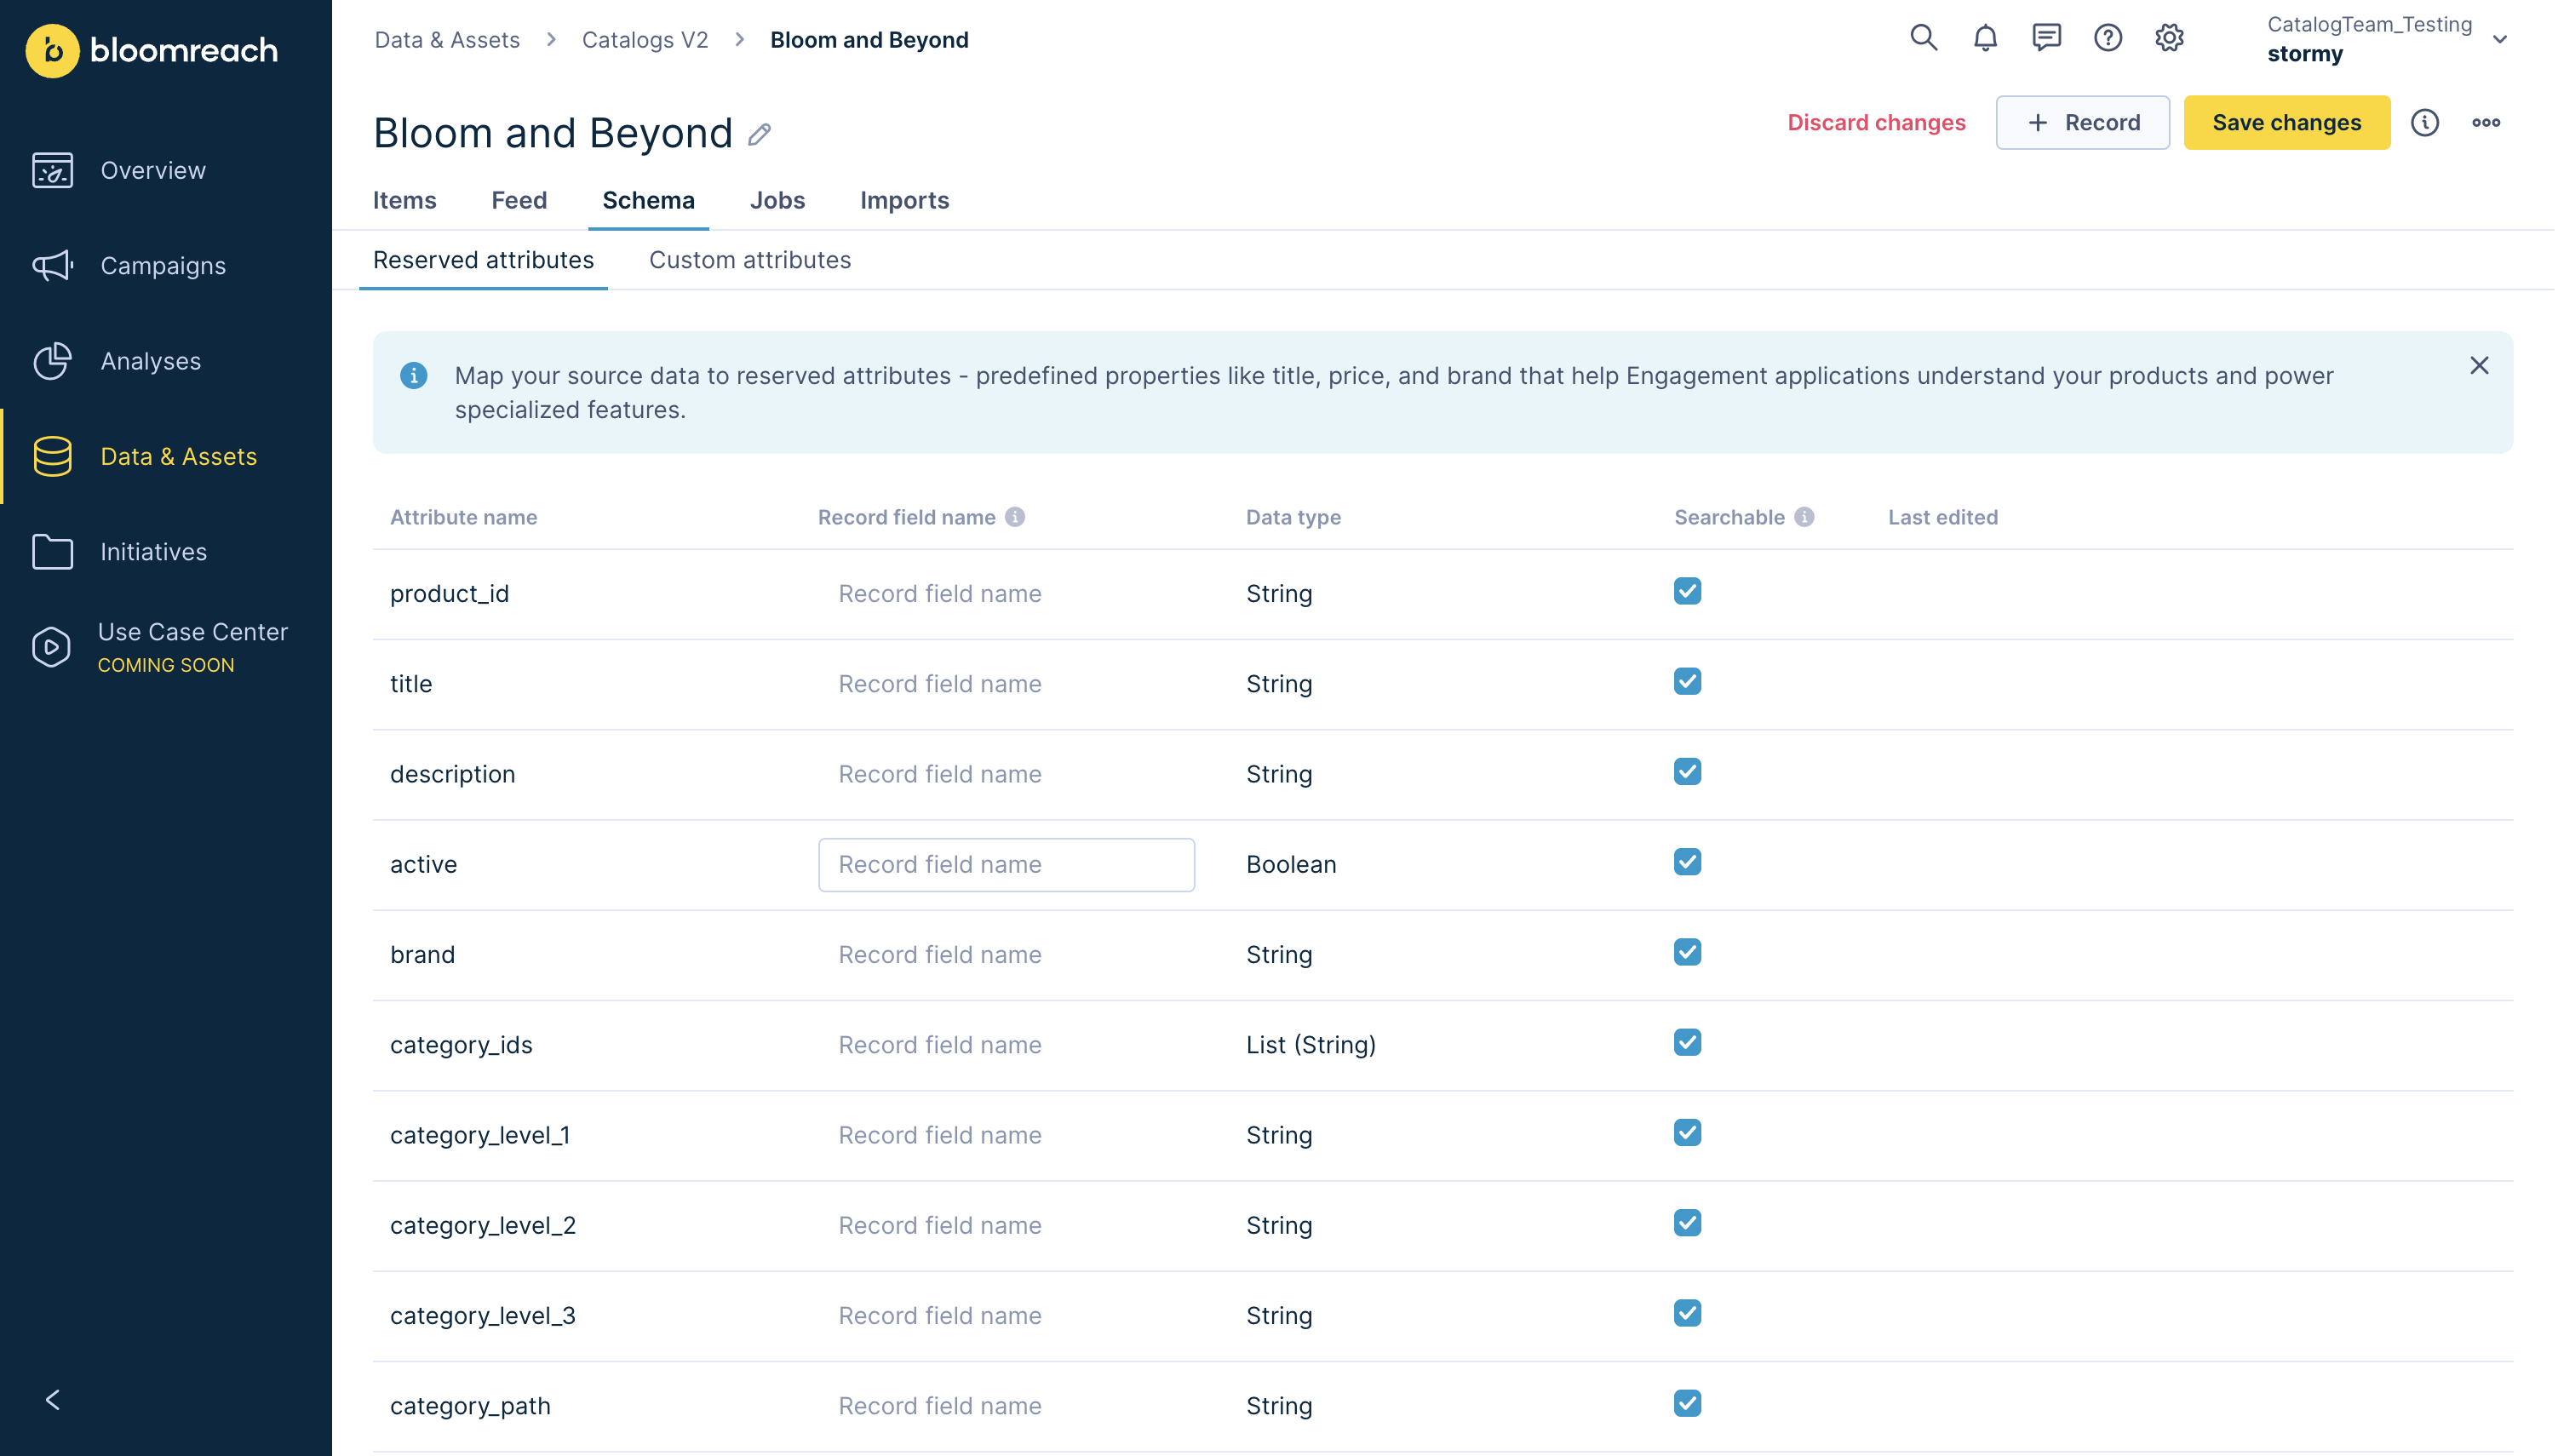
Reserved attributes have predefined meanings in Bloomreach Engagement, such as product_id, title, price and category_path. These attributes are only available for product catalogs.
- In the Schema tab, select the Reserved attributes section.
- Select the corresponding field in your records for each reserved attribute you want to use. For example, map the
product_idattribute to your record'sSKUfield. You can leave this mapping blank if you don't have a corresponding field. - Toggle the Searchable switch to enable searching and filtering using this attribute. There is a limit of 40 searchable attributes per catalog.
- Continue to make additional mappings as necessary.
- Click Save changes.
You aren't required to set any reserved attributes if they aren't relevant to your business. Only Reserved Attribute Mappings with an explicit field mapped will be on your items.
Custom attribute definitions
Custom attributes are attributes that you define for your specific needs.
- In the Schema tab, select the Custom attributes section.
- To create a new custom attribute, click Add custom attribute.
- Enter an Attribute name. Attribute names must not match Reserved Attribute names. For example:
color. - Choose the Data type of the attribute (for example,
String,Integer,Boolean, and more). - Toggle the Searchable switch to enable searching and filtering using this attribute. There is a limit of 40 searchable attributes per catalog.
- Click Save changes.

View items
Items are the processed and validated versions of the Records. You can view them on the Items tab.
These items, such as Campaigns, Scenarios, and Recommendations, are available to your project applications. Therefore, the item view in this management interface represents the data that your Engagement apps see.
- Click on the Items tab.
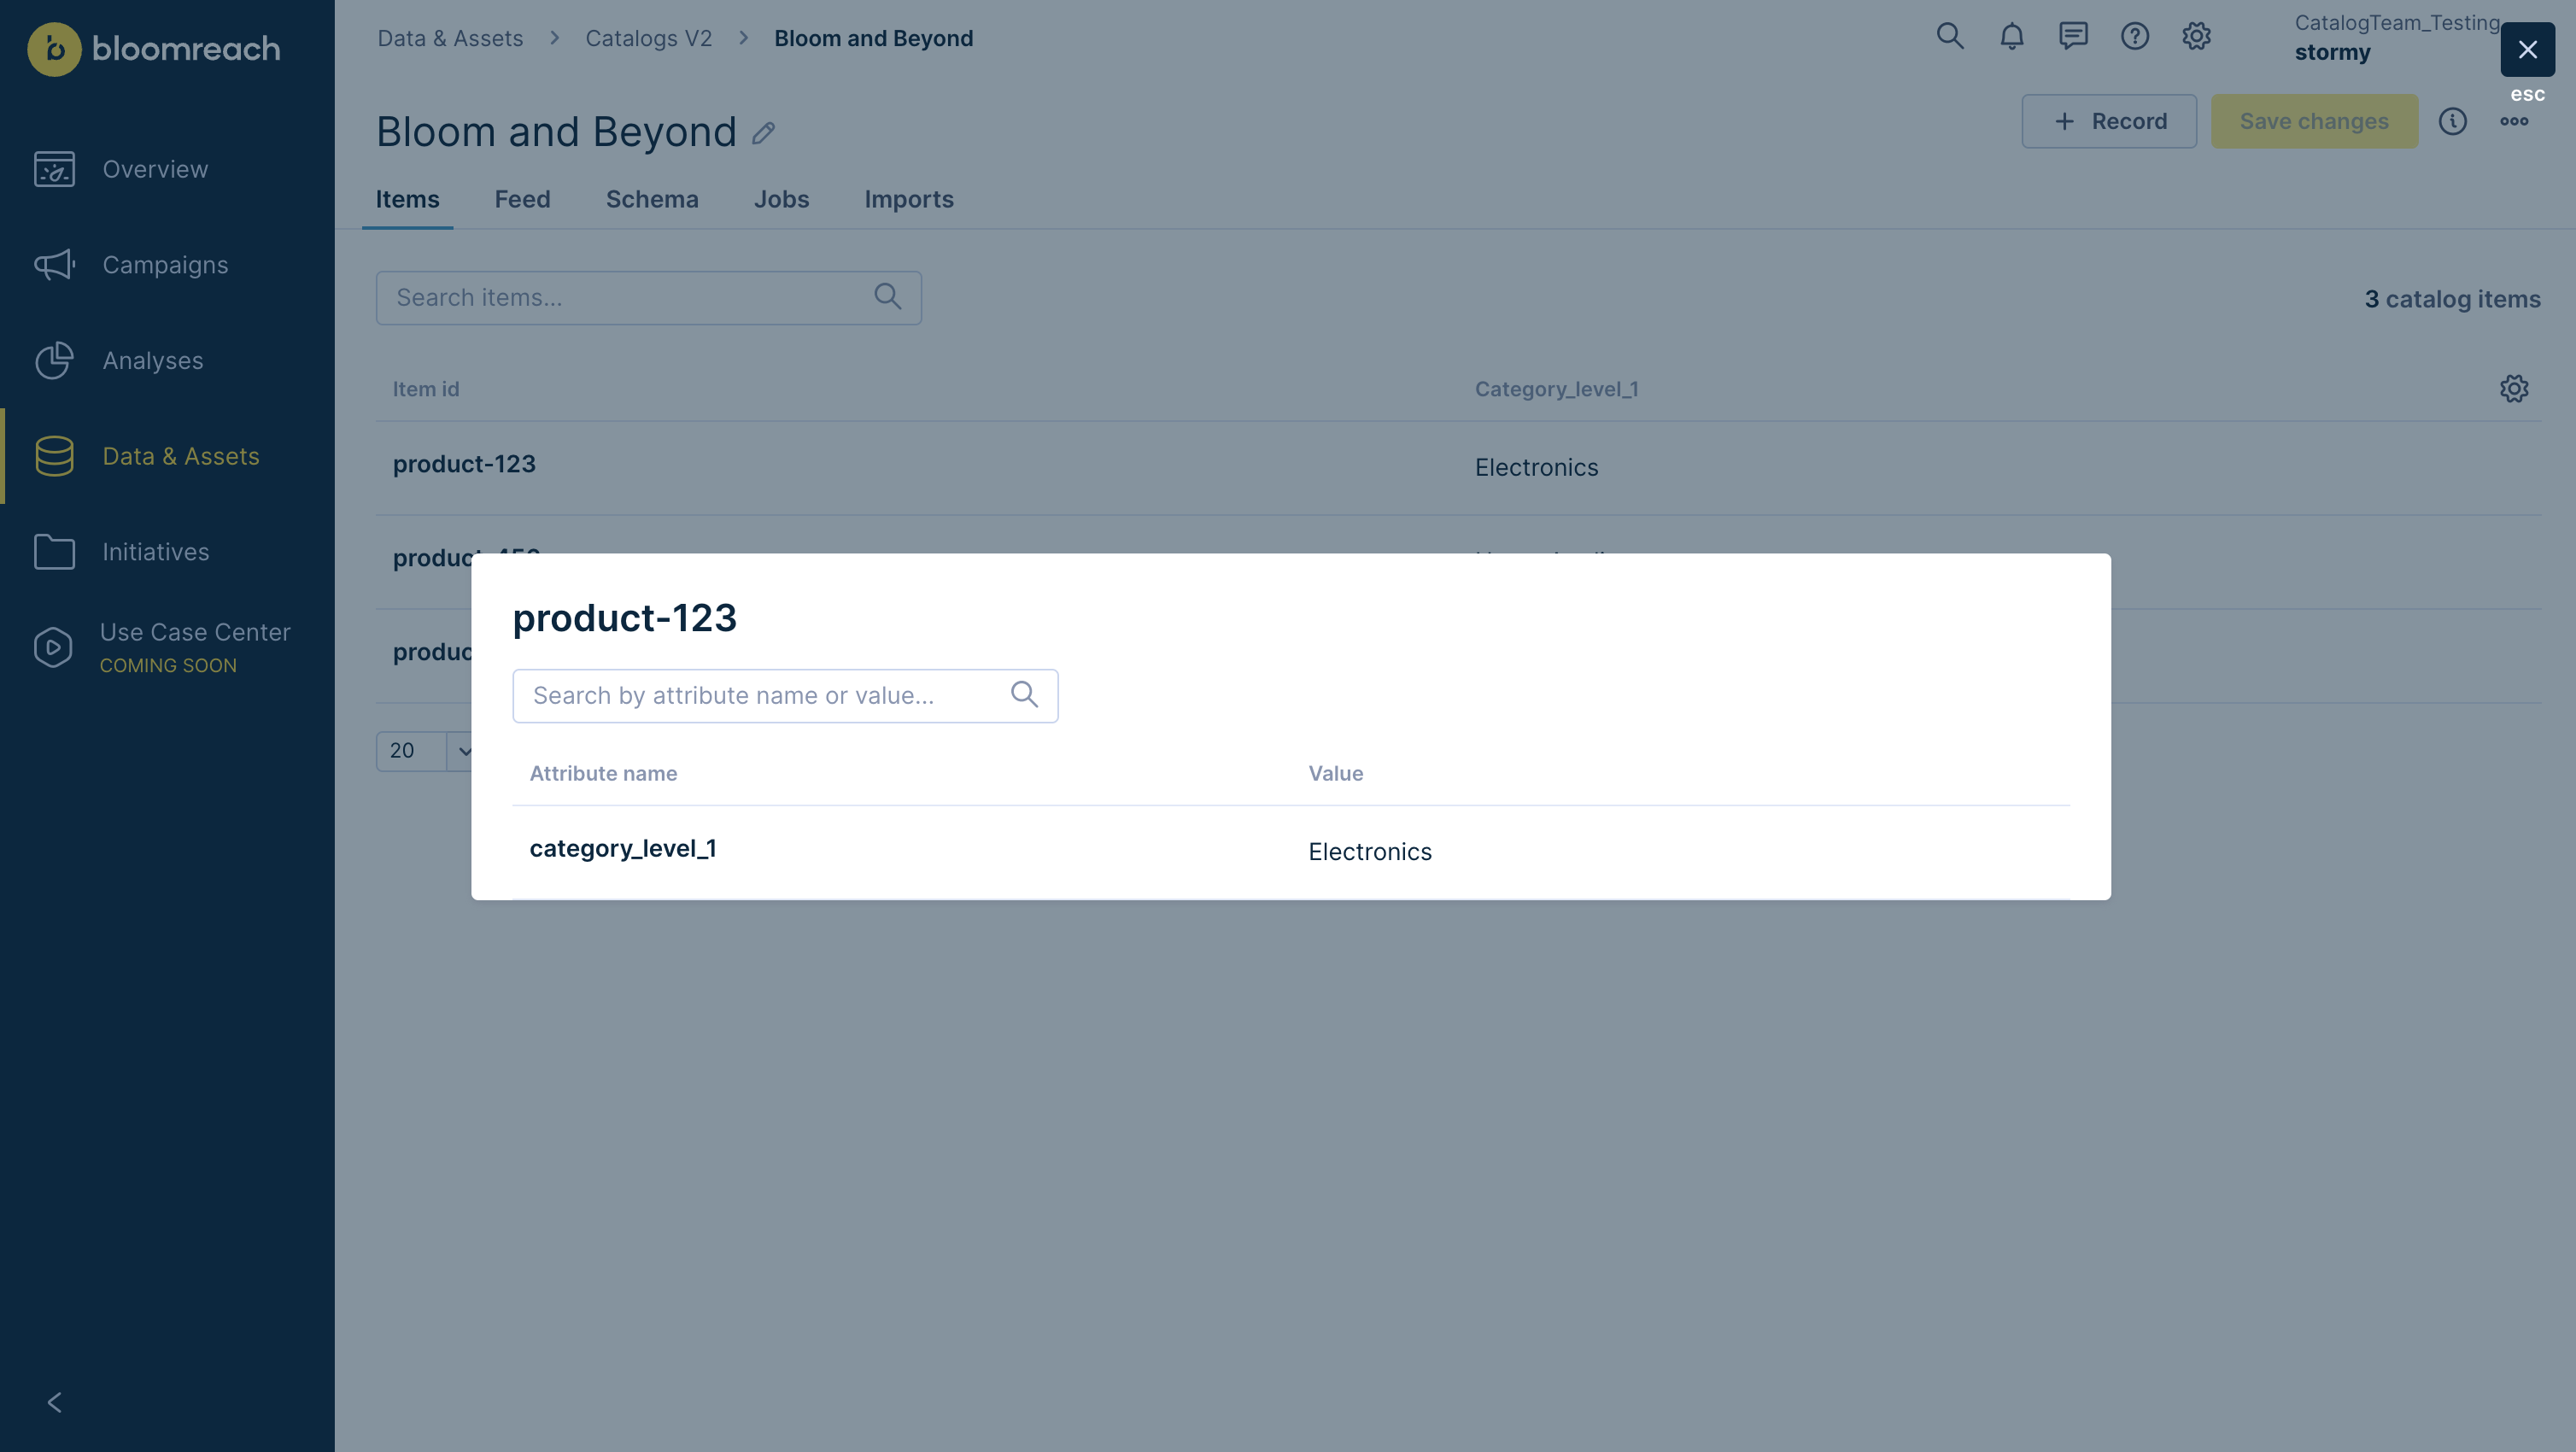
- Here, you can view all the items created based on the records and schema settings you have configured. By default, only the item IDs are shown. You can customize the columns displayed by selecting Customize columns and adding more attributes to view. You can also search items by attribute.
- Clicking on a specific item shows all of its attributes and values.
If the items displayed in the Items tab don't appear as expected, you should first check the Catalog's Schema. This is where you define how Record fields are mapped to Item attributes. Ensure that the Custom Attribute Definitions and Reserved Attribute Mappings are correctly set to transform your raw data as desired. Also, verify that your current Records contain the expected data.
The fields in your Records are the source for the attributes in your Items. If a record is missing a field or has a value that doesn't conform to the configured attribute type, the item may not be generated or will have unexpected values.
Monitor jobs
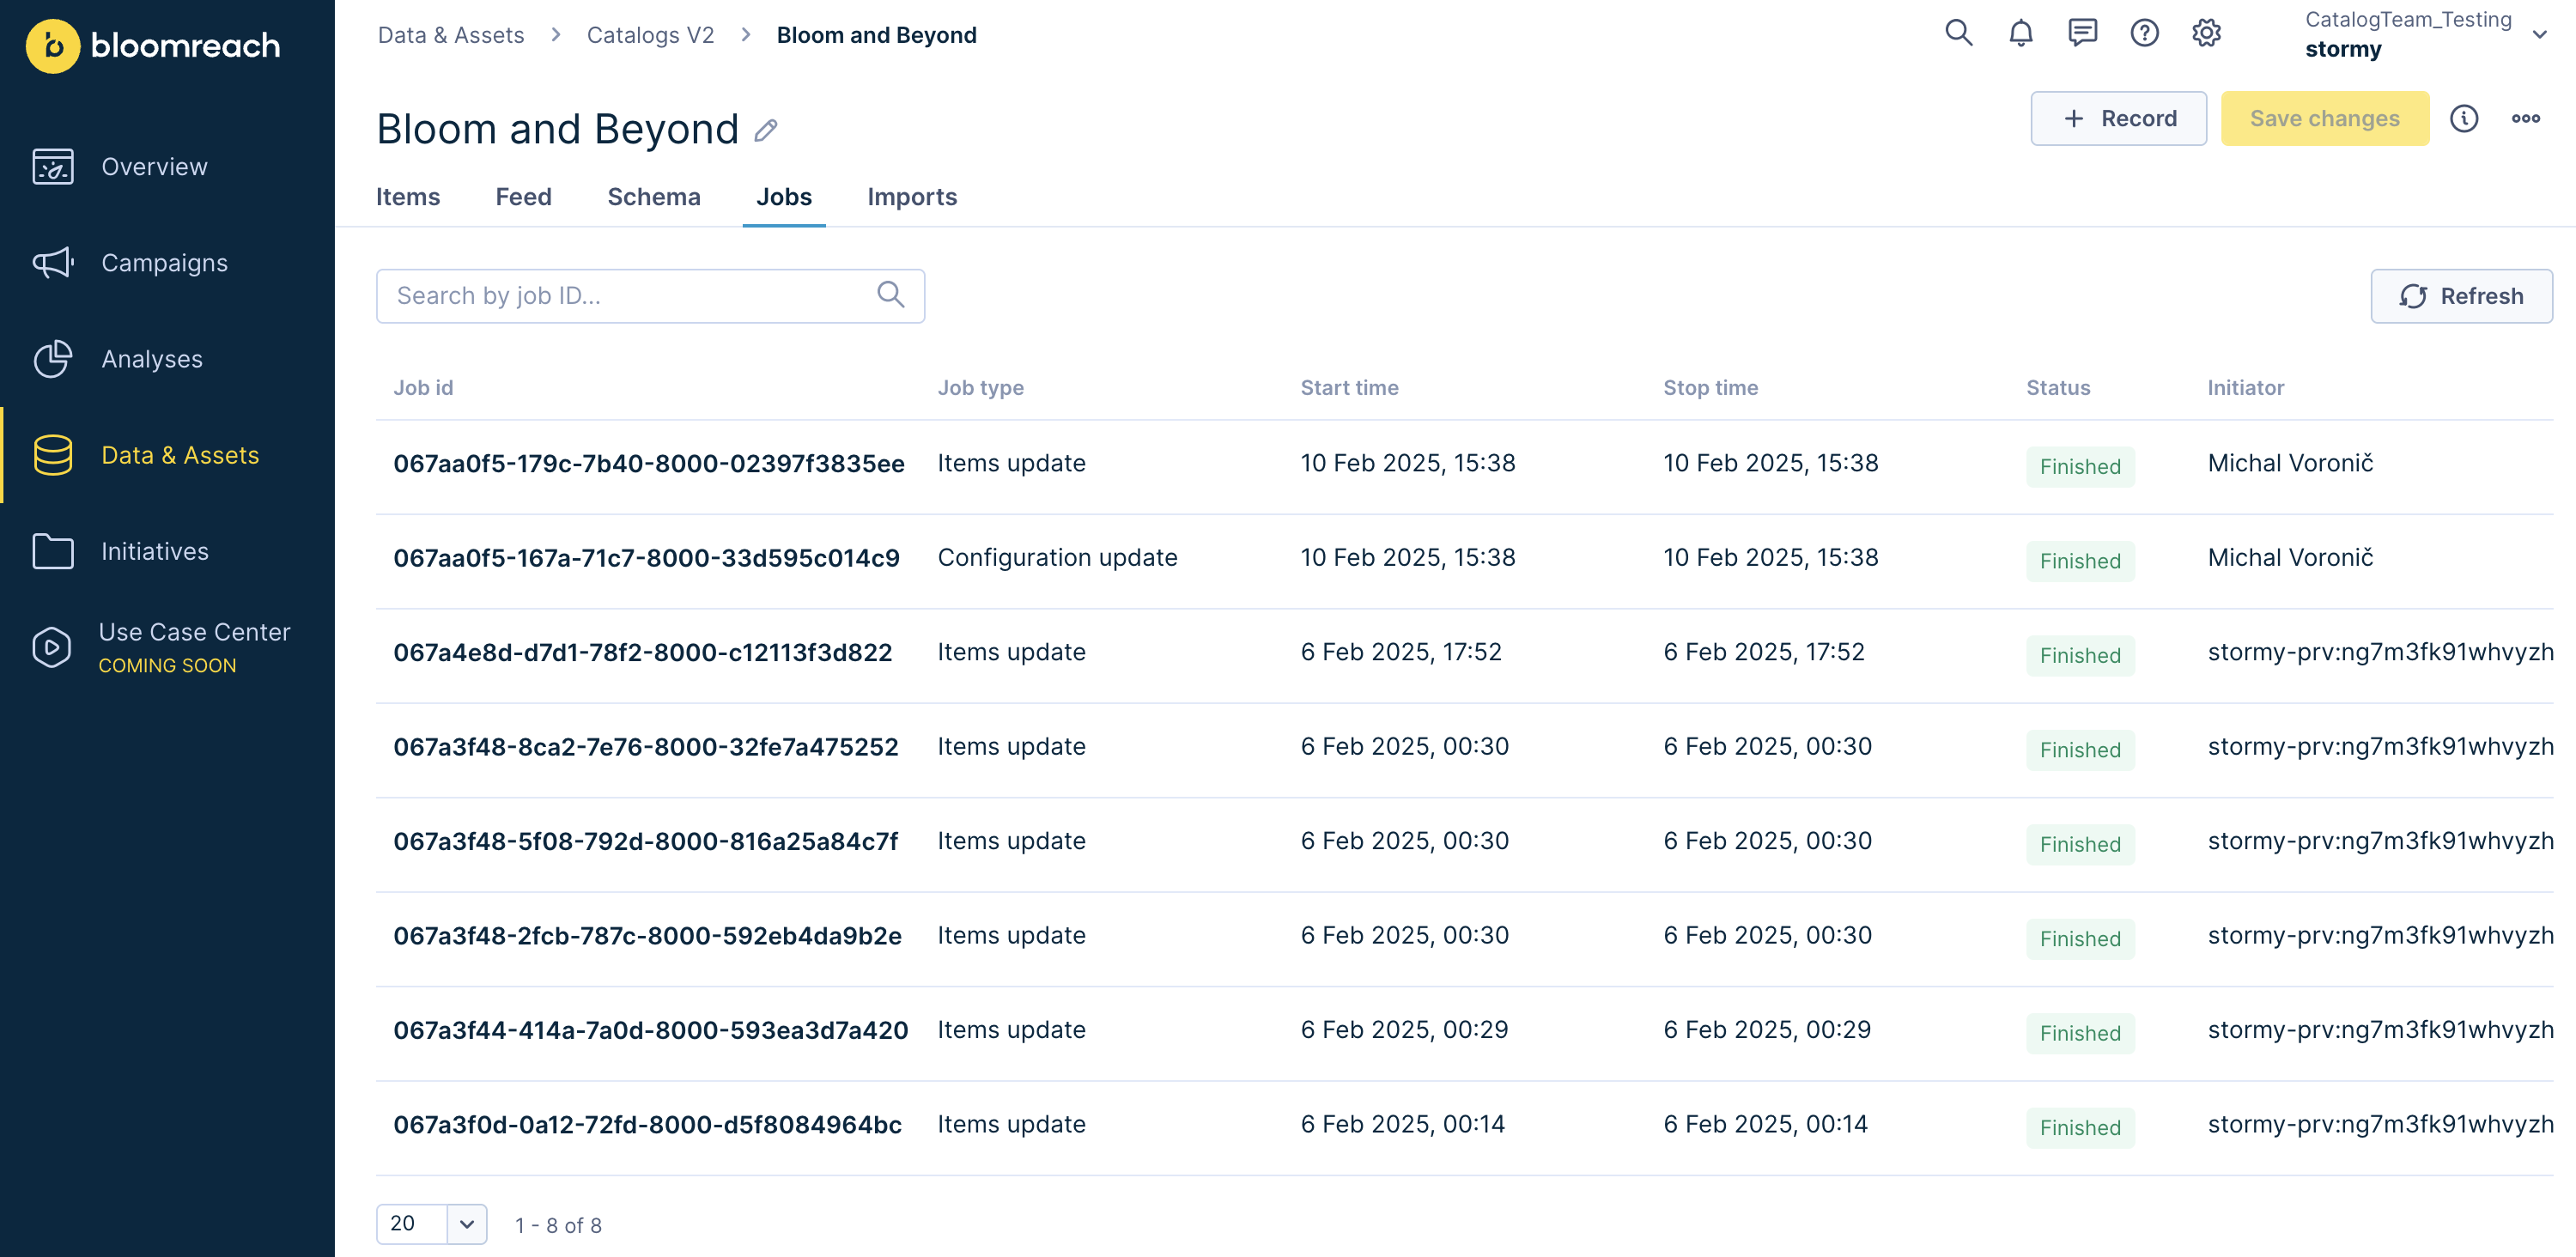
In the Jobs tab, track the status of catalog operations. It displays all jobs, including import jobs, items update jobs, and configuration update jobs, which are processed sequentially. Job statuses include pending, running, success, fail, and canceled.
Imports
The Imports tab lets you manage and view import definitions for your catalog. It displays saved import definitions along with their names and status. By selecting the edit option, you can delete an existing import definition or re-run an import.

Header features
- Display name: You can change the display name of the catalog.
- Catalog info: Click the info icon to view:
- The unique catalog identifier
- Last updated timestamp
- Description (view or modify)
- Show usages: The triple dot icon shows where a particular catalog is used throughout Bloomreach Engagement. This will show you where a campaign, scenario, or recommendation is using a catalog. This can't show all usages, particularly if a dynamic catalog reference is created and accessed via the Jinja template.

Reserved attributes
Reserved attributes are predefined attributes within Bloomreach Engagement with specific semantic meanings for Engagement applications and the Use Case Center. These attributes are designed to standardize common product data use cases and enable particular functionalities in the platform.
Key characteristics:
- Predefined semantics: Bloomreach defines the meaning and usage of these attributes, which are essential for product-focused features in Engagement applications.
- Product catalogs only: Reserved Attributes are only available for mapping in product-type catalogs.
- Fixed names and data types: Each Reserved Attribute has a specific, fixed name and data type that can't be modified. For example, the price attribute is always a float.
- Mapped from record fields: You must map Reserved Attributes to corresponding fields within your catalog's Records through the Configuration.
- Required for specific features: Certain Engagement features may require specific Reserved Attributes to function correctly.
item_idis always present: Theitem_idattribute is a globally reserved attribute that is always present on every item and is set automatically from the record ID.
List of reserved attributes
The following table lists the available Reserved Attributes, their names, data types, descriptions, and example values:
| Attribute | Attribute Name | Type | Description | Example Value |
|---|---|---|---|---|
| Product ID | product_id | string | Base product identifier (ignores variants) | "SHIRT123" |
| Title | title | string | Product name | "Black fitted crew neck t-shirt" |
| Description | description | string | Product description | "Comfortable cotton t-shirt..." |
| Active | active | boolean | Product availability status | true |
| Brand | brand | string | Product brand | "Nike" |
| Category Ids | category_ids | list | Internal category identifiers | [12345, 67890] |
| Category Level 1 | category_level_1 | string | Top-level category name | "Shoes" |
| Category Level 2 | category_level_2 | string | Second-level category name | "Athletic" |
| Category Level 3 | category_level_3 | string | Third-level category name | "Running" |
| Category Path | category_path | string | Full category hierarchy | "Shoes | Athletic | Running" |
| Color | color | string | Main product color | "red" |
| Gender | gender | string | Target gender | "Male", "Female", "Unisex" |
| Image | image | string | Main product image URL | http://example.com/image.jpg |
| Lead time | lead_time | string | Restocking time | "7" |
| Supplier | supplier | string | Supplier identifier | "SUPP123" |
| Size | size | string | Product size | "XL", "12" |
| URL | url | string | Direct product URL | http://example.com/product |
| Stock Level | stock_level | integer | Current inventory quantity | 42 |
| Cost Per Unit | cost_per_unit | float | Product cost before margin | 15.99 |
| Discount Percentage | discount_percentage | float | Percentage discount | 50.0 |
| Price | price | float | Final customer price | 29.99 |
| Returned Products | returned_products | string | Number of returns | "5" |
| Date Added | date_added | timestamp | First inventory date | 1709078400 |
Value format requirements
Ensuring that the Record field values you map to Reserved Attributes match the expected format is crucial. The system performs type coercion (for example, converting a string to an integer) but performs no other transformations. This means the following formatting adjustments for reserved attributes must be performed before sending data into records:
- No delimiter conversion: For example, the
category_pathmust use|as a separator, not another delimiter like>. - No format standardization: For attributes like price, a numeric value (for example,
29.99) is expected, and a value like$29.99will not work.
Best practices:
- Map critical attributes: Map basic attributes like title, price, and URL for core functionality. Map category-related attributes for proper product organization and enable search for attributes commonly used in filtering.
- Data quality: Ensure your source fields contain the appropriate data types and maintain consistent formats for record fields like category paths. Validate URLs for image and product links.
- Performance: Enable searchable selectively, based on filtering needs. Consider the 128-character truncation limit for searchable values.
- Record value formatting: Ensure source field values match the required formats of each reserved attribute. Only type coercion is performed automatically. No delimiter conversion, case normalization, or semantic mapping occurs. Validate formats at source to prevent item creation failures.
Important considerations
- If a Reserved Attribute can't be created based on the mapping, the entire item will be invalid and not created.
- Reserved attribute mappings are optional, but some Engagement features require them.
- Reserved Attributes are mapped through the Reserved Attribute Mappings section of the catalog's Schema.
- When a Reserved Attribute is mapped, the corresponding item will have a strongly typed attribute with the name of the Reserved Attribute, such as
price.
Using Reserved Attributes effectively ensures your product data is properly formatted and can be used for specialized features within Bloomreach Engagement.
Updated about 1 month ago
