SMS in Scenarios
Bloomreach Engagement enables you to run personalized SMS campaigns through scenarios that allow for one-to-one communication with your customers. This article explains how to set up such a campaign where you use the SMS single action node.
Refer to our main SMS Campaigns documentation which will guide you through the needed prerequisites, elaborate on the message's size, show you how to customize SMS, elaborate on the consent policies, illustrate how to include links in your messages, and present an example of where SMS messages can be used to your advantage.
Create a scenario
Create a scenario to build an SMS campaign.
Add the SMS action node
Add the SMS action node to your scenario.
Choose a template
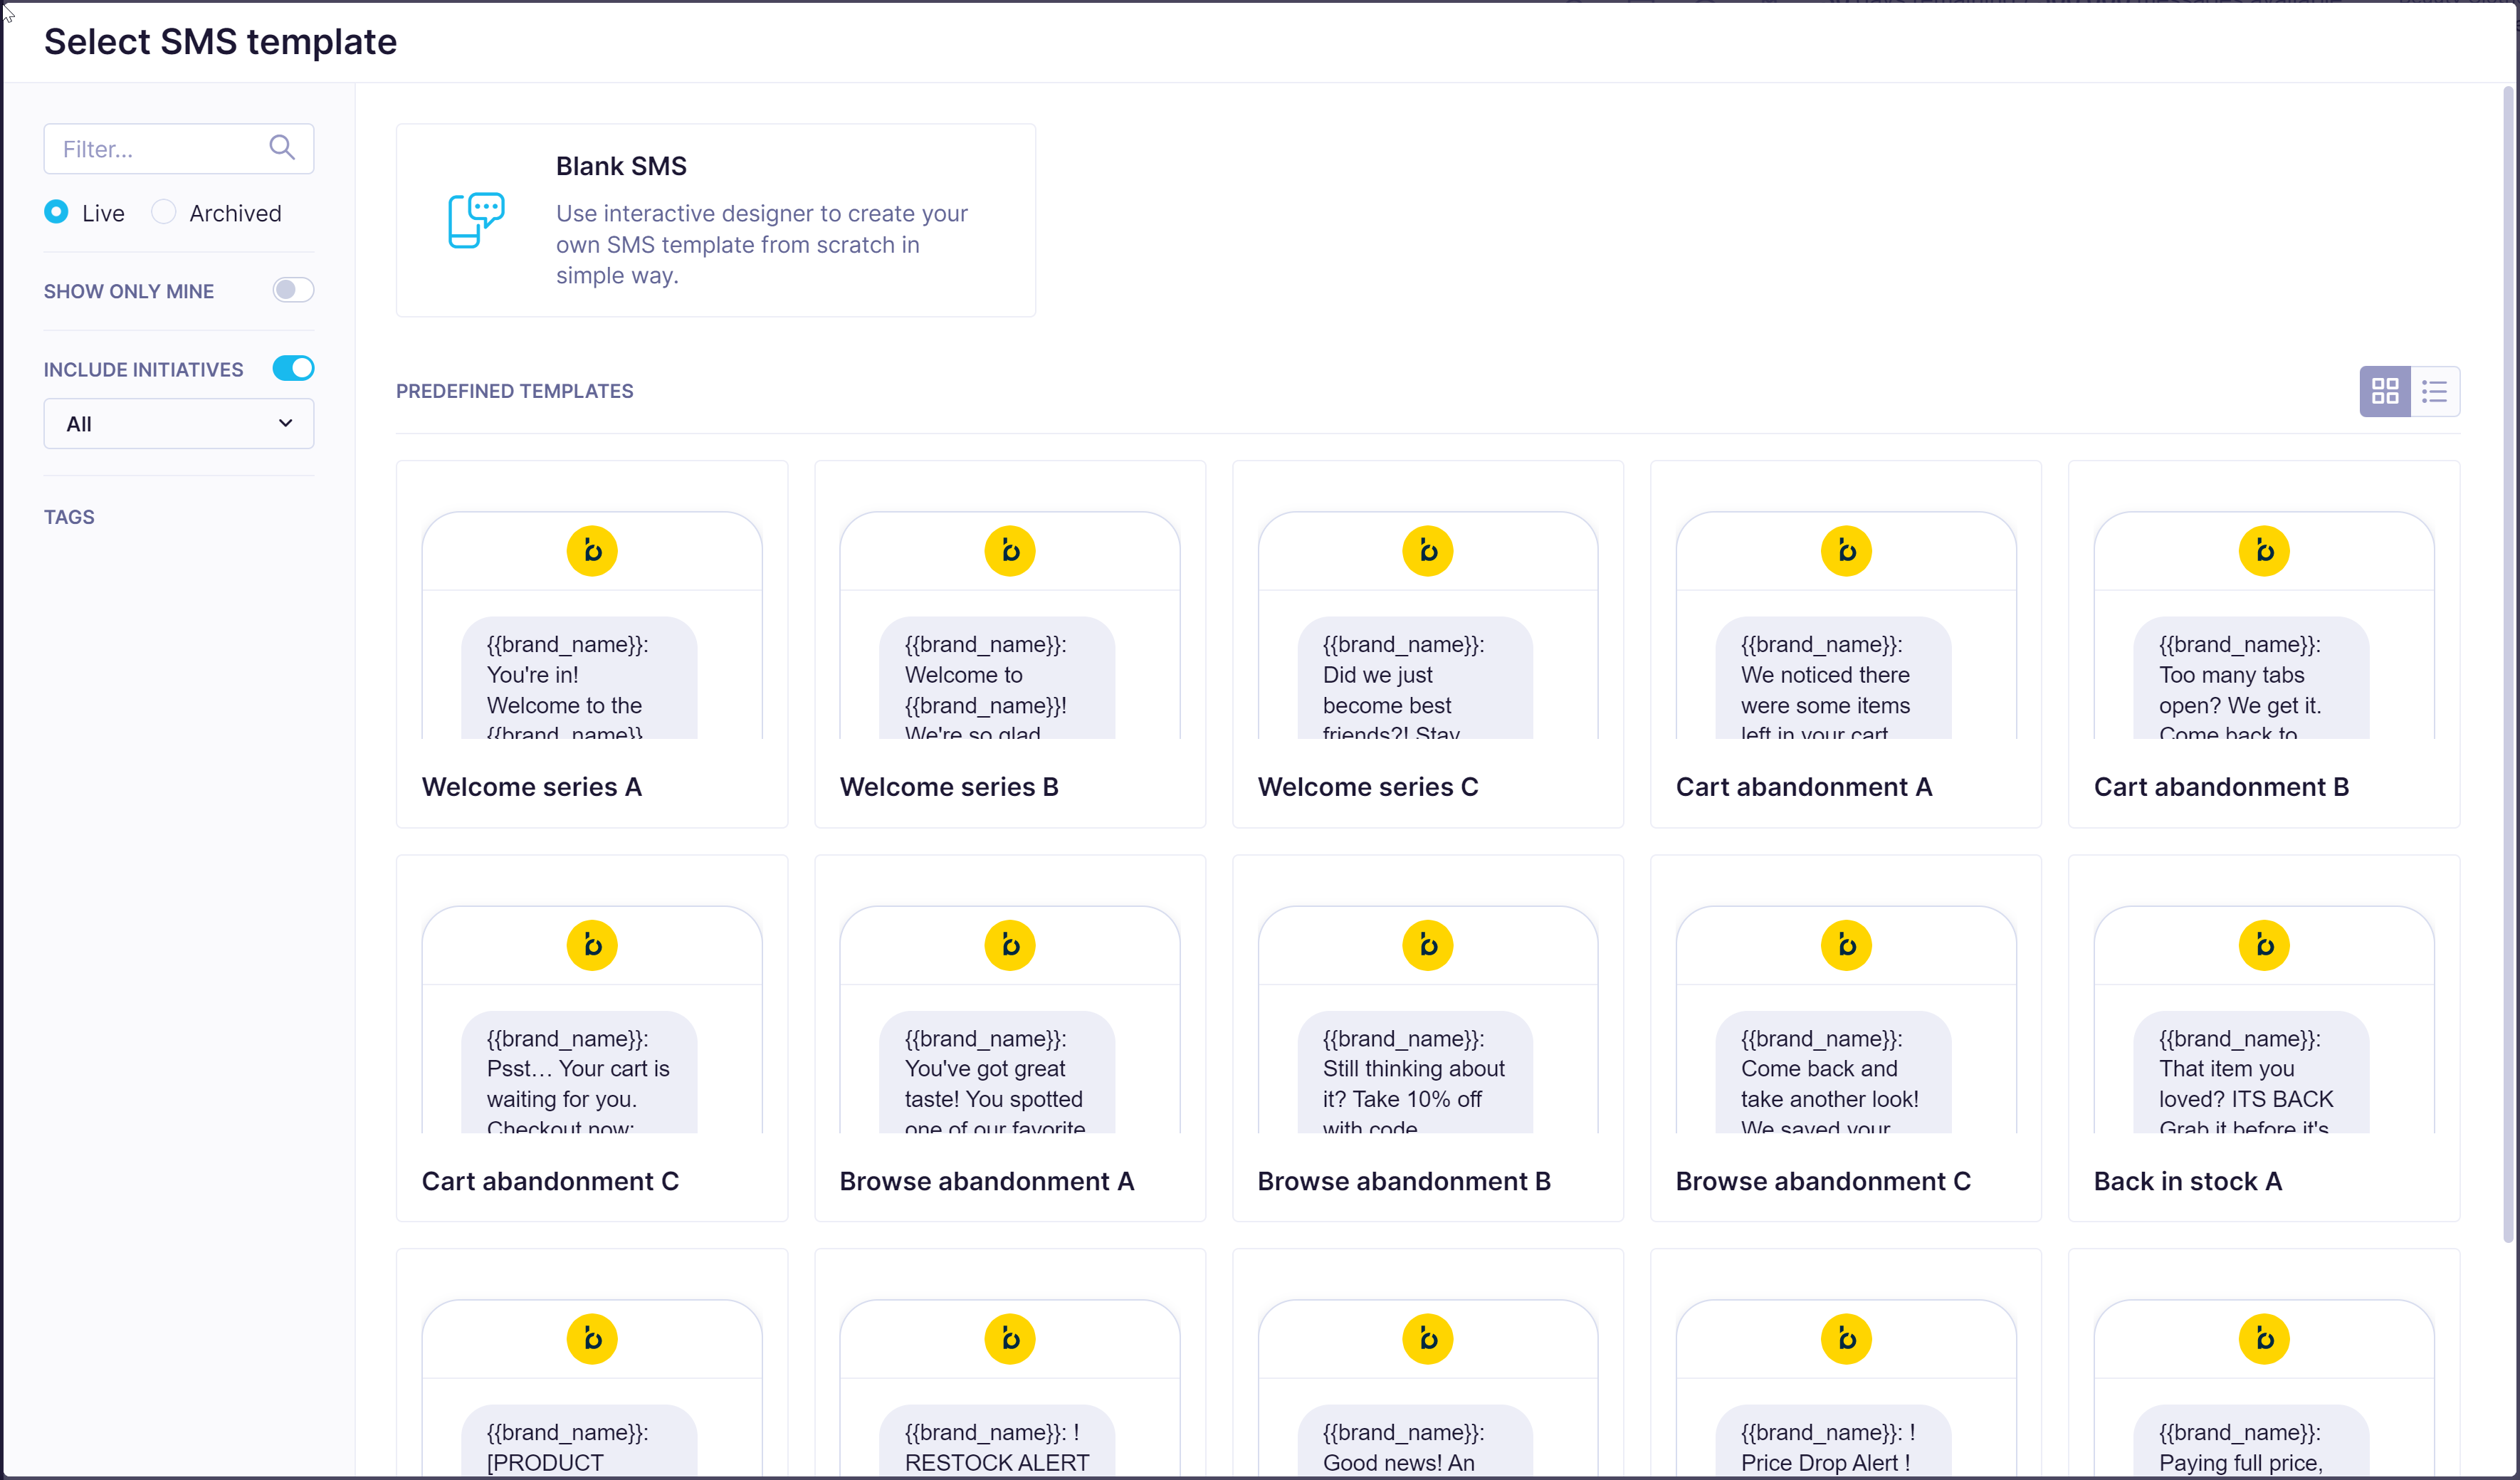
You can build your SMS campaign from scratch or use our Predefined templates or Project templates.
- Predefined templates are part of the built-in library of templates.
- Project templates are templates you build within the Asset Manager.
You can reuse these templates during the campaign creation process.
Access to a list of predefined or project templates is visible when you click on the SMS node in your scenario.

SMS template settings
SMS template settings are disabled by default. If you enable its settings, it includes:
- Link shortener
- Transfer identity to URL links
- Link transformation
- Custom campaign tracking
When you create a new SMS campaign using a template, the campaign settings will be prefilled if the template settings are enabled.
You don't have to configure the settings for the same template every time. When you change a template in an existing campaign, you have the option to apply the settings from the template or not apply them and keep the existing campaign settings unchanged.
Create sender profile
To use the integration, set it up as a sender profile in Project settings > Campaigns > SMS / MMS / RCS. For details, read the SMS campaign documentation.
Personalize the message
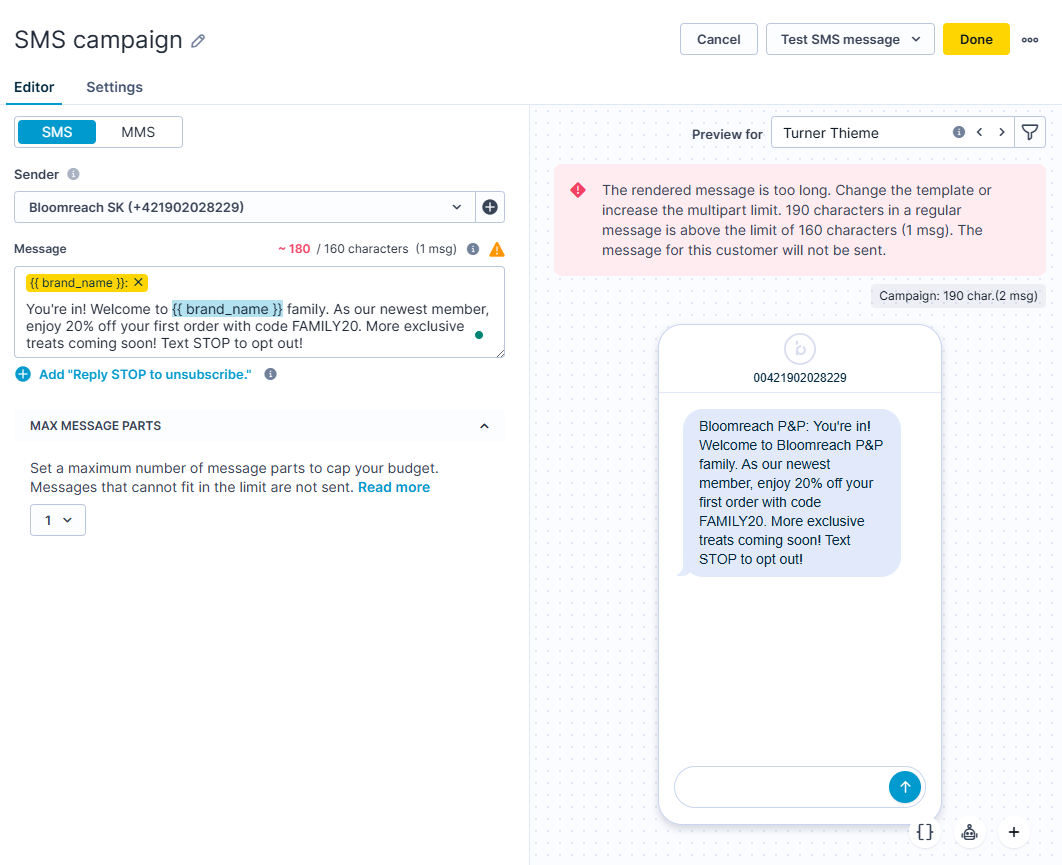
The message and media to be sent can be typed within an editor with an option to include Jinja personalization. The editor also displays a characters counter and automatic highlighting of special characters, as well as the option to define fallback SMS with limited automatic message splitting.

The SMS action node
Configure the settings
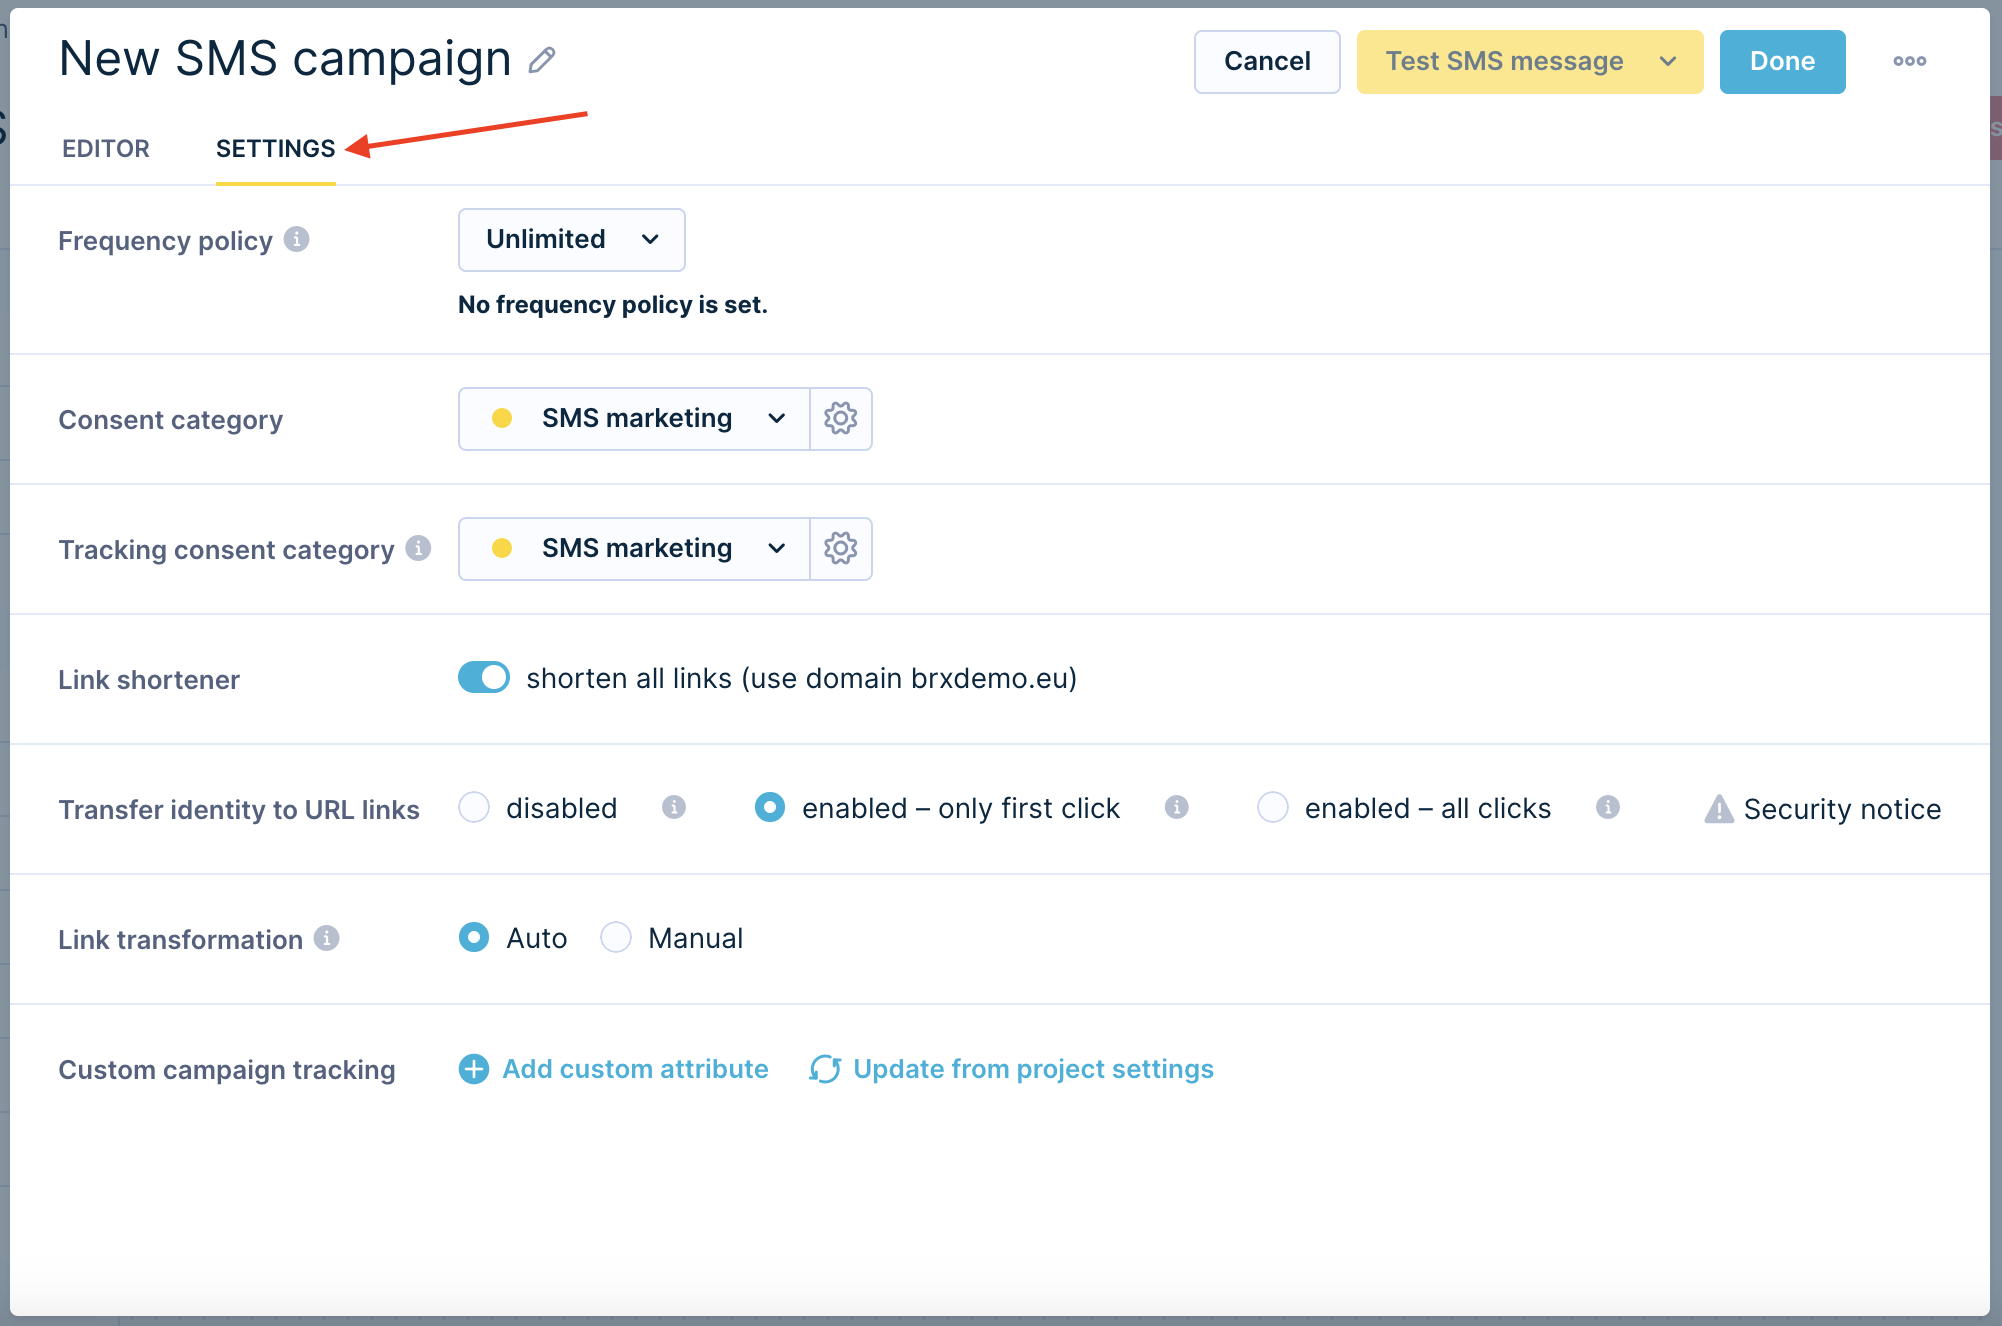
You can access SMS campaign settings through SMS action node in Settings. In this tab, you can configure various SMS parameters:
| Function | Description |
|---|---|
| Frequency policy | It defines the number of SMS messages that a customer can receive within a specified timeframe. |
| Consent category | Choose which consent is required for a customer to have to receive this campaign. Set the right Consent category to comply with the applicable regulations. |
| Tracking consent category | Ensure that you only track those customers who have given you specific permission to do so. Opens and clicks in email/SMS/MMS/push campaigns will not be tracked without selected consent. |
| Link shortener | When enabled, it automatically shortens all hyperlinks in SMS/MMS. |
| Transfer identity to URL links | - It can be managed only if the Link shortener is enabled. - Using URL links for customer identification. - Options: 1. Disabled 2. Enabled - first click only (recommended) 3. Enabled - all clicks |
| Link transformation | Auto: default UTM settings Manual: modify the UTM tags utm_campaign, utm_medium, and utm_source |
| Custom campaign tracking | It allows you to add custom event attributes to be tracked in the campaign events for all statuses of the campaigns. |

Test your message
You can preview your final SMS message before you actually send it or test it for the selected group of your customers.
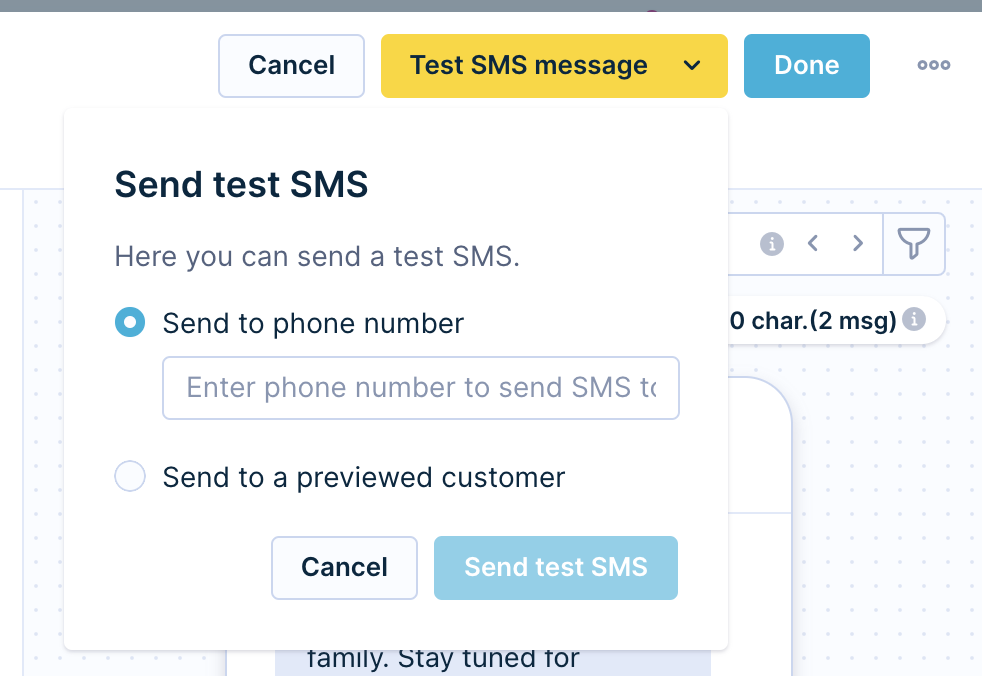
You can test your SMS message through the editor when you click on the Send test SMS button. Here, you have two options:
- You can send it to a specific provided phone number (for example, send it to yourself).
- You can send it to the previewed customer.

Launch the campaign
Once you created your Scenario and made all the adaptations needed, you are ready to run the campaign.
Updated 7 months ago
