
Frequency policy
Frequency policies control the number of campaigns customers receive within specific time periods. They prevent message overload by setting intelligent limits based on customer engagement levels.
These policies work across all channels, including email, SMS, and push notifications. They help you stay connected to customers while avoiding message fatigue. Less engaged customers receive fewer messages to prevent unsubscribes, while engaged customers can receive more frequent communication.
Set up frequency policies
Bloomreach includes a built-in "Smart newsletter policy" that works right away. You can also create custom policies or modify existing ones.
To create a frequency policy:
- Go to Settings > Project settings.
- Under Campaigns, go to Privacy management > Frequency policy.
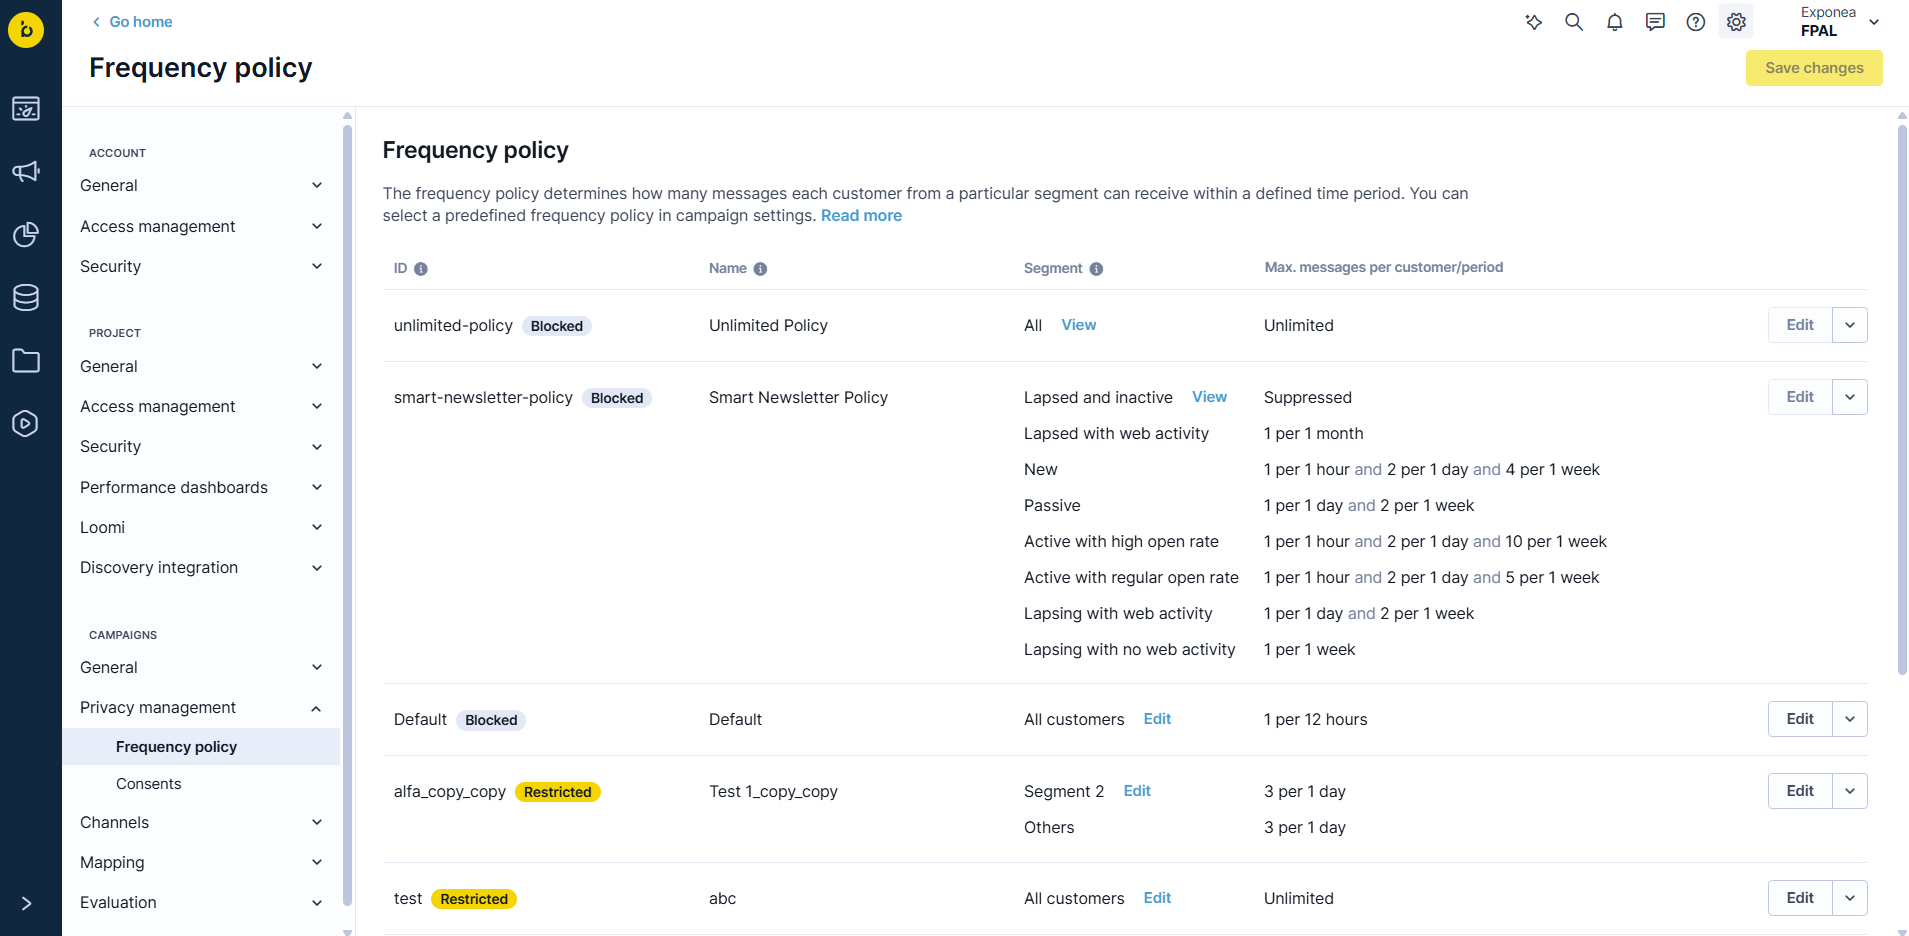
The frequency policy list in Project settings under Privacy management.
To make changes to a policy, click Edit on the right side of a policy row. To manage policy access, click the downward arrow on the right side of a policy row.
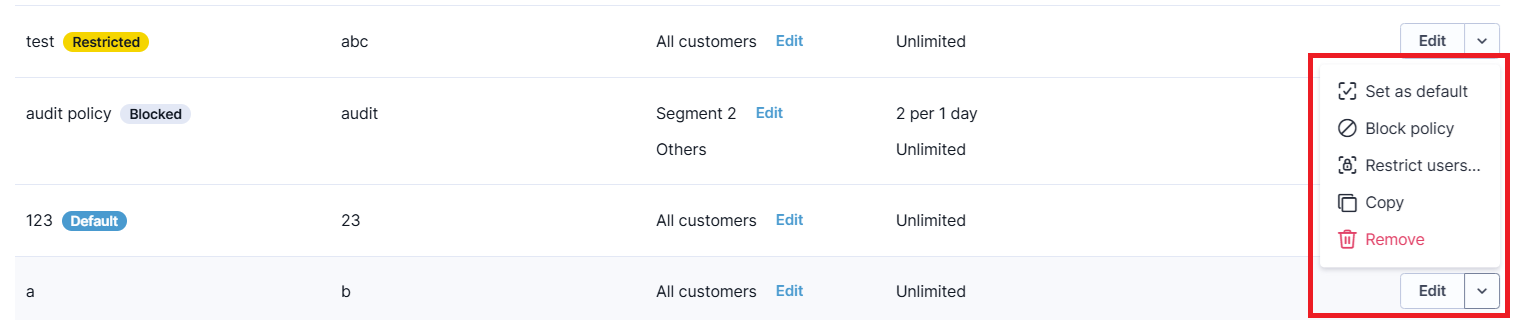
Policy row options for editing and managing access.
From here, you can set or unset a default policy, block or unblock a policy, manage user restrictions, and copy or remove a policy.
Policy functionality
Administrators can block frequency policies to make them unusable for new scenarios, and lock policies to specific user groups so that only group members can use them.
Project admins can take the following actions:
- Set a project-wide default frequency policy that is auto-applied unless changed by an authorized user.
- Block a frequency policy so it cannot be assigned to new scenarios or campaigns. Existing scenarios continue running, but can't be updated with the blocked policy.
- Restrict policies so only users in specified groups can use or edit them in campaigns and scenarios.
- Change a policy's blocked status, group access, or default assignment in settings.
Actions like blocking, locking, and default assignment are logged for compliance tracking.
The Unlimited policy is a system frequency policy set as the default when no other default is present. It cannot be edited, and admins can optionally disable it entirely. When no default policy is set, the Unlimited policy is used. You can't block or restrict the default policy without first selecting a replacement.
Policy management
Policies can be marked as blocked. Blocked policies are unselectable when building new scenarios or accessing them via API. Existing scenarios using a blocked policy remain operational but cannot be updated.
Policies can be locked for specific user groups. For unauthorized users, locked policies appear greyed out and unselectable, with explanatory tooltips such as "Access locked by project Administrator." This locking is enforced across both the UI and API. When unauthorized users try to assign a locked policy or block a default policy, they receive descriptive error messages in both the UI and the API, such as 400 errors with details.
NotePolicies are enforced and checked at the time a user starts them.
How frequency policies work
What's in a policy
Each policy contains:
- Unique ID: Used internally by the system. It appears as
campaign_policyin campaign events. - Display name: The name you see in the interface.
- Segments: Customer groups with specific frequency rules.
Apply policies to campaigns
When you apply a policy to campaigns, all campaigns using that policy share the same limits.
For example, if your policy allows a maximum of 2 campaigns per day and 3 campaigns trigger for the same customer on one day, only the first 2 are sent. The system blocks the third based on when each campaign triggers.
Campaigns with different frequency policies don't affect each other's limits.
Control all channels together
One frequency policy covers all marketing channels:
- SMS
- Push notifications
- Webhooks
To manage channels separately, create different policies for each channel.
NoteOnly marketing emails count toward the
Create customer segments
Segment basics
Segments define how a policy treats different customer groups. You can create rules based on customer behavior and engagement.
For a simple setup, use one segment that applies the same rules to all customers.
For an advanced setup, create multiple segments with different rules. For example:
- High-engagement customers: Allow multiple emails per week.
- Low-engagement customers: Limit to one email per week.
Segment rules
- A policy can have a maximum of 12 segments.
- The final segment must catch all customers not matched by earlier segments.
Set message limits
Create limits
Set the maximum number of messages a customer can receive within a specific time period. Each limit requires:
- Number limit: How many messages.
- Time period: How long.
For example: "3 messages per 7 days."
Choose time periods
You can choose from 6 time period options:
- Minutes
- Hours
- Days (24-hour periods)
- Weeks (7-day periods)
- Months
- Years
How time periods work
Time periods count backward from the current moment. For example, if it's 3:00 PM and you set "last 1 day," the system looks at the previous 24 hours (3:00 PM yesterday to 3:00 PM today), not just the current calendar day.
NoteUse hours instead of days for more precise control over specific time ranges.
Configure rules
- Each segment supports up to 4 rules. When any rule is met, the system stops sending messages.
- To stop all communication for a segment, set "0 per any duration."
- To allow unlimited messages, leave the constraints empty.
Use the smart newsletter policy
The smart newsletter policy is a ready-to-use policy built by email experts and data scientists. It automatically:
- Limits emails to inactive and less engaged customers.
- Maintains normal frequency for customers who recently visited your website.
- Identifies highly engaged subscribers (those who open most emails) and allows them to receive one extra email per day.
This policy balances engagement with deliverability. Your most active customers stay engaged while your sender reputation is protected with less active subscribers.
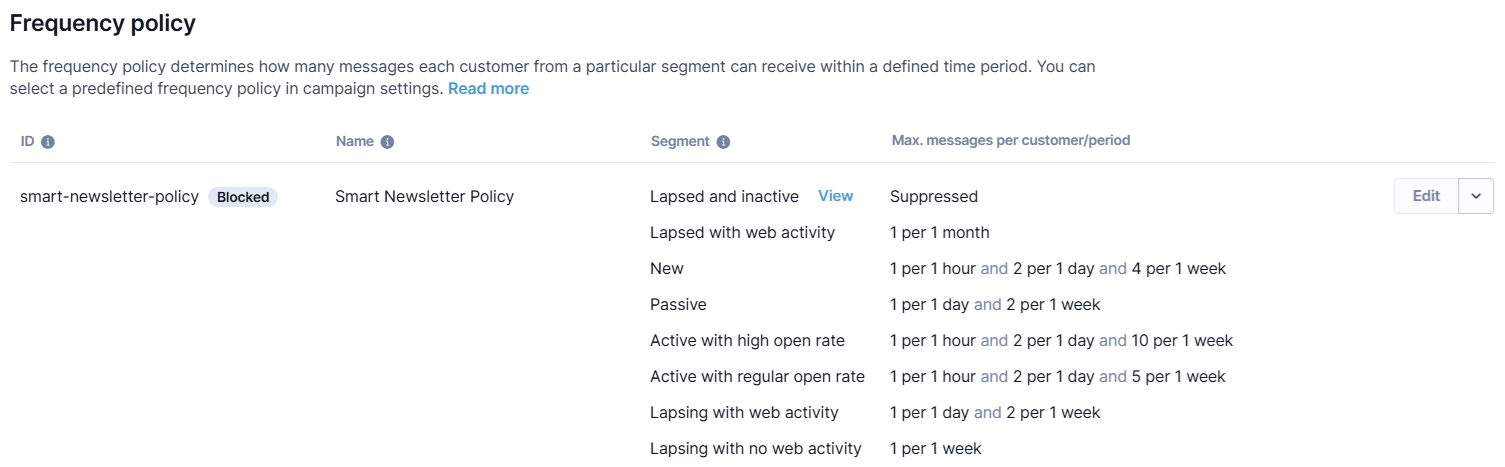
The smart newsletter policy with its pre-configured segment rules.
Updated 1 day ago