

Shopify and Shopify Plus
By connecting your Shopify or Shopify Plus account to Bloomreach Engagement, you can easily analyze your Shopify data, run marketing campaigns across multiple channels, and use Bloomreach Engagement's advanced AI features on your Shopify store. No more dealing with numerous plugins!
Bloomreach Engagement retrieves customer information, past orders, and product catalogs from Shopify, and it regularly imports the delta product catalogs in real time. It also stays connected to Shopify to receive real-time updates on customers and orders.
Time to completeInitial Integration: less than 10 Minutes
Web Integration: A few days
How is the integration useful
With the Bloomreach Engagement Shopify Integration, you can effortlessly send emails, and push notifications, create experiments, and gain valuable insights from your Shopify data analysis. It simplifies the entire process and makes it more efficient.
Instead of having to depend on external plugins, the Shopify integration allows for a simple plug-and-play transition.
- You can set up a straightforward and uncomplicated way to analyze your Shopify data and use them to boost your marketing campaigns.
- You do not have to deal with external plugins for integrating my Shopify data with Bloomreach Engagement.
- You can integrate your Shopify data with Bloomreach Engagement in the most efficient way.
How the integration works
After you set up the integration, Bloomreach Engagement downloads historical data (data up to that point) and subsequently tracks new data (changes, additions, etc.) from the Shopify API:
Initial data load
Bloomreach Engagement loads customer base, historical orders or purchases, and product catalogs from Shopify:
- Initial load of all events from the beginning until the time when webhooks were added
- Events loaded from Shopify:
purchase,purchase_item,cart_update - Customer attributes loaded from Shopify: personal information,
accepts_marketing - Catalogs: products and variants
Real time imports
Bloomreach Engagement imports delta product catalogs from Shopify Products API in real time.
Real Time Imports for New IntegrationsAll new integrations with Shopify import data to Bloomreach Engagement in real time.
However, older integrations have updates of imports every 4 hours.
Near real-time webhooks
Bloomreach Engagement subscribes for new updates on customers and orders from the Shopify backend.
Webhook registration
Bloomreach Engagement registers webhooks to receive real-time tracking and customer updates from Shopify.
Webhooks processing
Bloomreach Engagement processes real-time tracking:
- customer create/update attributes/deletion (track
_customer_change) purchaseeventscart_create,cart_update
Setup process
NoteAn existing project is required for this integration. You can choose from one of our Predefined Project Templates or create your own. Use the Shopify project structure template to make your initial set-up even easier
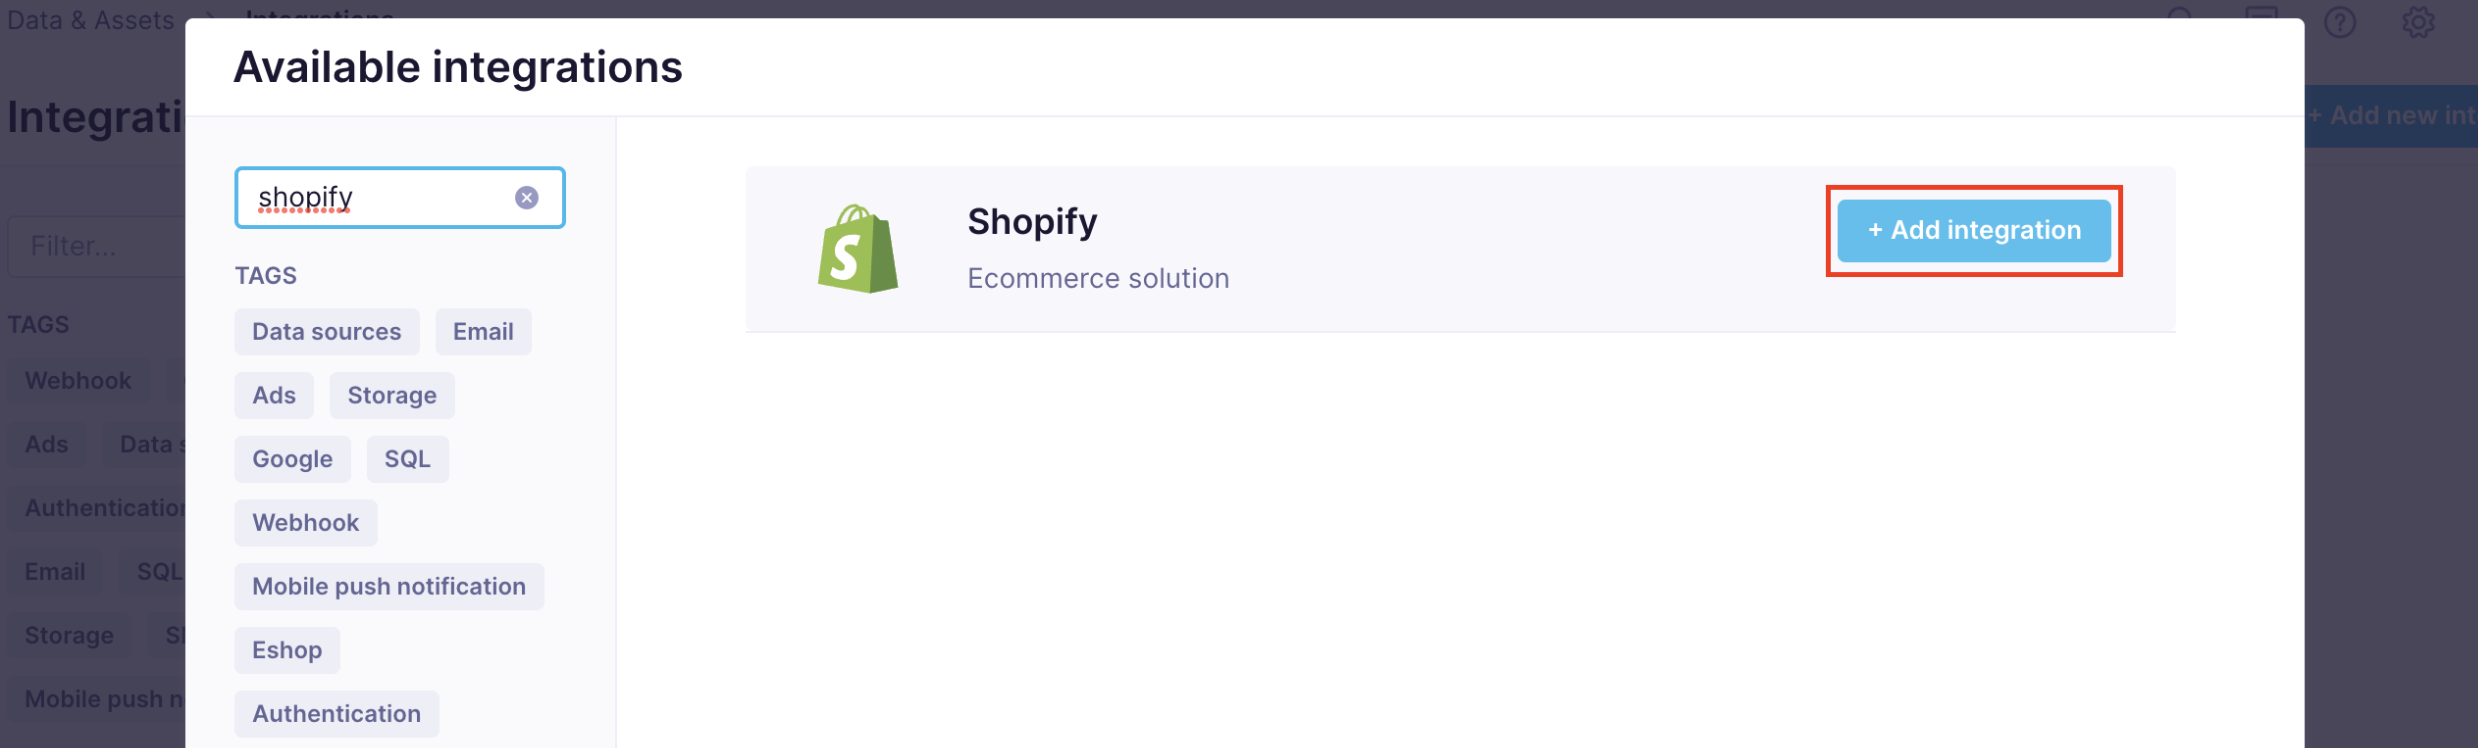
1. Add new integration
Open Bloomreach Engagement App and go to Data & Assets > Integrations > + Add new integration and look up Shopify. Next, click on + Add integration.

2. Prerequisites
On the next screen, you will see 4 IDs that need to be set up in your project. Make sure these are set up before you continue and match exactly; ID names are not customizable. You do not need to fill anything in here – just be sure these IDs have been set up. The integration will automatically use these IDs once it starts working.
A project needs to have the following IDs set up:
email_id- Hard ID, lowercase, trim; email address is the primary identifier for a customer in Bloomreach Engagement ⓘ If there are multiple Shopify customers with the same email address, there is one customer for Bloomreach Engagementshopify_id- Soft ID - numeric Shopify Customer identifier ⓘ one customer can have more values if multiple Shopify stores are integrated into one Bloomreach Engagement projectcart_id- Soft ID - an alphanumeric token of a shopping cart for purposes of cartupdate tracking ⓘ the cart_id is used to match Shopify carts with Bloomreach Engagement customers_cookie- Soft ID - device unique cookie identifier ⓘ standard cookie identifier that is used in web tracking
Shopify integration does not use the default "registered" as its ID. Setting up a project without a "registered" ID is recommended. If the project has this ID, it will be ignored, but it is better to create a new project without "registered" if possible.
3. Authentication
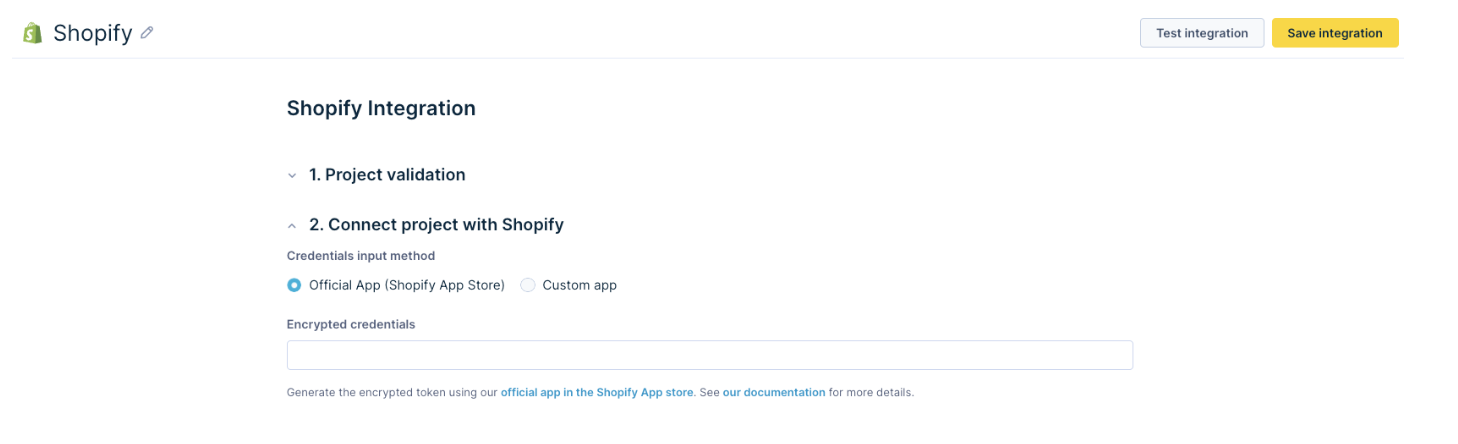
To connect your project with Shopify, there are two ways how to authenticate with Shopify and allow the data to flow successfully:
- Official app (Shopify App Store) - recommended
- Custom app
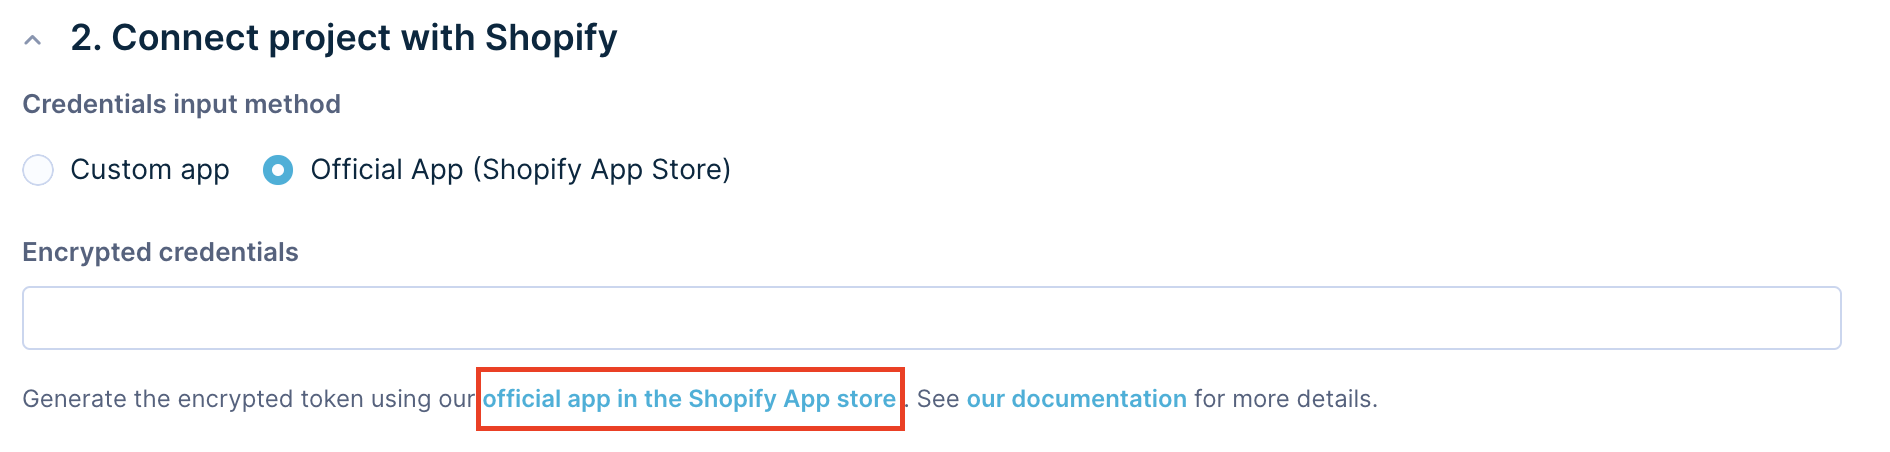
Official App
- After reviewing the prerequisites, connect your project with Shopify via the Official App. To generate Encrypted credentials, click on the
official App in the Shopify App Storelink, which redirects you to the Shopify App Store.
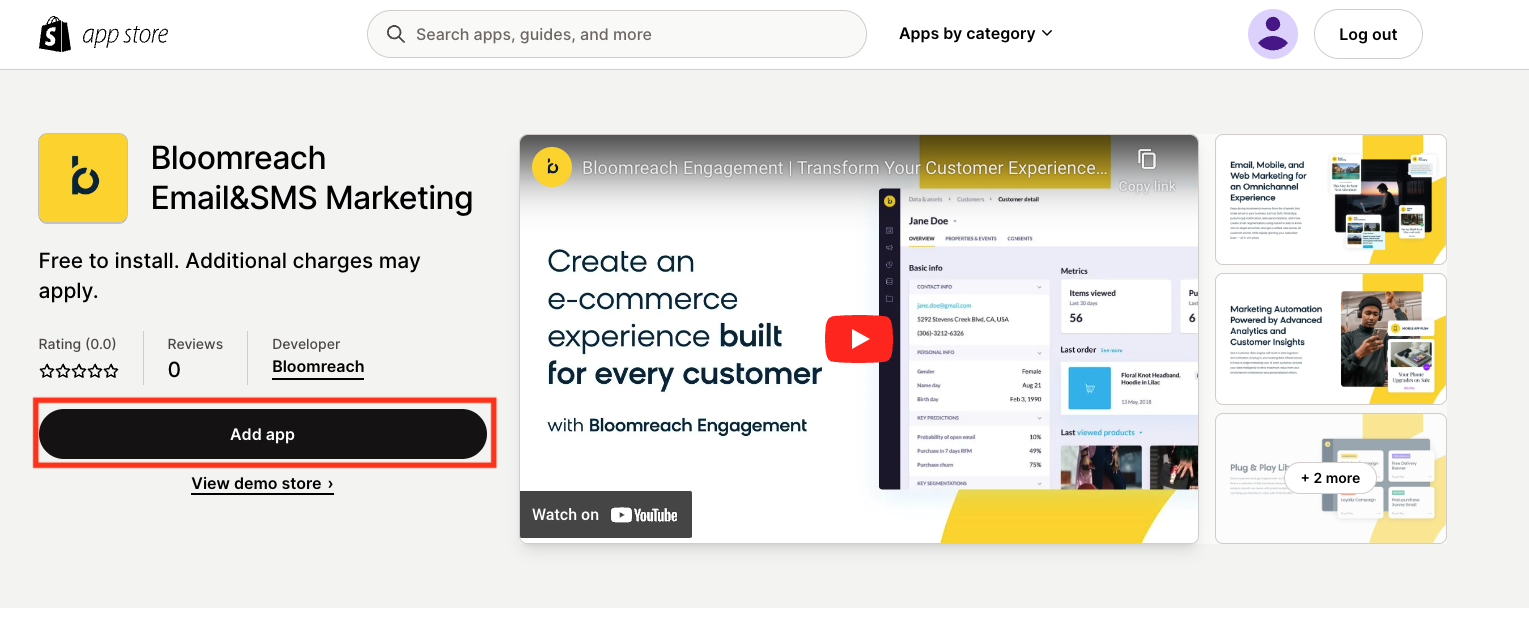
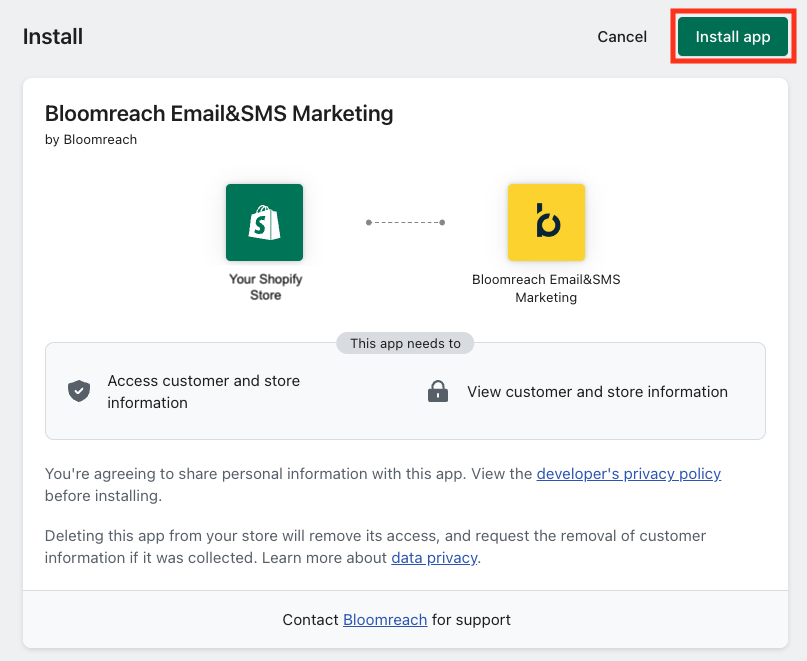
- Click on
Add app, then approve permissions by clicking theInstall appbutton.
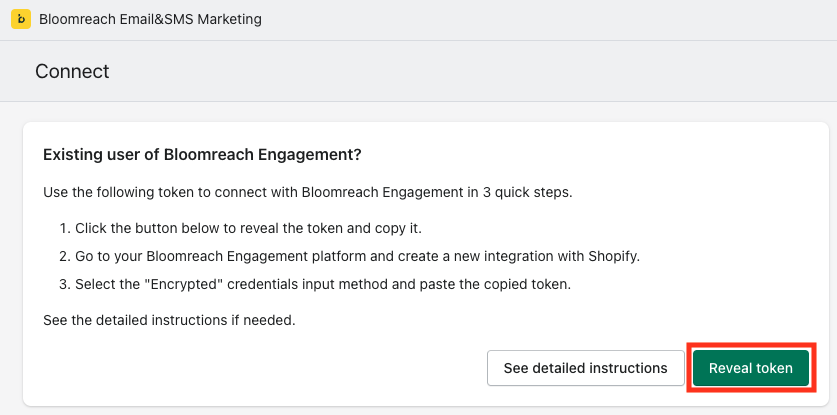
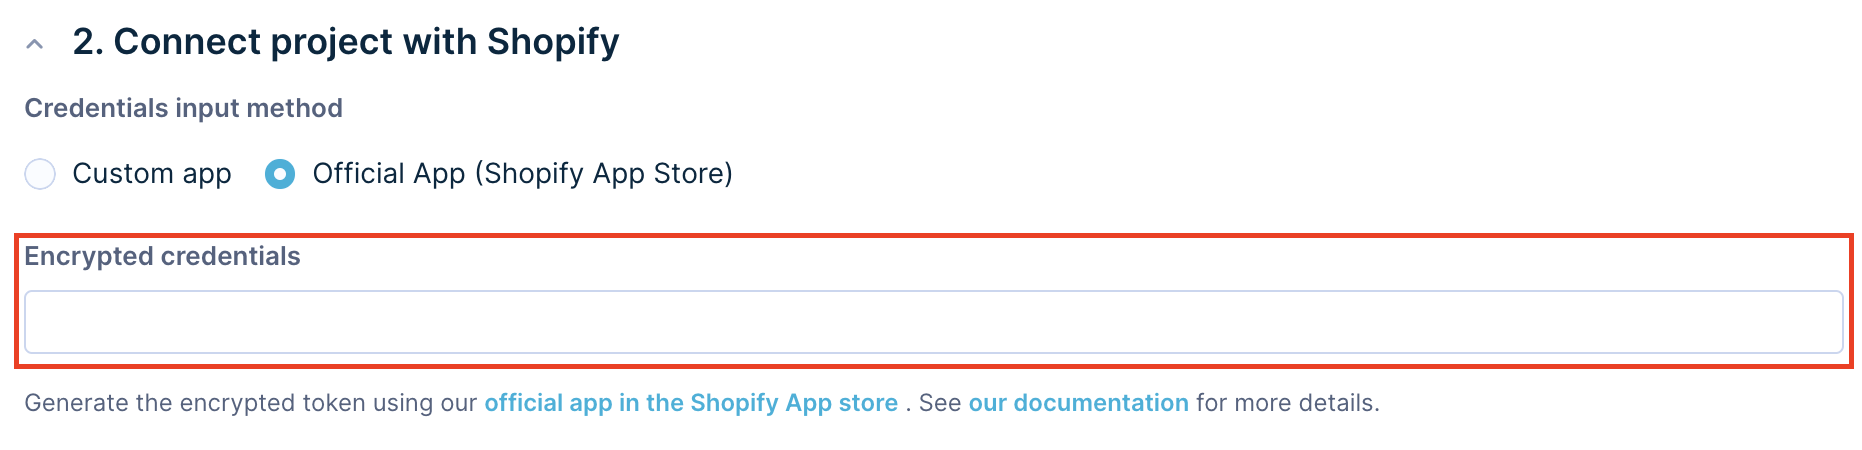
- To connect your Shopify account with Bloomreach Engagement, click the
Reveal tokenbutton and copy and paste it into the Encrypted credentials field in Bloomreach Engagement.
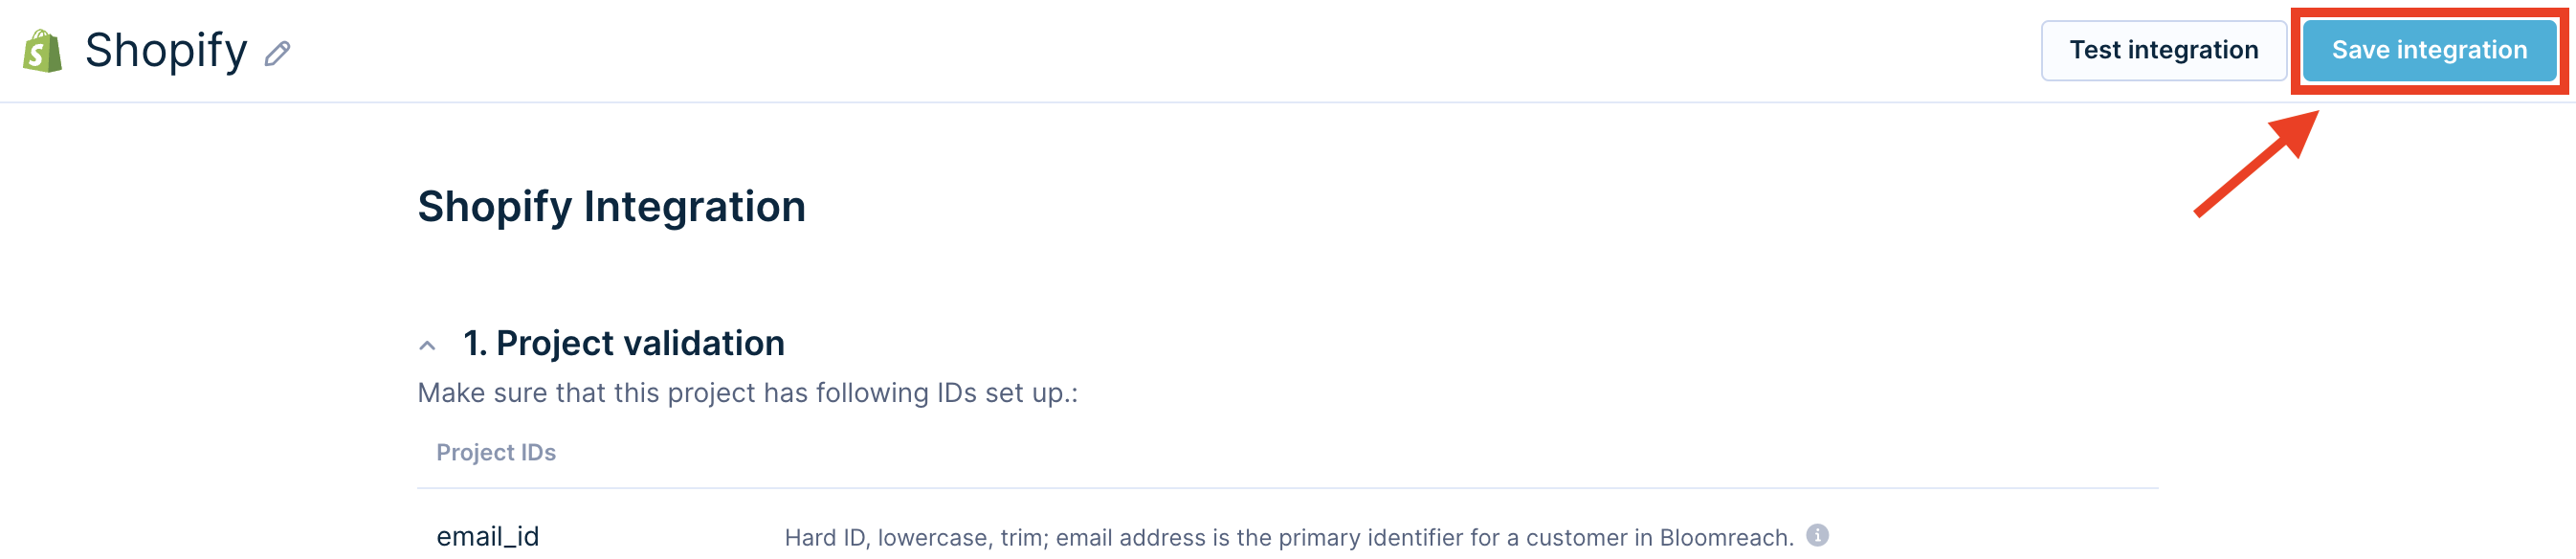
- Click the
Save integrationbutton to complete your integration.
Custom app
- Log in to your Shopify account and click on the
>symbol next to Apps.

- Click on
App and sales channel settings.

- Click on
Develop apps.

- Click on
Allow custom app developmentand re-confirm in the next window by clicking onAllow custom app developmentagain.


- Now go and click
Create an app.

- Complete the field App name with a descriptive name (we recommend Bloomreach Engagement). Choose a responsible technical person as the App developer and insert their email address. Then click on
Create app.

- Go to
API credentialsand click onConfigure Admin API scopes.

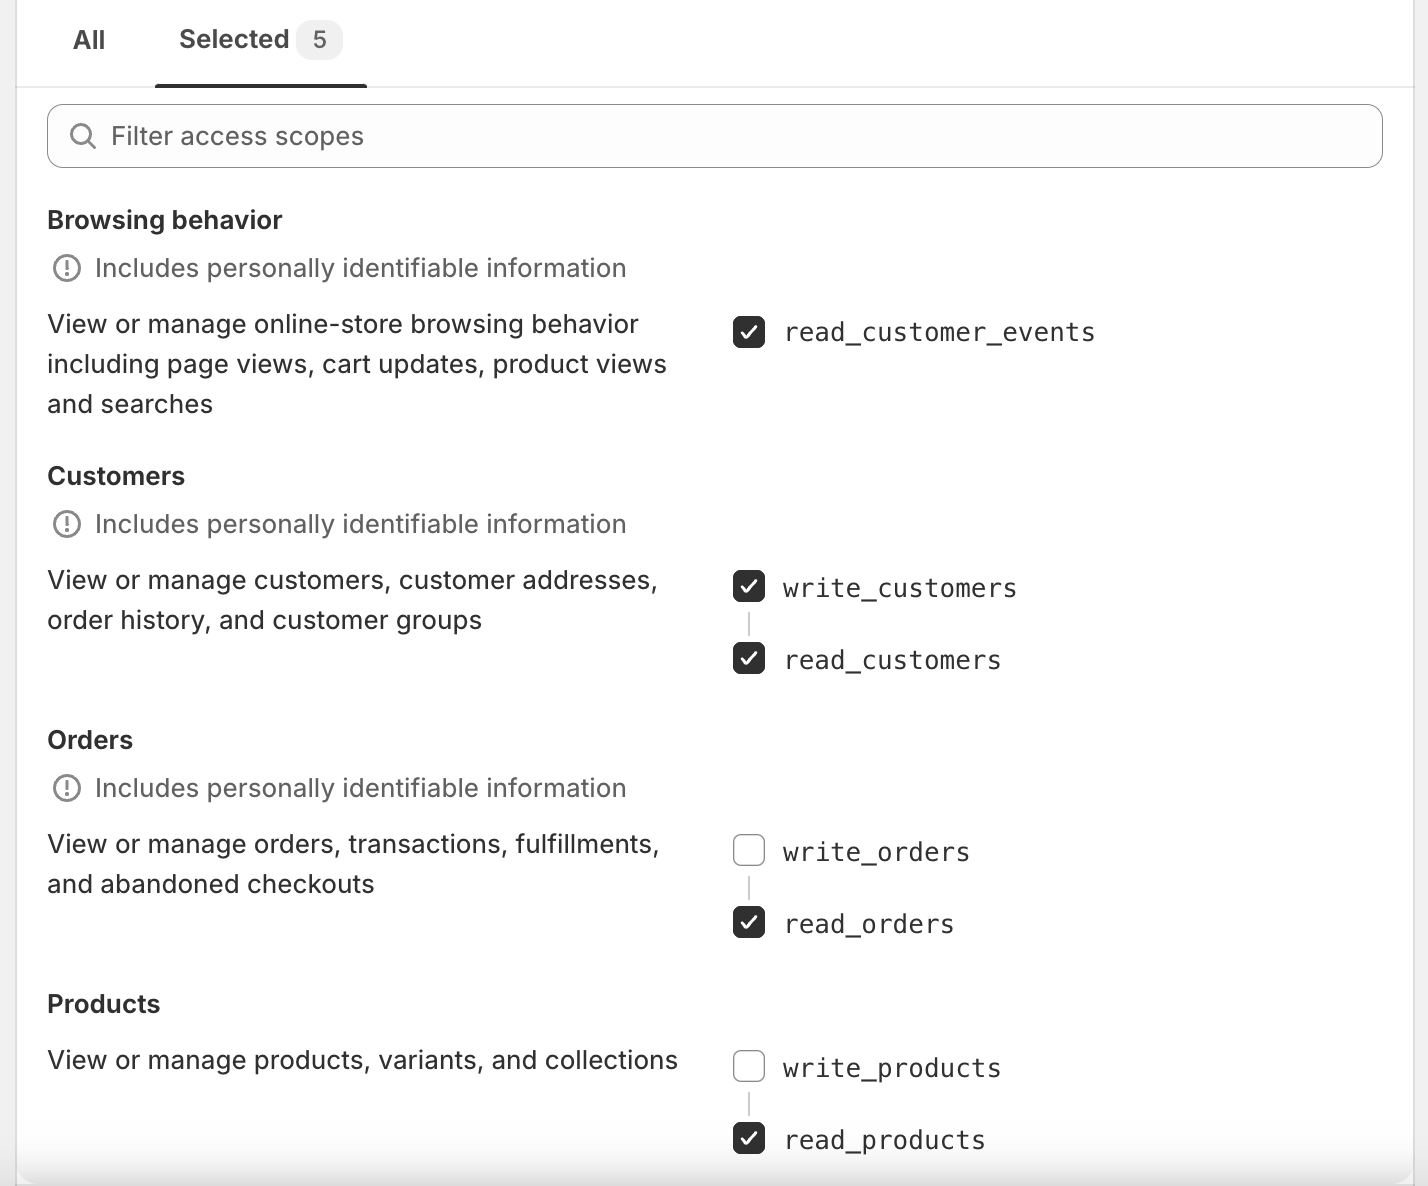
- In Admin API access scopes, select the required user permissions. Then in Event version under Webhook subscriptions, choose
2024-01.
Required user permissionsRequired user permissions are:
read_customer_events,write_customers,read_customers,read_orders, andread_products.

- Now, click on
Install app. Make sure to keep your tab with Shopify open for completing the following steps.

- Now, go back to your Shopify tab and copy & paste the
Admin API access token,API key, andAPI secret keyfrom your Shopify account to the matching fields in Bloomreach Engagement under the section Connect project with Shopify.

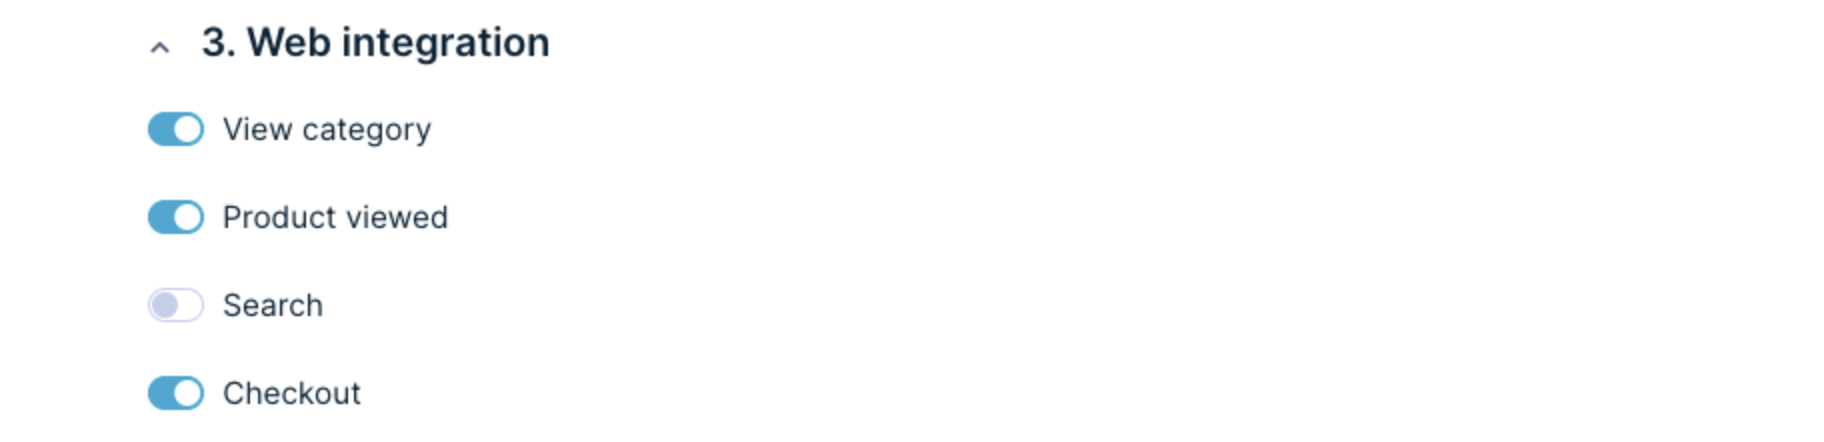
4. Web integration
In order to start tracking fronted events (view_item, view_category etc.), it is needed to integrate it via one of these two methods:
- Shopify Web Pixel - recommended
- Custom Web Integration
Support of Checkout trackingPlease note that due to changes on Shopify's side, checkout tracking is supported only by the Shopify Web Pixel.
Shopify Web Pixel
PrerequisitesShopify Web Pixel is part of our official app in the Shopify App Store. That's why this method is supported only via the Authorization method through the Official App (Shopify App Store).
A single store can only have one web-pixel integration. This usually means 1 project = 1 integration = 1 pixel. You won't be able to create 2 web pixel integrations on the same store (and the same app).
Integrating with Web Pixel takes only few steps to set up:
1. Insert Bloomreach snippet into Shopify
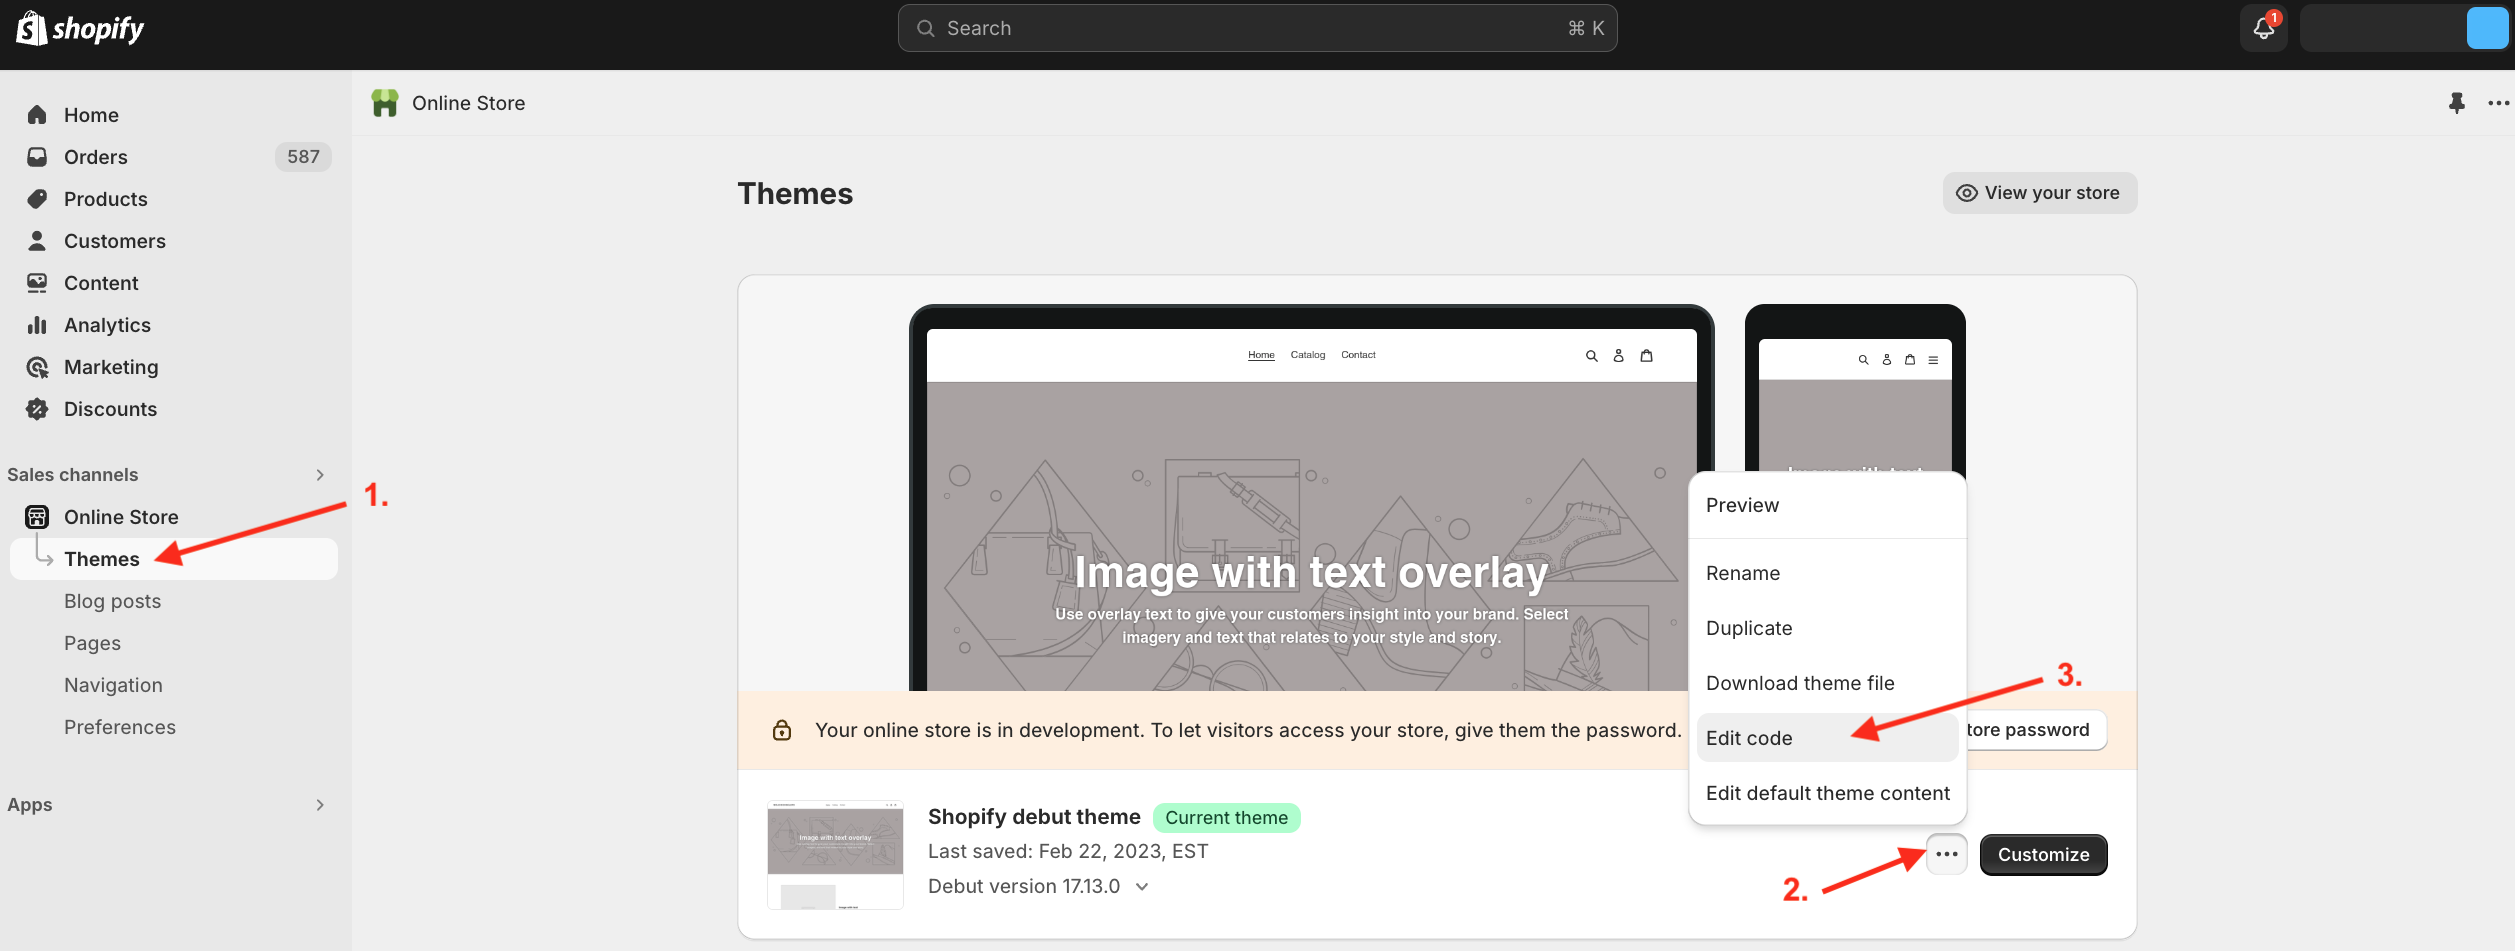
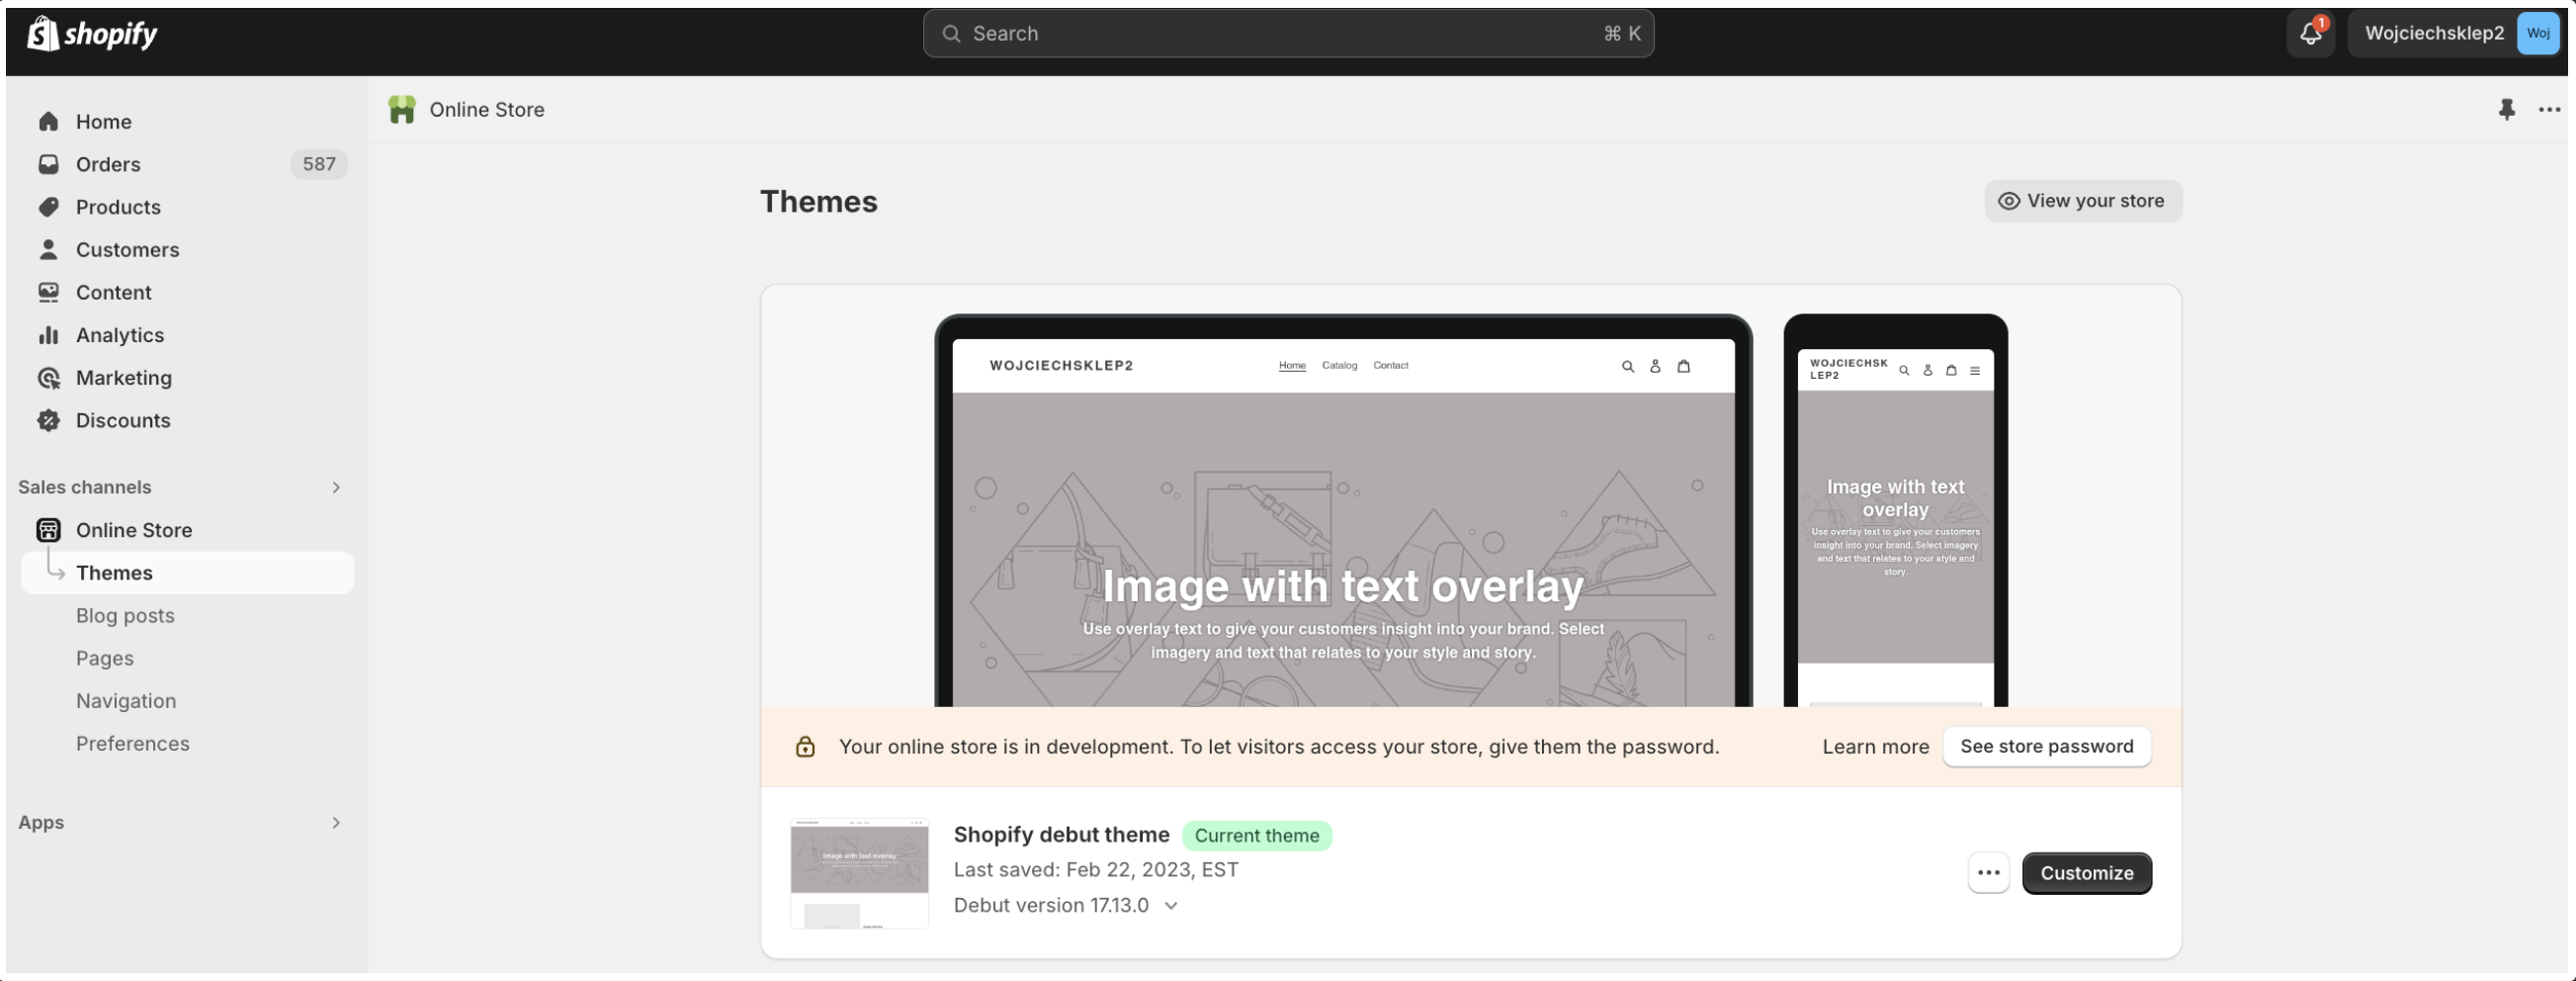
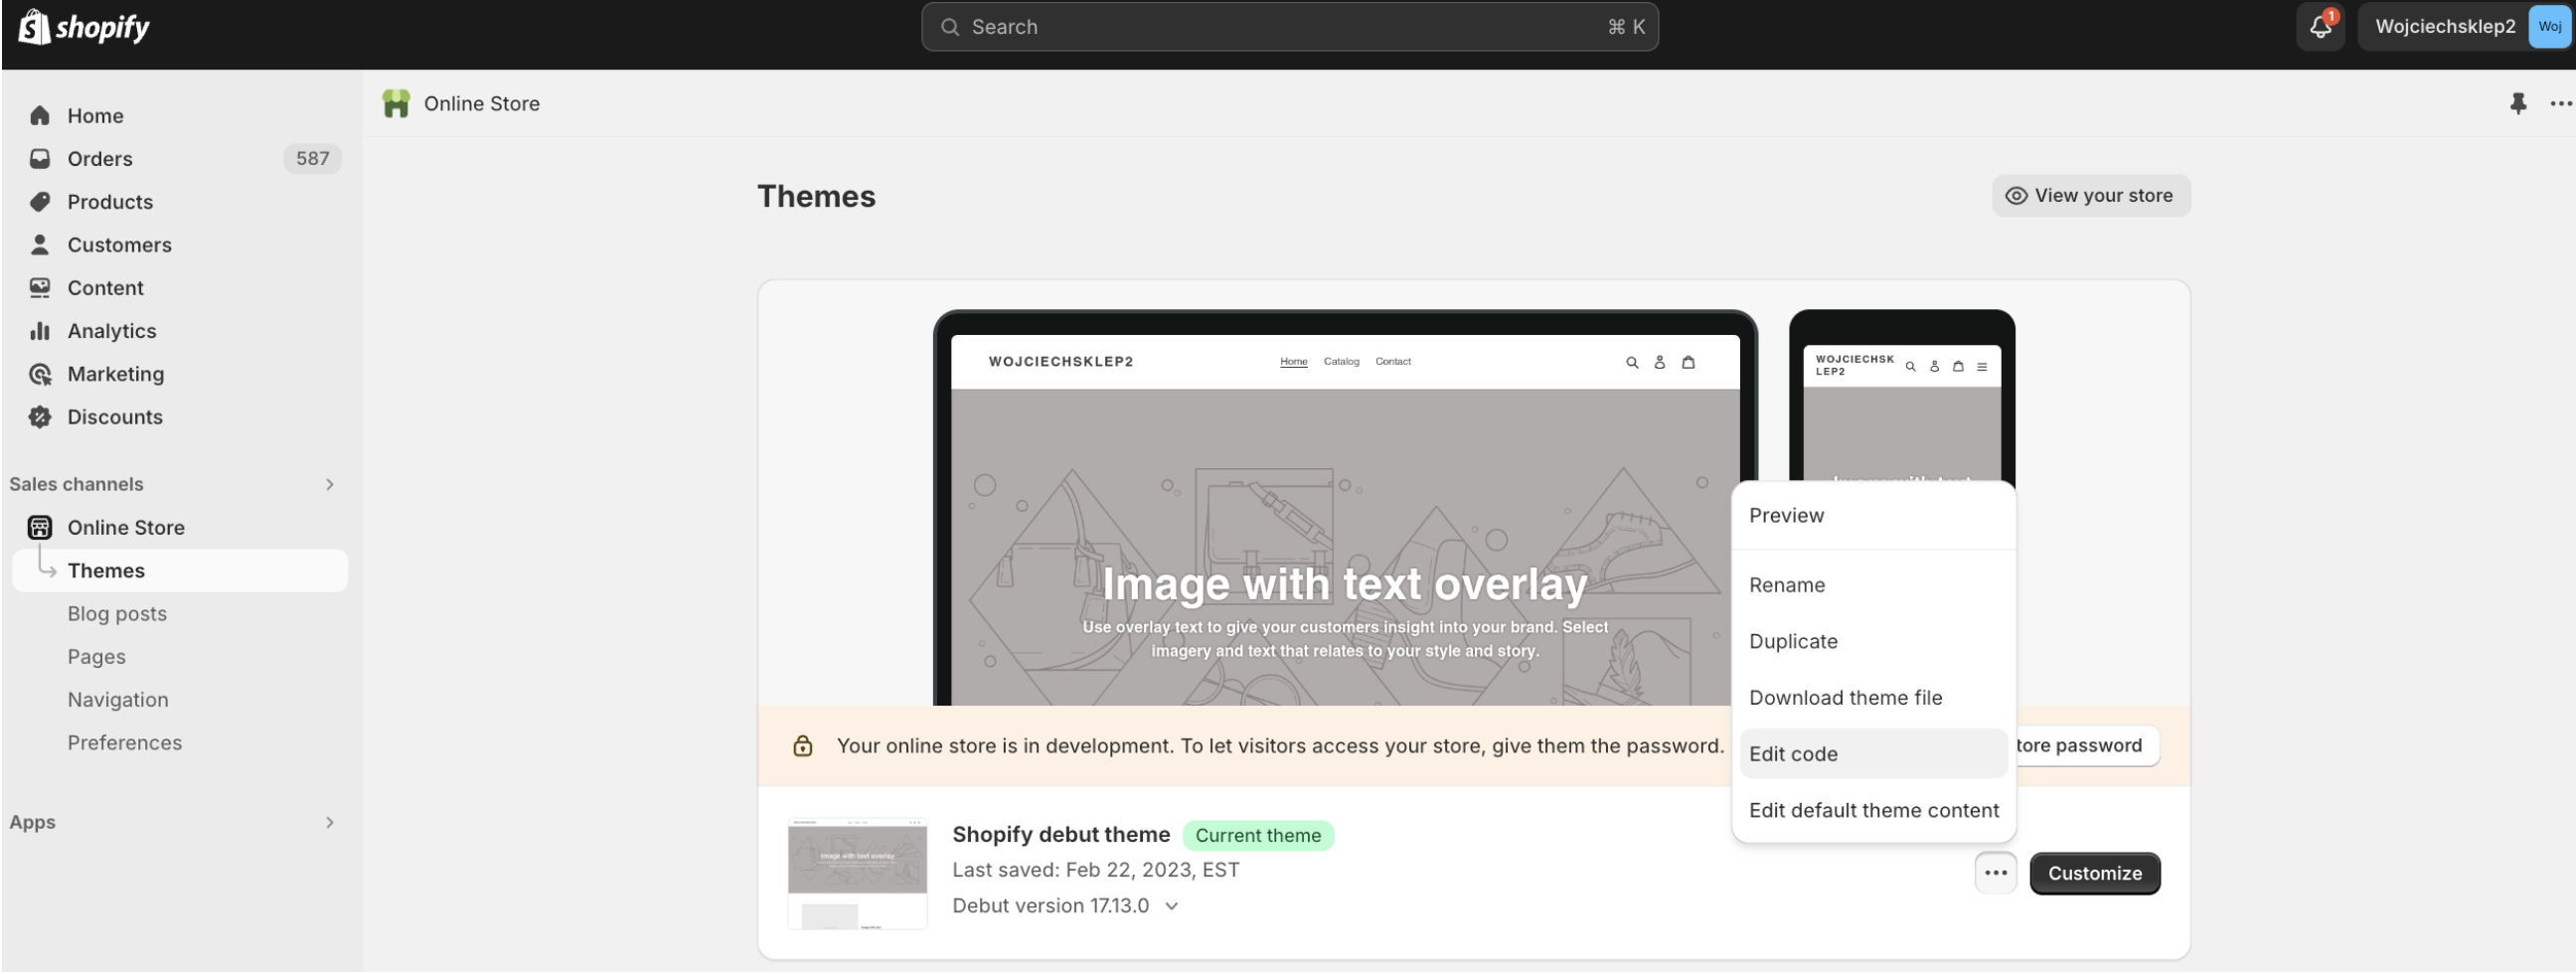
To insert Bloomreach Web Integration snippet inside your Shopify store, go to the Themes tab of your Shopify store and click on ⋯ Edit code.
Open the theme.liquid file.
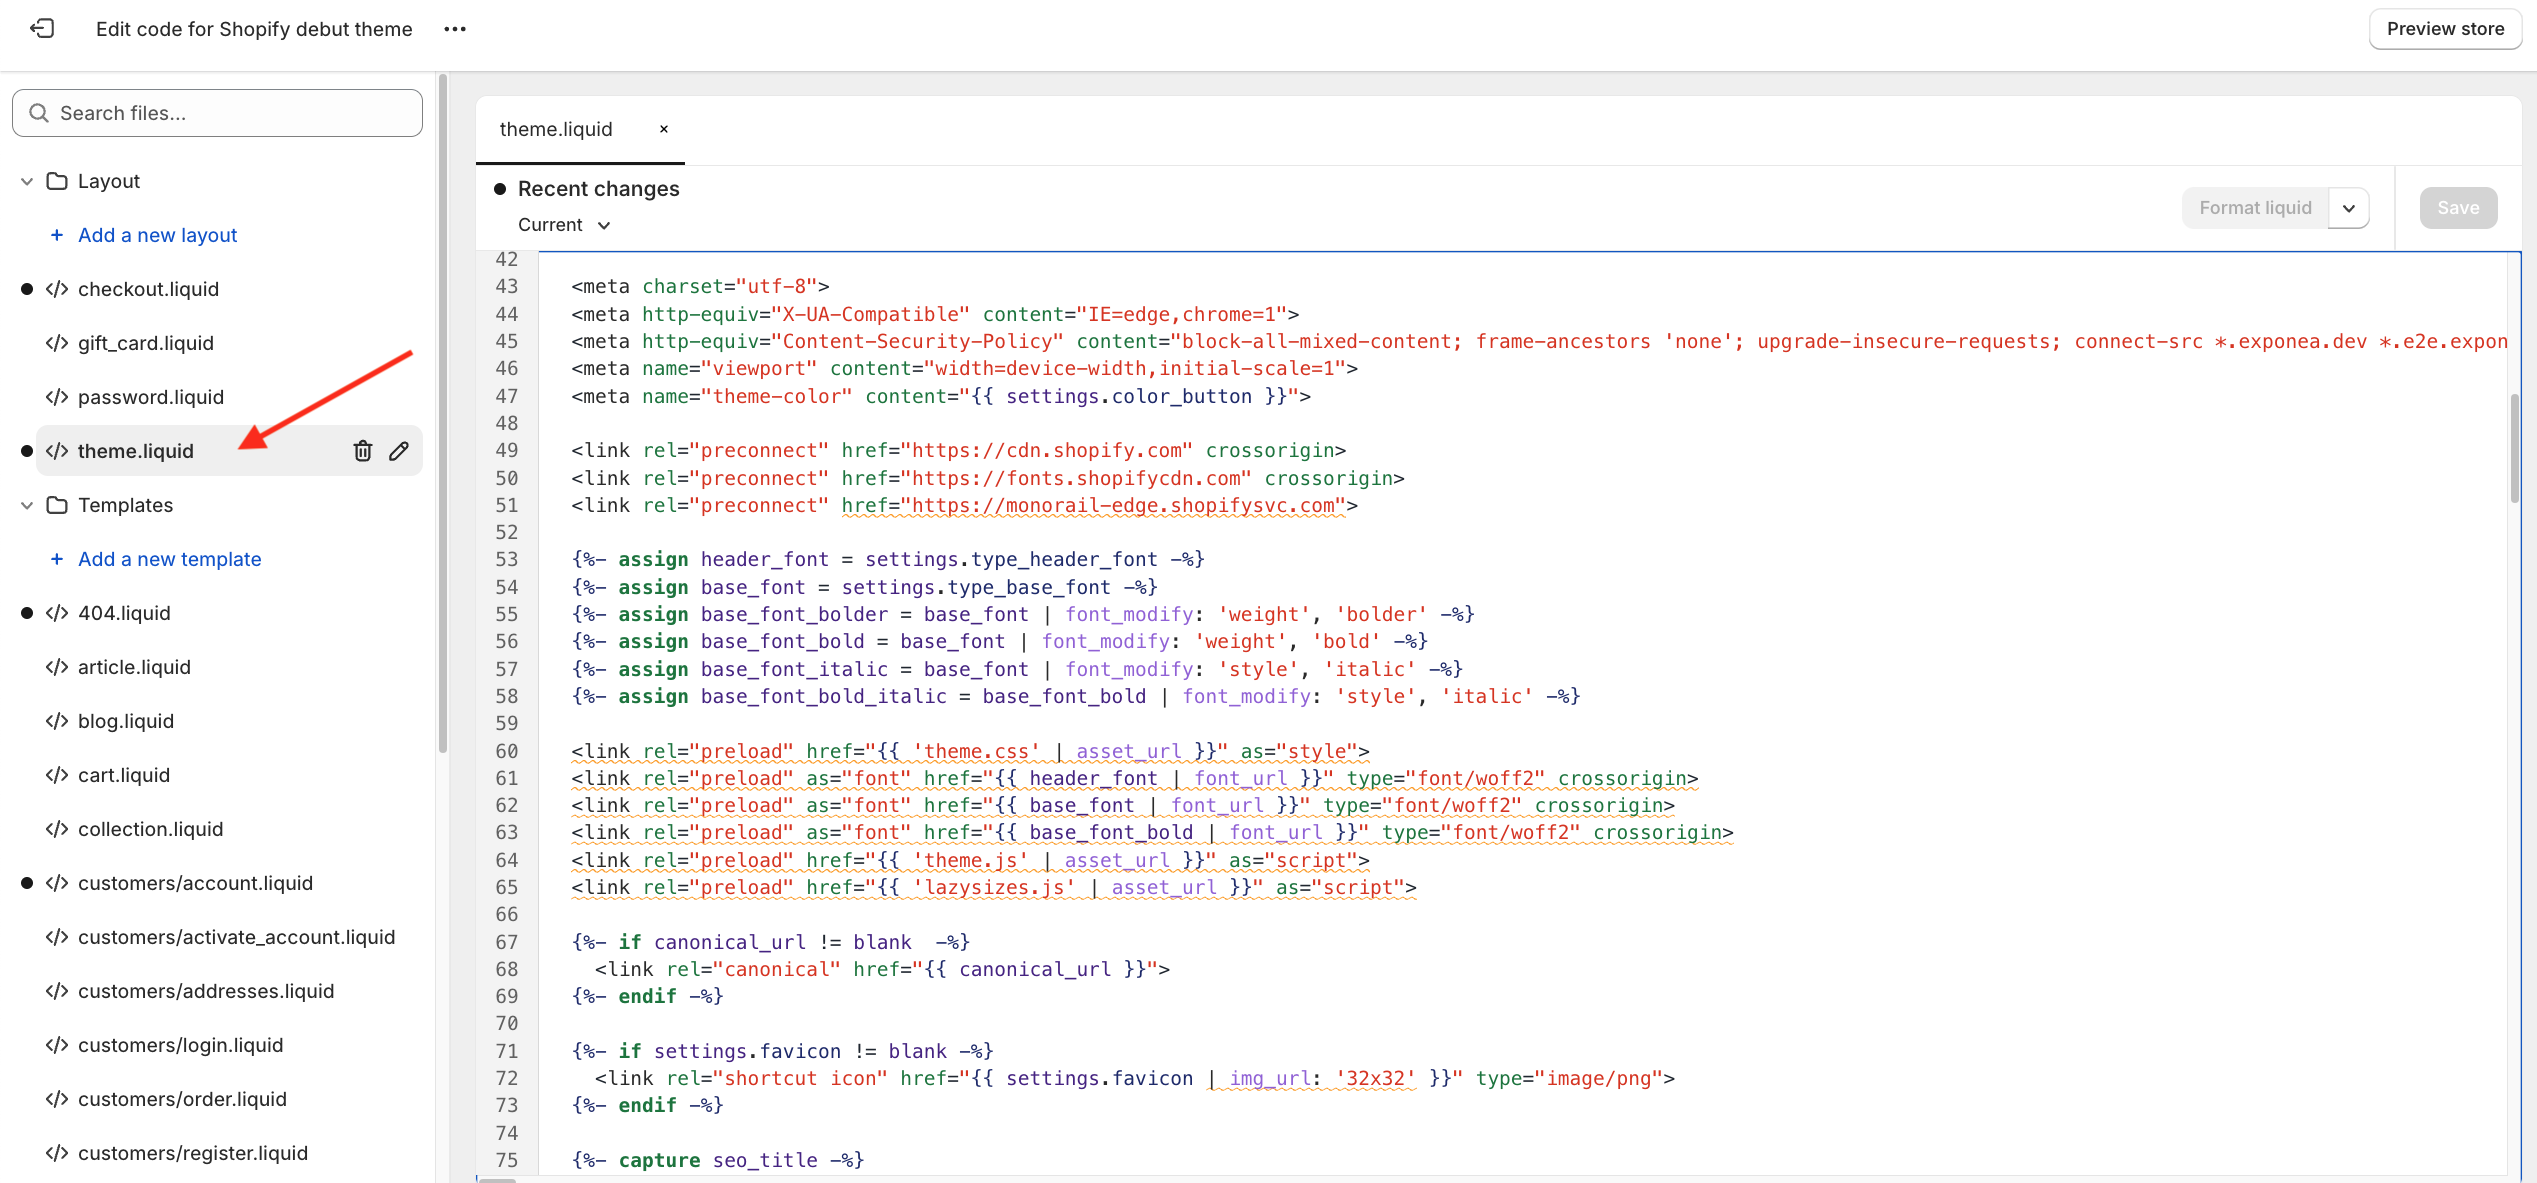
Copy the following data-layer snippet and paste it on a new line above the closing header tag </head> inside your theme.liquid file.
<script>
window.dataLayer = window.dataLayer || [];
function subscribeCookieListener(dataLayer) {
// Step to process information already existing in the datalayer
dataLayer.forEach(processDatalayerEvent)
// Set-up a "listener"
const originalPush = dataLayer.push;
dataLayer.push = function() {
originalPush.apply(dataLayer, arguments);
Array.from(arguments).forEach(processDatalayerEvent);
};
}
subscribeCookieListener(window.dataLayer);
function processDatalayerEvent(event){
if(event.event === "bre.cookie"){
Shopify.analytics.publish("bre.cookie",event);
}
}
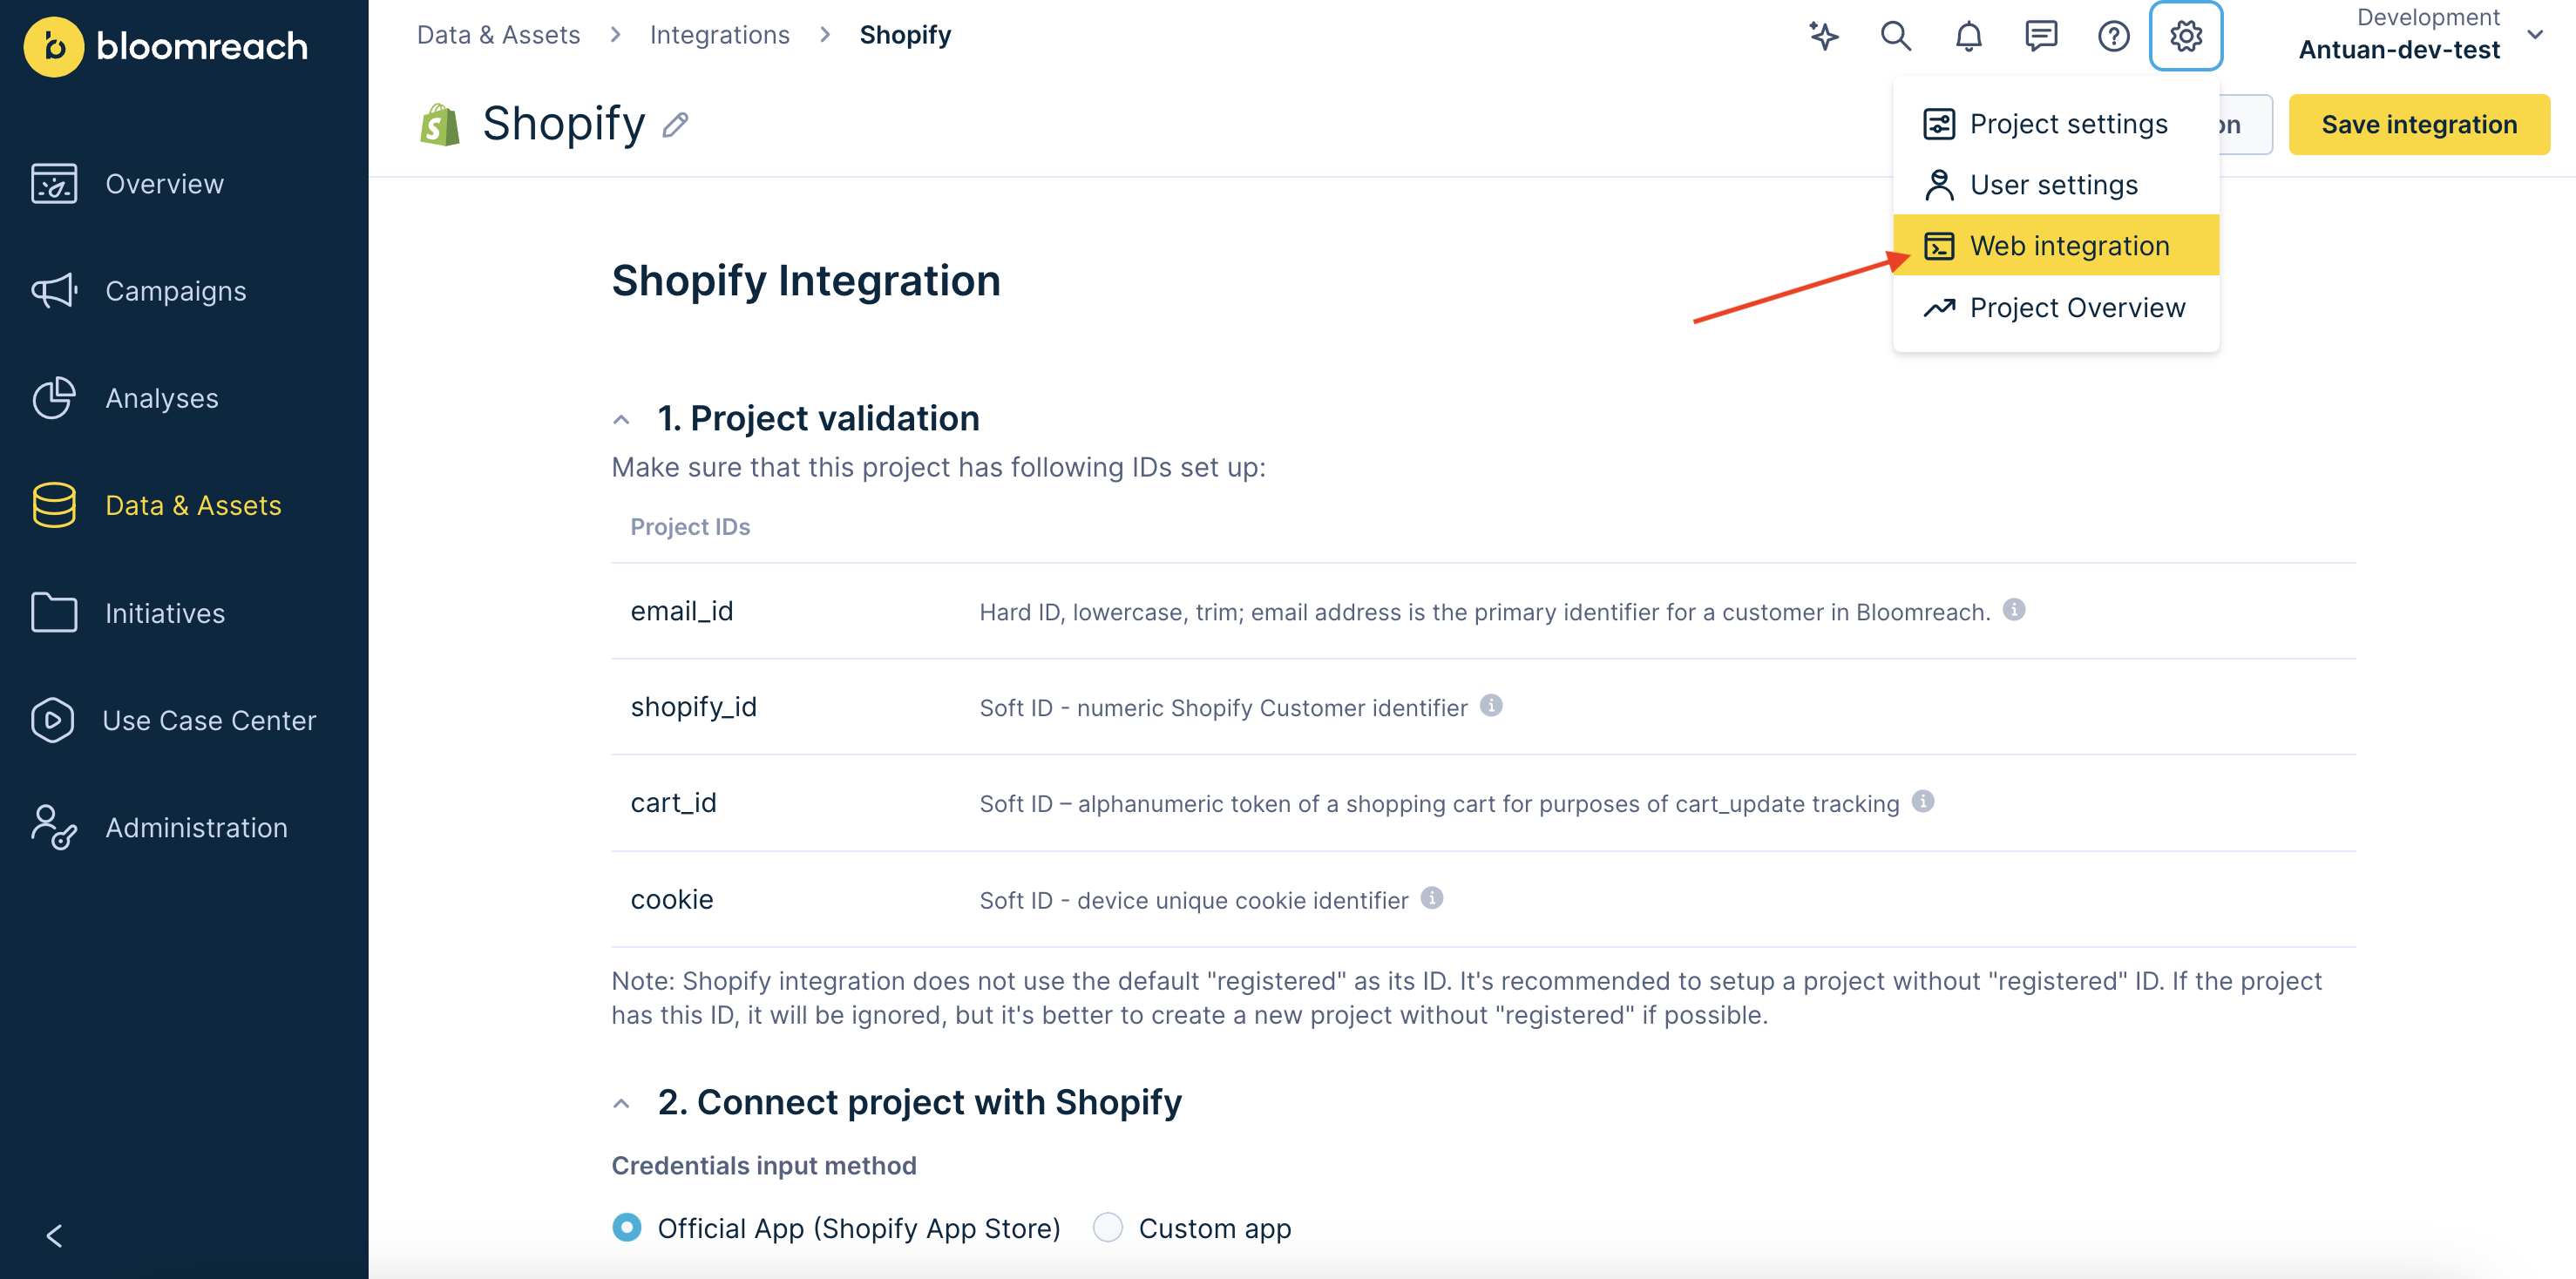
</script>Now go to your project in Bloomreach and click on Web integration.
Decide whether you want to track page_visit events. If yes, tick the relevant checkbox.
Hit Copy to clipboard button and paste the snippet from Bloomreach Engagement directly under the data-layer script in your Shopify theme.liquid file.
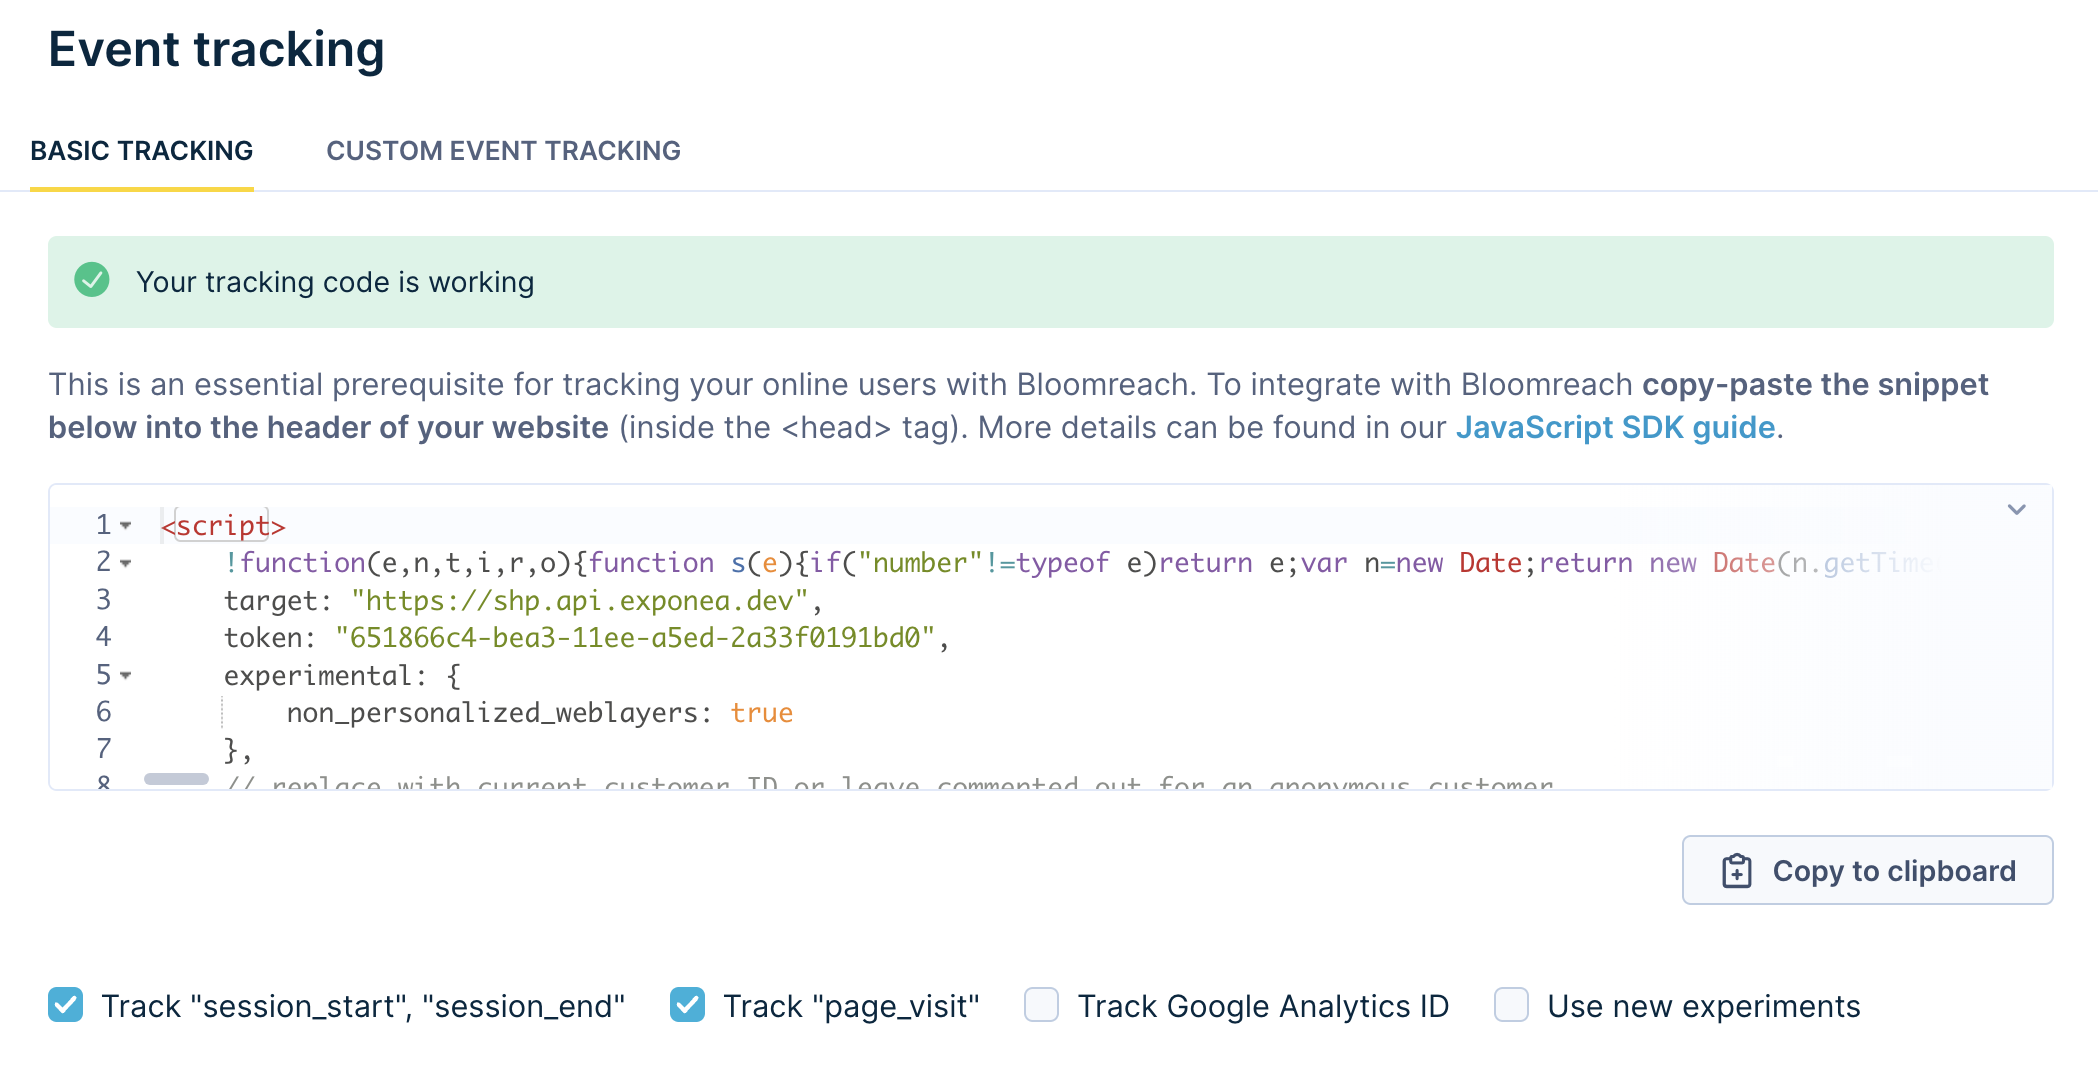
Additionally, copy the following line data_layer: true. Place it below the token parameter and ensure they are on the same hierarchical level.
data_layer: trueTo clarify, here's an example of the Web Integration snippet. Make sure to specify your target and token.
<script>
  window.dataLayer = window.dataLayer || [];

  function subscribeCookieListener(dataLayer) {
    // Step to process information already existing in the datalayer
    dataLayer.forEach(processDatalayerEvent)

    // Set-up a "listener"
    const originalPush = dataLayer.push;
    dataLayer.push = function() {
        originalPush.apply(dataLayer, arguments);
        Array.from(arguments).forEach(processDatalayerEvent);
    };

  }
subscribeCookieListener(window.dataLayer);

function processDatalayerEvent(event){
  if(event.event === "bre.cookie"){
    Shopify.analytics.publish("bre.cookie",event);
  }
}

</script><script>
!function(e,n,t,i,r,o){function s(e){if("number"!=typeof e)return e;var n=new Date;return new Date(n.getTime()+1e3*e)}var a=4e3,c="xnpe_async_hide";function p(e){return e.reduce((function(e,n){return e[n]=function(){e._.push([n.toString(),arguments])},e}),{_:[]})}function m(e,n,t){var i=t.createElement(n);i.src=e;var r=t.getElementsByTagName(n)[0];return r.parentNode.insertBefore(i,r),i}function u(e){return"[object Date]"===Object.prototype.toString.call(e)}o.target=o.target||"https://api.exponea.com",o.file_path=o.file_path||o.target+"/js/exponea.min.js",r[n]=p(["anonymize","initialize","identify","getSegments","update","track","trackLink","trackEnhancedEcommerce","getHtml","showHtml","showBanner","showWebLayer","ping","getAbTest","loadDependency","getRecommendation","reloadWebLayers","_preInitialize","_initializeConfig"]),r[n].notifications=p(["isAvailable","isSubscribed","subscribe","unsubscribe"]),r[n].segments=p(["subscribe"]),r[n]["snippetVersion"]="v2.7.0",function(e,n,t){e[n]["_"+t]={},e[n]["_"+t].nowFn=Date.now,e[n]["_"+t].snippetStartTime=e[n]["_"+t].nowFn()}(r,n,"performance"),function(e,n,t,i,r,o){e[r]={sdk:e[i],sdkObjectName:i,skipExperiments:!!t.new_experiments,sign:t.token+"/"+(o.exec(n.cookie)||["","new"])[1],path:t.target}}(r,e,o,n,i,RegExp("__exponea_etc__"+"=([\\w-]+)")),function(e,n,t){m(e.file_path,n,t)}(o,t,e),function(e,n,t,i,r,o,p){if(e.new_experiments){!0===e.new_experiments&&(e.new_experiments={});var l,f=e.new_experiments.hide_class||c,_=e.new_experiments.timeout||a,g=encodeURIComponent(o.location.href.split("#")[0]);e.cookies&&e.cookies.expires&&("number"==typeof e.cookies.expires||u(e.cookies.expires)?l=s(e.cookies.expires):e.cookies.expires.tracking&&("number"==typeof e.cookies.expires.tracking||u(e.cookies.expires.tracking))&&(l=s(e.cookies.expires.tracking))),l&&l<new Date&&(l=void 0);var d=e.target+"/webxp/"+n+"/"+o[t].sign+"/modifications.min.js?http-referer="+g+"&timeout="+_+"ms"+(l?"&cookie-expires="+Math.floor(l.getTime()/1e3):"");"sync"===e.new_experiments.mode&&o.localStorage.getItem("__exponea__sync_modifications__")?function(e,n,t,i,r){t[r][n]="<"+n+' src="'+e+'"></'+n+">",i.writeln(t[r][n]),i.writeln("<"+n+">!"+r+".init && document.writeln("+r+"."+n+'.replace("/'+n+'/", "/'+n+'-async/").replace("><", " async><"))</'+n+">")}(d,n,o,p,t):function(e,n,t,i,r,o,s,a){o.documentElement.classList.add(e);var c=m(t,i,o);function p(){r[a].init||m(t.replace("/"+i+"/","/"+i+"-async/"),i,o)}function u(){o.documentElement.classList.remove(e)}c.onload=p,c.onerror=p,r.setTimeout(u,n),r[s]._revealPage=u}(f,_,d,n,o,p,r,t)}}(o,t,i,0,n,r,e),function(e,n,t){var i;e[n]._initializeConfig(t),(null===(i=t.experimental)||void 0===i?void 0:i.non_personalized_weblayers)&&e[n]._preInitialize(t),e[n].start=function(i){i&&Object.keys(i).forEach((function(e){return t[e]=i[e]})),e[n].initialize(t)}}(r,n,o)}(document,"exponea","script","webxpClient",window,{
target: "YOUR INSTANCE",
token: "YOUR TOKEN",
data_layer: true,
experimental: {
non_personalized_weblayers: true
},
// replace with current customer ID or leave commented out for an anonymous customer
// customer: window.currentUserId,
track: {
visits: true,
google_analytics: false,
},
});
exponea.start();
</script>Save the changes in the liquid.file and navigate back to your Bloomreach project.
Snippets orderBear in mind that the order of snippets matters.
2. Finish the web integration
Enable the flows you want to track.
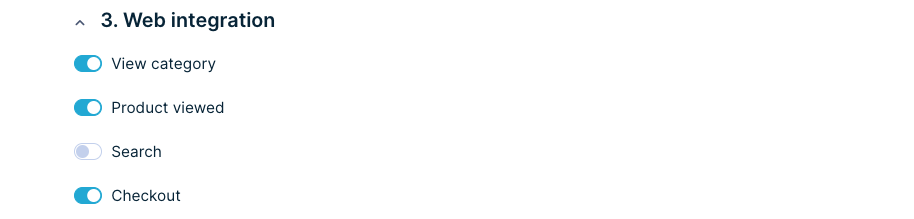
Save the changes in the liquid.file and your Web Integration is done!
Custom Web Integration
Now, you can move on to web integration. You will need a technical person to complete the integration by making a few front-end modifications. This will take less than a few hours to complete.

Shopify Front-end integration for Bloomreach EngagementThis repository contains .liquid snippets that can enable standardized front-end tracking of e-commerce events on your Shopify Plus website.
Using Shopify instead of Shopify PlusUsing the non-Plus version of Shopify does not allow you to customize your checkout page, thus not allowing you to add checkout tracking. This means that Bloomreach Engagement cannot track the checkout steps.
Bloomreach Engagement script runs only on the final checkout step; therefore, Bloomreach Engagement cannot personalize the previous checkout process steps.
How to switch from the Custom Web Integration to Shopify Web Pixel
In order to switch to Web Pixel tracking, remove the Exponea scripts inserted to Shopify liquids during the Custom Web Integration installation. Find the Custom Web Integration installation guide here. These are the files that might contain some tracking snippets, depending on your custom configuration:
- product.liquid
- collection.liquid
- search.liquid
- theme.liquid
- checkout.liquid
To find them, go to the Themes tab of your Shopify store.
Click Edit Code.
After that, you need to navigate to Theme Liquid and paste the new Bloomreach Web Integration snippets. For more details on how to do it, please check the instructions in the section above.
As soon as the theme liquid is updated, navigate to the Bloomreach App and accept new scopes by pressing the upgrade button. Now you can enable the Web Pixel Integration on your Shopify integration page. Don't forget to save the changes at the end. This is related to existing integrations created via the offcial app.
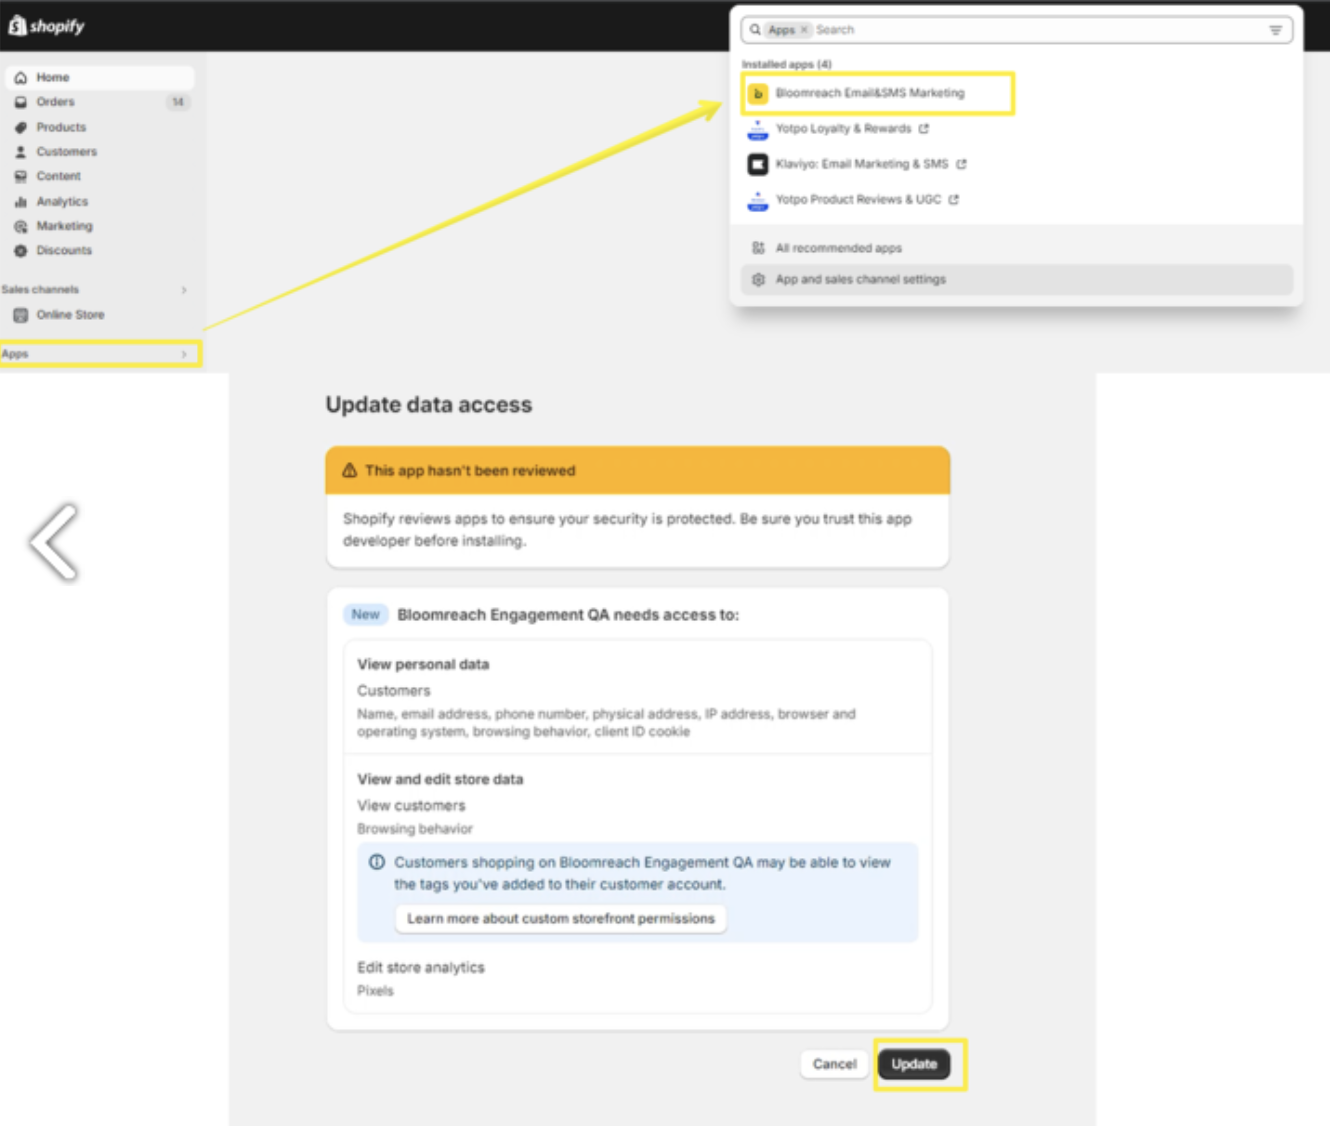
In case your integration was created via a custom App, you need to do the reauthorization and installation of the official Bloomreach Eamil&SMS marketing app.
For that, navigate to your existing Shopify integration page and click the the Reauthorize button.
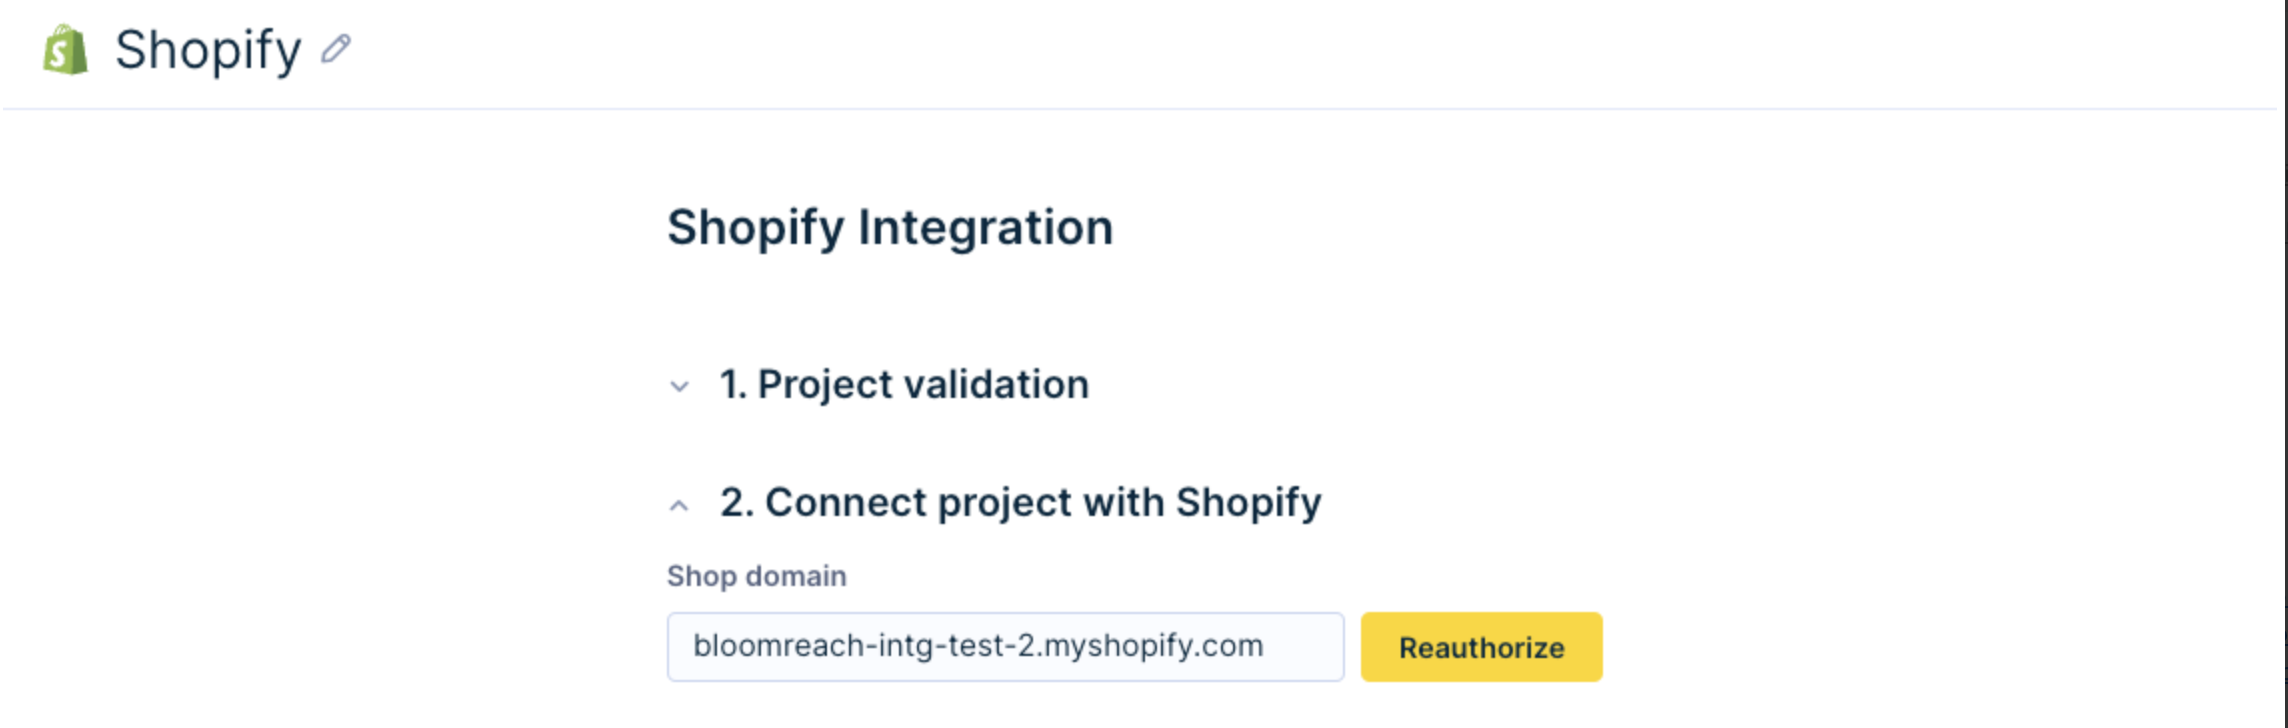
Navigate to your Shopify store, install the Official Bloomreach Eamil&SMS marketing app (Shopify App Store), and paste the revealed token into the Encrypted credentials field in Bloomreach Engagement.
At the end, save changes.
Main changes between Custom Web integration and Shopify Web Pixel
attributes not tracked by webpixel:
view_category: browser, device, location and os
view_item: browser, device, location and os
search: browser, device, location and os
checkout: browser, device, location and os
Checkout event is triggered when any of the checkout steps is changed:
checkout_started,checkout_contact_info_submitted,checkout_address_info_submitted,checkout_shipping_info_submitted,checkout_completedIn the checkout event the
step_titleattribute is changed to be representative of the checkout state, so for examplestep_titlethankyoubecomescheckout_completed.
We take thesestep_titleattributes from checkout event names.
5. Manage consents
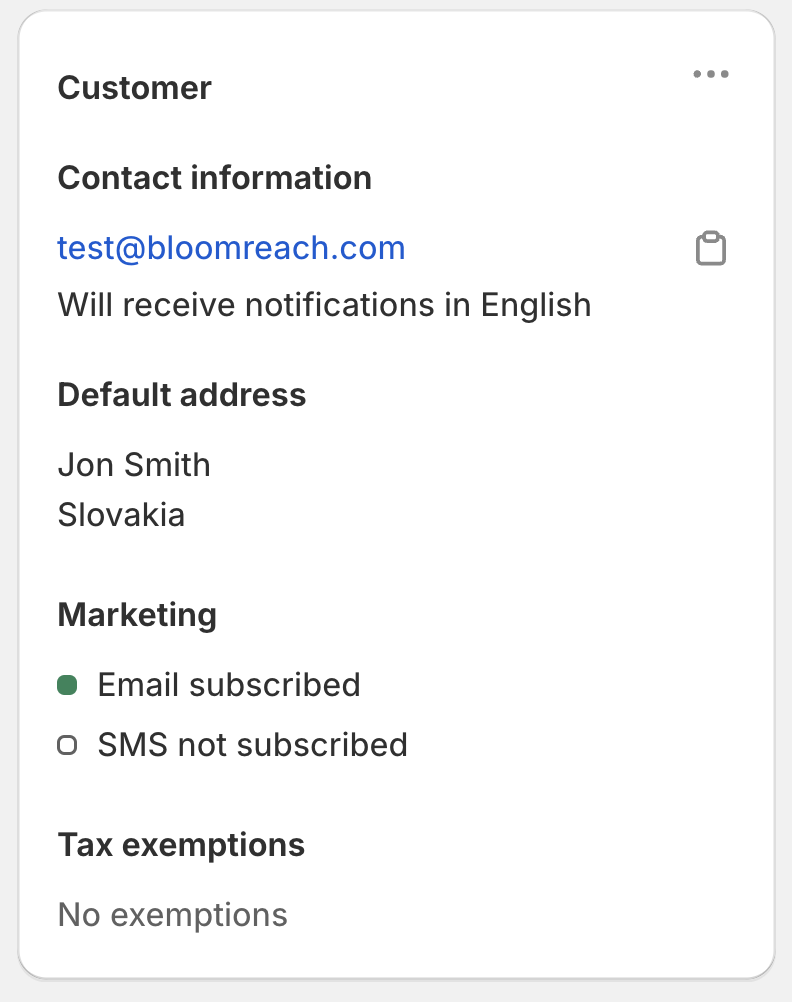
In this step, you decide how to integrate your consents from Shopify into Bloomreach. Learn more about the Shopify Marketing consents.
In Shopify, there are two marketing channels: Email and SMS.
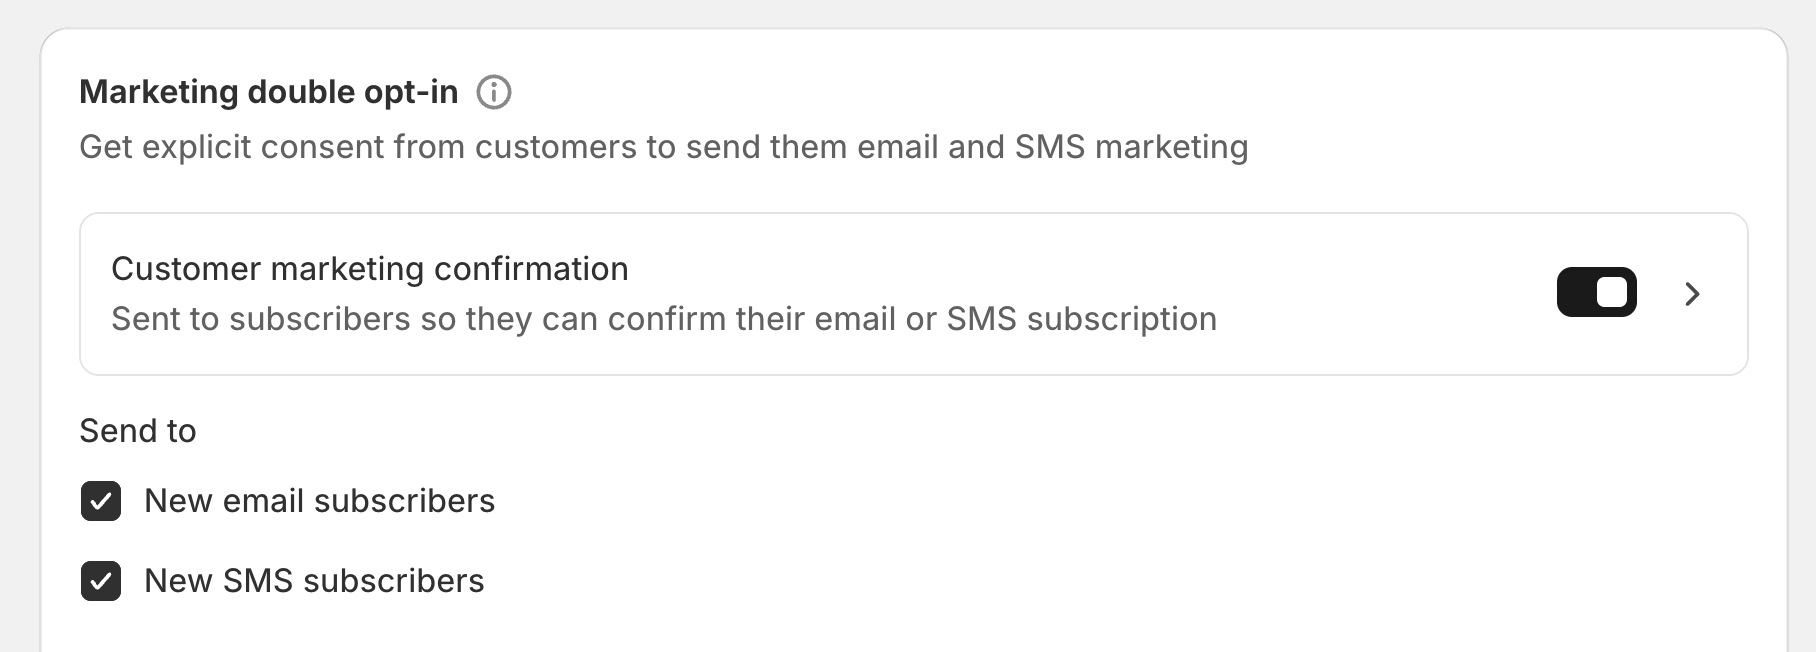
Your consent setup for the Shopify integration will depend on whether or where you are managing your Marketing double opt-in.
Double opt-in management via Shopify
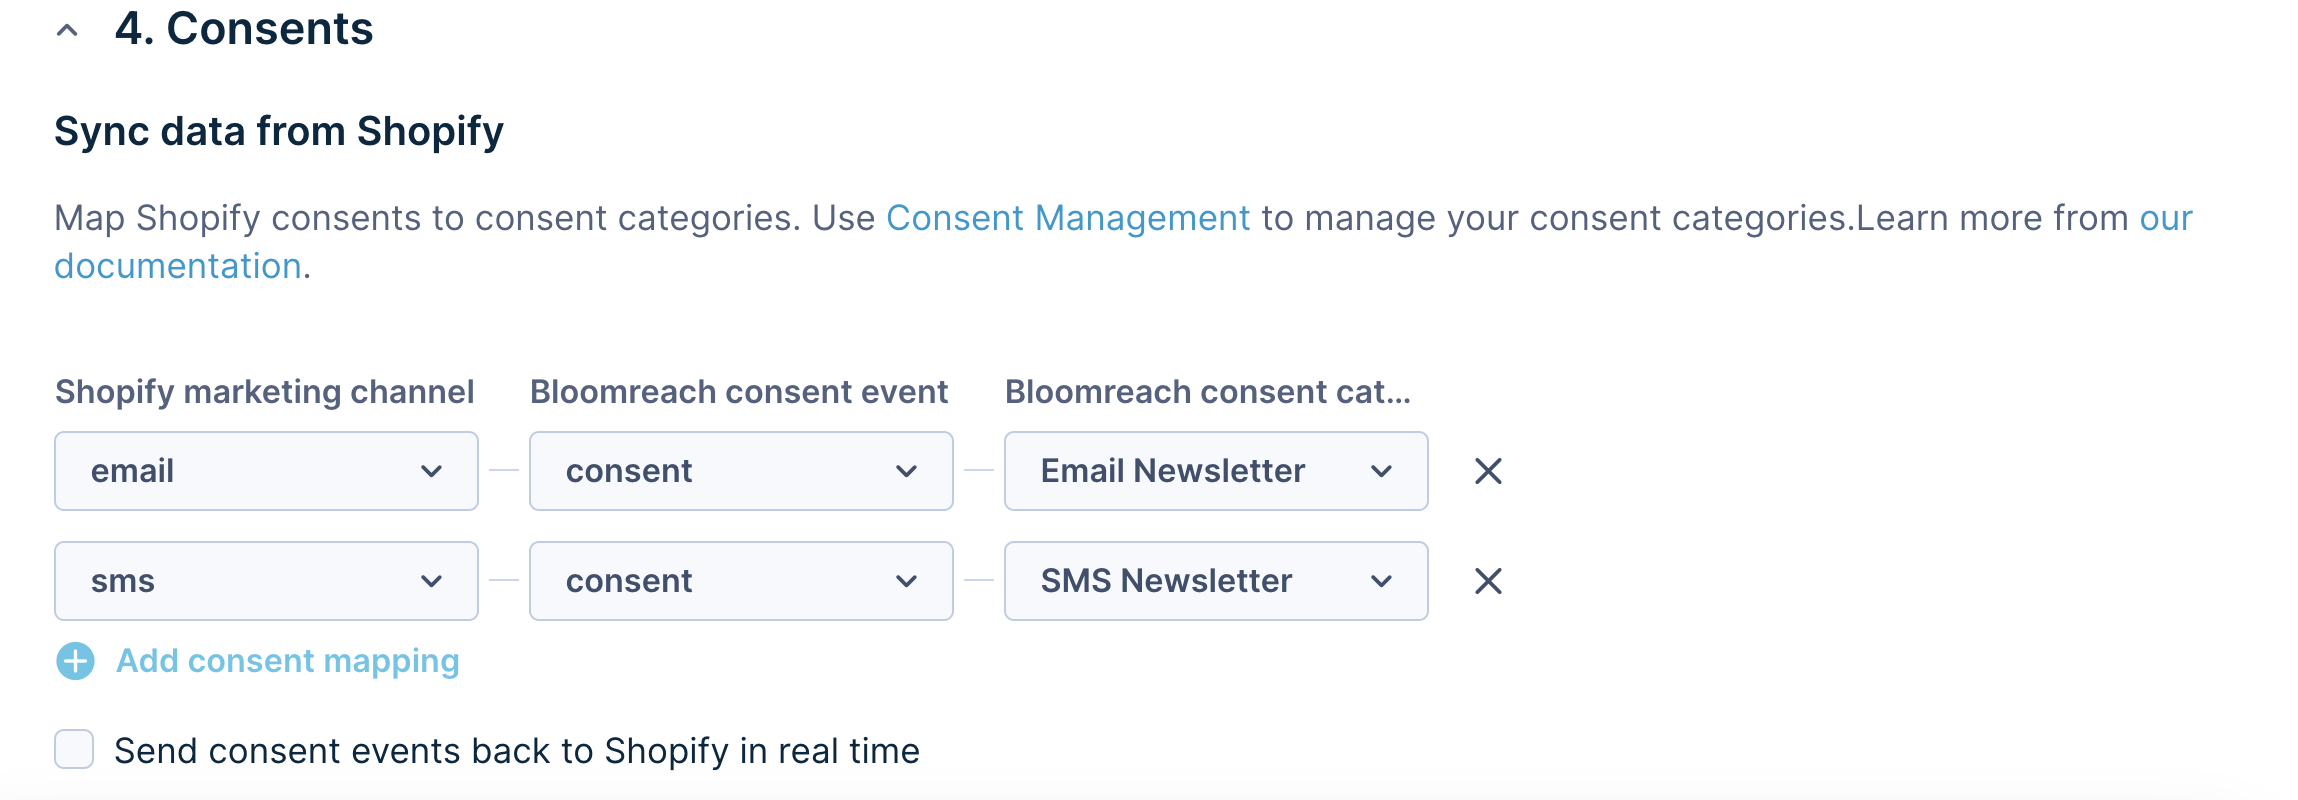
If it is managed via Shopify, you can map Shopify Marketing Consents to Bloomreach Consent, as showcased below. This means that for each consented customer, we will create a Bloomreach Consent event.
Shopify setup
Bloomreach setup
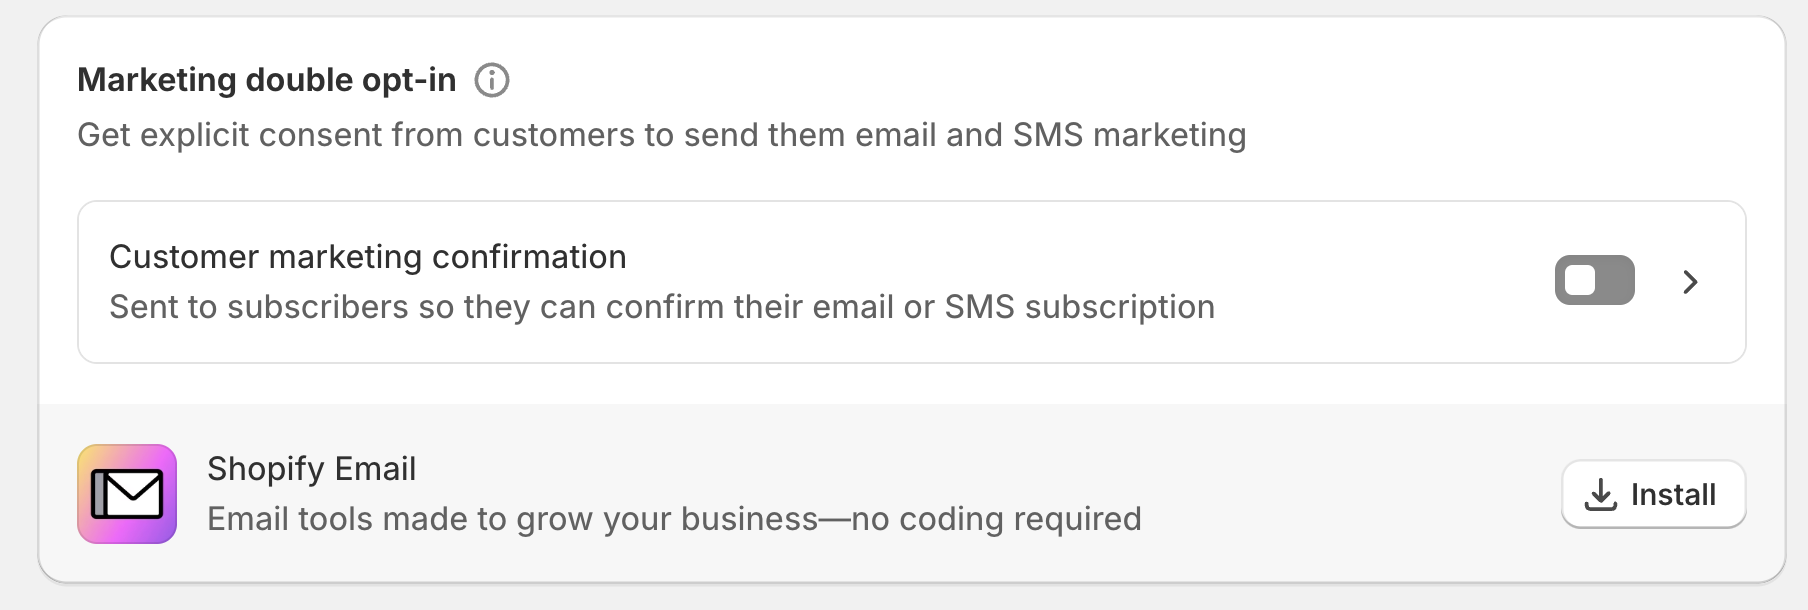
Double opt-in management via Bloomreach
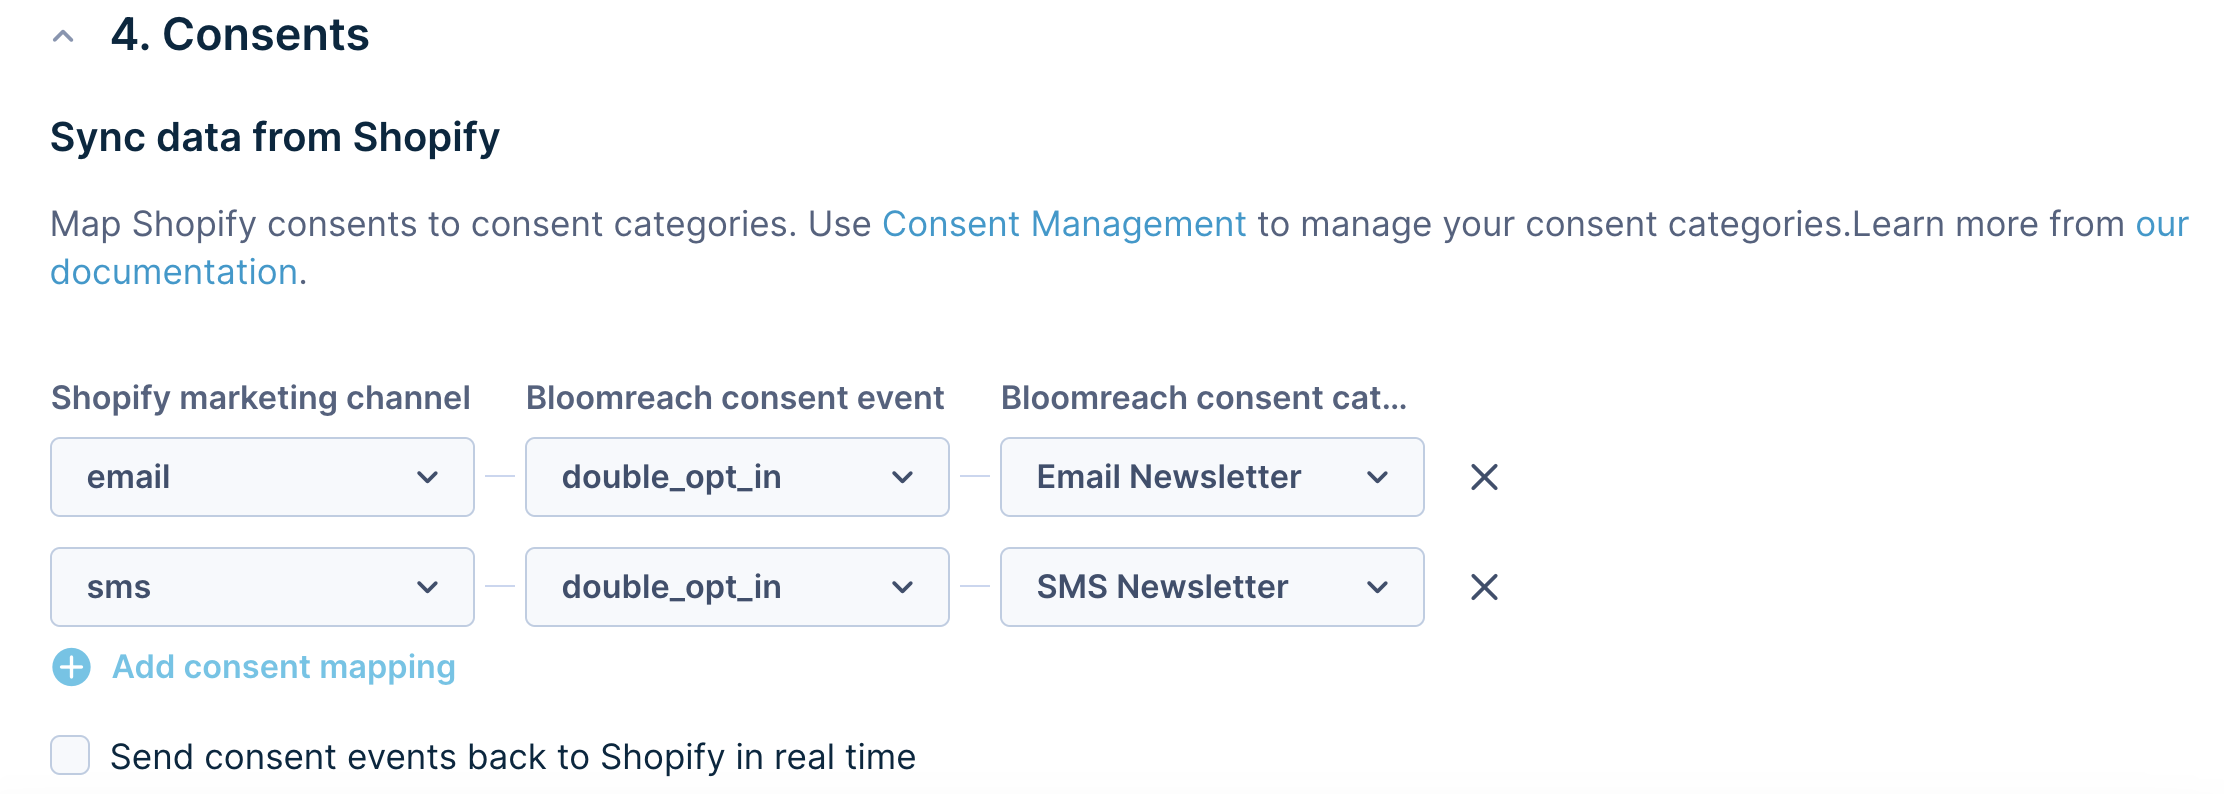
If you want to manage double opt-in via Bloomreach, choose the following setup: When a customer subscribes to your communication, a new double_opt_in event will appear in Bloomreach, which can be used to trigger a double opt-in scenario. Learn how to create a double opt-in scenario inside Bloomreach here.
Shopify setup
Bloomreach setup
The last option for the Bloomreach consent event is shopify_consent. Selecting it will create a shopify_consent event with each change of consent for your customers. This option is dedicated to users willing to create custom scenarios to process their customer consents.
A Bloomreach consent category must be assigned for both the consent and double_opt_in consent events. Please be aware that you must map only one Bloomreach Consent Category for each Shopify Marketing Chanel.
The last step of the consent management setup is deciding about the bidirectional sync (Bloomreach to Shopify). This can be done by ticking the Send consent event back to Shopify in the real time checkbox. Enabling this feature means that all consent changes made on the Bloomreach side will be reflected inside Shopify. We recommend enabling this feature to keep consents in sync between both platforms.
6. Additional settings
Product tags
If you use Product Tags in Shopify, we recommend bringing them to Bloomreach to power the recommendation engine with additional product data or enrich your analytics with product insights.
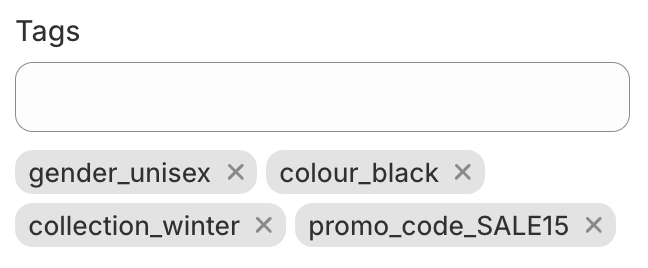
Naming convention of the Shopify Product TagsTo match Bloomreach Catalogues structure, we recommend using the following naming convention structure for the Shopify Product Tags:
name_of_the_tagany separator (, - _ ;), and then value, for example,gender_unisex,collection-winter,promo_code=Sale15.
Once you decide which product tags you would like to bring to Bloomreach, you need to place them in the Additional Settings section under the Product Tags.
- Tag value = name of your tag, such as:
color,gender,promo_code. - Separator = sign separating tag from the value, such as:
_ , - =. - Searchable = marks this field as searchable inside catalogs, recommendations, and so on.
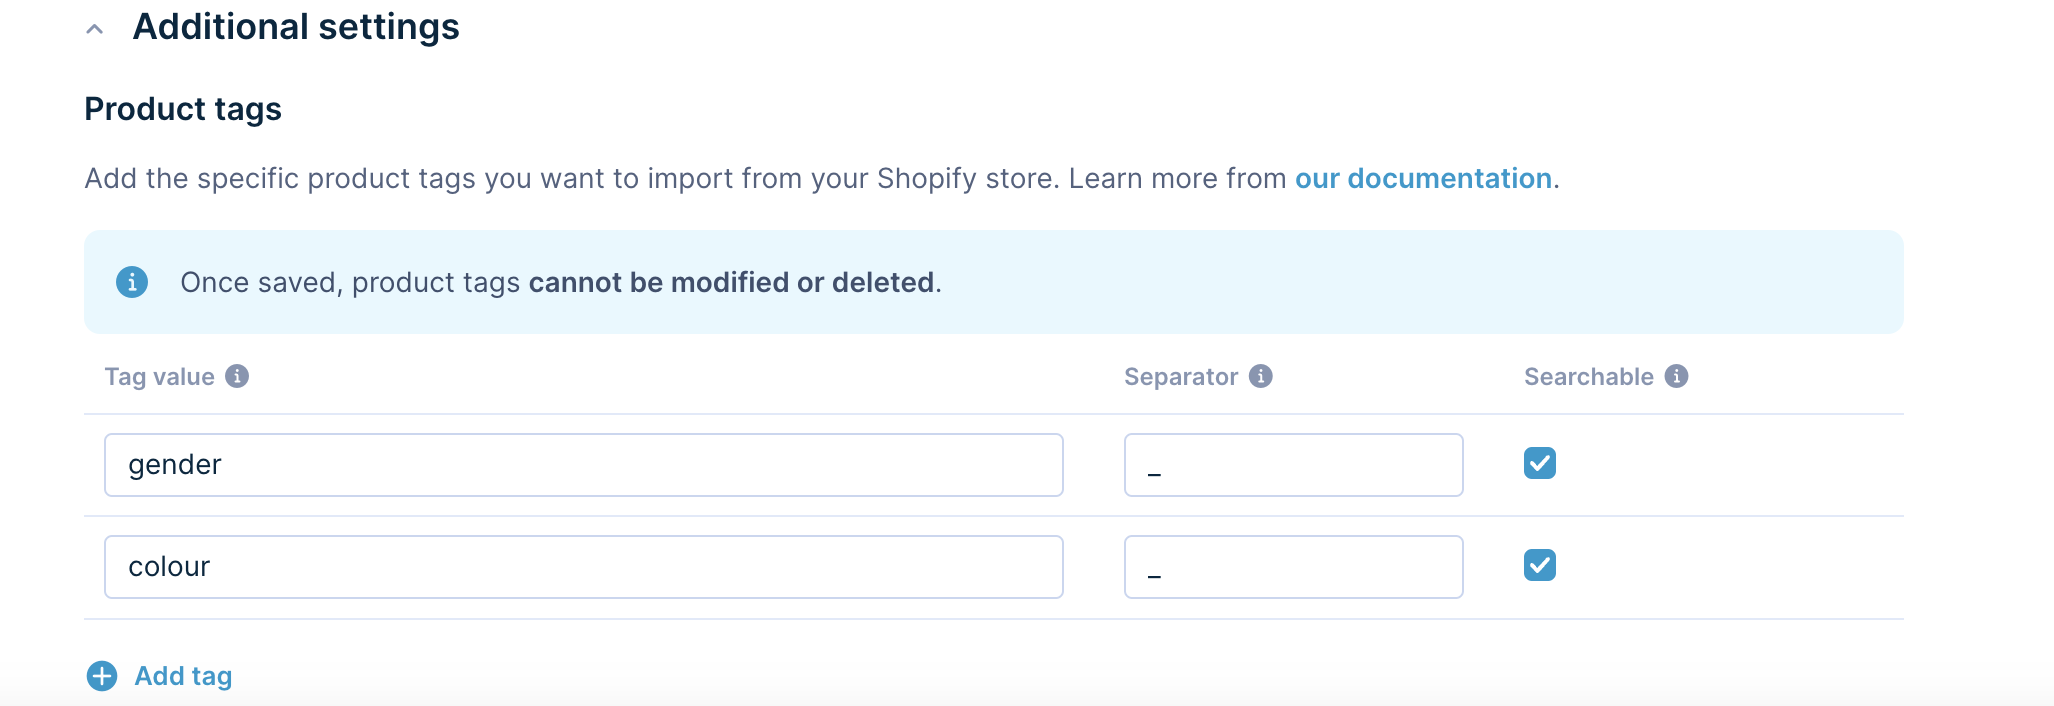
Limit of searchable fieldsPlease be aware that the number of searchable attributes is limited for the integration and shared across other settings such as Product metafields and Product catalogs. We recommend selecting up to 20 fields (across Product metafields and Product tags) that you want to bring to Bloomreach. Please be aware that once the configuration is saved, it cannot be modified or deleted.
Selected product tags will be visible inside the product catalogs and will be part of the purchase_item events.
7. Save the integration
After the web integration is complete, the data will start coming in. Events from the API should appear instantly after the setup is finished (remember to click Save integration). Regular catalog imports and customer and historical purchase data can be found in Bloomreach Engagement under Imports.
Take a coffee break before all the imports are visible, as it might take a while for the whole import to be finished.
Limitations
Service worker not supportedShopify does not support using a service worker as it prevents installing the service worker into the root folder of Shopify. The root folder is required to install the service worker for web push notifications and non-flickering experiments. Therefore, those two features are not supported out-of-the-box for this integration.
Technical detail
What is the latency between an order happening and an order appearing in our app when using our Shopify integration?
The sync is near real-time - Bloomreach Engagement subscribes and listens for new updates on customers and orders from the Shopify backend, resulting in near real-time webhooks.
Removing Shopify integration
If you decide to remove Shopify integration, please do not remove the webhook from the integration manually before removing the integration in the application, as you will not be able to remove the integration afterward. Instead, use only the 'Remove Integration' button in the application. It will take care of all steps required to remove the integration, including deleting the webhook.

Updated 4 months ago