OLD Custom Tracking Domain Set Up For Multi Tenant Instance
Follow the steps below to set up a custom tracking domain (CTD) for multi-tenant instances. For more information about how it works, see custom tracking domain (CTD) article.
1. Prepare your subdomain
Prepare a subdomain of your website, e.g. “analytics-api.yourdomain.com”. The selected subdomain should be dedicated entirely for this use, nothing existing should run there, not even on sub-sub domains e.g.. "something.analytics-api.yourdomain.com".
Setting DNS records on an incorrect domain that is used for other purposes can have serious consequences.
2. Add your subdomain in Project settings
Go to Project settings -> General -> General project settings as seen in the picture below
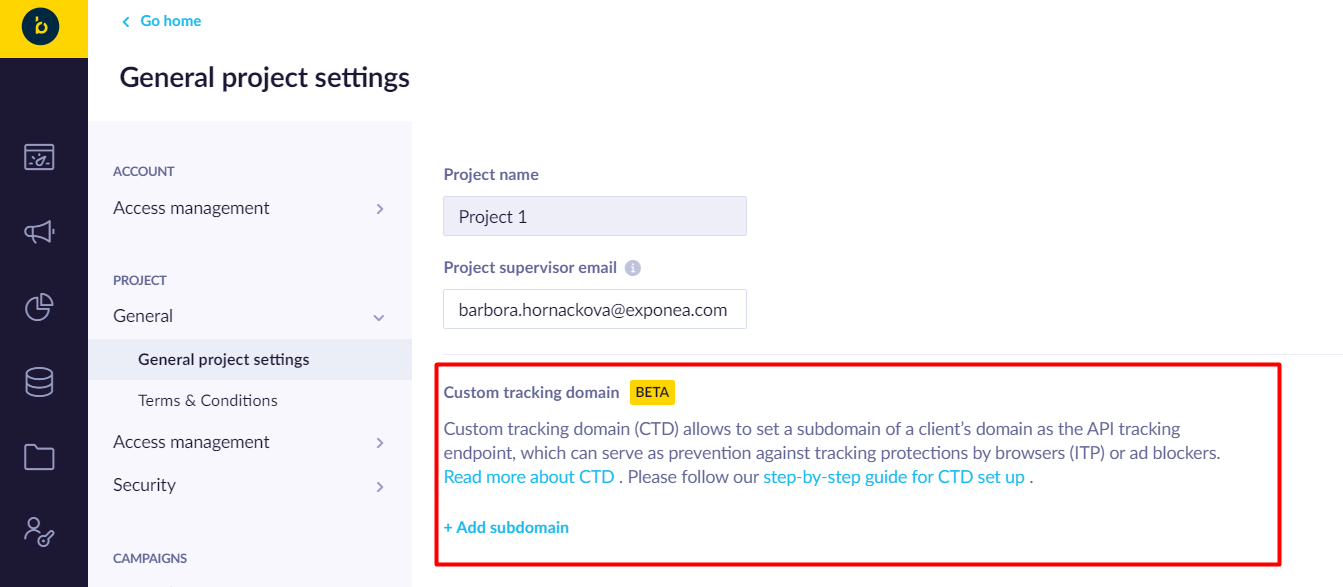
Enter your subdomain (or multiple subdomains, if you are tracking multiple domains in a single project); and save the settings. After saving the subdomain we will generate the NS DNS records to be set for your subdomain. This will not impact your existing tracking.
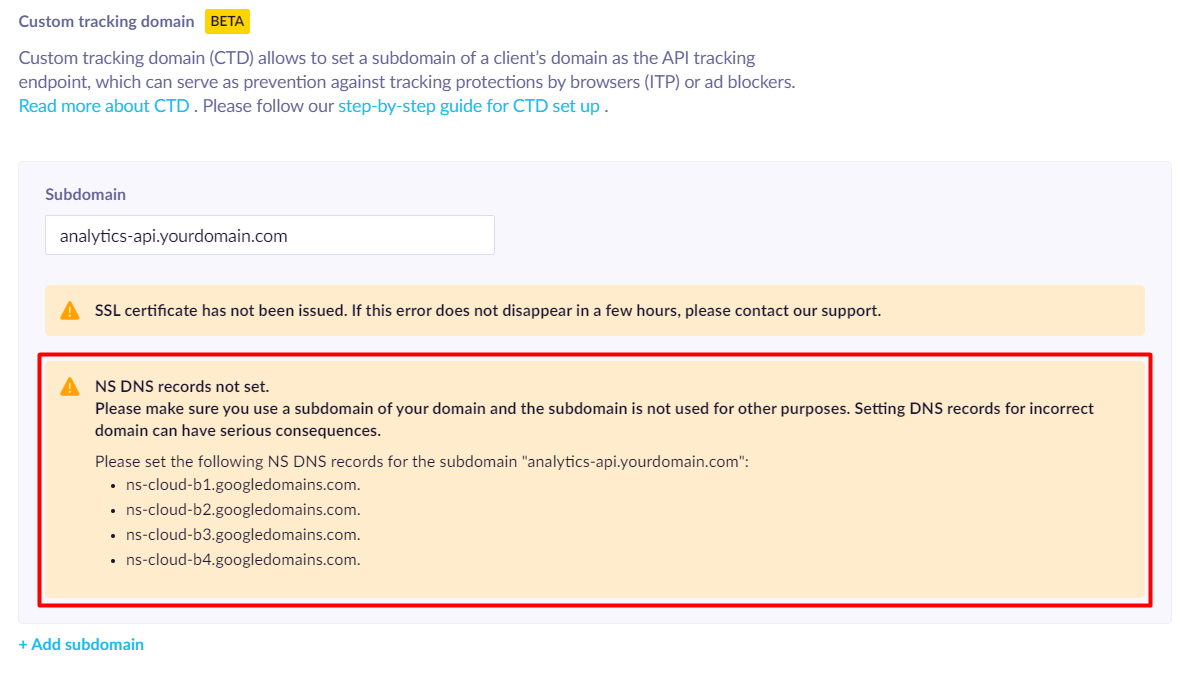
3. Set the DNS records
While for the Single Tenant Instance, our IT will provide the NS DNS records, for this Multi Tenant Instance, you need to set the NS DNS records for your subdomain yourself as instructed in the Project settings.
Please bear in mind that setting DNS records doesn’t happen instantaneously. You can experience two kinds of delays:
- DNS vendor processing delay
- DNS propagation delay due to caching (usually, a couple of hours up to 24 hours)
Due to these delays, you need to plan ahead and understand the impact of DNS changes. For example, when you switch from an old e-mail tool to Bloomreach Engagement, these delays during the DNS change can affect deliverability.
The NS DNS records might differ for every entered subdomain, make sure you set it correctly. There are commonly 4 records to be set.
NS Example:
| Your Subdomain | Record Type | Destination Domain | TTL |
|---|---|---|---|
| analytics-api.yourdomain.com | NS | ns-cloud-d1.googledomains.com | 21600 |
CNAME records
Custom tracking domain can be also set up using CNAME DNS records, but will not work to ensure persistent cookies and anonymous identity. We recommend using NS DNS records. If you wish to use CNAME records the destination domain can be found in the Project settings. CNAME destination domain is the same for every subdomain.
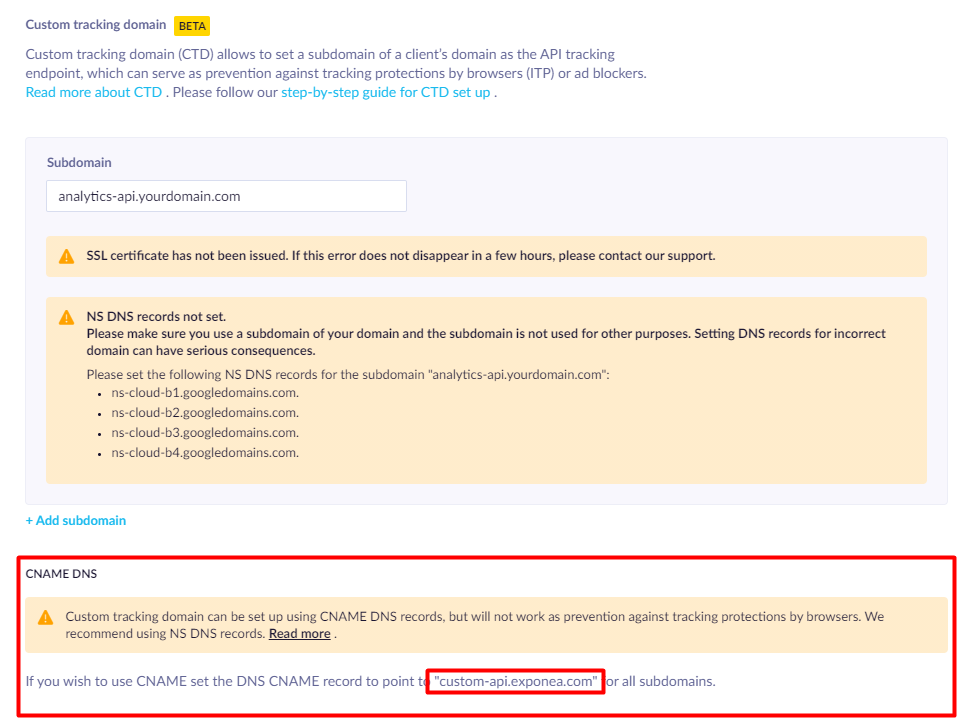
| Your Subdomain | Record Type | Destination Domain | TTL |
|---|---|---|---|
| analytics-api.yourdomain.com | CNAME | custom-api.exponea.com | 86400 |
4. Review DNS were created correctly
Once you have your DNS records configured, come back to the Project settings -> General -> General project settings. You will see a confirmation message in case the DNS records are set correctly. Be aware it may take a while till the DNS records are propagated and available for validation. If you set your records and you still dont see the confirmation, try coming back in 24 hours. If you still don’t see any confirmations, the records might not be set correctly.
We will also issue an SSL certificate for your subdomain and it may also take a while till this is processed. If you still see the error that the SSL certificate has not been issued after one day, please contact our support.
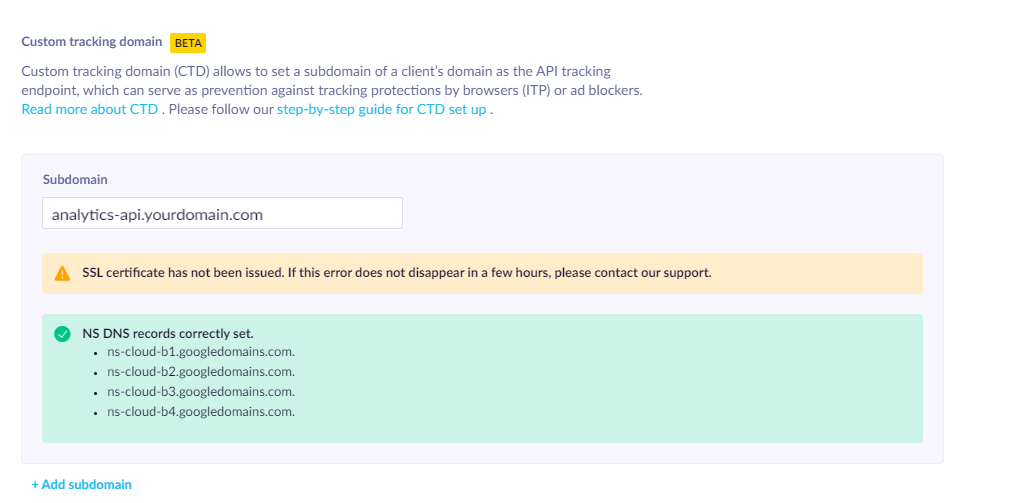
CNAME records
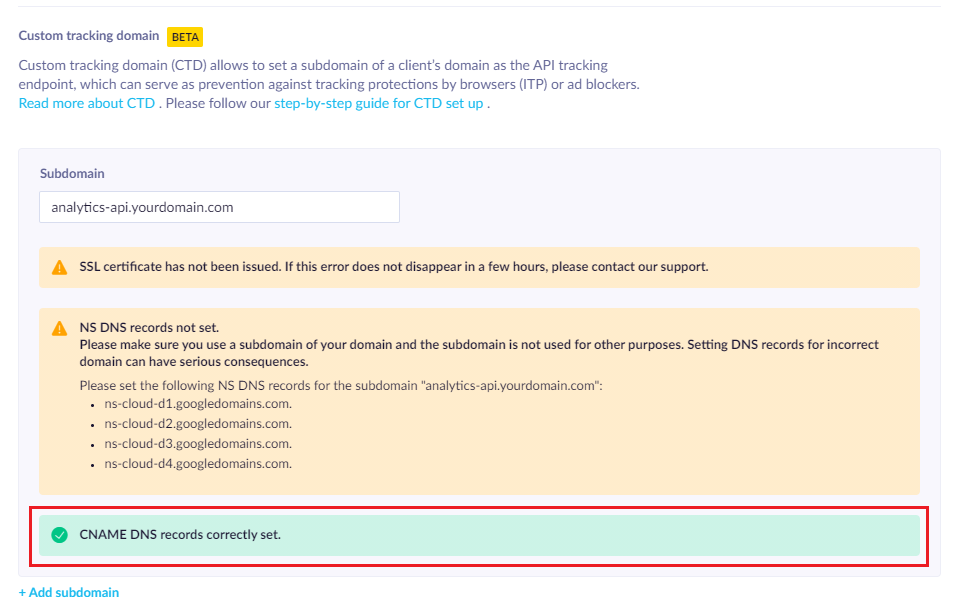
In case you have used the CNAME records and they are set correctly, you will see the following confirmation.
5. Try to test load SDK
Try to test load our SDK from your new domain (you can do this via any browser)
e.g analytics-api.yourdomain.com/js/exponea.min.js
6. Update and test the tracking snippet
There are up to three places where the snippet needs to be updated, based on the version of the web integration snippet you are using. You can update the snippet directly using the instructions below or look into the Web Integration tab where, once the CTD is set up, you can find the updated snippet. In case you have multiple custom domains in one project, follow the steps below.
When updating the snippet be careful to keep all your existing configuration of the initialization unchanged.
1. Tracking API target
Add/Update the "target" parameter to your initialization config and set it to your custom domain e.g. "target" : "https://analytics-api.yourdomain.com
<script type="text/javascript">
    exponea.initialize({
        "target": "//analytics-api.yourdomain.com",
        "token": "<project_token>",
        ...
    });
</script>
2. JS SDK link
Look for the link to exponea.min.js in the initialization snippet and replace the JS SDK domain to your custom tracking domain.
Example:
Change from
//api.exponea.com/js/exponea.min.js
to
//analytics-api.yourdomain.com/js/exponea.min.js
<script>
(function(b,c){
...a.src=g+"//analyticsapi.yourdomain.com/js/exponea.min.js";...
})(window,document);
</script>
If you just see r.target+"/js/exponea.min.js" you have a newest version of the snippet and this stp is not needed.
3. Non-flickering experiments API path
In case you are using non-flickering experiments update the “path” parameter in their initialization config and set it to your custom domain
e.g. webxpClient.path = https://analytics-api.yourdomain.com
<script>
    webxpClient.path = 'https://analytics-api.yourdomain.com';
    webxpClient.sign = '<PROJECT-TOKEN>' + '/' +
    ...
</script>
7. Make sure everything is working
Visit your website and make sure everything is working (events are being tracked, weblayers displayed…).
Cookies
You might also review the cookies and check the expiry when switching to your new domain, before doing so please make sure to read how CTD works and which cookies are used.
Updated over 1 year ago
