
Twilio Segment - guide to increase conversions
This is a guide for a concrete use case with Twilio Segment.
If you only want a guide on connecting Bloomreach Engagement as a Destination with Twilio Segment, click here.
Learn to employ Twilio Segment and Bloomreach Engagement omnichannel campaigns to target potential buyers effectively. Utilize Bloomreach Engagement's Mobile App Messaging to inform users about specific products or new campaigns and employ push notifications to enhance conversion rates.
Prerequisites:
- access to Twilio Segment account and Unify which is a premium add-on
- access to Bloomreach Engagement account and App Inbox feature
- help of someone who works as a developer for your mobile app to access and configure your codebase
Step 1: Set up Data Tracking on Your App
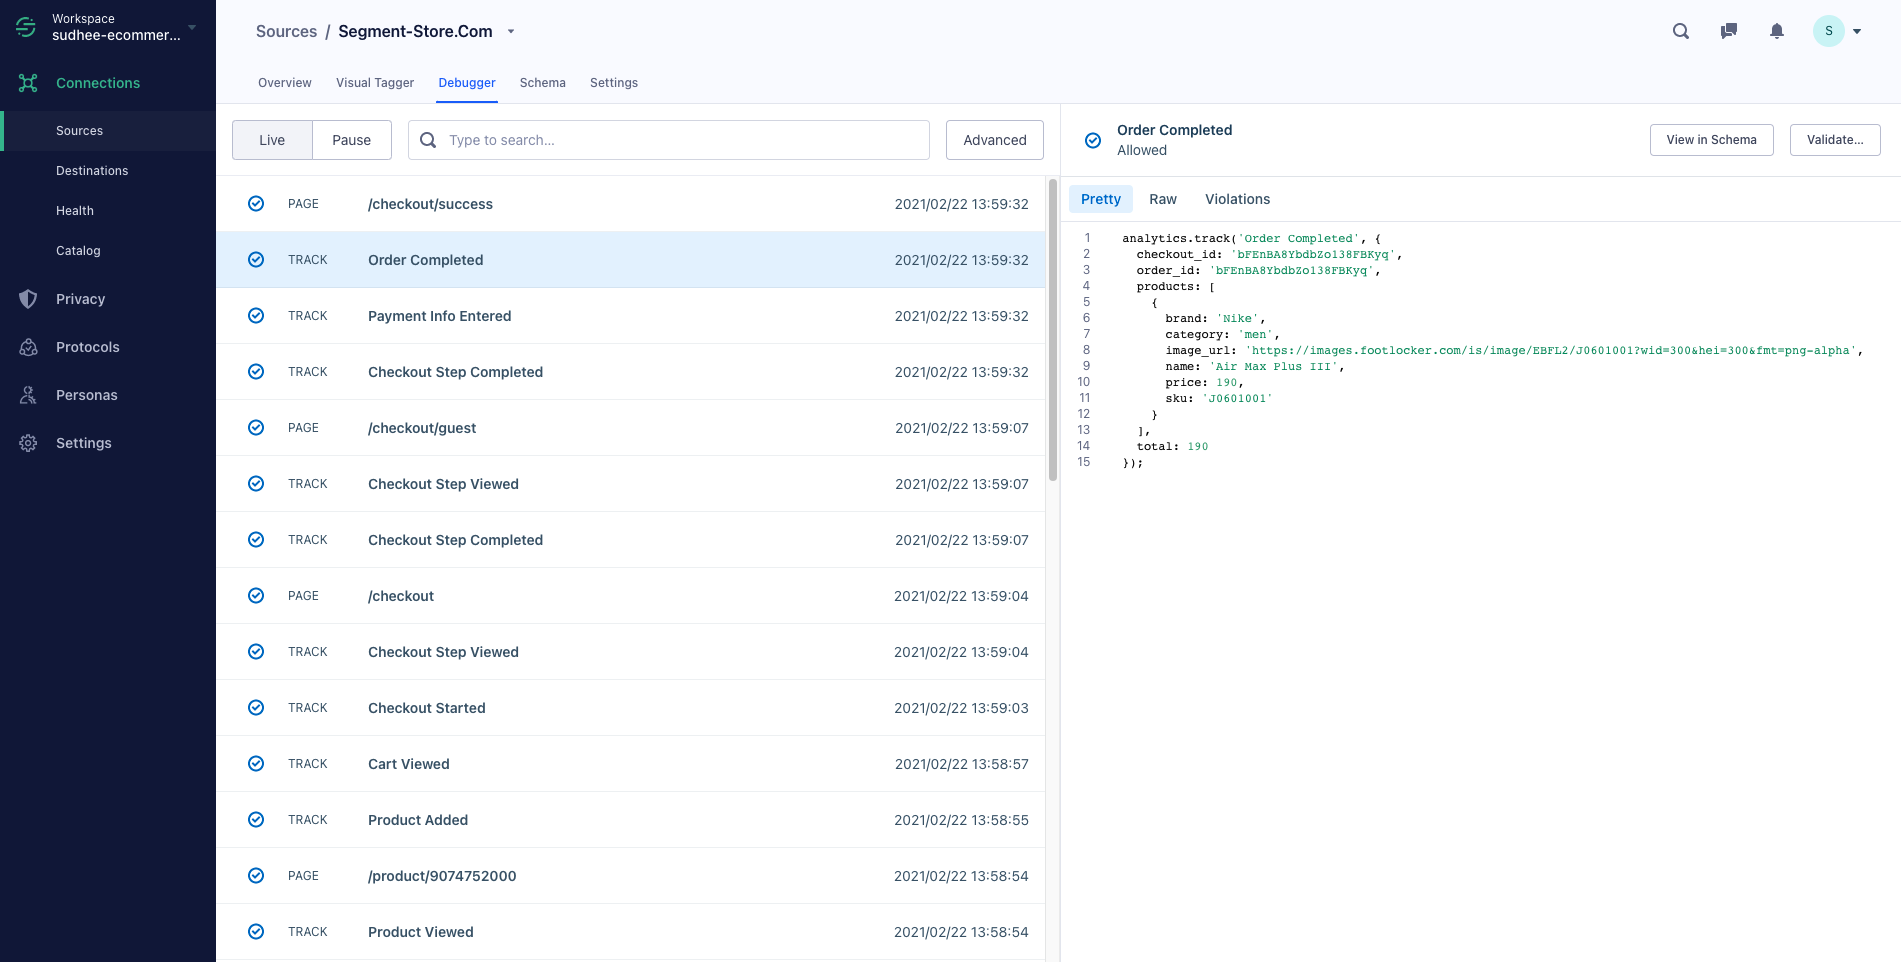
First, sign up or log in to the Segment App. Next, create a Source for your Mobile App. A Source is where events such as Application Opened and Feature Used are collected and sent to Segment. Since we'd be sending mobile push notifications, we recommend you begin with an iOS or Android Source. After you set up your Source, you'll begin implementing Events, essentially actions such as screen views or button clicks performed by users on your App. You can implement events by bundling Segment's Android or iOS SDK with your App. (Check out these docs to learn more about setting up your Source.)
We recommend you track the below events to understand users' actions on your site.
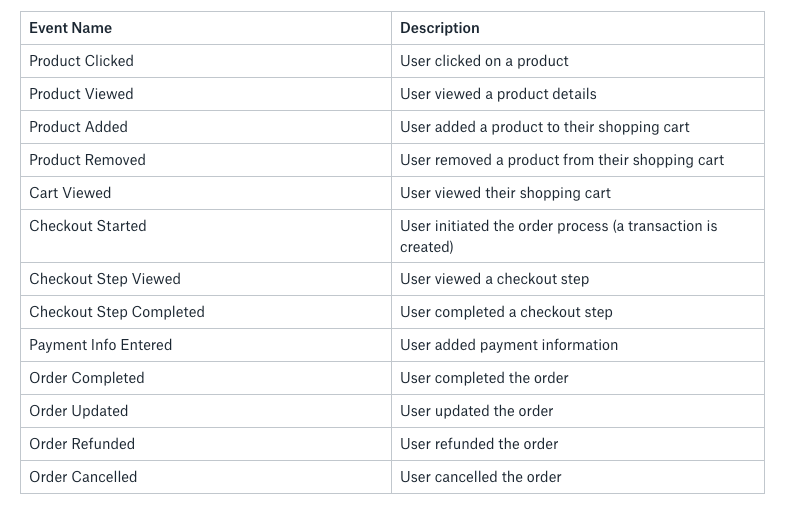
In addition to the track events, we also require you to send an identify call each time a user registers, logs in, or updates their info.
Step 2: Connect Bloomreach Engagement Destination with Twilio Segment
In this recipe, we will use Engage to create an audience of inactive users and then send that information to Bloomreach Engagement. This customer engagement platform lets you send your users emails, SMS / MMS, push notifications, and much more.
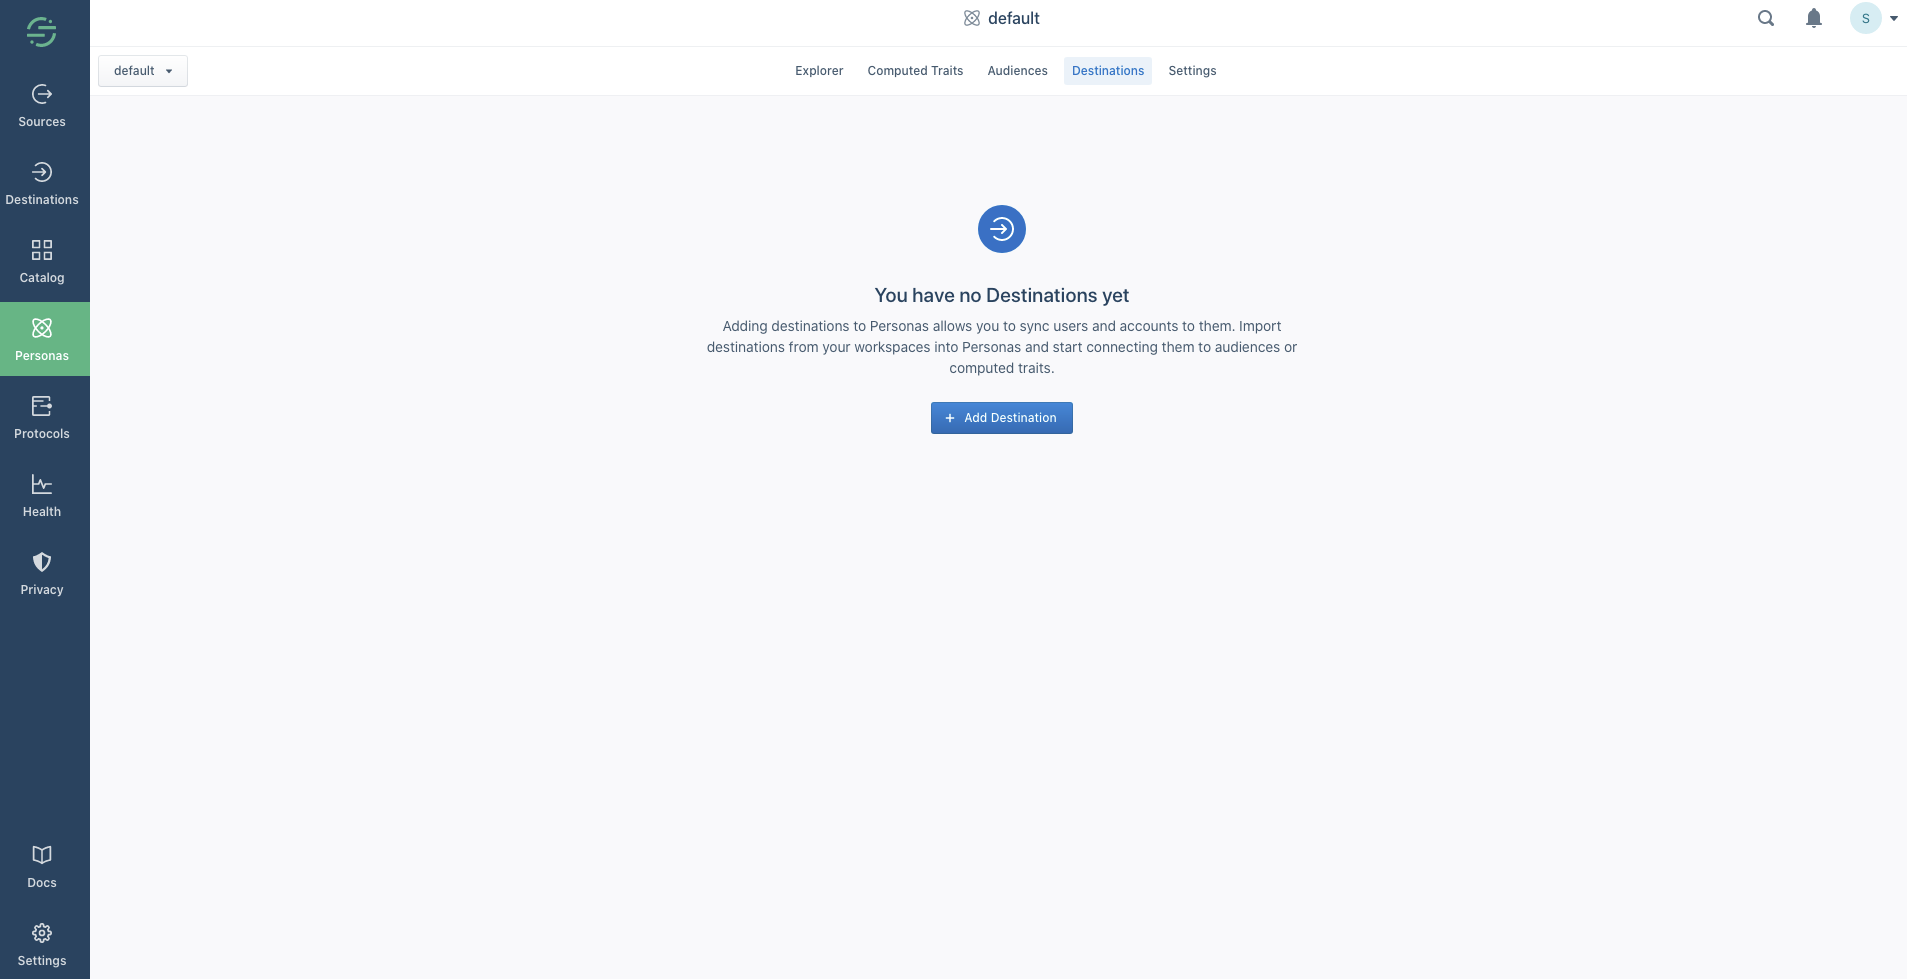
The next step is to enable the Bloomreach Engagement Destination inside Segment. Go to the Connections page and navigate to the Destinations section.
Click “Add Destination” and then search for “Bloomreach” within the Destinations Catalog and enter the API key details to enable the destination. (Please see these detailed instructions if you need additional guidance.)
Step 3: Create a New Computed Trait and Send it to Bloomreach Engagement
Once you’ve successfully enabled the Bloomreach Destination, the next step is to create a Computed Trait. This will be logged as a Static Attribute on each customer profile within Bloomreach Engagement and will later be used to target these customers with personalized campaigns.
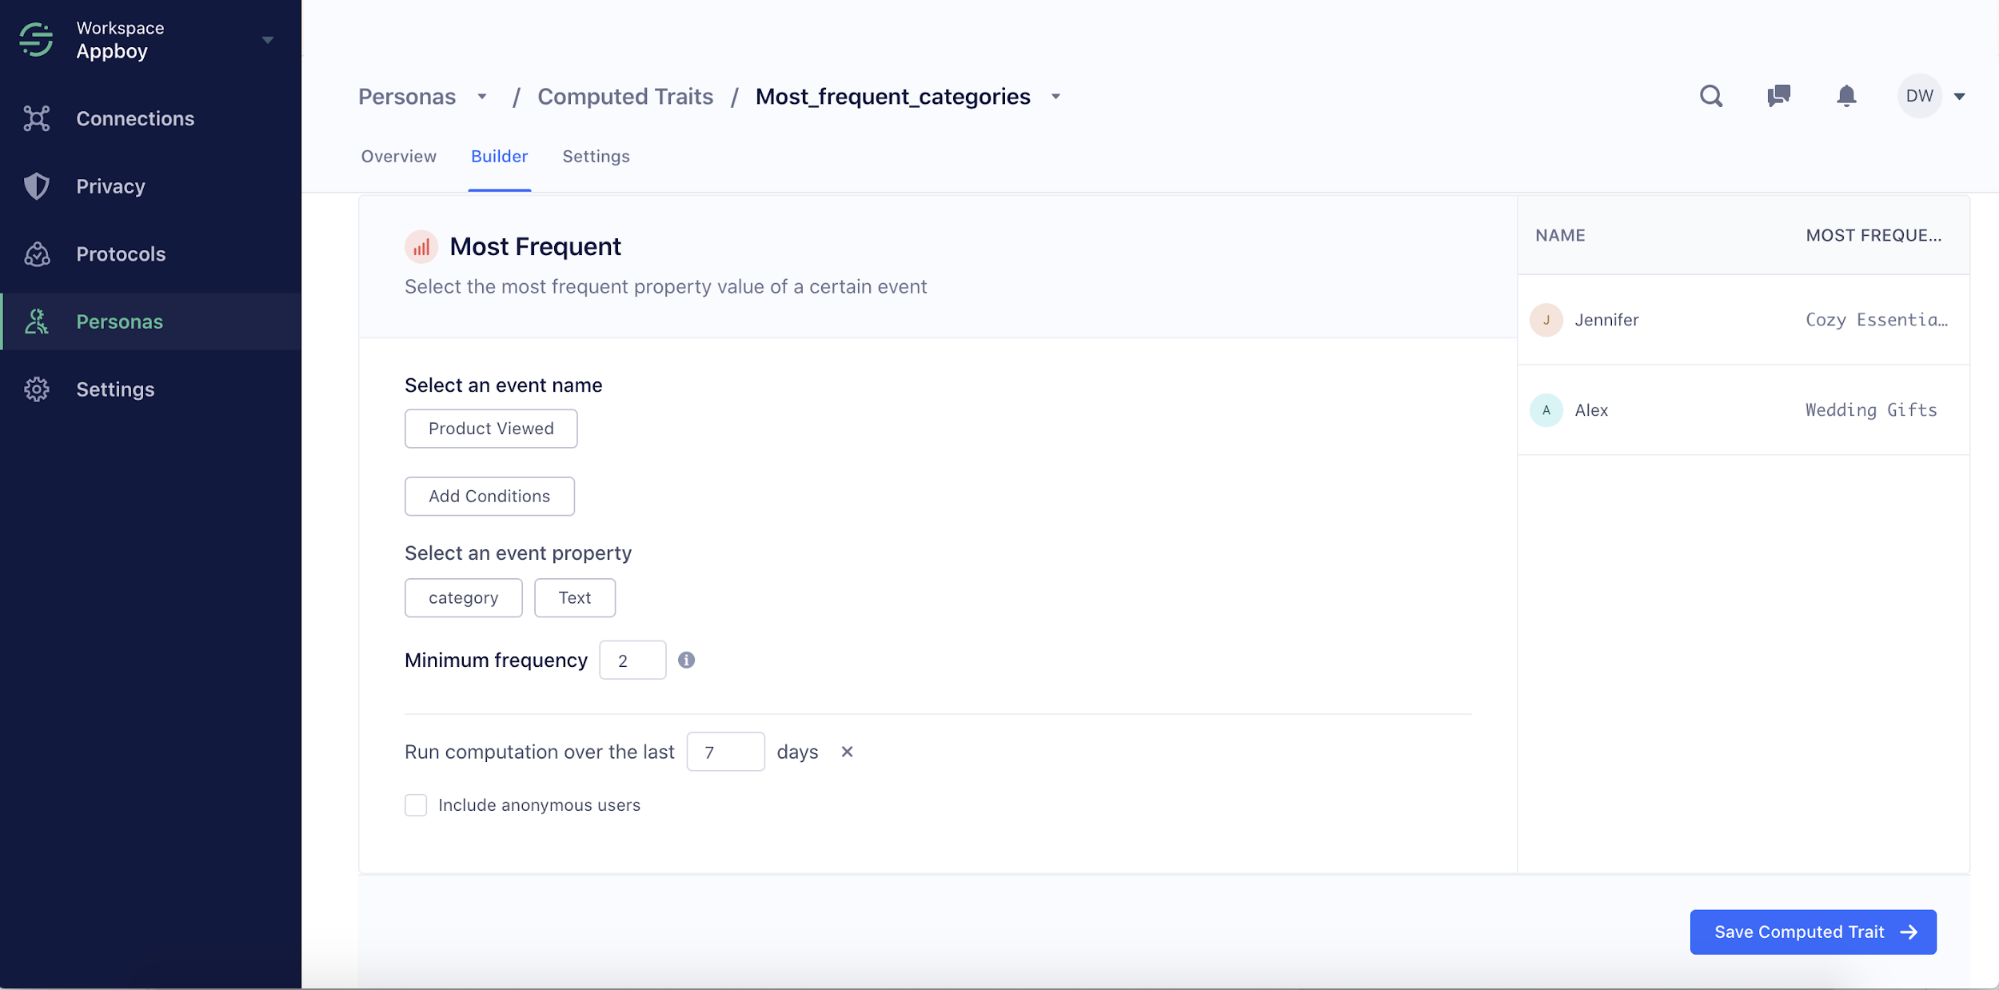
To do that, start by navigating to the Computed Traits page, clicking the “New Computed Trait” button to calculate this value, and sending that information to Bloomreach Engagement and other marketing tools. We calculate a user’s most frequently viewed product category in this recipe. You can construct your audience query and preview the results. Click on any user to get a 360-degree view of their profile.
Sync this Computed Trait to your Bloomreach Engagement Destination and choose a connection setting of send identify to send this Trait to Bloomreach Engagement as a Standard Attribute.
Finally, give your Computed Trait a name and description that allows you to identify users with this Trait inside Bloomreach Engagement.
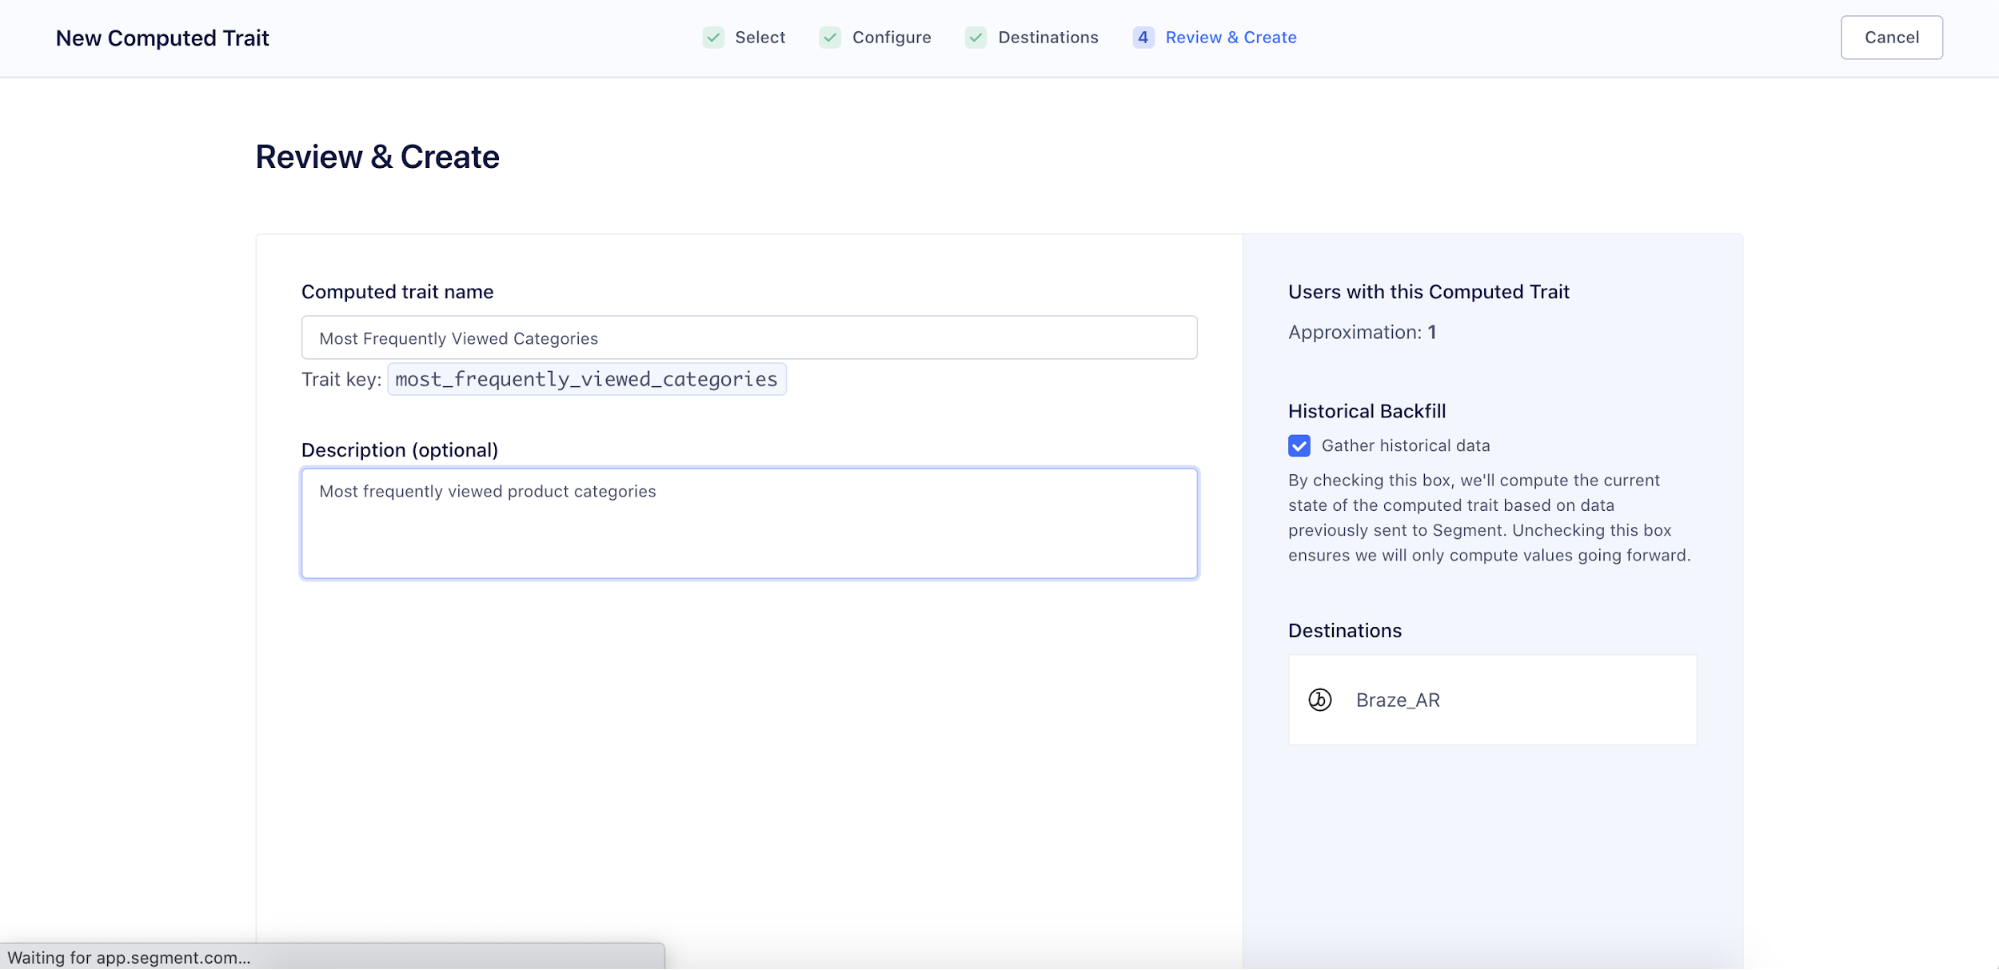
On each customer profile in the Bloomreach Engagement dashboard, this Standard Attribute will be unique to that user’s specific most frequently viewed category.
Step 4: Create a Cross-Channel Campaign in Bloomreach Engagement
To drive users to the app, we want to ensure that our messages have timely content about relevant products—and that some of these messages can persist once these users are inside the app. We'll use a Push Notification and a Marketing App Message to make that happen.
The push notification acts as ephemeral and timely content, allowing users to open your app and act. For those users who wait to open the app or convert, the Marketing App Message acts as a reminder to the user to take action. This reminder persists within your app, providing additional opportunities for users to view the content.
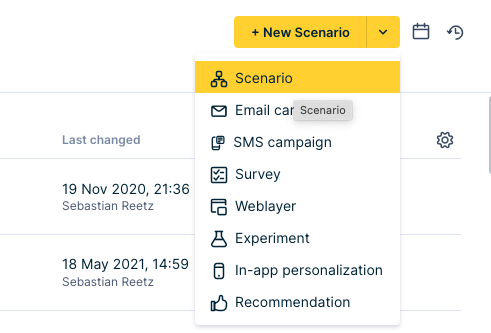
To do that, navigate the Scenarios page within the Bloomreach Engagement dashboard and create a new Scenario.
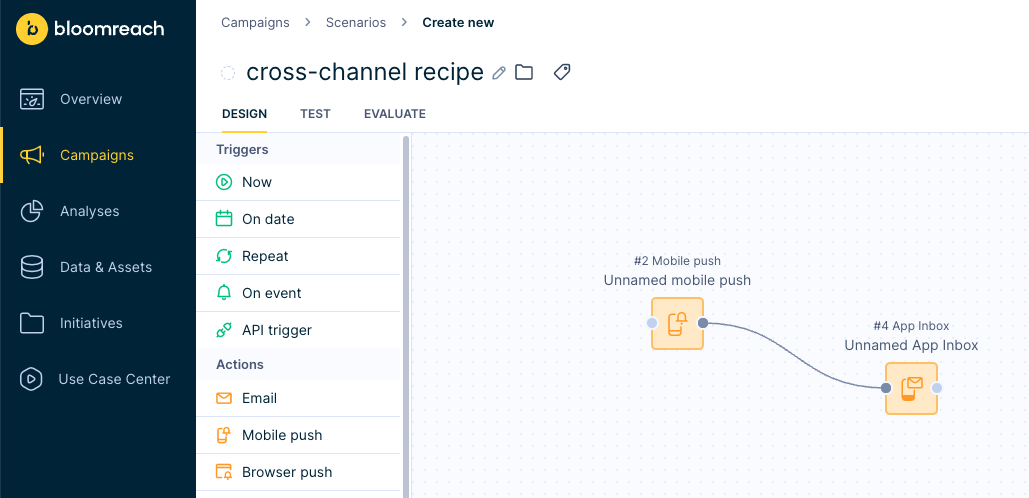
Add your first messaging channel, a push notification, then select your preferred notification platform, i.e., iOS or Android. You could also use Browser Push Notifications if you so desire. This step can be repeated for all notification platforms you wish to use. Please check out our documentation here for setting up Push Notifications.
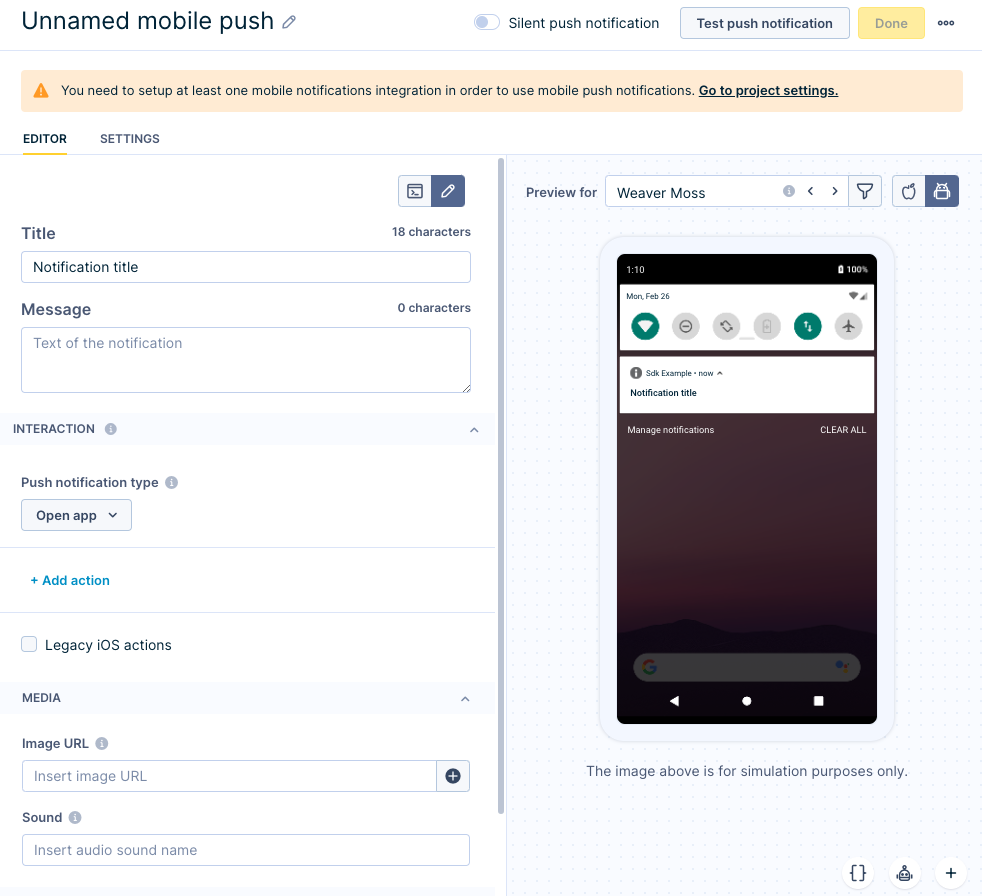
Then, compose your notification by choosing a title, message, and push icon image.
Once you are done composing your push notification, the next step is adding a Mobile App Message as your second messaging channel. Check out this article here to learn more about Mobile App Messaging, and here for App Inbox.
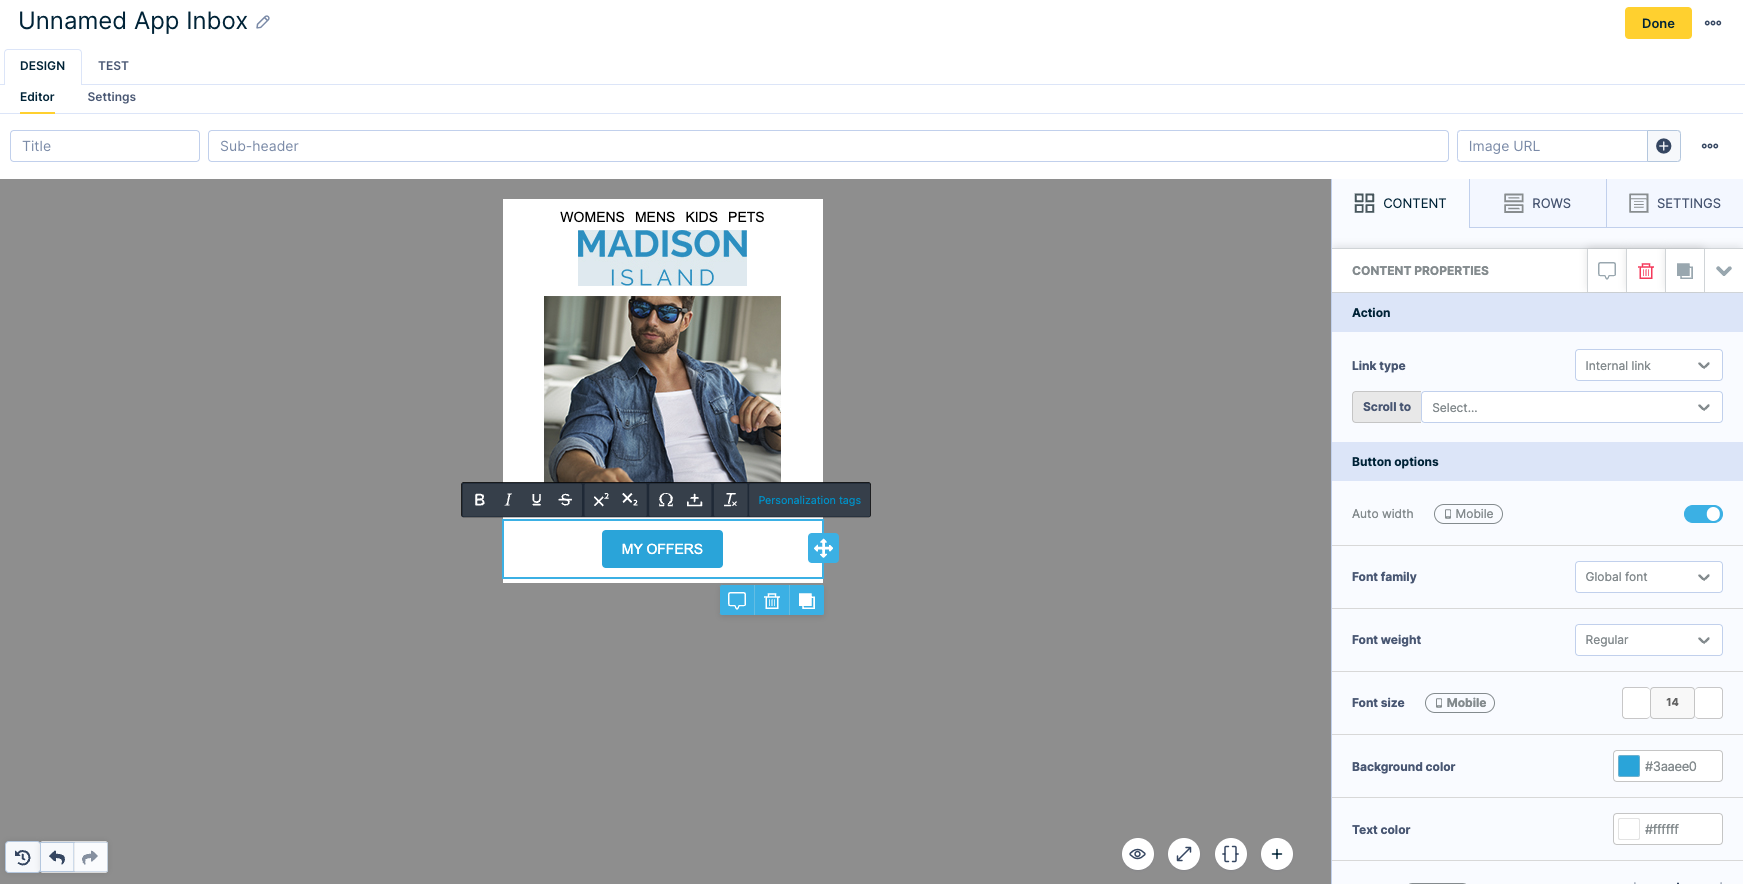
As with push notifications, you can define what action should be taken when a user clicks on the Mobile App Message. In the INTERACTION section, you can specify three types of interactions that will be performed:
- Open application
- Open browser
- Open deeplink (how to handle deeplinks)
Step 5: Testing your messages
You can click the “Test” tab to see how your messages will look and ensure that personalization tags are rendered correctly.

Step 6: Finish Setting your Scenario and Target your Users
To finish your scenario, you must add nodes that satisfy your use case. If you are still getting familiar with our scenarios and node structure, please visit our documentation.
Before you launch your scenario, you can test and preview the complete workflow in the Test tab. When you click Start, you will see a confirmation window indicating how many customers will be affected by the scenario run.
Step 7: Measure the Conversion Rate
You can create a conversion dashboard to measure the conversion rates and evaluate your campaign results. To learn more about how to create a conversion dashboard click here.
Feel free to add any additional sources of conversion, e.g. based on campaign / not campaign or based on being subscribed to newsletter / not - through this, you will be able to better compare the effectiveness of your customer interaction.
Wrapping up
Here’s what we’ve done in this recipe:
- Created a Mobile Source for your eCommerce App to track events
- Connected Bloomreach Engagement destination with Twilio Segment
- Created a new Computed Trait for the most frequently viewed product category in Twilio Segment and sent it to Bloomreach Engagement
- Created a Cross-channel Campaign in Bloomreach with Push Notification and Mobile App Message as messaging channels and targeted users inside Bloomreach Engagement
- Launched the campaign and measured the conversion rate
Updated 7 months ago