Facebook and Instagram Ads
You can connect Bloomreach Engagement with Facebook and Instagram ads in two ways. This guide explains both options and helps you choose the right one.
Watch this introductory video about this feature.
Choose your integration method
Option 1: Built-in Facebook integration
This method creates custom audiences on Facebook by matching customer email addresses or phone numbers from Bloomreach Engagement.
Use this method when you:
- Want to create custom audiences for lookalike targeting.
- Need to retarget customers who haven't visited your website recently.
| Pros | Cons |
|---|---|
| You can update audiences anytime through the API. | Customers won't match if their email or phone in Bloomreach Engagement differs from their Facebook account. |
| Customers don't need to visit your website again. |
Option 2: Facebook pixel with Tag Manager
This method places the Facebook pixel on your website and enriches cookie data with Bloomreach Engagement segments or product recommendations.
When to use this method when you:
- Want to use dynamic product ads.
- Need 100% match rates.
| Pros | Cons |
|---|---|
| No need to match emails or phone numbers (100% match rate). | Cookie information only updates when someone visits your website. |
| You can use dynamic product ads. | Cookies expire, so you can only retarget recent visitors. |
Set up the built-in Facebook integration
Step 1: Connect Facebook to Bloomreach Engagement
Requirement: You need a Facebook Business Manager account to enable this integration.
- In Bloomreach Engagement, go to Data & Assets > Integrations.
- Click on Add new integration.
- Choose Facebook Ads.
- Click on Connect your Facebook account with Bloomreach.

- Sign in with your Facebook Business Manager account.
- Give permission to access your linked Facebook advertising accounts.
- Click Save integration.
Note
We recommend creating a dedicated Facebook user with permissions for just one advertising account. This prevents uploading audience data to the wrong account.
Step 2: Create retargeting scenarios
- Create business logic for assigning customers to Facebook audiences using the Bloomreach Engagement scenario editor.
- To assign a customer to a specific Facebook audience, add the retargeting node and double-click it.
- Select Facebook Ads.
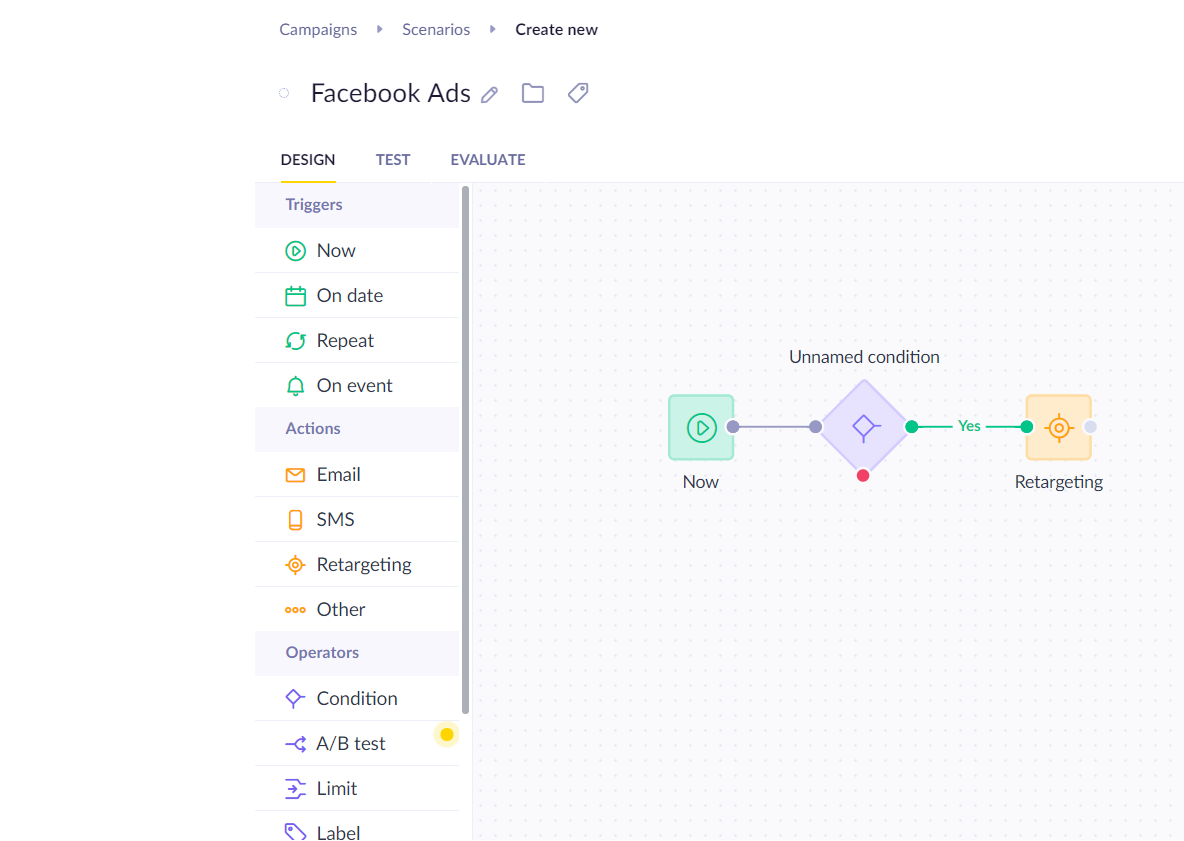
- Choose the integration you created in Step 1.
- Select an existing audience or create a new one.
When you create an audience in the retargeting node, it will be available in Facebook Manager immediately before the scenario has started for the first time.
Step 3: Configure customer matching
Click Advanced settings: Customer matching to choose which Bloomreach Engagement attributes match customers.
Deprecated IDs
- Facebook’s App Scope User ID was discontinued by the network.
External IDhas been deprecated as a customer matching option in Engagement.
Available matching options:
| Customer ID | Description |
|---|---|
| Must be the same email used with their Facebook account. Gets hashed automatically before sending to Facebook. | |
| email_sha256 | Use this if you already have SHA256 hashed emails (prevents double hashing). |
| Phone | Must be in the international format E.164. All characters except numbers will be removed before sending to Facebook, leading zeroes, and the "+" sign is also removed. Gets hashed automatically. Note: always include the country code (for example, +44) as part of your customers' phone numbers, even if they are from the same country where your organization is based. |
| phone_sha256 | Use this if you already have SHA256 hashed phone numbers (prevents double hashing). |
| Mobile Advertiser ID | A unique identifier of a customer’s mobile device. Apple’s Advertising Identifier (IDFA) or Android Advertising ID from your mobile app. |
Prevent double hashing
Bloomreach Engagement automatically hashes plain emails and phone numbers before sending to Facebook. If you send pre-hashed data using standard email or phone fields, it gets double-hashed and won't match anything on Facebook. If you can only upload hashed data, use the
email_sha256andphone_sha256fields instead. These prevent double hashing. The system checks if your SHA256 values are valid before sending them to Facebook. Read more about Ad audiences hashing.
Step 4: Set up value-based audiences
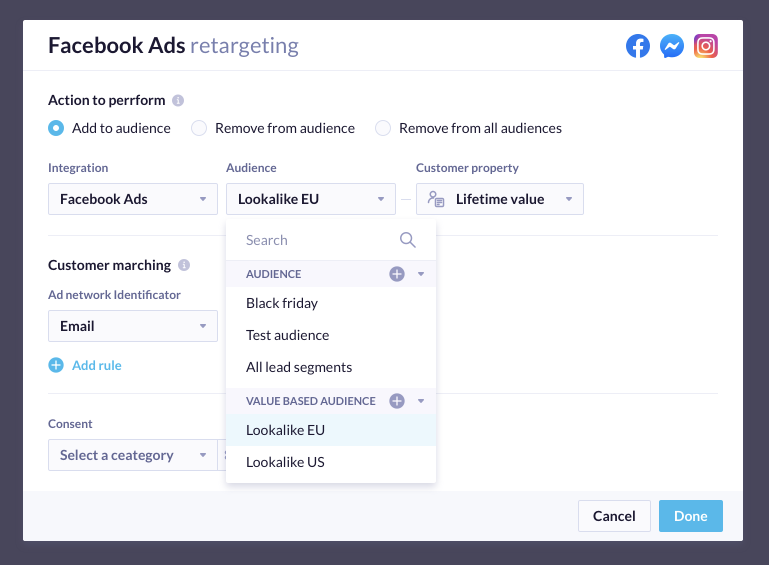
You can enrich the information Facebook receives about your audience using the Value Based Audiences function. This lets Facebook calculate lookalike audiences (people with similar characteristics) by providing a specific metric (value) for each customer sent to retargeting nodes.
How it works:
- Send customer values like Customer Lifetime Value (CLV) or total revenue.
- Facebook uses these values to find similar high-value customers.
- This improves your conversion rate and return on investment.
To set this up:
- In your retargeting node, look for Value based audience settings.
- Choose which customer metric to send (CLV, total revenue).
- Facebook will use this data to optimize your lookalike audiences.
Step 5: Check your Facebook audience
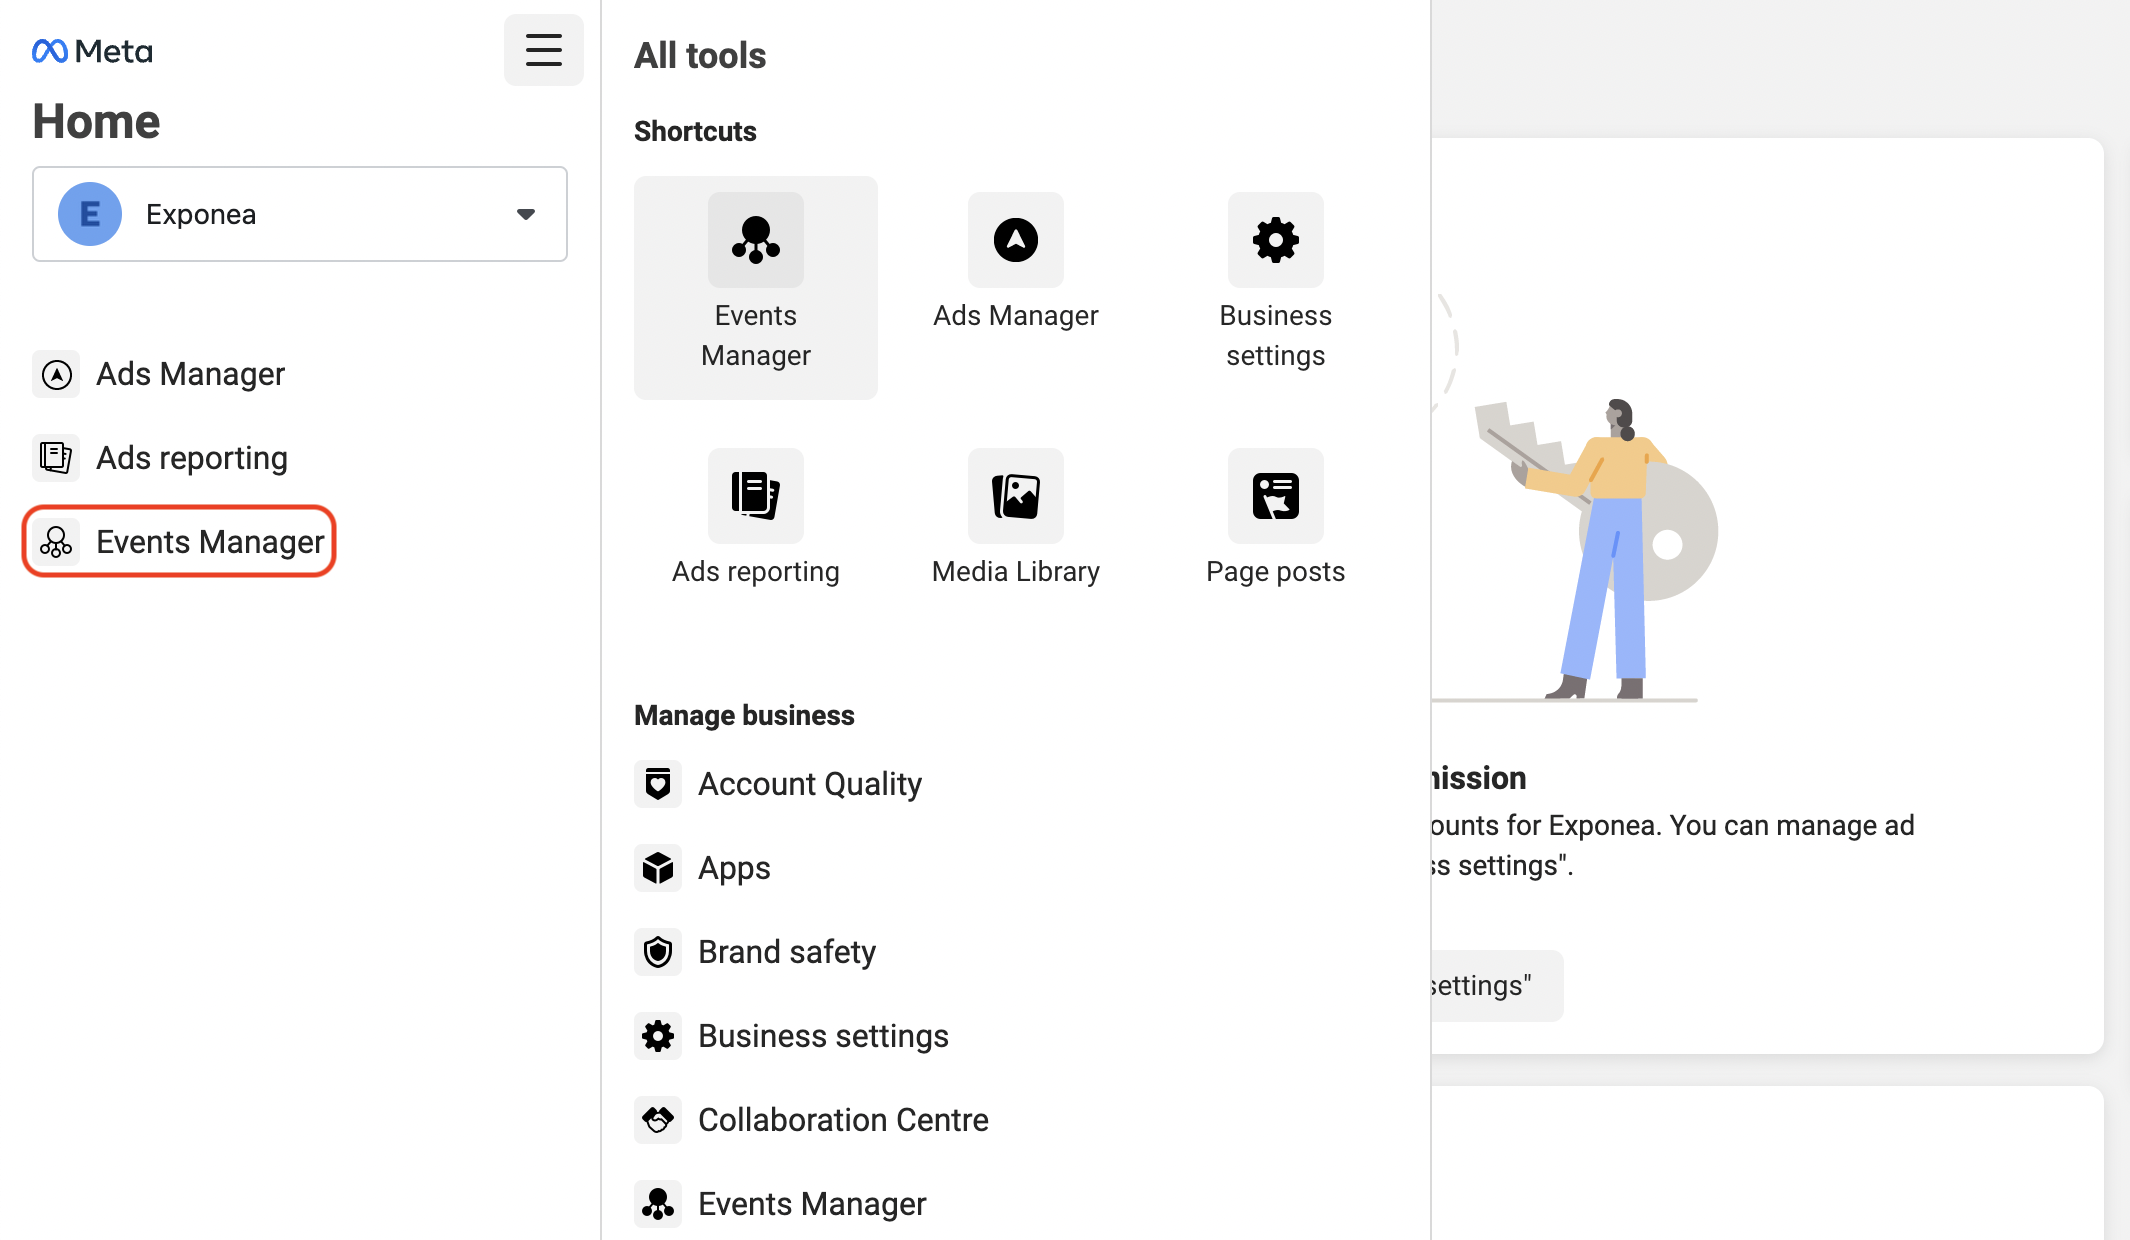
Go to your Facebook Ads Manager to see your new audience.
If you see "Low match, populating": This is normal. When you have many customers, it can take a few hours for the audience to populate fully.
About audience size estimates:
- When you use multiple identifiers (like
emailandphonetogether), Meta won't show estimated audience size. - This doesn't affect your ability to use the audience for targeting.
- Your ads will still work normally even without the size estimate.
Remove customers from specific audience
- In the retargeting node settings, select Remove from the audience.
- Choose the specific audience.
Remove from all audiences
If a customer asks you to delete all their data, you can remove them from all Facebook Ads audiences at once.

Audience size limits
- You can't remove users from audiences with fewer than 100 people.
- Facebook requires custom audiences to have at least 100 unique users.
- If removing users drops you below this limit, delete the entire audience instead.
Retention period
Facebook Ads integration doesn't send retention_days of 180 days when creating an audience. It defaults to forever. However, this applies only to the audiences created directly from Bloomreach via the integration. If the audiences already existed, for example, by being manually created in Meta (and updated via Bloomreach), they might have other durations. This is because they are specified during the audience creation process.
Consent policy
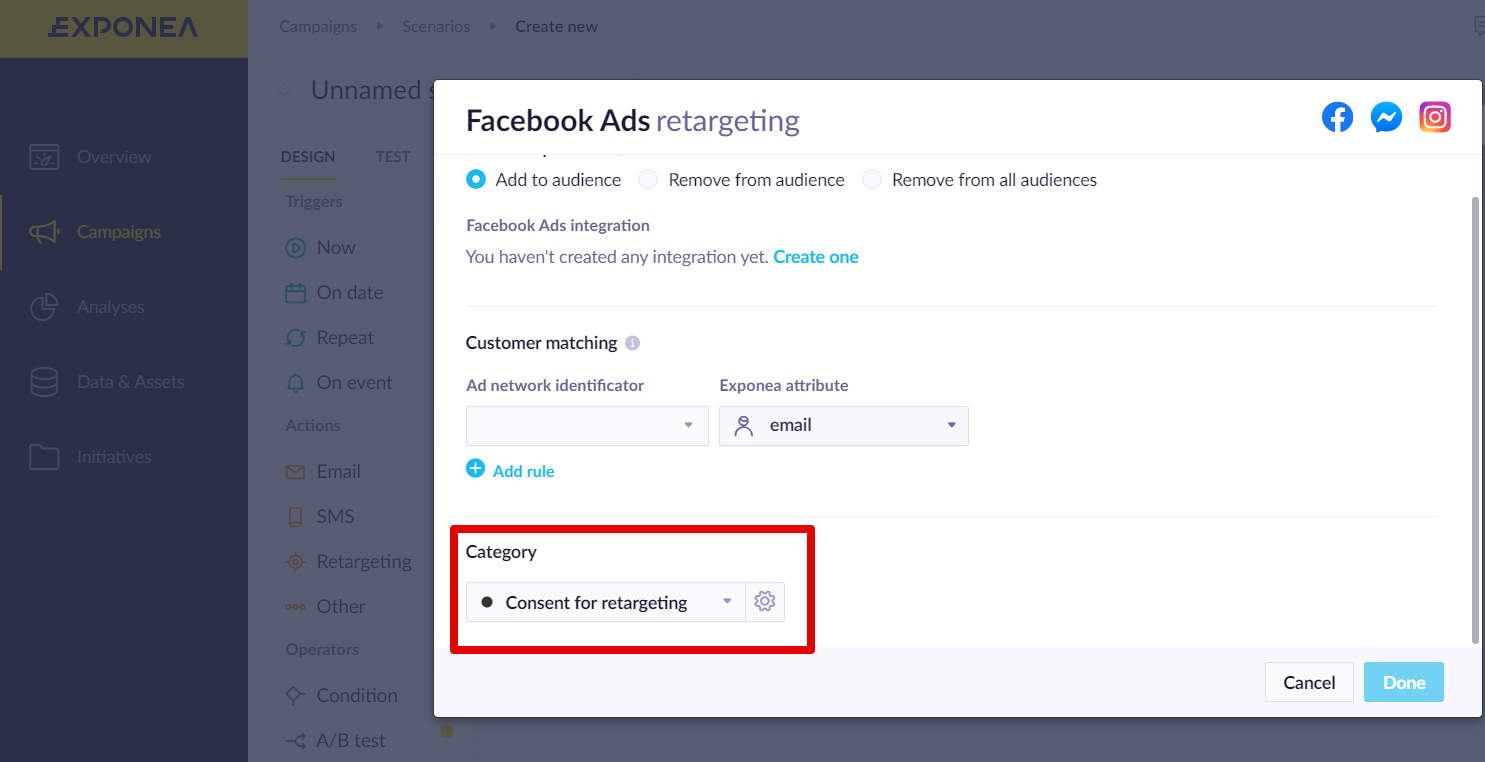
Consent policy settings are part of the retargeting node, which simplifies the design of the retargeting scenarios and ensures that only people with proper consent will be pushed to Google/Facebook Ads audiences.
Set up the FB pixel via Bloomreach Engagement Tag Manager
Step 1: Add the main Facebook pixel
- In Bloomreach Engagement, go to Data & Assets > Tag Manager.
- Create a new Custom HTML tag.
- Copy and paste the Facebook Pixel code from your Facebook Ads account.
- Replace
your-pixel-id-goes-herewith your actual pixel ID in both places.
<!-- Facebook Pixel Code -->
<script>
  !function(f,b,e,v,n,t,s)
  {if(f.fbq)return;n=f.fbq=function(){n.callMethod?
  n.callMethod.apply(n,arguments):n.queue.push(arguments)};
  if(!f._fbq)f._fbq=n;n.push=n;n.loaded=!0;n.version='2.0';
  n.queue=[];t=b.createElement(e);t.async=!0;
  t.src=v;s=b.getElementsByTagName(e)[0];
  s.parentNode.insertBefore(t,s)}(window, document,'script',
  'https://connect.facebook.net/en_US/fbevents.js');
  fbq('init', 'your-pixel-id-goes-here');
  fbq('track', 'PageView');
</script>
<noscript>
  <img height="1" width="1" style="display:none"    src="https://www.facebook.com/tr?id=your-pixel-id-goes-here&ev=PageView&noscript=1"/>
</noscript>
<!-- End Facebook Pixel Code -->
Step 2: Track custom segments
- Add this code as a separate tag:
<script>
{% set score_segment = segmentations['YOUR-SEGMENTATION-ID-HERE'] | string  %}
  fbq('trackCustom', 'addToSegment', {
    segment_name: '{{ score_segment | string }}'
  });
</script>
- Replace
YOUR-SEGMENTATION-ID-HEREwith your actual segmentation ID. - Make sure this custom tag has lower priority than the main Facebook pixel.
![]()
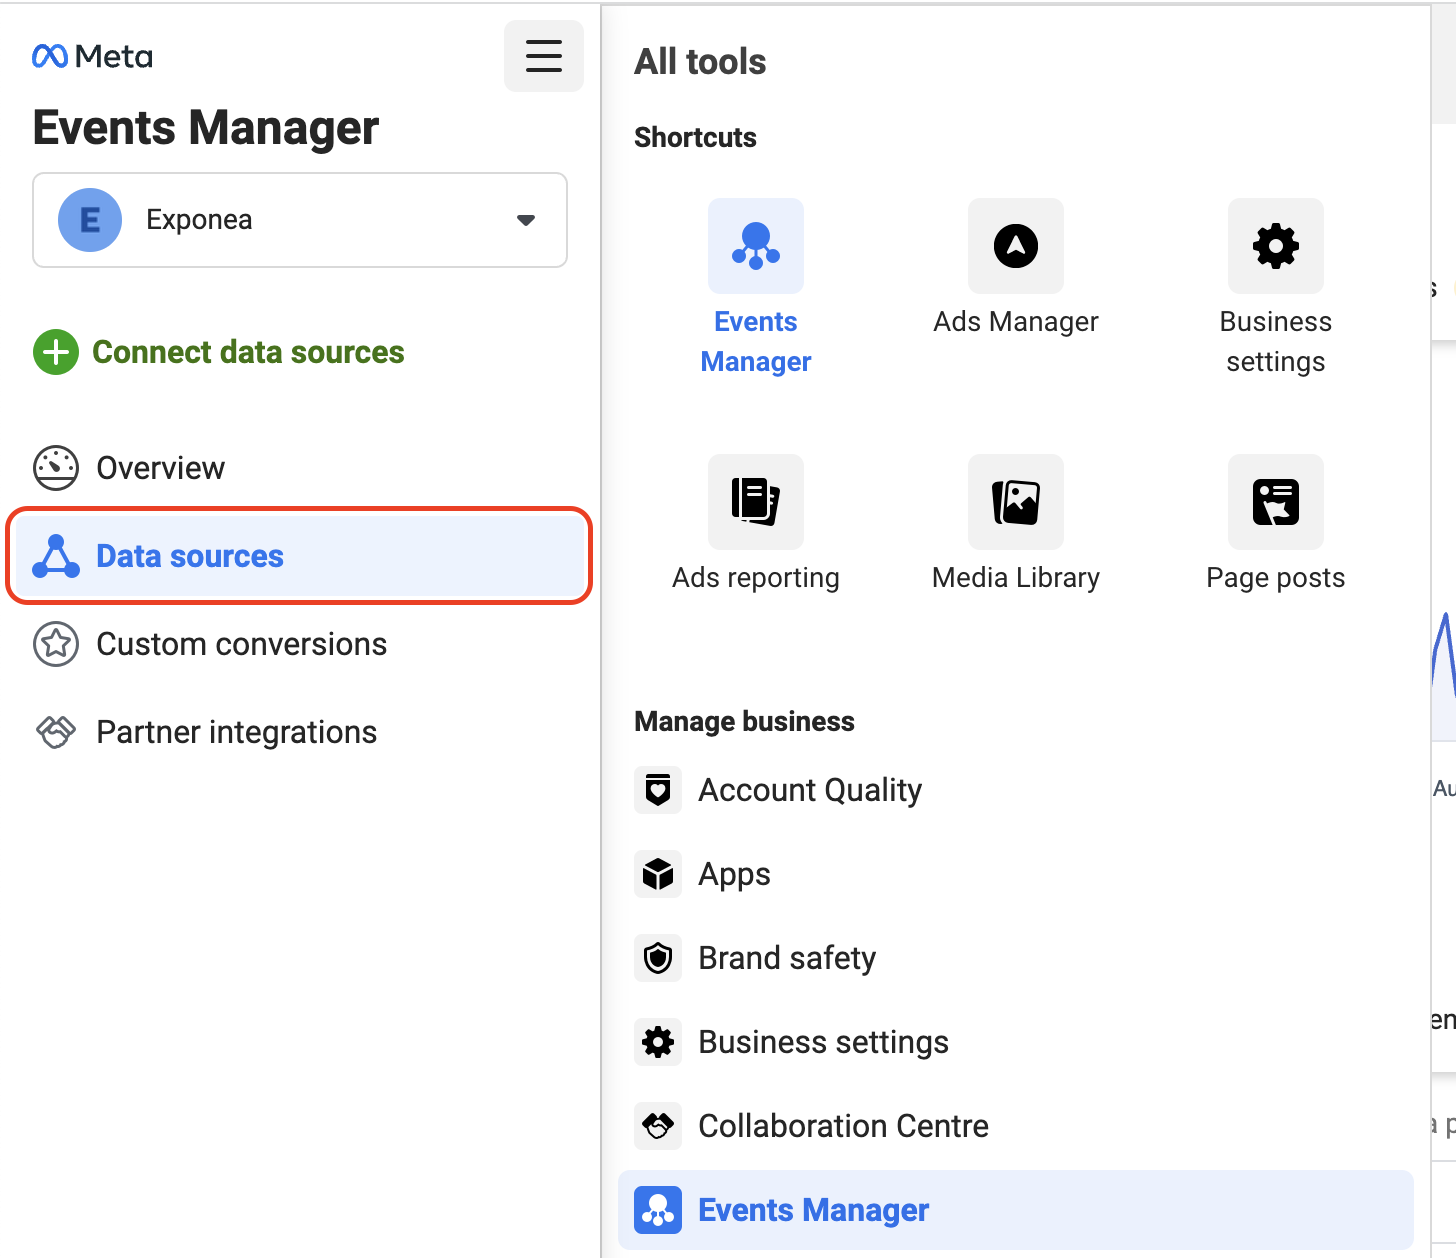
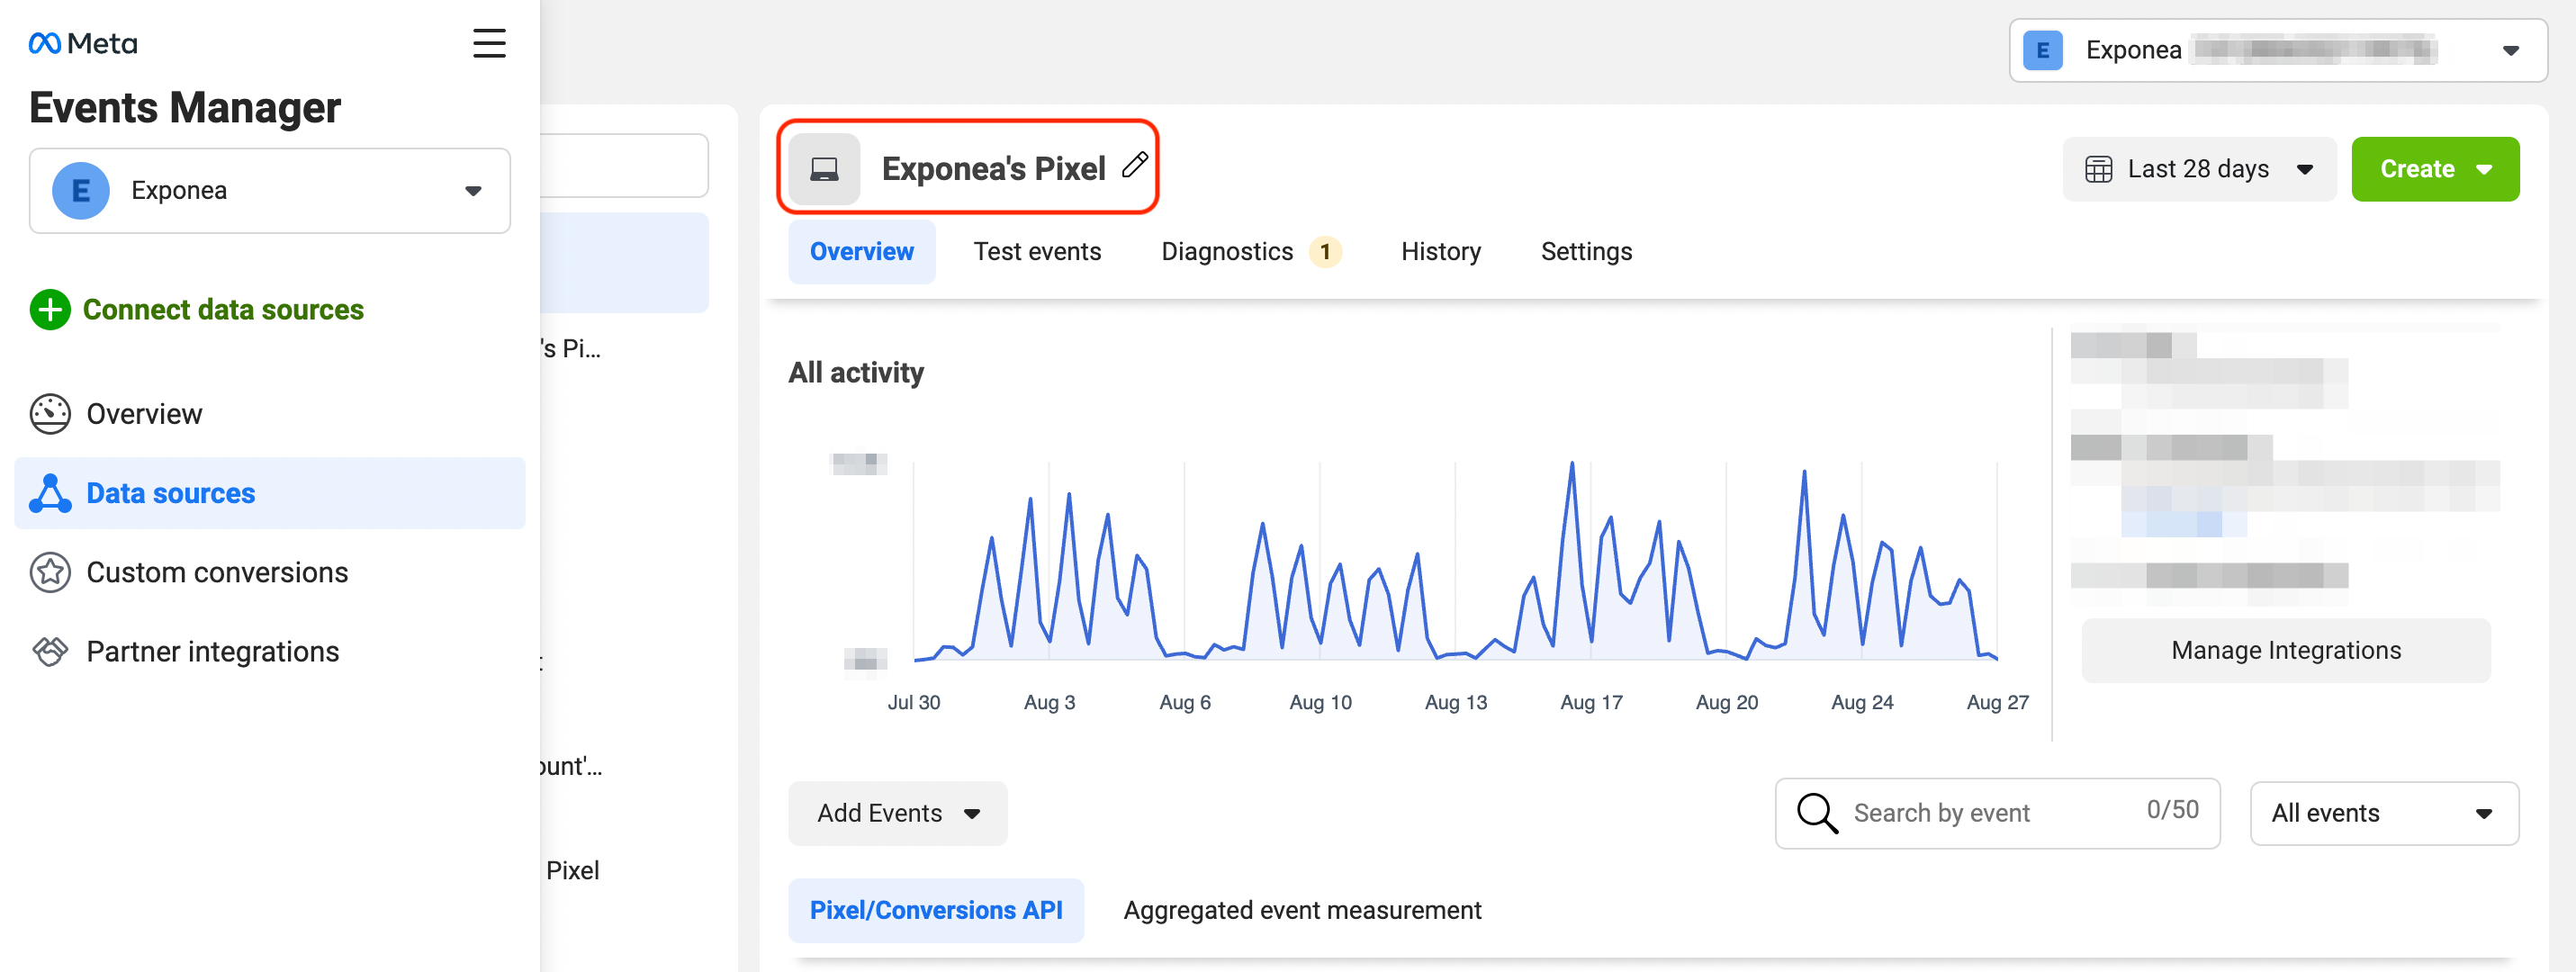
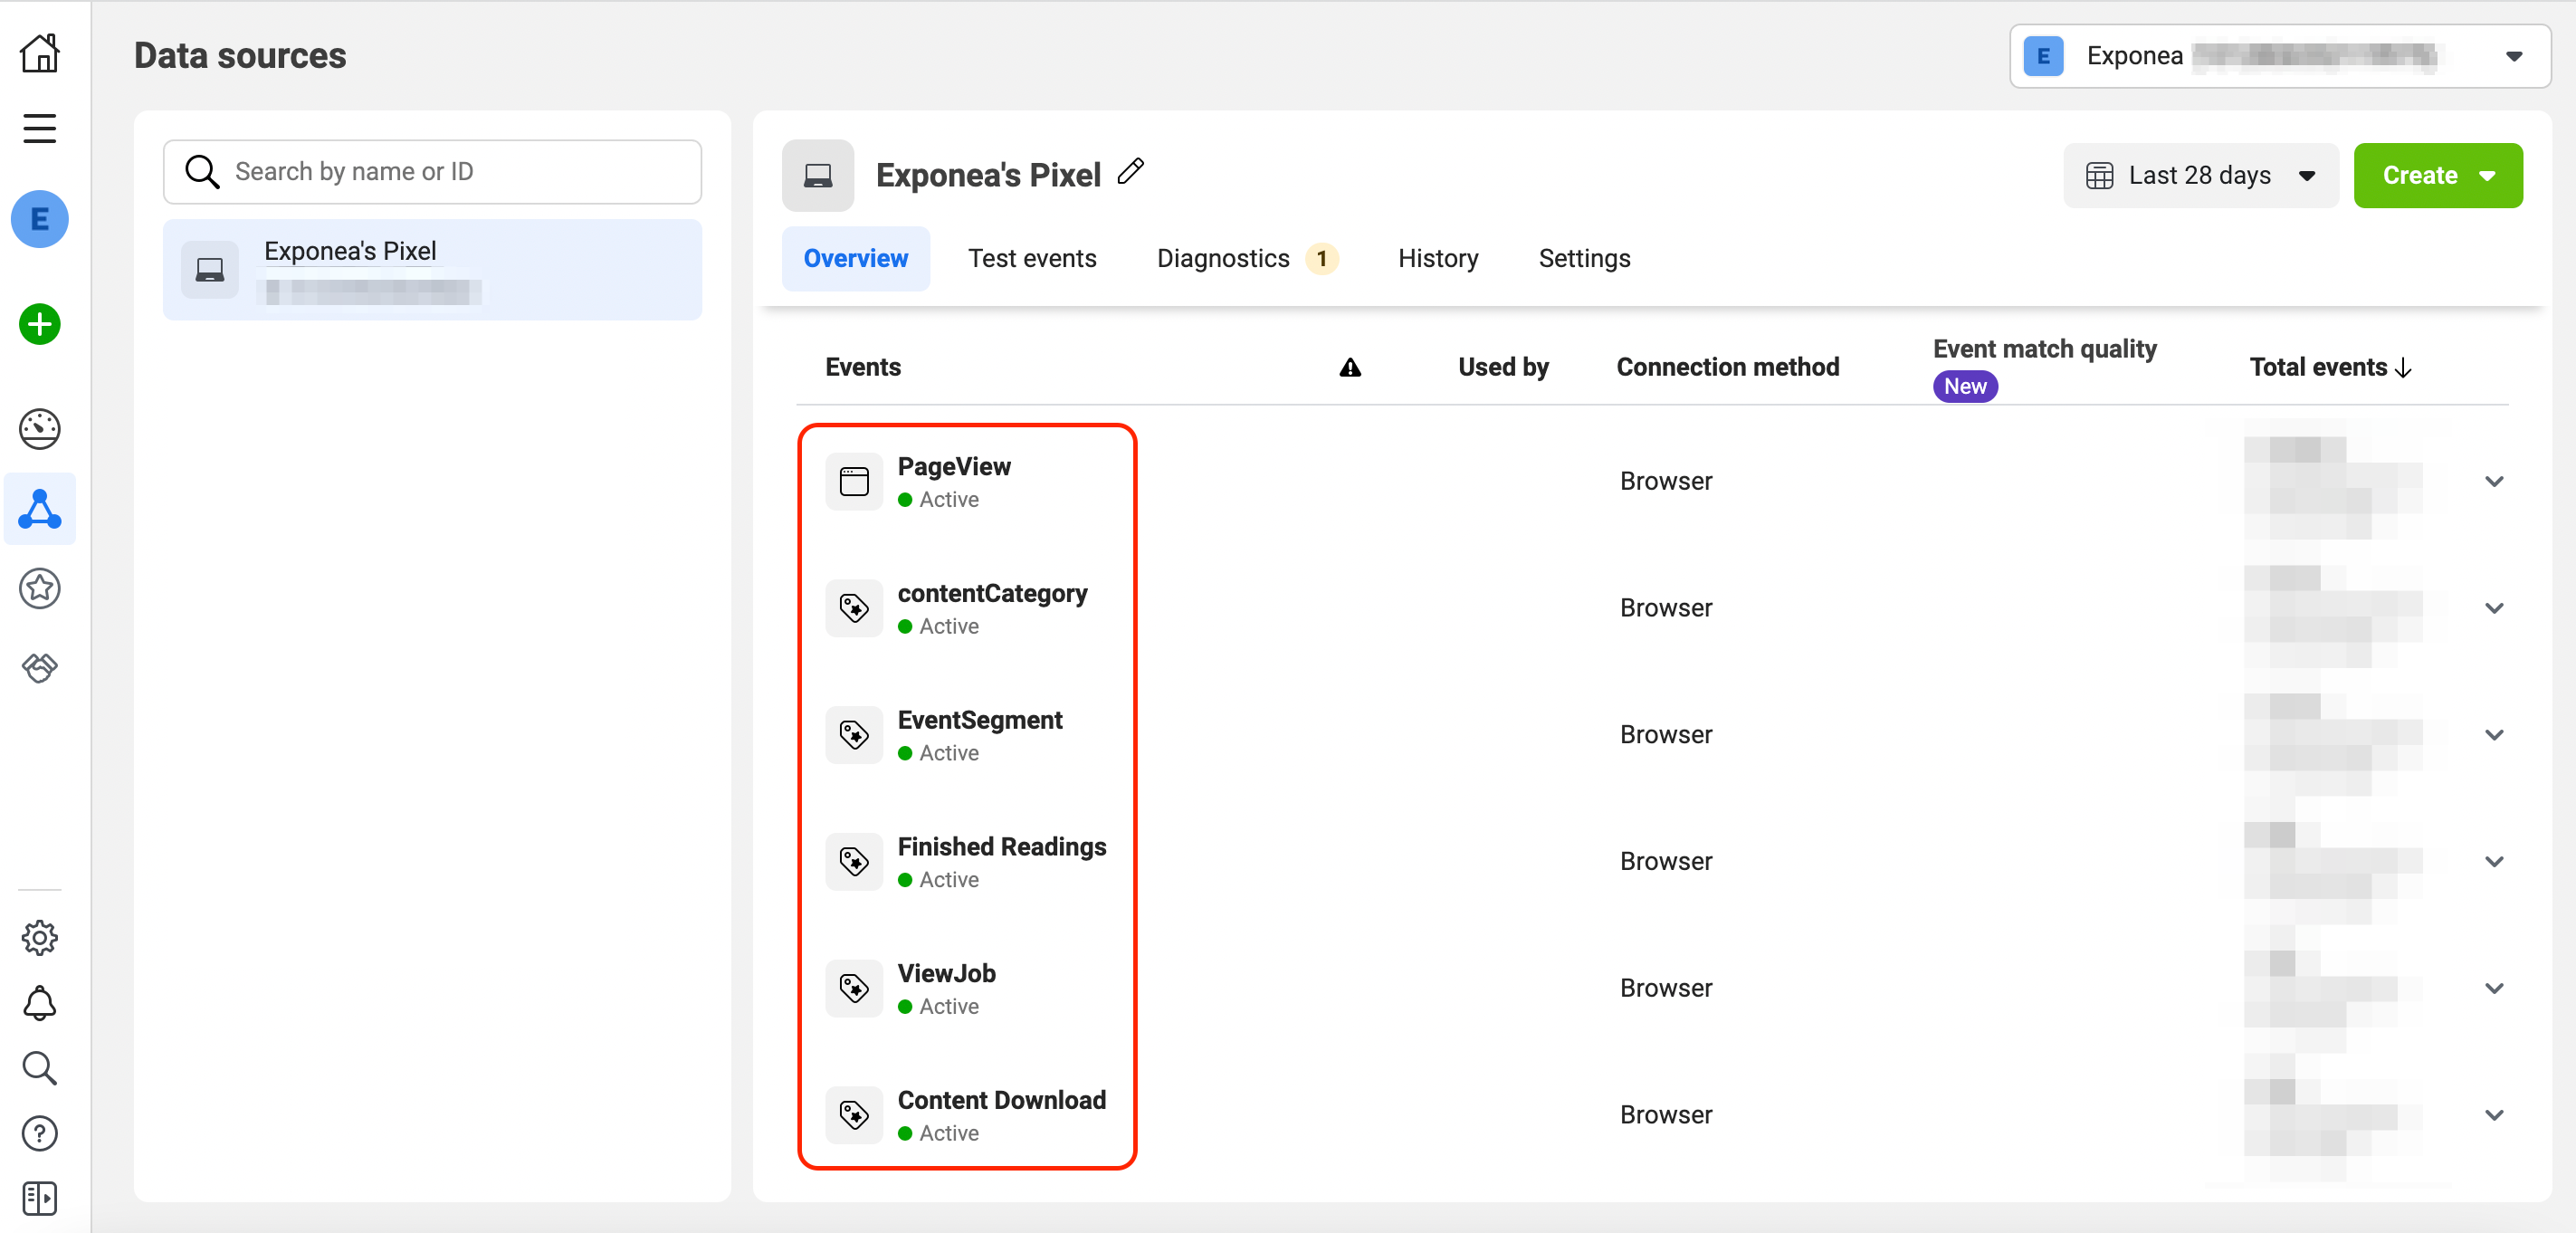
- Check your new event on your Facebook Ads account
Important considerations
Data tracking and consent
- Retargeting nodes automatically track campaign events.
- Consent policy settings are built into retargeting nodes.
- Only people with proper consent get added to Facebook audiences.
Data retention
- Facebook audiences created through Bloomreach Engagement don't expire (they last forever).
- Manually created Facebook audiences might have different retention periods.
Attribution differences
Facebook Ads uses different attribution models than Bloomreach Engagement. Your Facebook advertising data might not match Bloomreach Engagement data exactly.
Audience size in Meta
When you use multiple identifiers (like email and phone), Meta won't show the estimated audience size. This doesn't affect your ability to use the audience for targeting.
Related resources
For more detailed information, check our documentation about:
Updated 3 months ago
