AB Testing using Bloomreach Engagement
This guide outlines the flow to configure an AB Test for the Segmented search feature using Bloomreach Engagement.
You may have use cases where you’d like to test the performance of any segmentation for a subset of site viewers using the AB Testing capability in Bloomreach Engagement. The following workflow illustrates the components you’ll need to configure for the AB Test.
1. Create a Scenario for the AB Testing
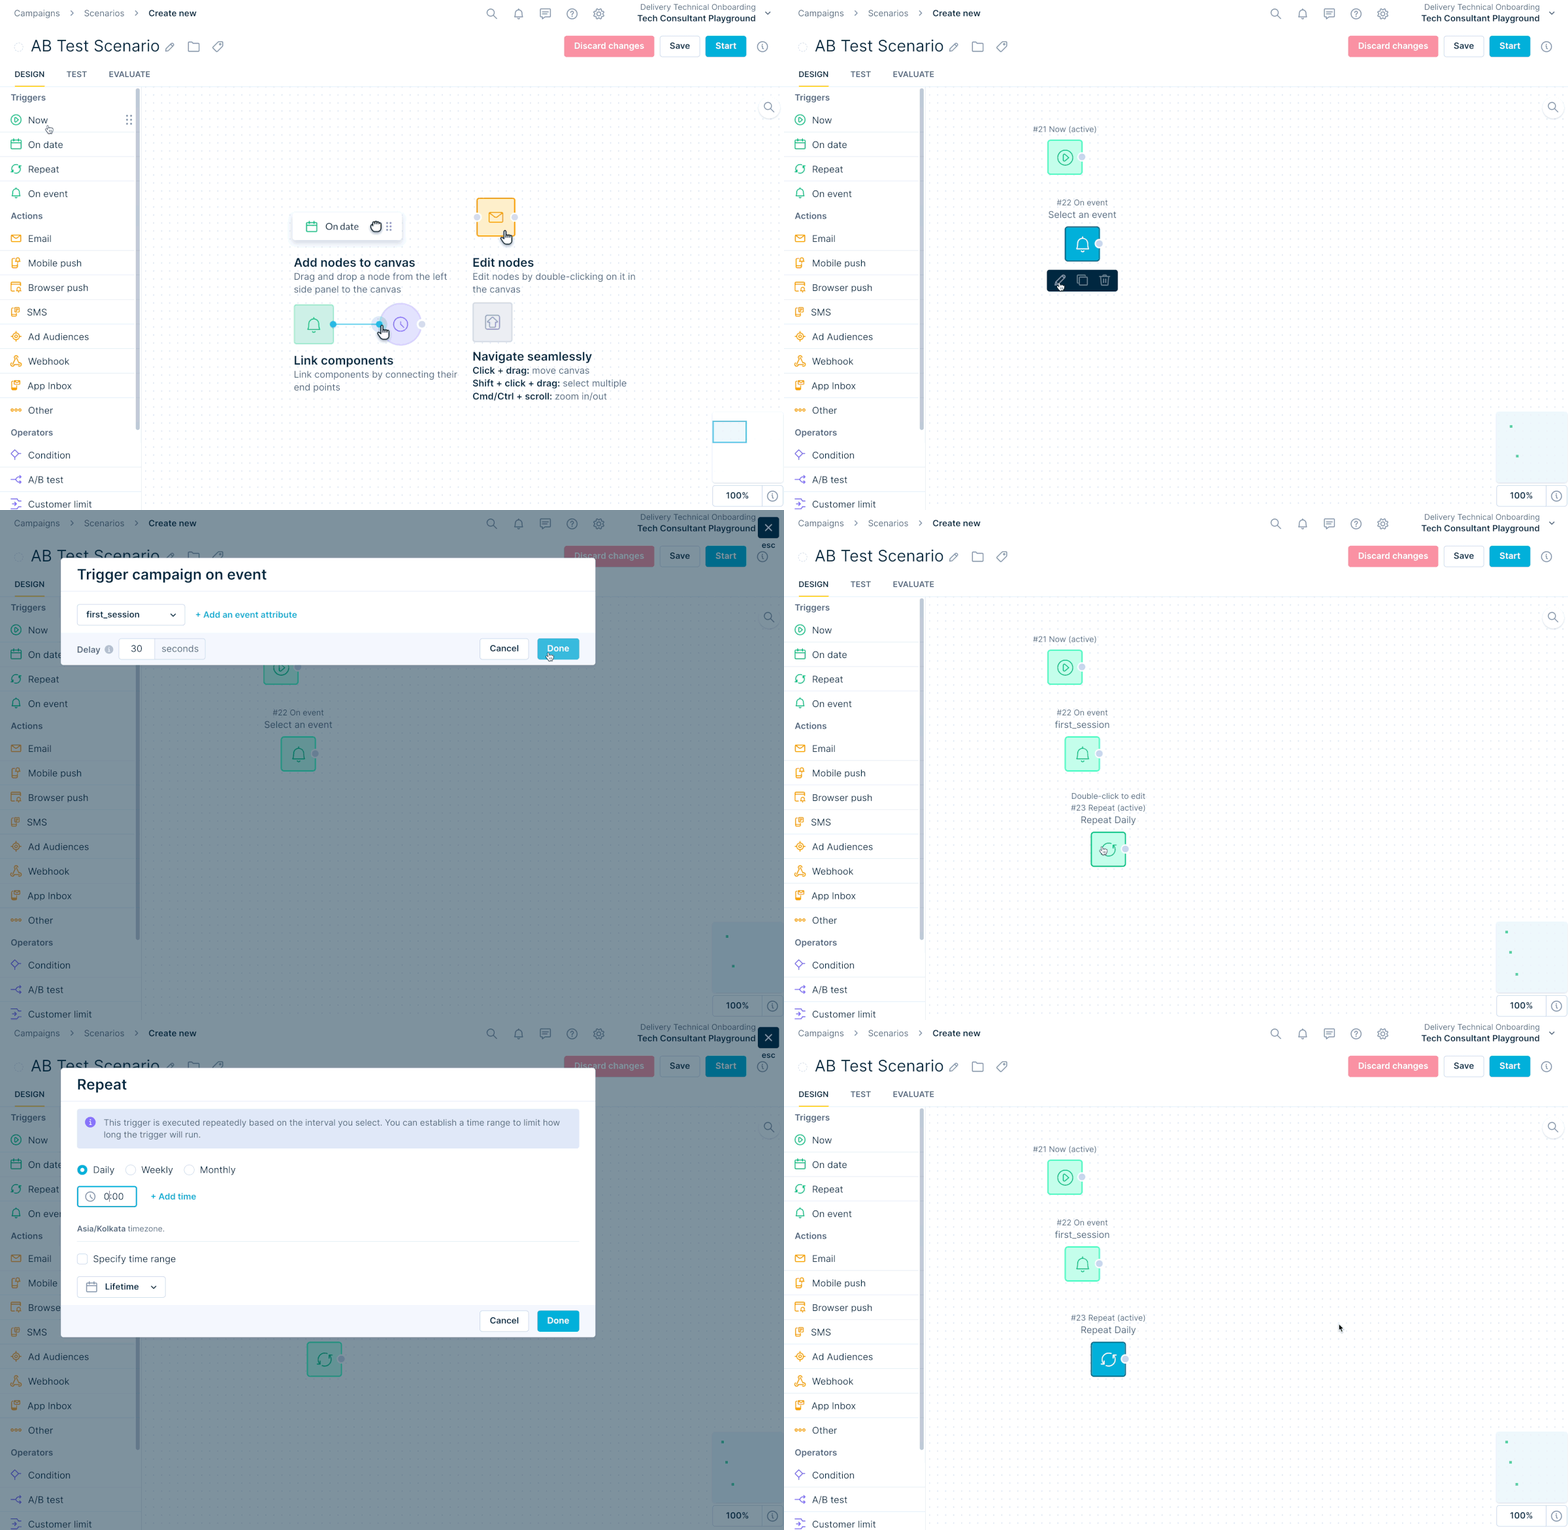
Scenario allows you to define a flow for your AB Test and customize the experience for specific customer groups. To create the scenario, follow the steps below:
- In the Engagement dashboard, open the scenario editor by going to
Campaigns>Scenarios>+ Create new. - Now create a scenario with the following components:
| Component | Purpose and example configuration |
|---|---|
| Triggers |
 |
| Operators |
2. Create the Source and AB Split Segmentations
We need the Source segmentation to specify the customer segments and the AB split segmentation to define the test variants. Later, both these segmentations will be used to build the Testing buckets.
The following is just an example of the segmentations that we built. You can create your own segmentations for the AB Test.
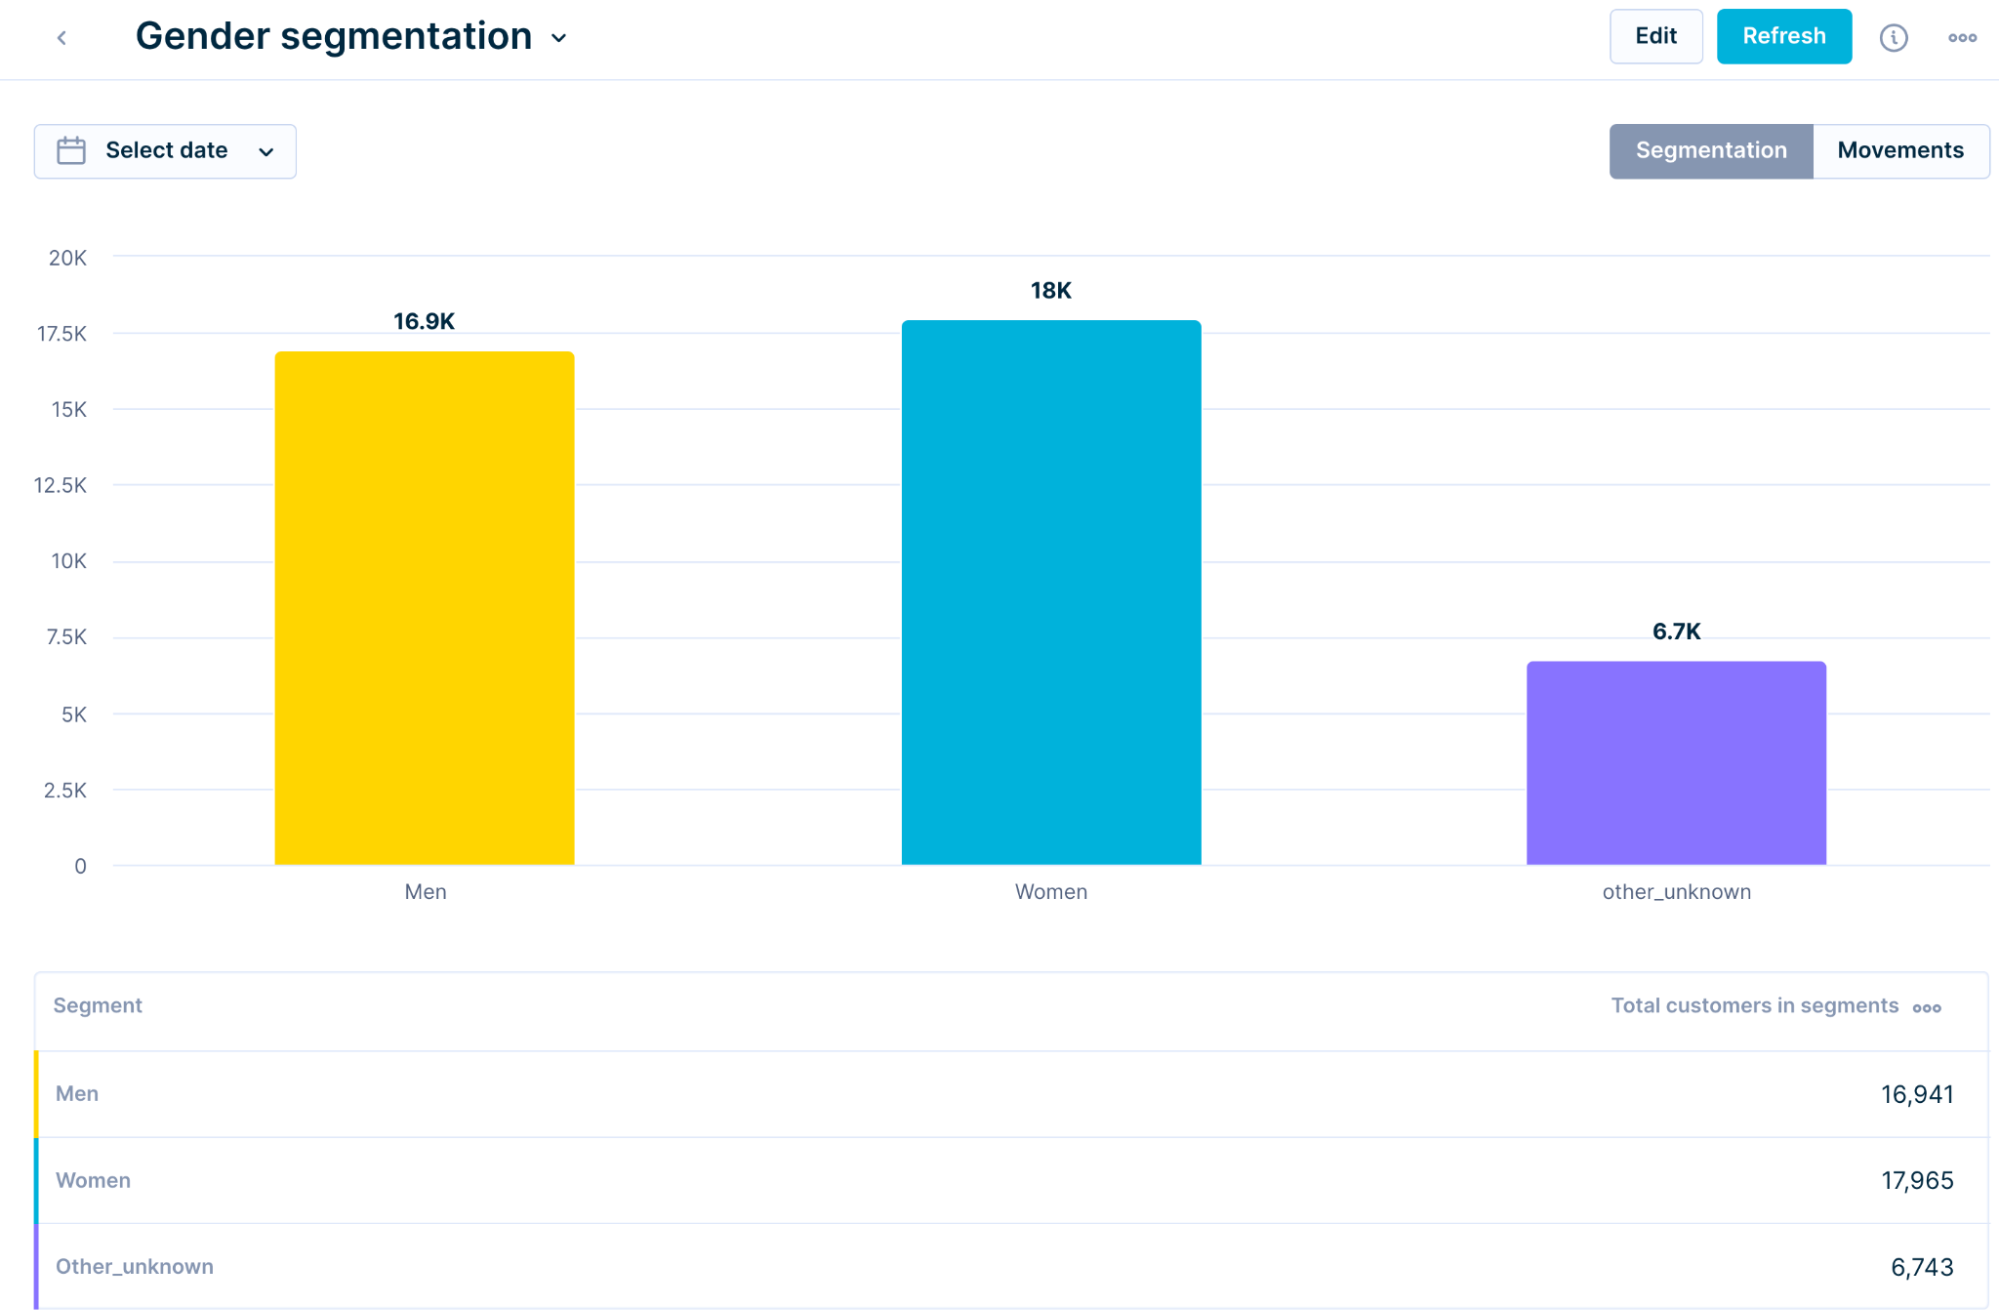
Source Segmentation
This segmentation determines which segments are applied to the search results for better targeting. In this example, we use the customer segments Male, Female, and Other.
AB Split Segmentation
This segmentation divides the traffic into 3 groups, namely Target and Control segments. This uses the Scenario we built earlier.
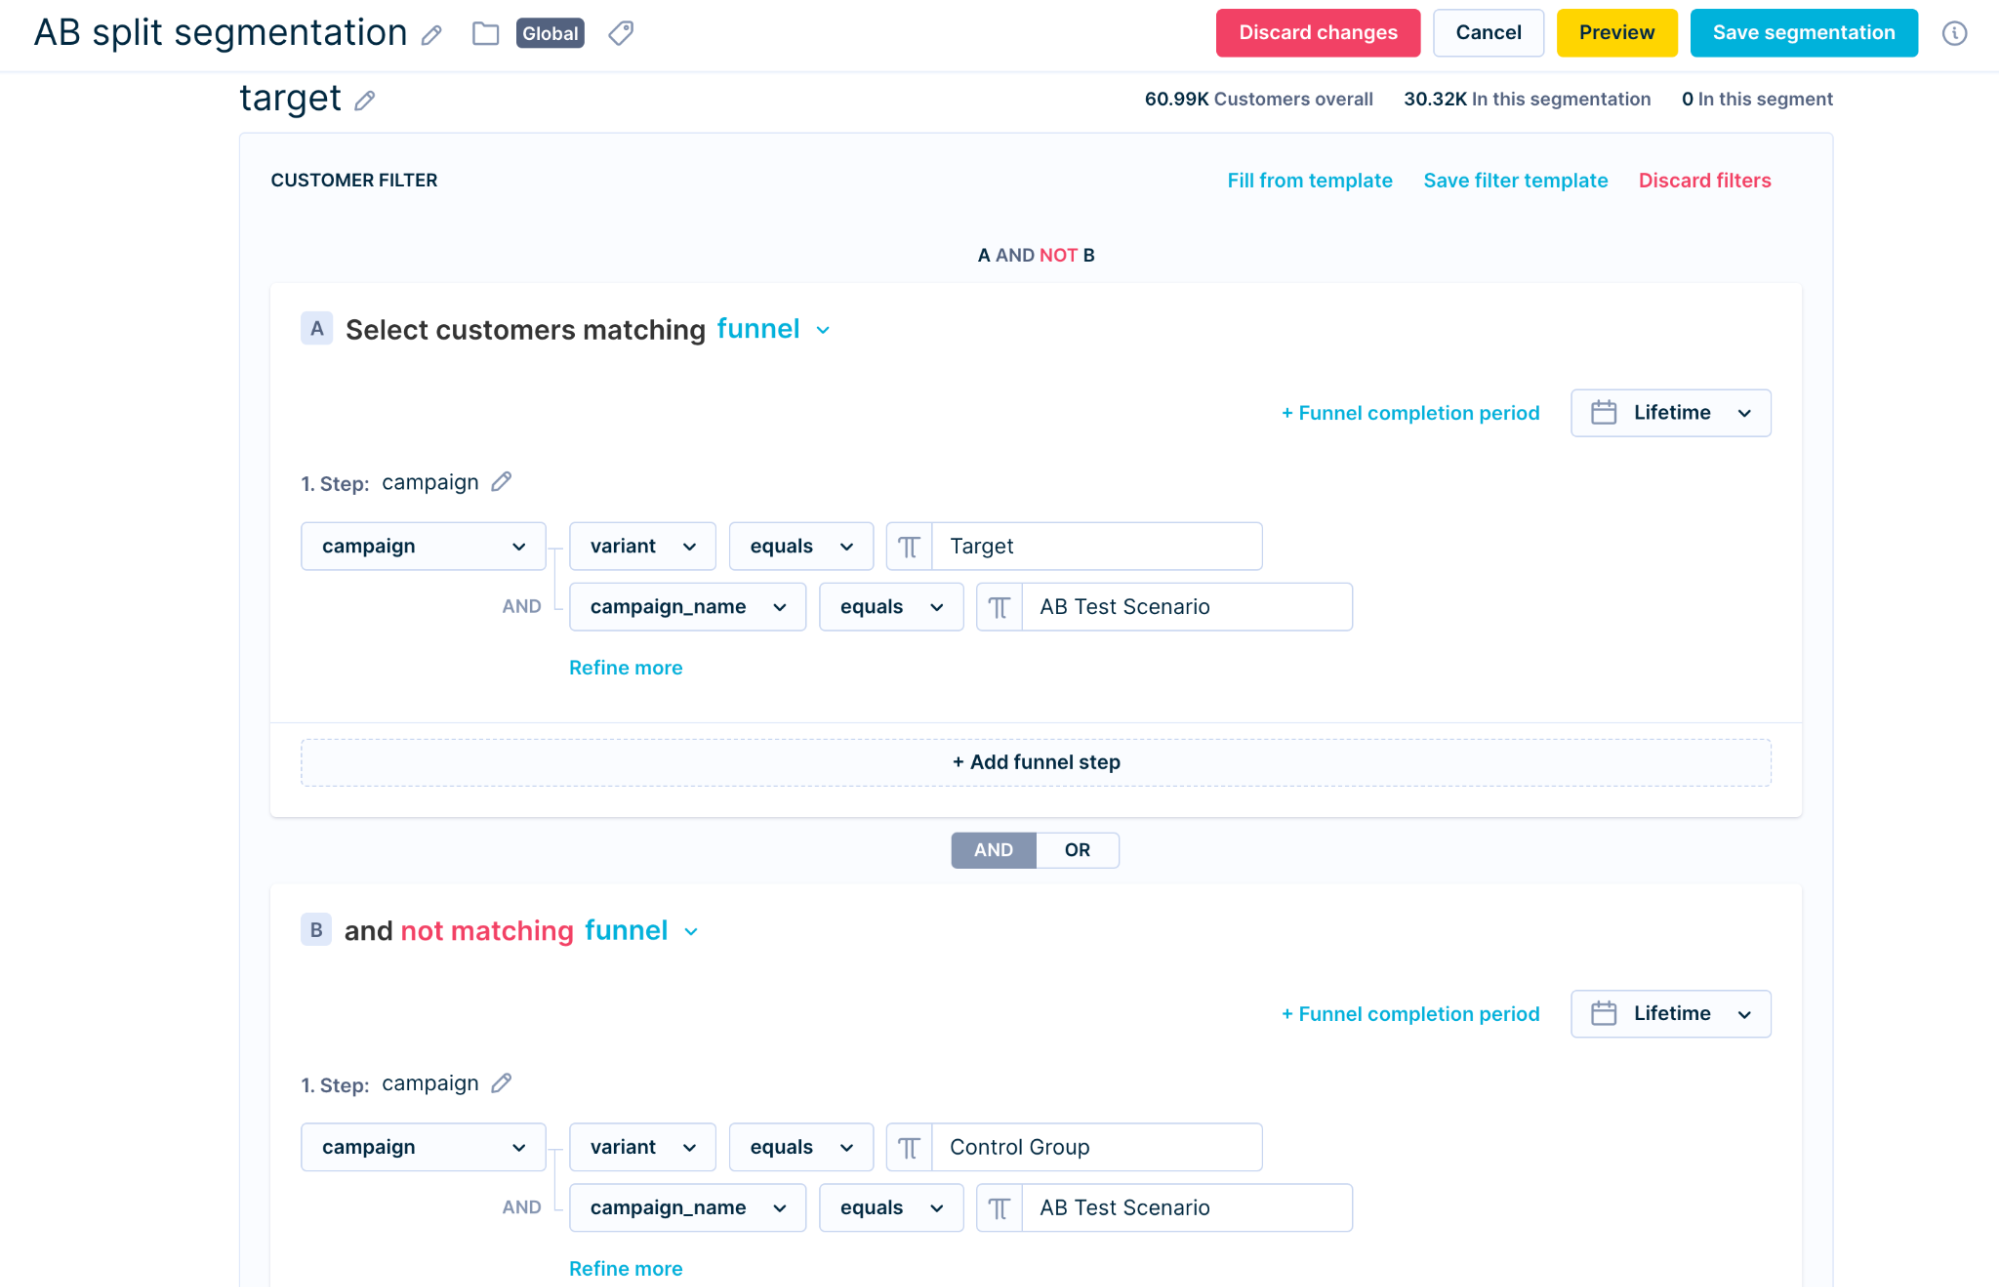
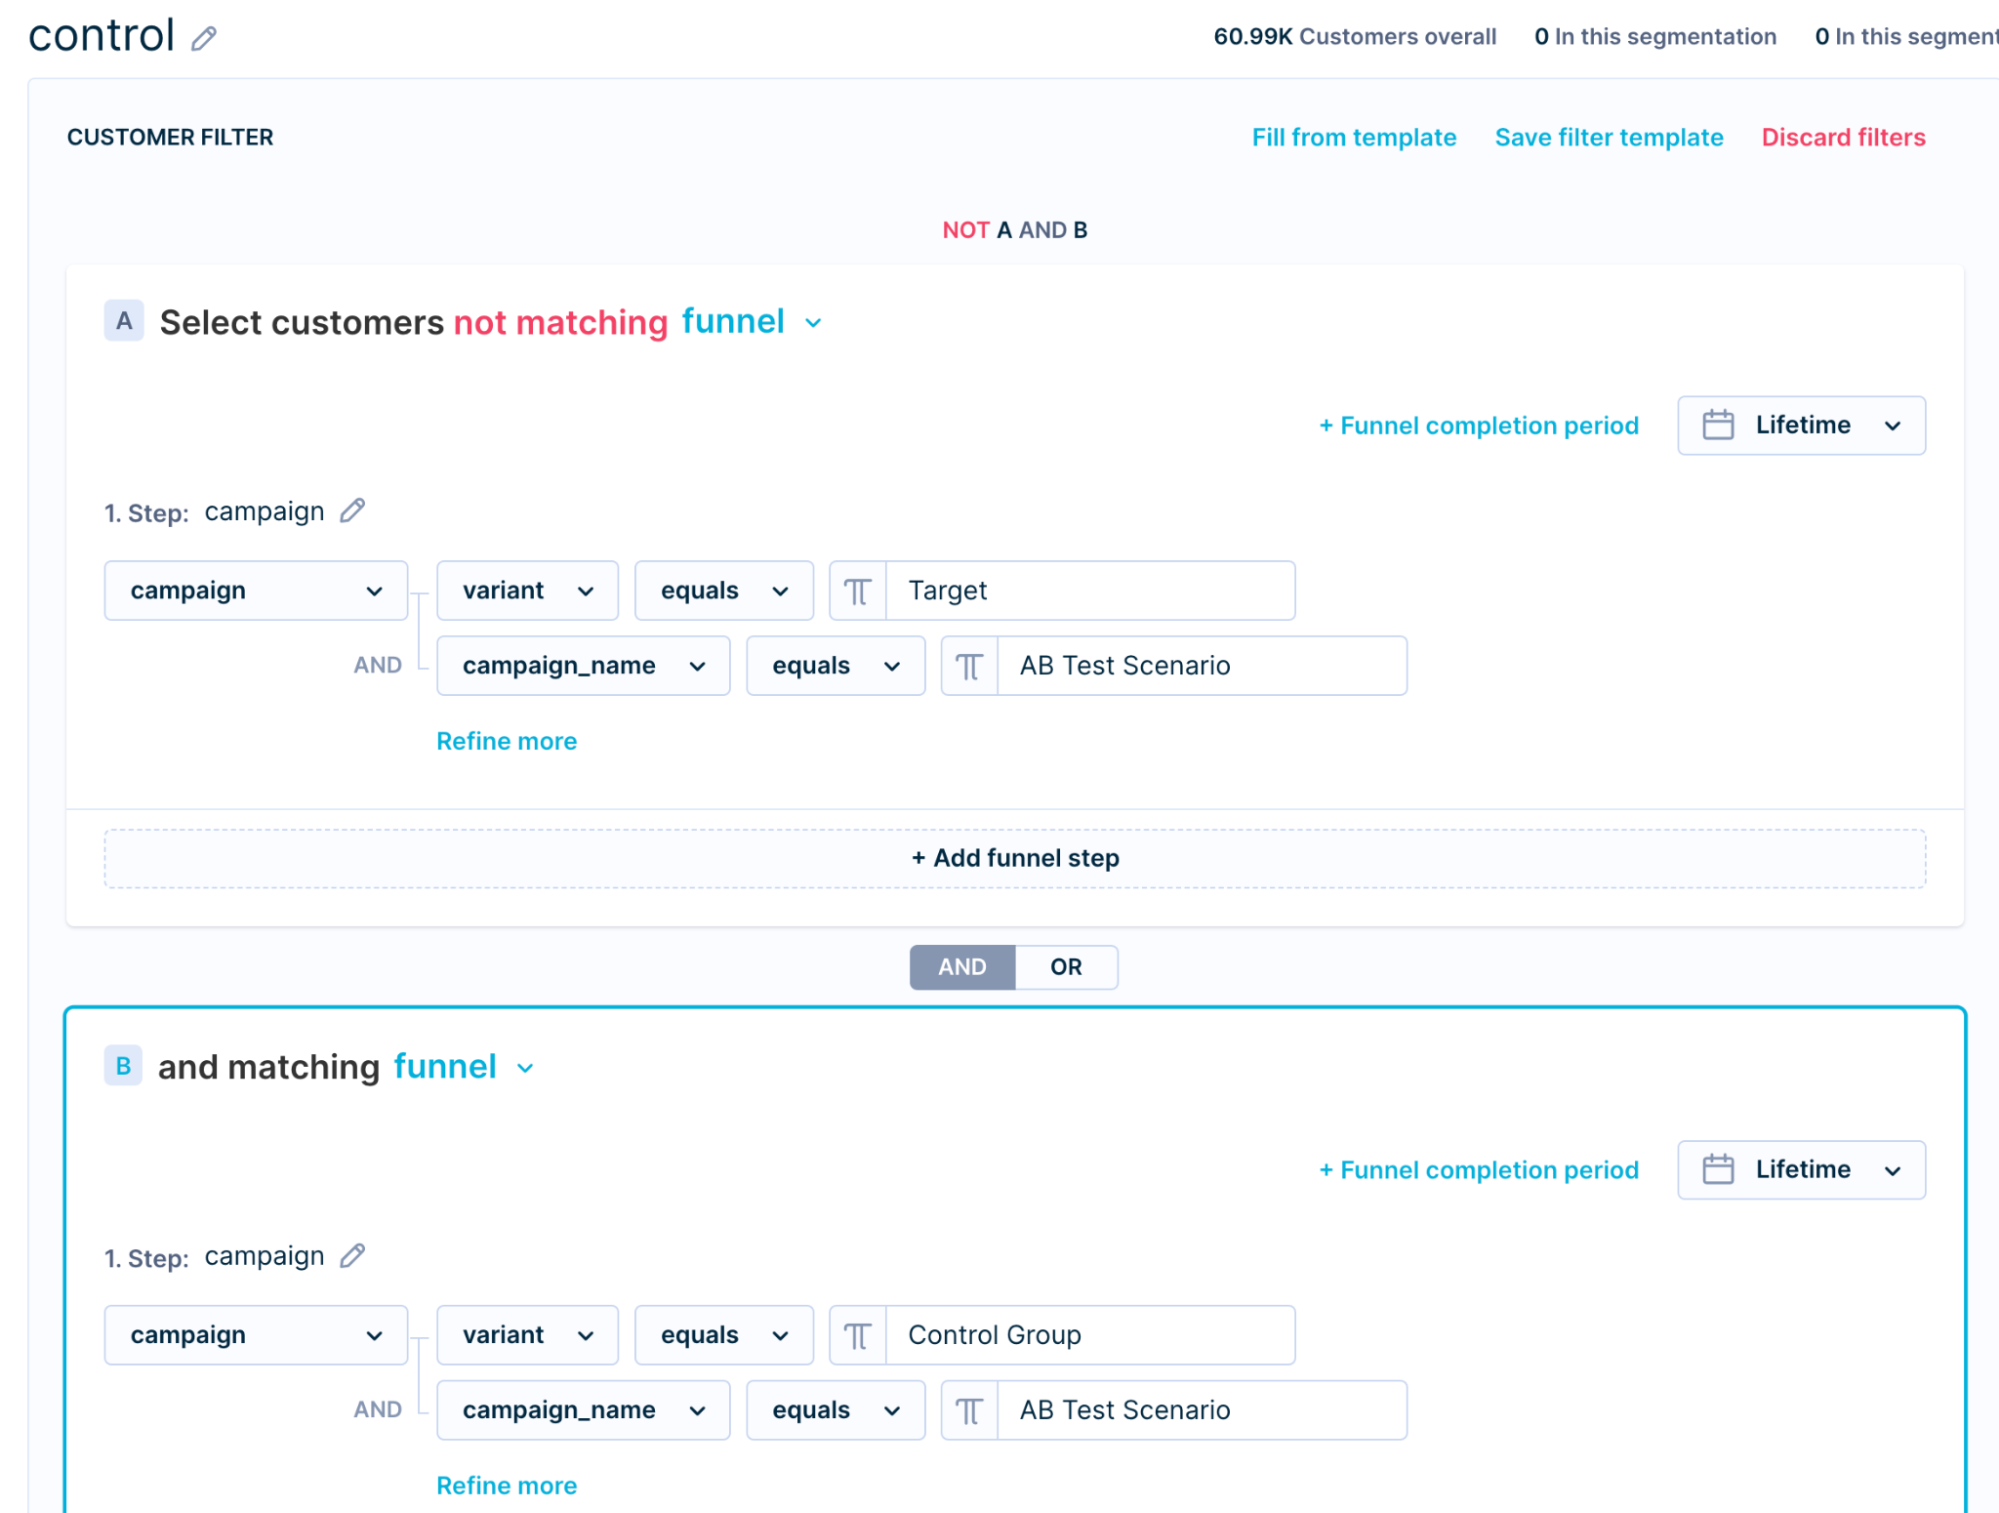
Refer to the visuals below to understand the configuration of the Target, Control, and Mixed segments using the AB Testing Scenario.
- Target segment: This segment pulls in the users belonging to the target group and filters out the control group users.
- Control segment: This segment pulls in the users belonging to the control group and filters out the target group users.
3. Configure the Test Buckets - Superset & Subset Segmentations
To ensure a reliable test, we divide the customers into two groups: the Superset and the Subset. The Superset group acts as a reference point for comparison, while the Subset represents the specific target group we want to focus on and analyze in the test.
The Superset group will receive the default experience, while the Subset group will receive the search experience with segmented search results. Read below to learn how to configure both of these segmentations.
Superset segmentation
This segmentation will act as a baseline for the test. The segments are derived from the previously created Source segmentation.
In this example, we created a Gender superset segmentation using the source Gender segmentation.
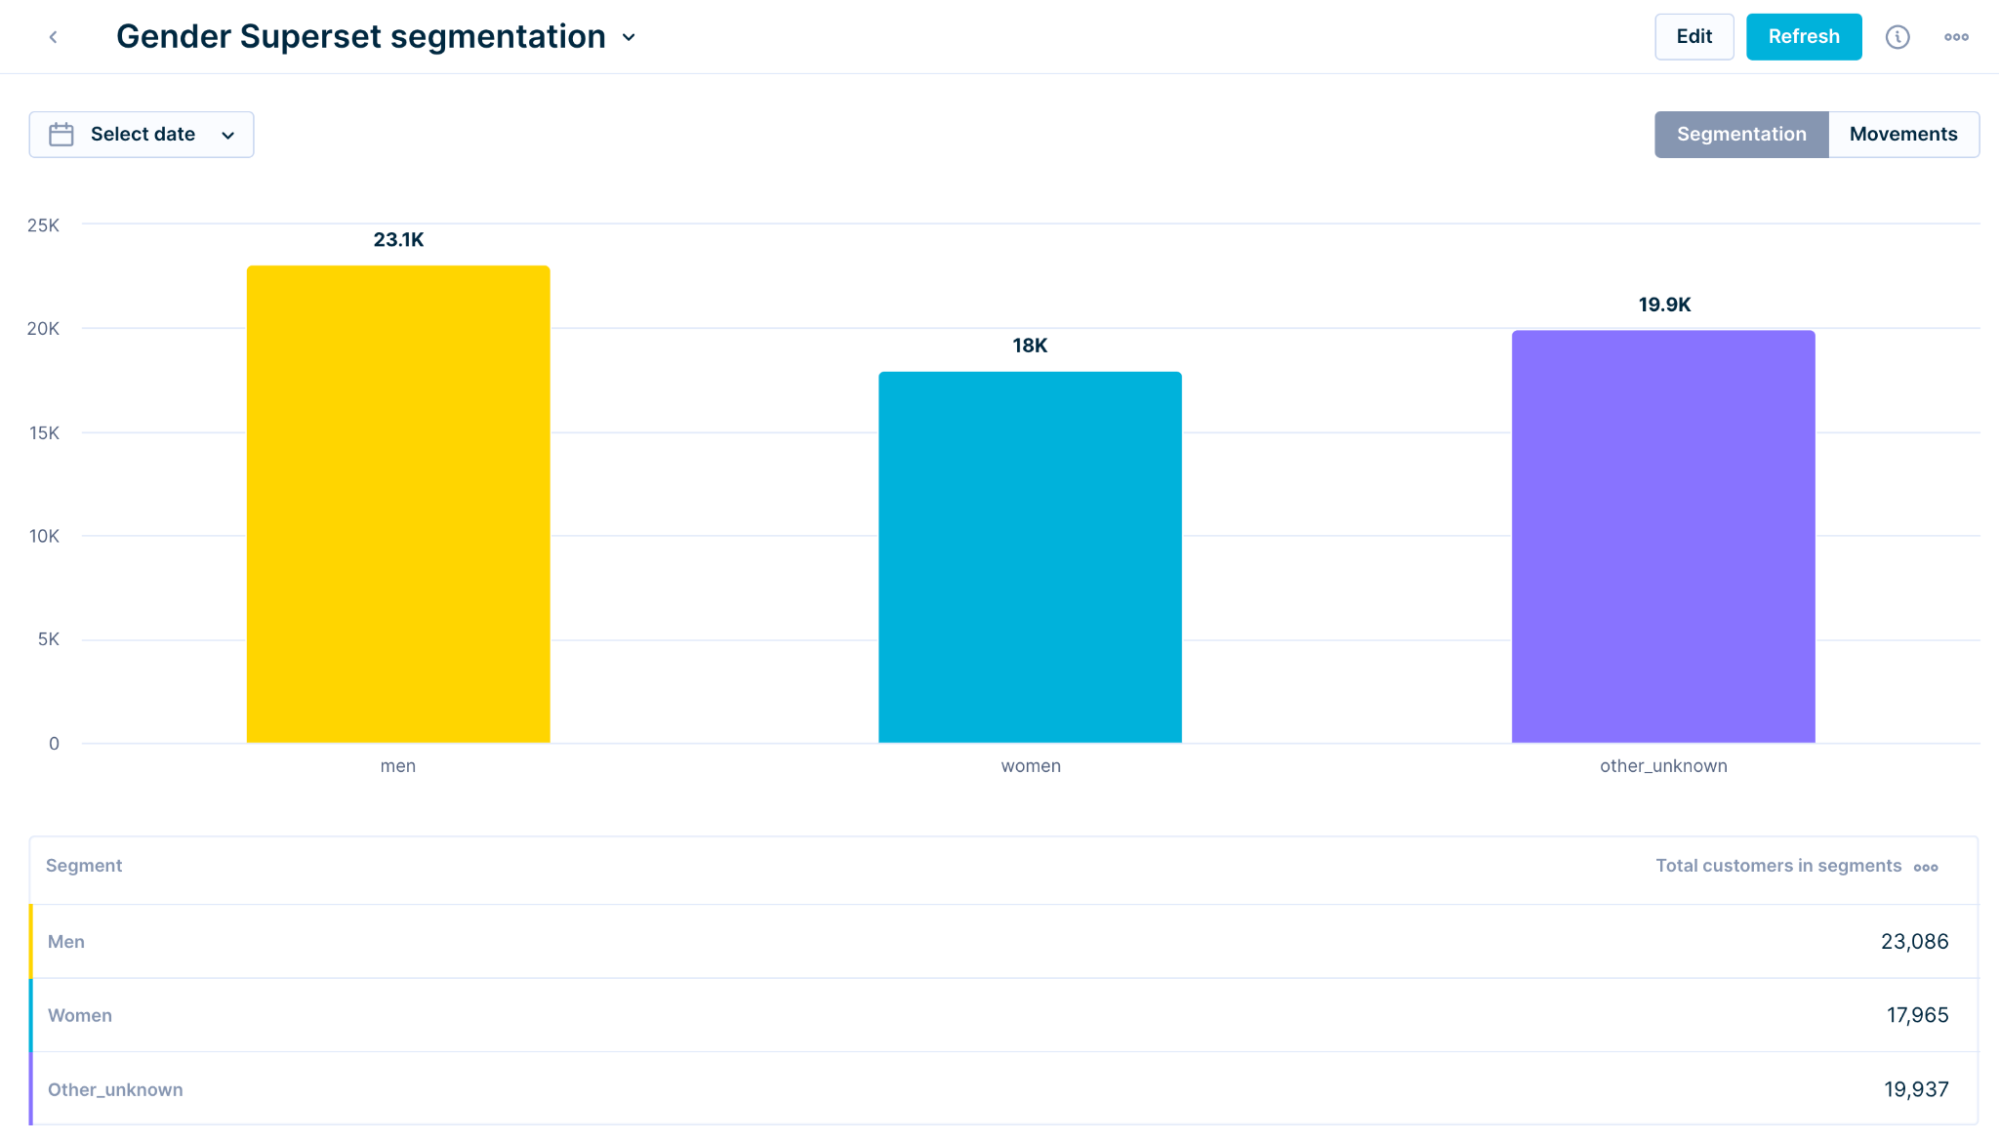
The visual below illustrates the configuration of the Men segment. Other segments can be configured similarly.

Subset segmentation
This segmentation targets a portion of the customer segments. Customers in this group will see tailored search results based on their segment.
In this example, we are targeting Gender groups; hence we created a Gender subset segmentation.
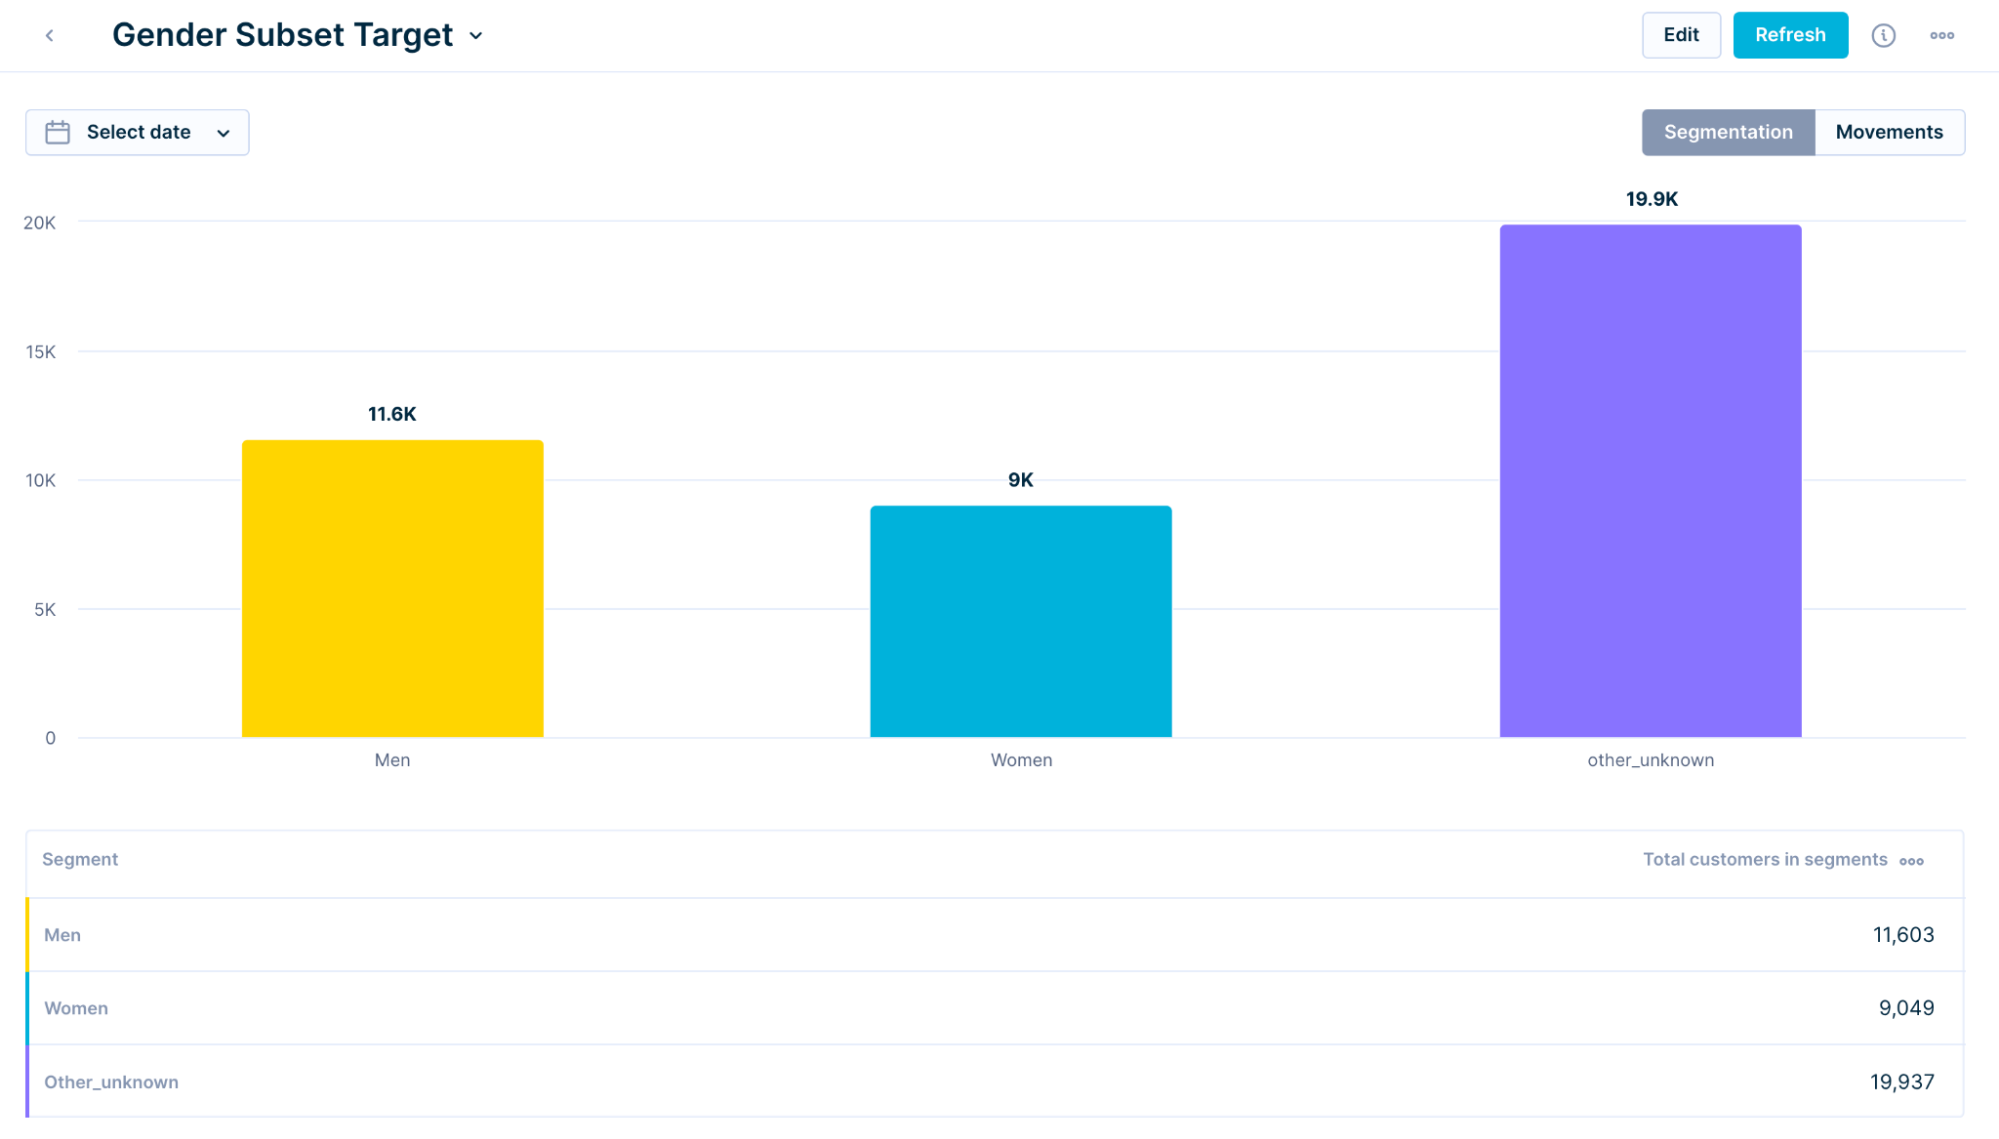
The visual below illustrates the configuration of the Men segment. Other segments can be configured similarly.
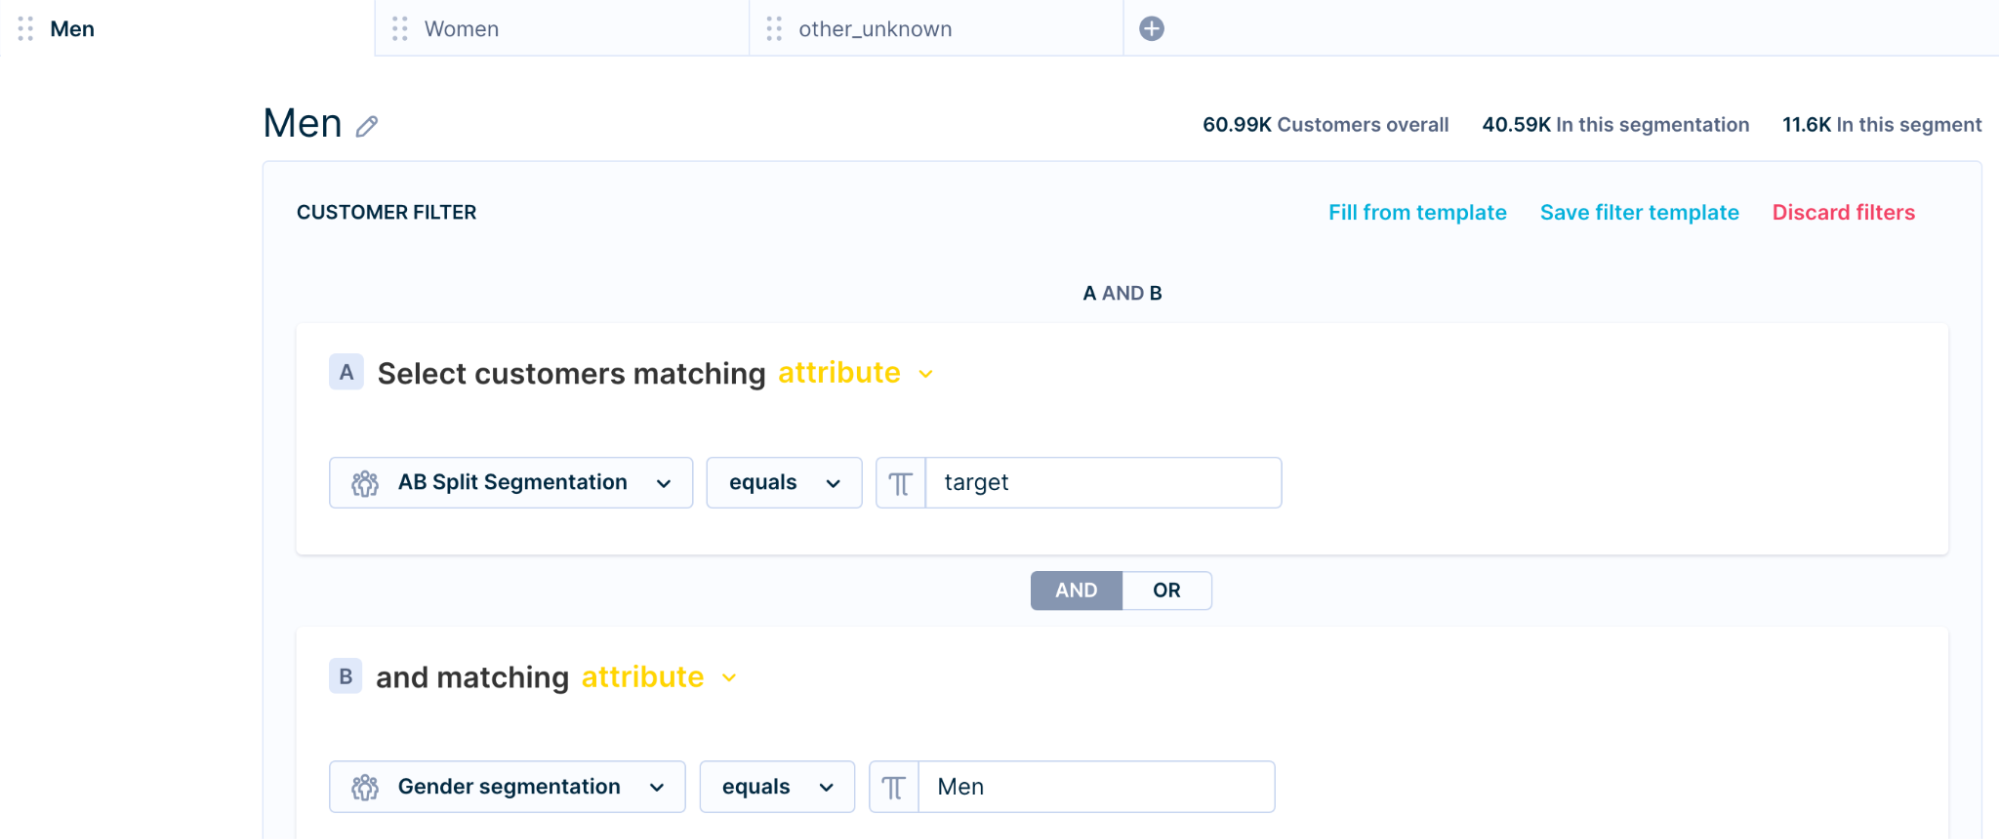
Once you’ve created the Superset and Subset segmentation, expose both of these segmentations to Bloomreach Discovery. After completing the data Training & algorithm-building phase, the segmentations will be available for AB Testing.
Updated 5 months ago
