

Widget Configurator
The Widget Configurator is a functionality within the Bloomreach Dashboard that allows you to create and manage the Recommendations and Pathways widgets easily. Some of the operations possible with the Widget Configurator are:
- Create a Widget
- Manage a Widget
- Delete a Widget
- Change the Widget Type
Create a Widget
You can create a widget for Recommendations and Pathways from the Dashboard by following the steps given below. Creating a widget is an important step in the widget integration process. When you create a widget, you can create Widget Global Merchandising Rules. You can further create and apply widget query-level rules as well. You can read more about Merchandising for Recommendations and Pathways in the Merchandising sub-section.
Create Widget in Staging
When you first create a widget, perform this step in your staging Dashboard to test it in your staging environment. You can recreate this widget in your production environment later. Remember that when you recreate this in production, the widget ID will be different since you originally added the widget in staging.
1. Navigation
- Log in to the Bloomreach Dashboard. For EMEA customers, use https://eu.search.bloomreach.com
- Go to Recommendations > Widget Configurator

- Click on + New widget
2. Specify Widget info

Configure the following details in the Widget Basic Info screen:
- Widget Name: A friendly name for the widget that will be used in the Dashboard.
- Widget Description: An optional description that helps you add more details on the widget use case.
- Primary Algorithm: Select the type of algorithm that you want the widget to use. You can select from the following options:

- Secondary Algorithm: Select the alternate algorithm you want the widget to use if there isn't sufficient data for the primary algorithm. The secondary algorithm cannot be defined for Pathways widgets. To read about which secondary algorithm selection is allowed, go to the Secondary Algorithm Selection page.
- Result Size: The minimum number of products you want the widgets to display. The default number is 10. This also acts as the threshold to display the Secondary widget.
- FL list: The list of product attributes to return for each product displayed in the widget. You can select attributes such as Brand, Category, Price, Sale Price, Size, Style, etc. This is the exact data returned by the API.
- Copy Configurations: When creating a widget, you can choose to copy configurations (widget global ranking and widget query rules) from an existing widget. This is a one-time-only operation.
Click Next Step to proceed.
3. Apply widget merchandising operations
You can now apply the global merchandising rule for the widget as described in the Recommendations and Pathways Merchandising page.

NoteOnly Product level attributes set as displayable can be used for merchandising Recommendations.
Numeric attribute rules
You can apply attribute rules using numeric attributes such as price, weight, sale price, and so on.

Go to Attribute > Create New Attribute Rule to view the Numeric Attribute operations
Boost and Bury operations on Numeric Attributes
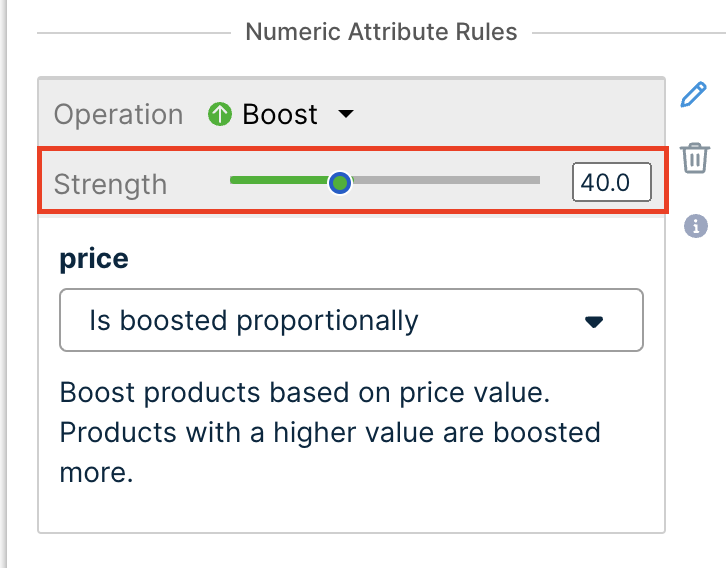
Boost
-
Drag the Strength slider to set the boost strength and move products closer to the top of the results.
-
Specify the condition that the attribute value must satisfy.
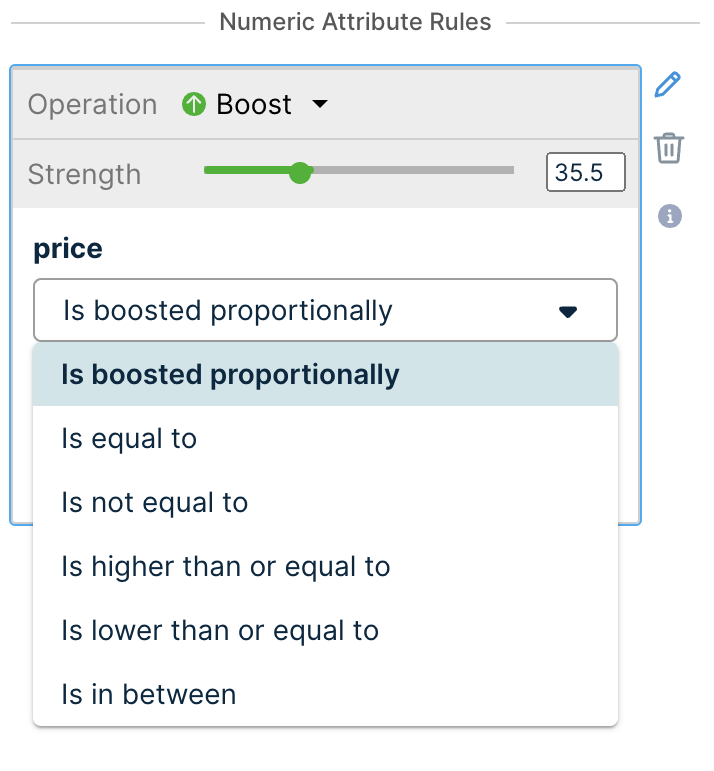
The condition can be one of the following:
- Boost proportionally to attribute value
Products with higher attribute values get a bigger boost. Imagine you boost the numeric attribute price by a factor of 40. Then, products with a higher price will receive a greater boost than those with a lower price, assuming all other factors remain the same. So, with the boost factor 40, a product with a price of "60" will receive a larger boost than a product priced "20".
Note: This condition functions in the same way as the previously supported Sort function. - Equal to a value
- Not equal to a value
- Higher than or equal to a value
- Lower than or equal to a value
- In between a range
Only products that satisfy the attribute value condition will be boosted in the results.
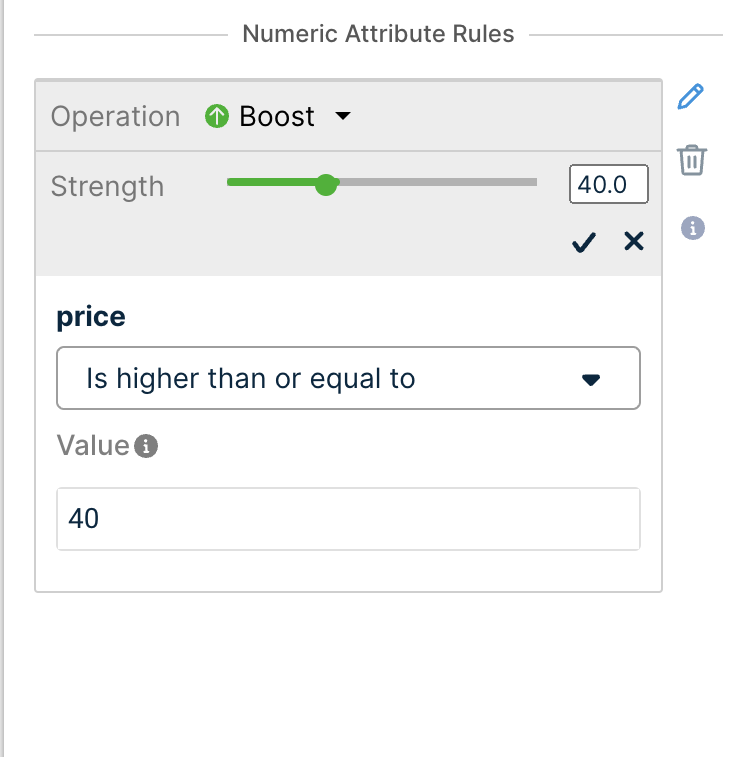
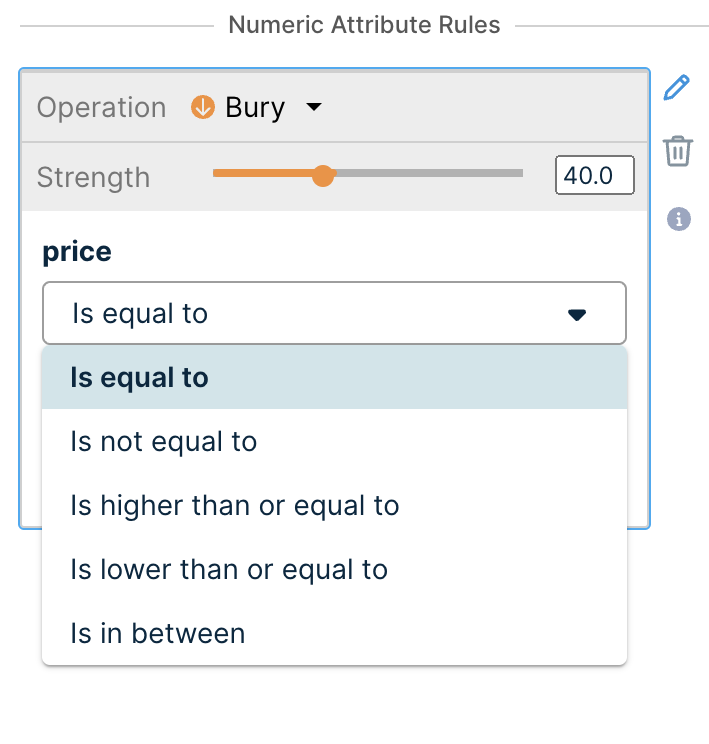
In this example, we boost products priced more than or equal to $40.
Please note that the value unit here is the same as the attribute value unit provided in the feed. For example, if the feed specifies prices in dollars ($), the price value you enter here will also be in dollars ($).
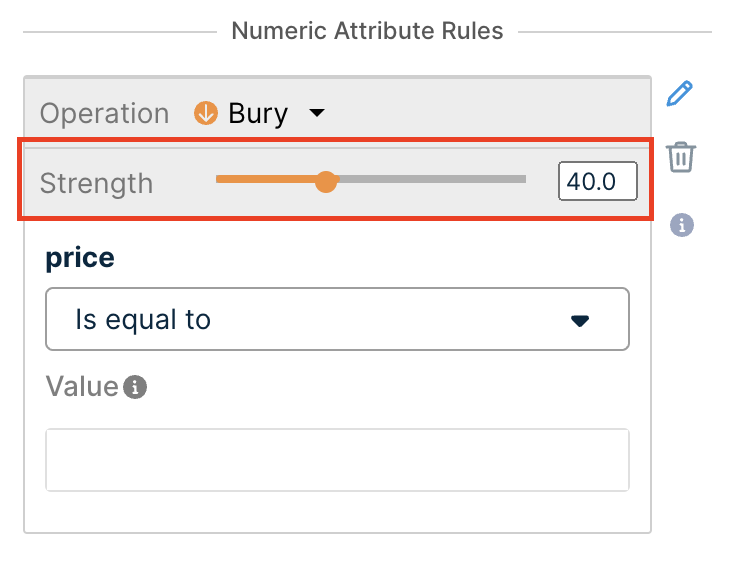
Bury
-
Drag the Strength slider to set the bury strength and move products closer to the bottom of the results.
-
Specify the condition that the attribute value must satisfy.
The condition can be one of the following:
- Equal to a value
- Not equal to a value
- Higher than or equal to a value
- Lower than or equal to a value
- In between a range
Only products that satisfy the attribute value condition will be buried in the results.
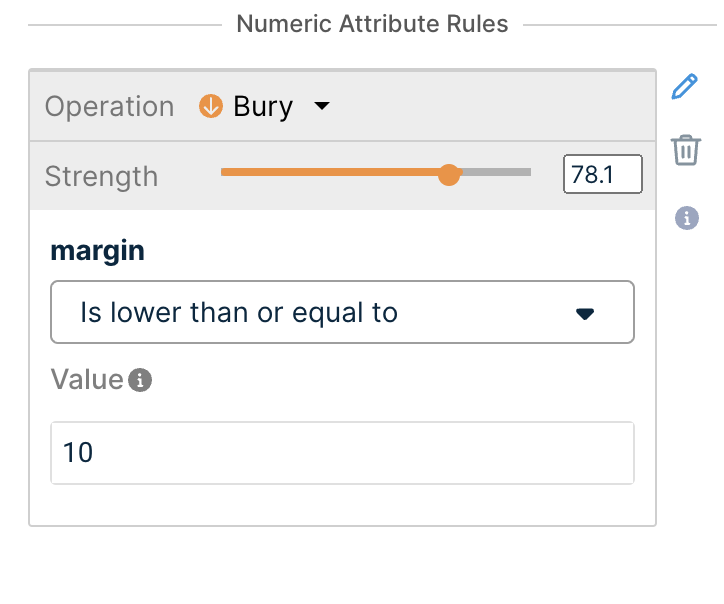
In this example, we bury products priced less than or equal to $10.
Please note that the value unit here is the same as the attribute value unit provided in the feed. For example, if the feed specifies prices in dollars ($), the price value you enter here will also be in dollars ($).
Include Only and Exclude operations on Numeric Attributes
Include Only
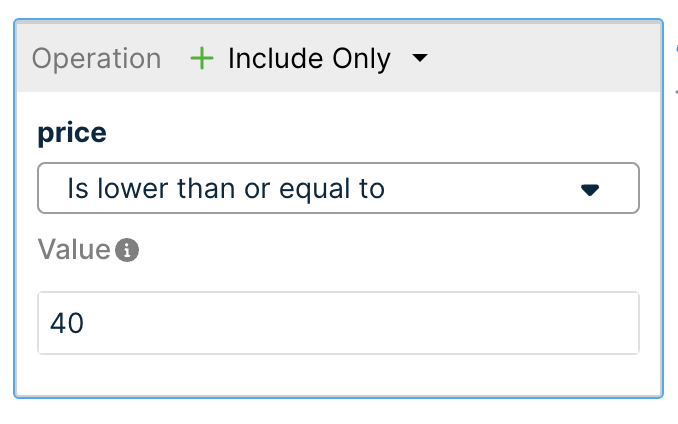
Specify the condition that the attribute value must satisfy. This can be equal to a value, higher or lower than a value, or in between a range. Only products that satisfy the attribute value condition will be included in the results. In this example, we include only products priced lower than or equal to $40.
Exclude
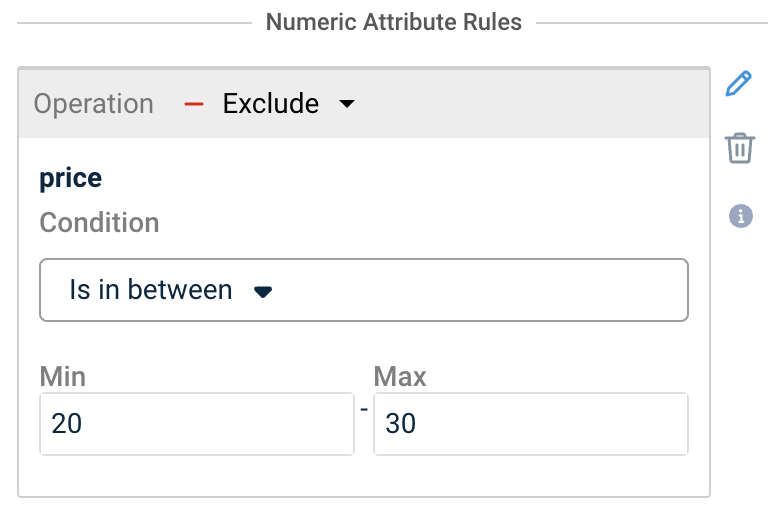
Specify the condition that the attribute value must satisfy. This can be equal to a value, higher or lower than a value, or in between a range. Only products that satisfy the attribute value condition will be excluded from the results. In this example, we exclude only products priced within the range of $20 - $30.
Attribute rule example
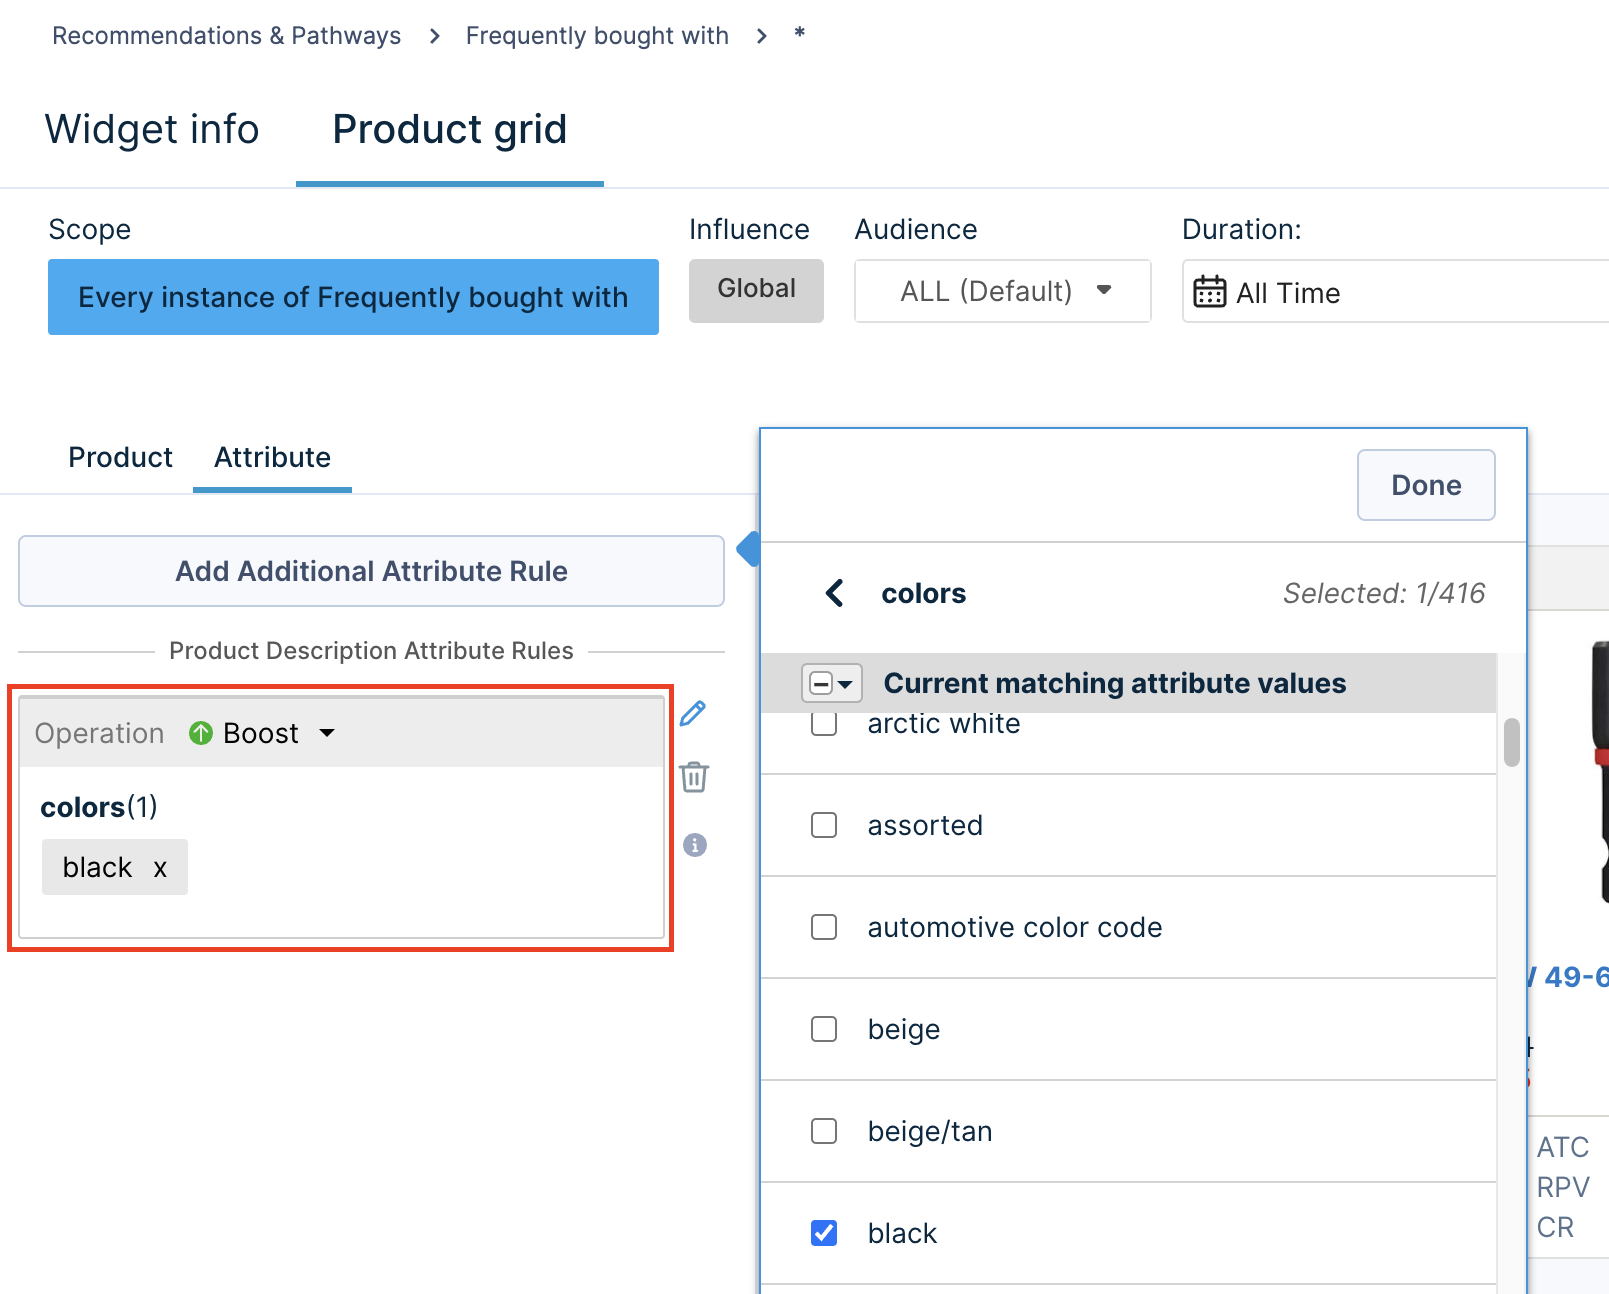
Given below is an example of applying the merchandising query rule for the color attribute "black" on a co-viewed widget:
Sonia, a digital merchandiser at Homeoasis, has created a widget "Bought with This" with the algorithm "Frequently Bought Together" for White Tops and wants to show other leather shoes in the color black as it is the most fast-moving color in this category. Sonia has to create an attribute rule for the color "black" and apply a product boost based on this rule so that other black leather shoes surface upon search.
Sonia navigates to Product Grid > Add Additional Attribute Rule > Product Description Attributes > color_groups > black and selects the Boost operation ON. This setting will boost similar products with the color "black" in the widget grid.
4. Save widget and note widget ID
Once the widget is created, note the widget_id , as it will be required in the API call. The widget ID is the alphanumeric value available on the Widget Configurator homepage.

Post Widget Creation
Please make sure to follow these steps in the given order once the creation of the widget is complete.
1. Implement UI in Staging
After creating your widgets, implement the widget UI in your staging environment and determine where to display the widget.
Suggested UI Placements for Recommendations Widgets
| Widget type | Placement Location | |
|---|---|---|
| 1 | Best Seller | Search Result Pages, Category/Department pages, or Landing Pages |
| 2 | Email Recommendations | Email campaign |
| 3 | Experience-Driven Recommendations | Home Page and Category Pages |
| 4 | Frequently Bought Together | Product Detail Pages, Cart, and Checkout pages |
| 5 | Frequently Viewed Together | Product Detail Pages |
| 6 | Past Purchases | Search Result Pages, Category/Department pages, or Landing Pages |
| 7 | Recently Viewed | Home Page and Category Pages |
| 8 | Similar Products | Product Detail Pages |
| 9 | Trending Products | Search Result Pages, Category/Department pages, Landing Pages |
| 10 | Visual Search | Homepage where there is a search box or Product Detail pages |
Suggested UI Placements for Pathways Widgets
| Widget type | Placement Location | |
|---|---|---|
| 1 | Category | Search Result Pages, Category/Department pages, and Landing Pages |
| 2 | Search | Search Result Pages, Category/Department pages, and Landing Pages |
2. Deploy to Production
Make sure to begin deploying your widgets into production only after testing them in the staging environment of your Dashboard.
QA & Acceptance TestingWe recommend that you perform QA and acceptance testing of your changes in staging before going live in the production site.
Updated 3 months ago