BigCommerce App User Guide
Getting started
Installation
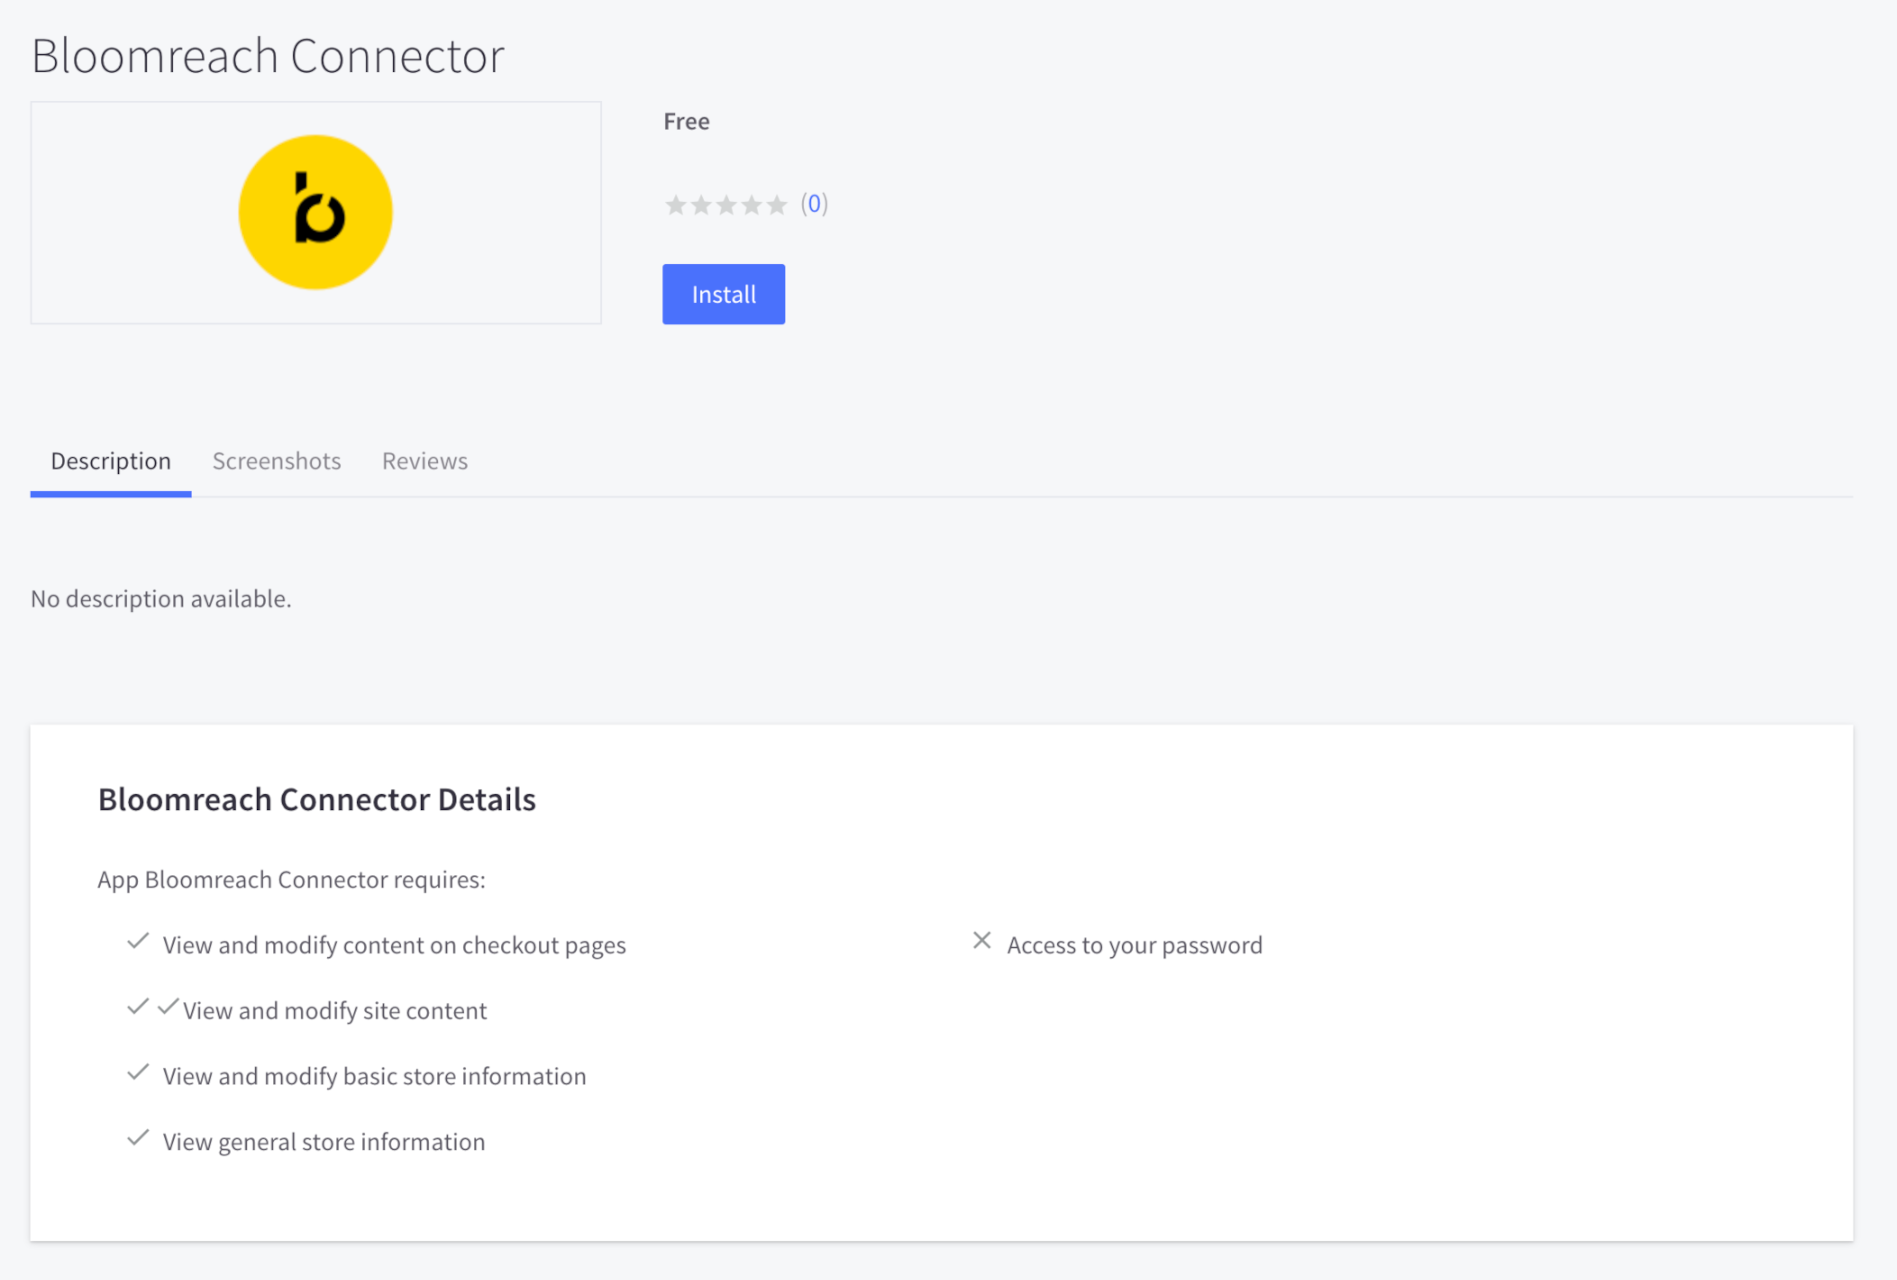
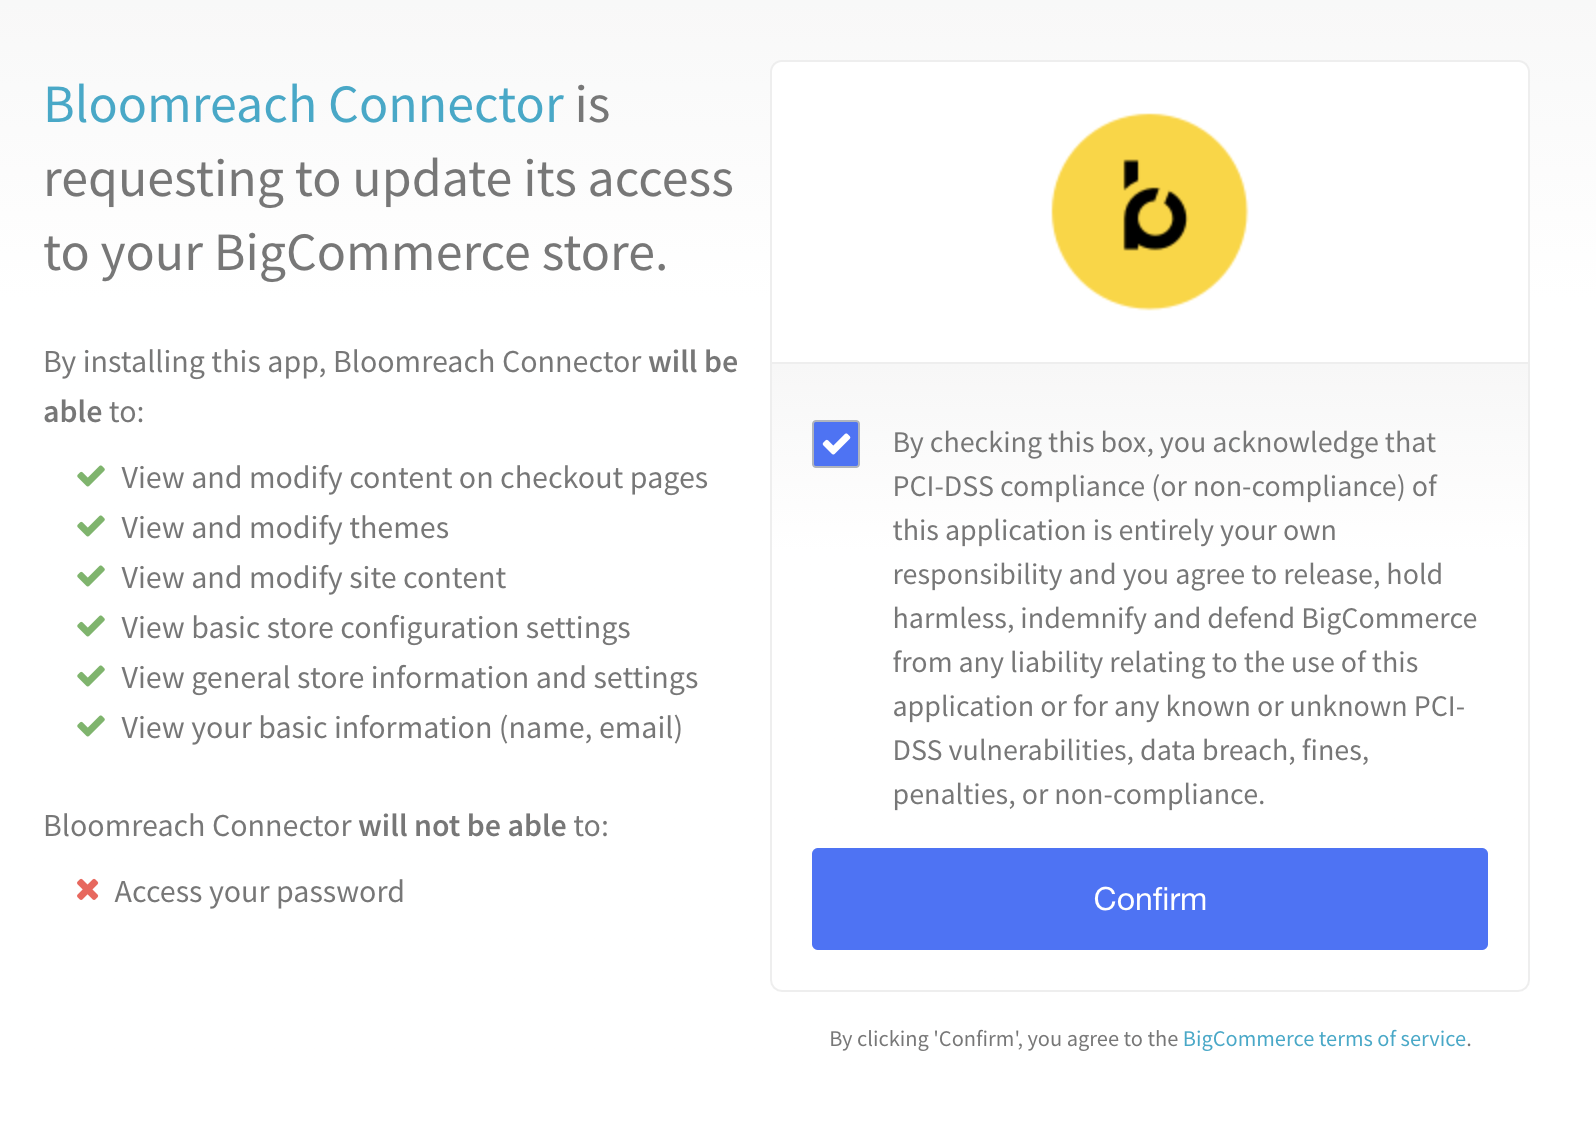
Installing our application in your store is easy. Head to the Bloomreach BigCommerce app page and click Install. You will be prompted with an Authorization screen. Click Confirm to install our application on your store.
Linking the application to your Bloomreach account
After the Bloomreach app is installed, you need to link the app to your Bloomreach account. To do this, copy your Bloomreach account credentials into your BigCommerce app. You can find your credentials on your Bloomreach Dashboard under the Setup > Discovery API Details tab.

Paste the keys into the BigCommerce app credentials form on the Settings page:
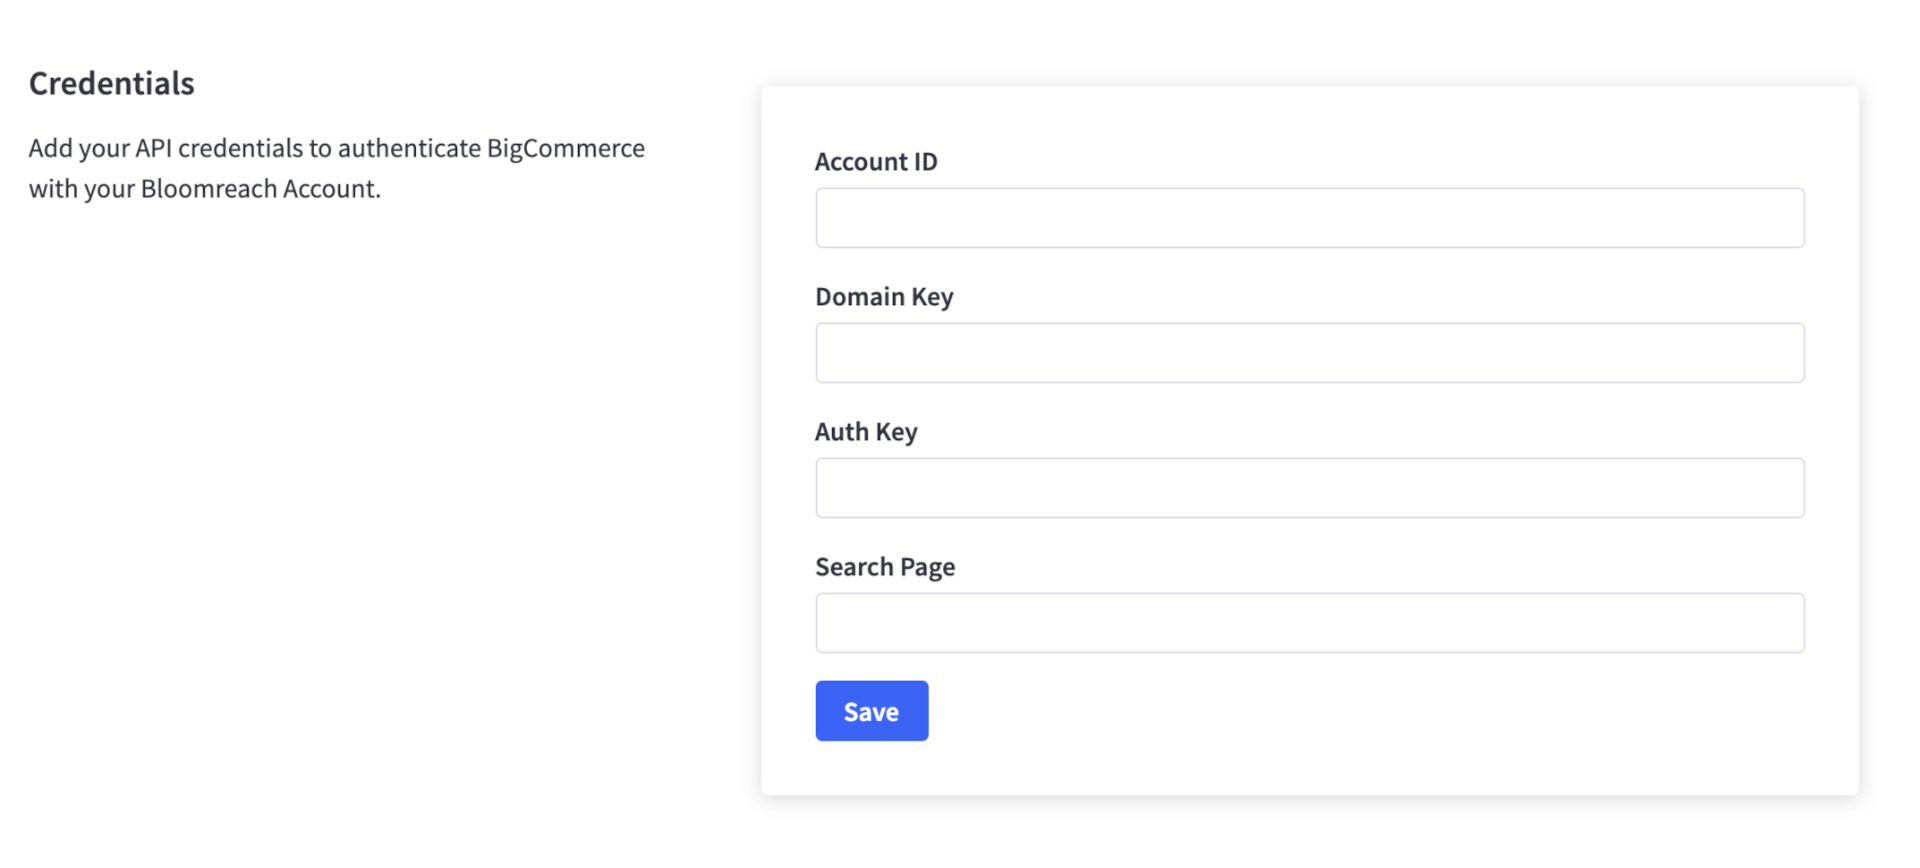
Copy and paste the following fields from the Bloomreach Dashboard to your BigCommerce app:
- Account ID
- Domain Key
- Auth Key
- Search Page - the Search Results page URL. The SDK requires this to correctly set redirect links. In BigCommerce, the URL is always
/search.php, for example:https://store-domain.com/search.php
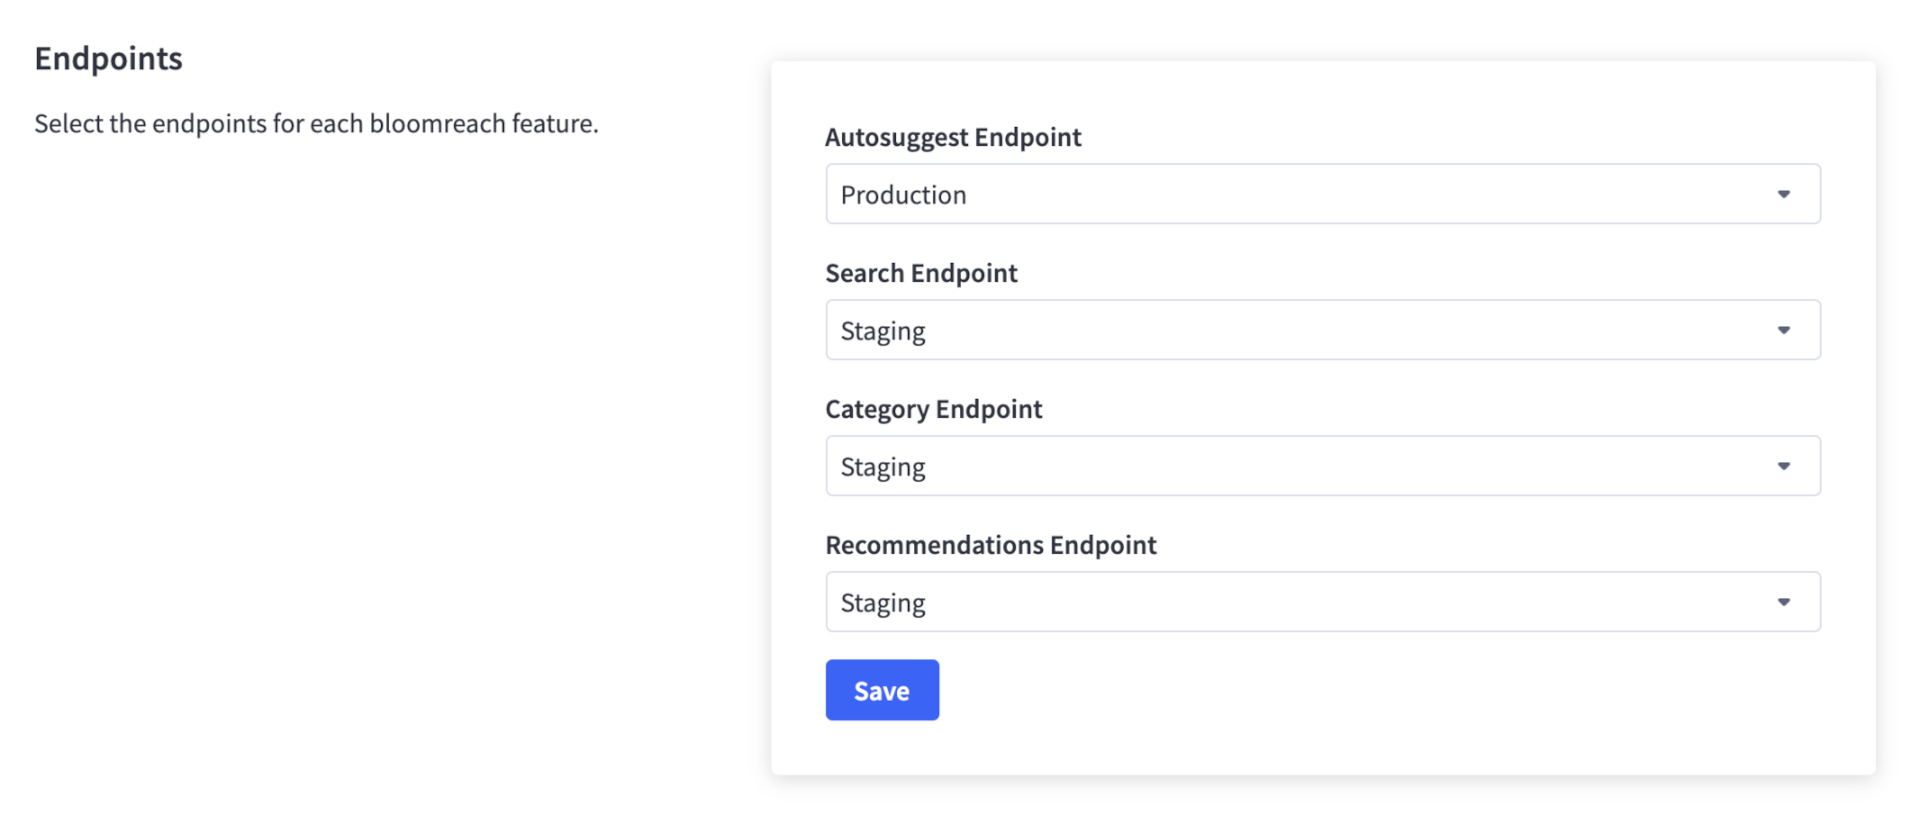
After you have added your credentials and connected the application to your Bloomreach account, scroll down to the Endpoints form and select the endpoints you want to use for each feature.
Configuring Bloomreach
Once Bloomreach is installed, you can start to configure it.
Bloomreach App
The Bloomreach app consists of seven pages:
- Dashboard: News and Analytics panel.
- Indexing: Configuration of the indexing.
- Search: Autosuggest and Search settings.
- Categories: Category configuration.
- Optimize: Configuration of search relevance.
- Recommendations: Recommendations Widgets.
- Settings: Credentials and Pixel settings.
Autosuggest
To customize and start using the Bloomreach Autosuggest feature, navigate to the Search page, scroll down to the Autosuggest settings form, and click Customize:
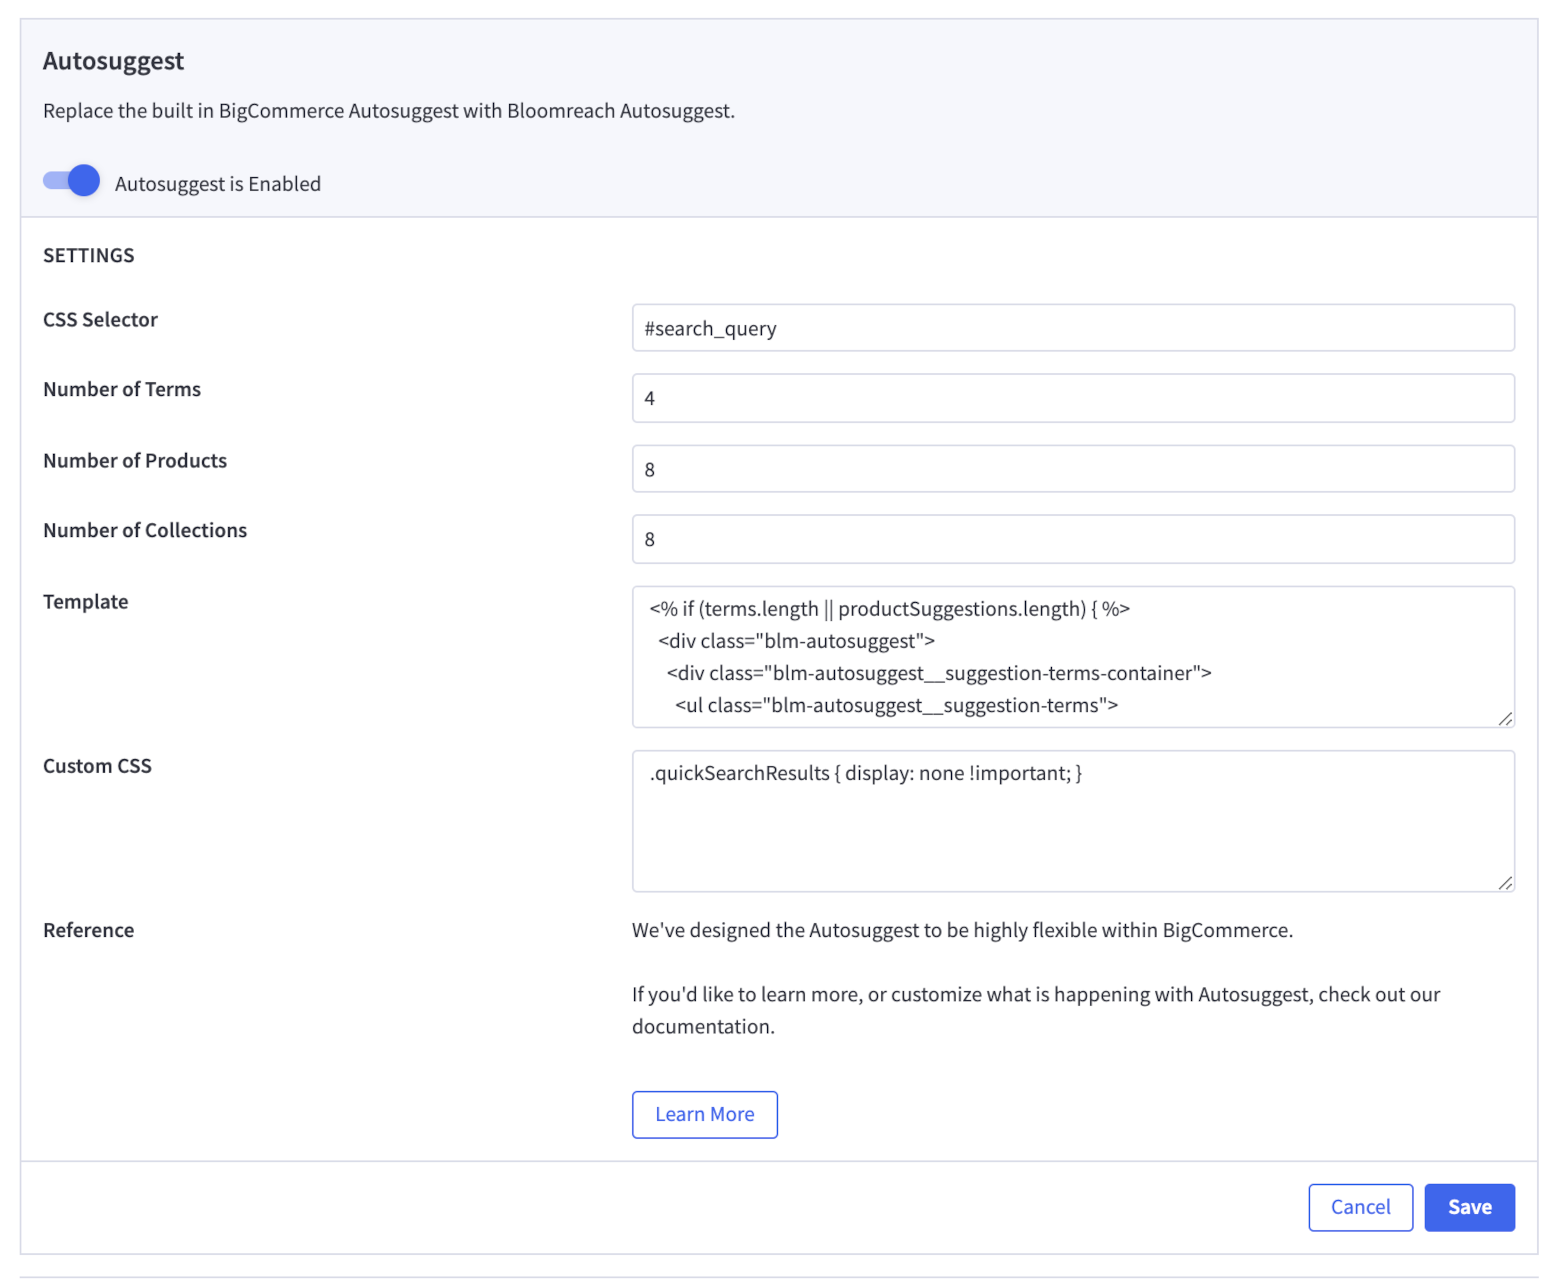
From here, you can:
- Enable this feature globally for your store.
- Change the CSS selector for the search input you wish to add autosuggest to.
- Set the number of terms you wish to display.
- Set the number of products you wish to display.
- Set the number of categories you wish to display.
- Add Custom CSS to alter the look of the autosuggest feature.
- View & Customize the Autosuggest Template.
Search
To customize and start using the Bloomreach Search feature, navigate to the Search page, scroll down to the Search settings form, and click Customize:
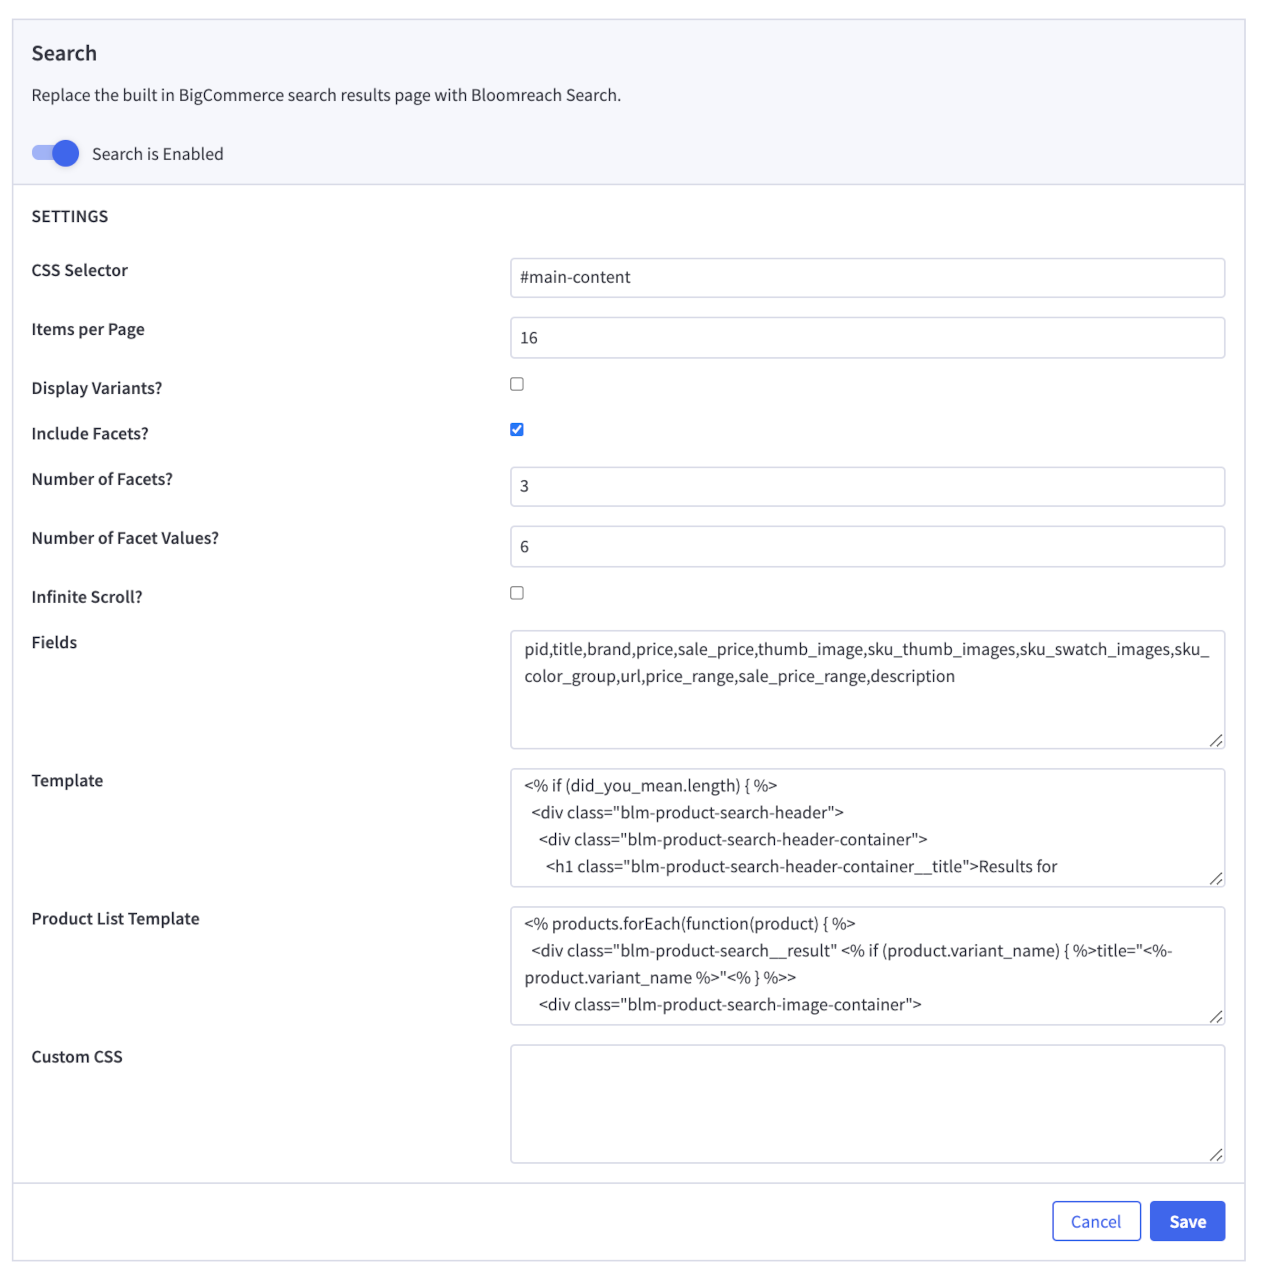
From here you can:
- Enable this feature on the search results page for your store.
- Set the CSS selector for the search results page content.
- Set the number of items per page you wish to display.
- Set whether you wish to display variants as individual products in the results.
- Set whether you wish to include facets in your results.
- Set the number of facets you wish to display.
- Set the number of facet values you wish to display.
- Set whether you wish to enable infinite scroll on your search results page.
- View & Edit the Fields Bloomreach will return in its results.
- Add Custom CSS to alter the look of the search feature.
- View & Customize the Search Template.
- View & Customize the Search Product List Template.
Categories
To customize and start using the Bloomreach Category feature, navigate to the Categories page, scroll down to the Categories settings form, and click Customize:
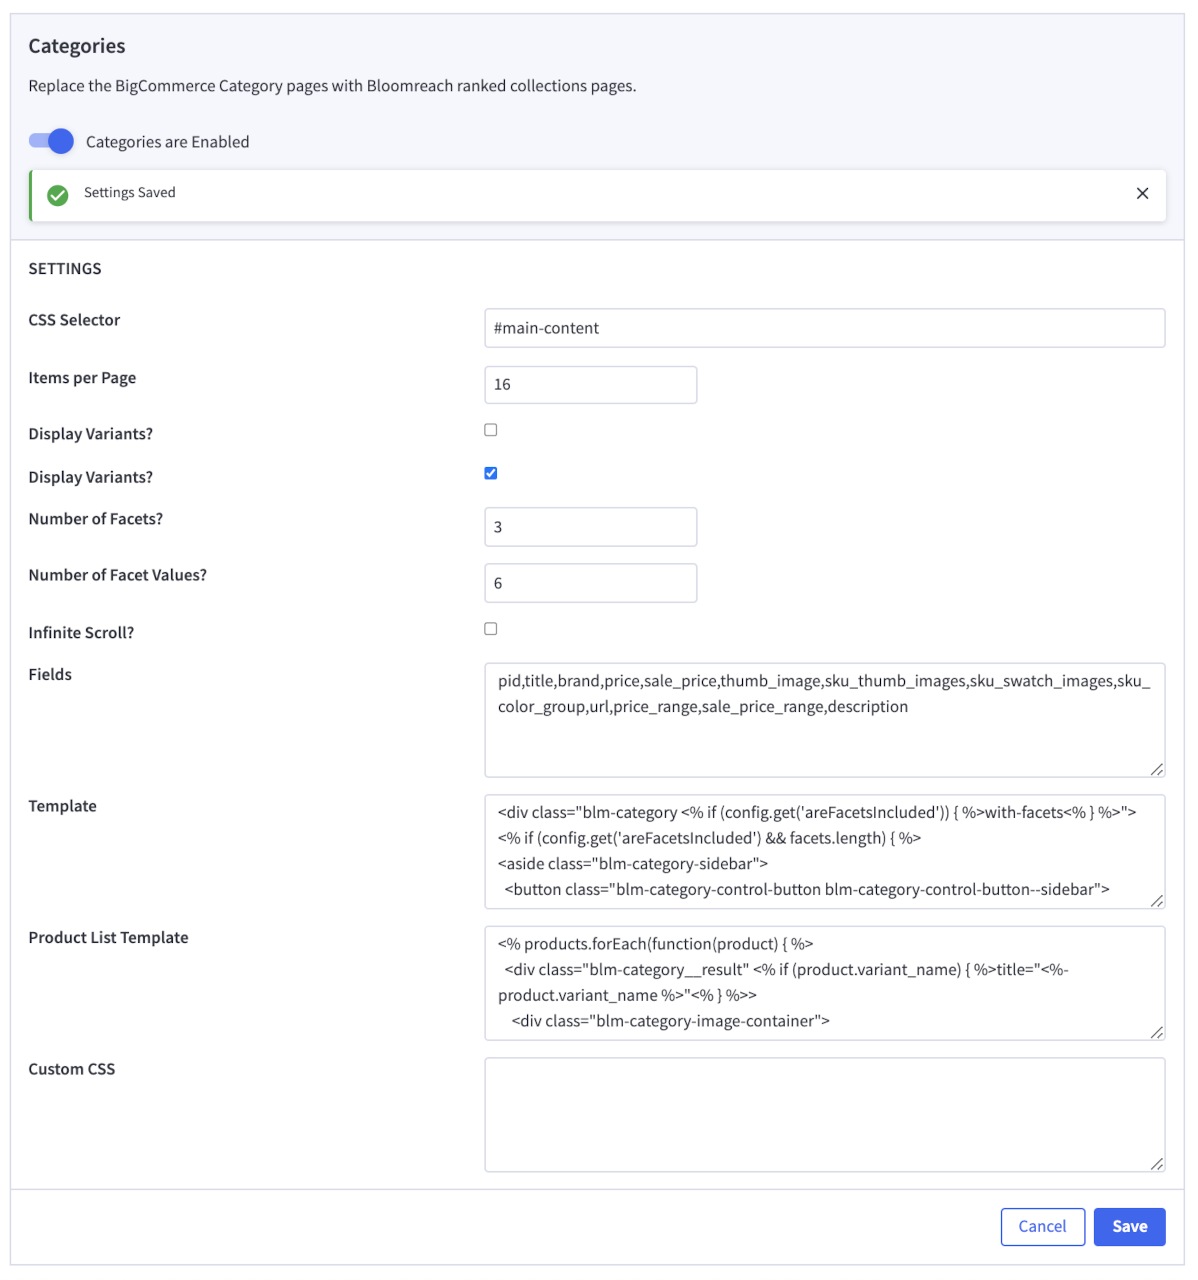
From here you can:
- Enable this feature on category pages for your store.
- Set the CSS selector for the category page content.
- Set the number of items per page you wish to display.
- Set whether you wish to display variants individually in the results.
- Set whether you wish to include facets in your results.
- Set the number of facets you wish to display.
- Set the number of facet values you wish to display.
- Set whether you wish to enable infinite scroll on your category results page.
- View & Edit the Fields Bloomreach will return in its results.
- Add Custom CSS to alter the look of the search feature.
- View & Customize the Category Template.
- View & Customize the Category Product List Template.
Recommendations
To customize and start using the Bloomreach Recommendations feature, navigate to the Recommendations page, scroll down to the Recommendations settings form, and click Enable. Once enabled, If your theme has regions available, the Bloomreach app will install five custom widgets for you to use within the drag & drop page builder. Once enabled, click Customize:
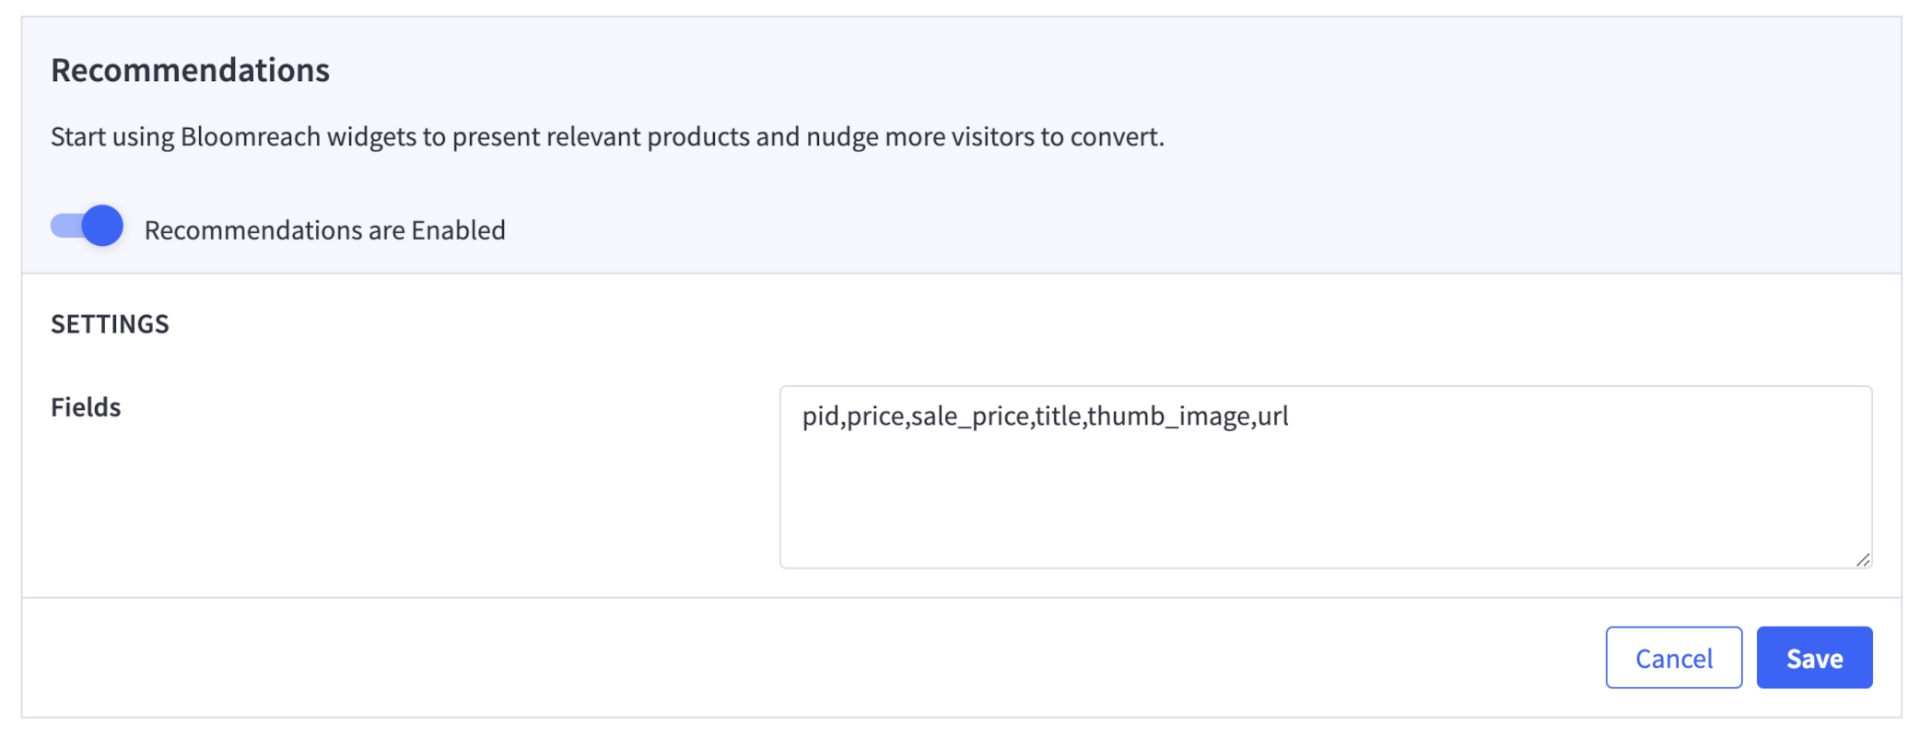
From here you can:
- View & Edit the Fields Bloomreach will return in its results.
To start creating Bloomreach Recommendations & Pathways Widgets, navigate to the theme selector page, and click Customize on the theme you wish to customize.
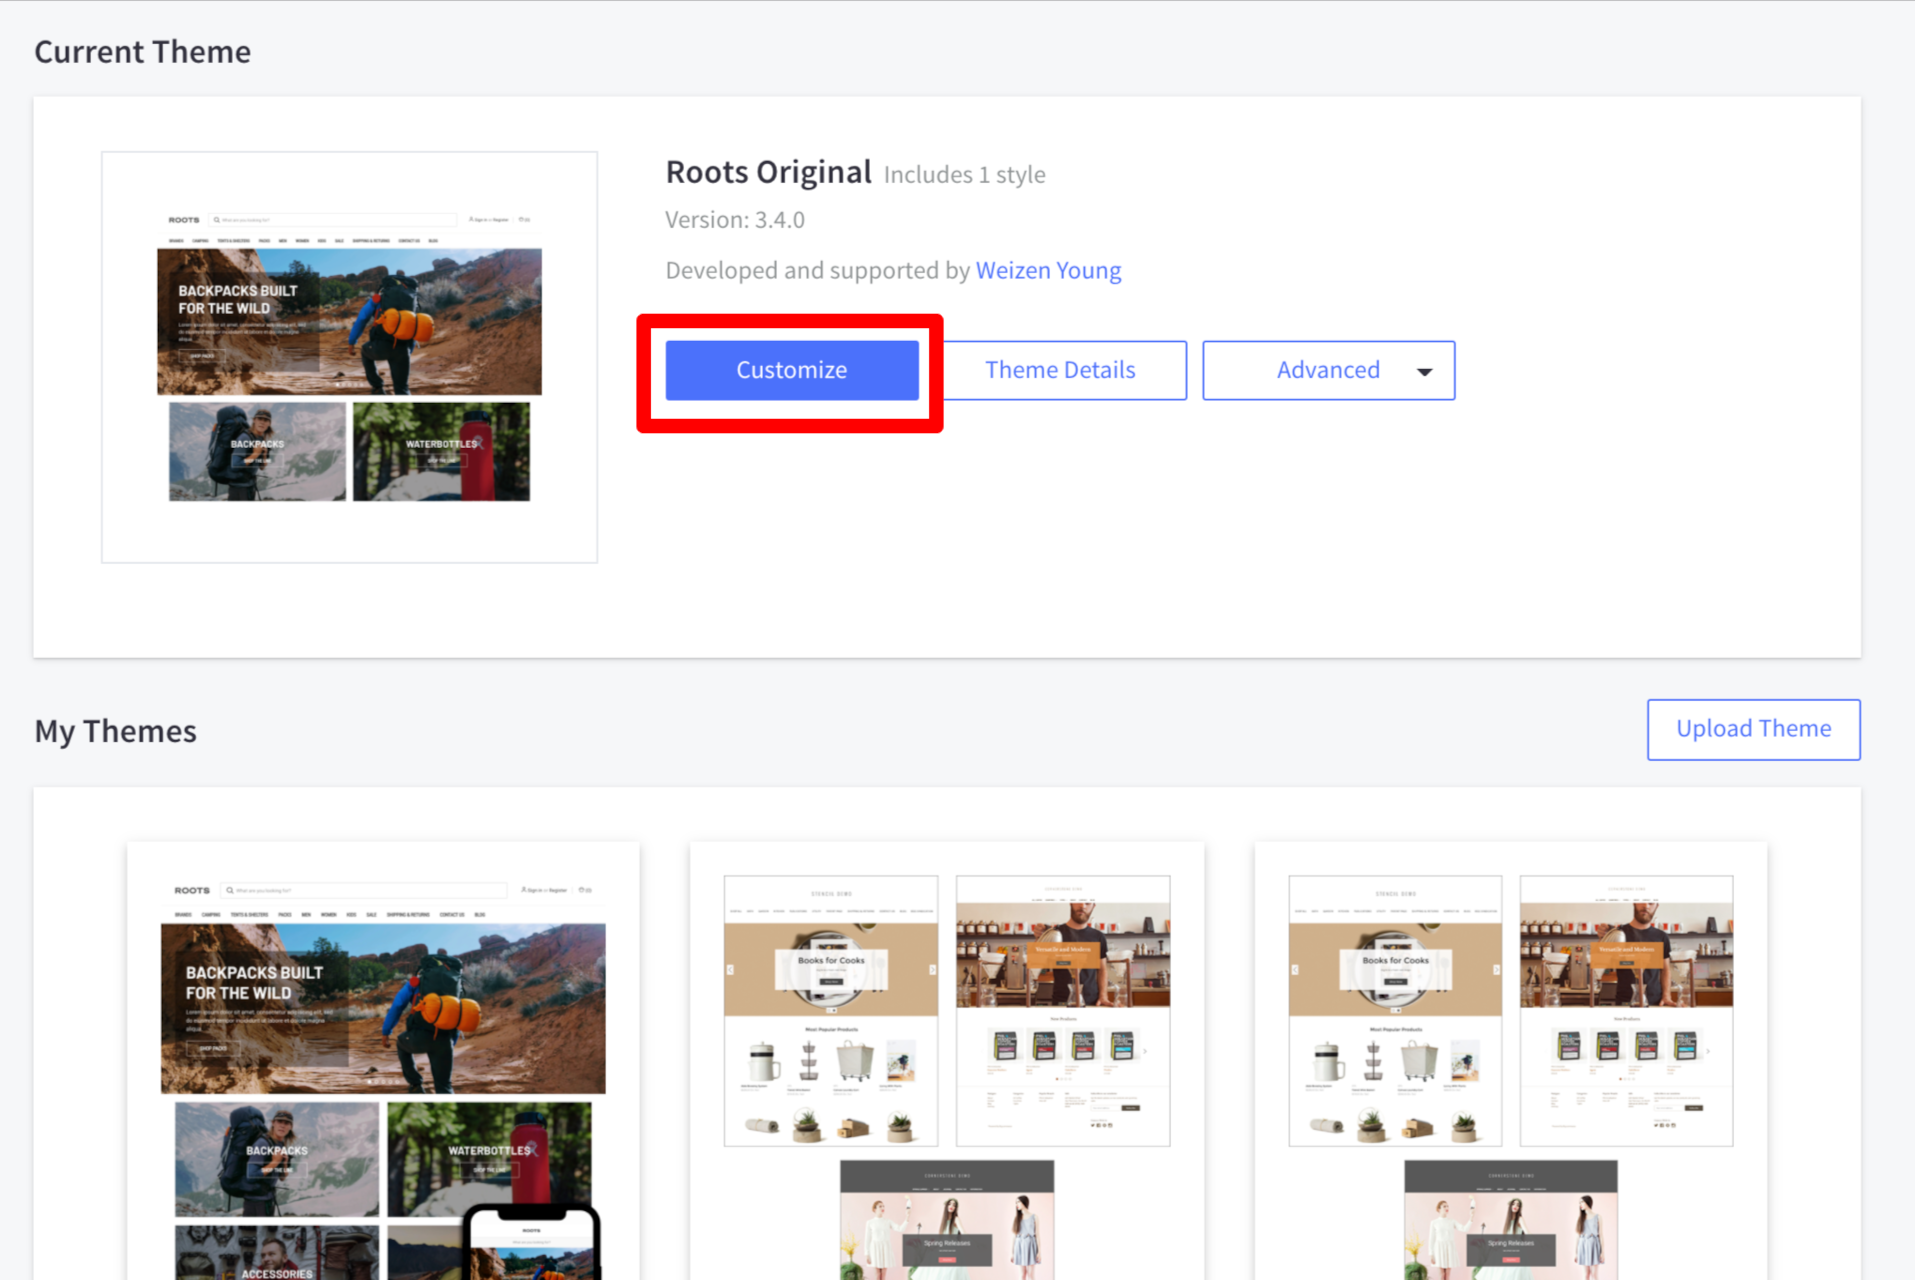
The Bloomreach app supports five widget types:
- Category
- Global
- Item
- Keyword
- Personalized
Select the widget type you want to display, then drag the widget to the region drop area to begin creating your widget.
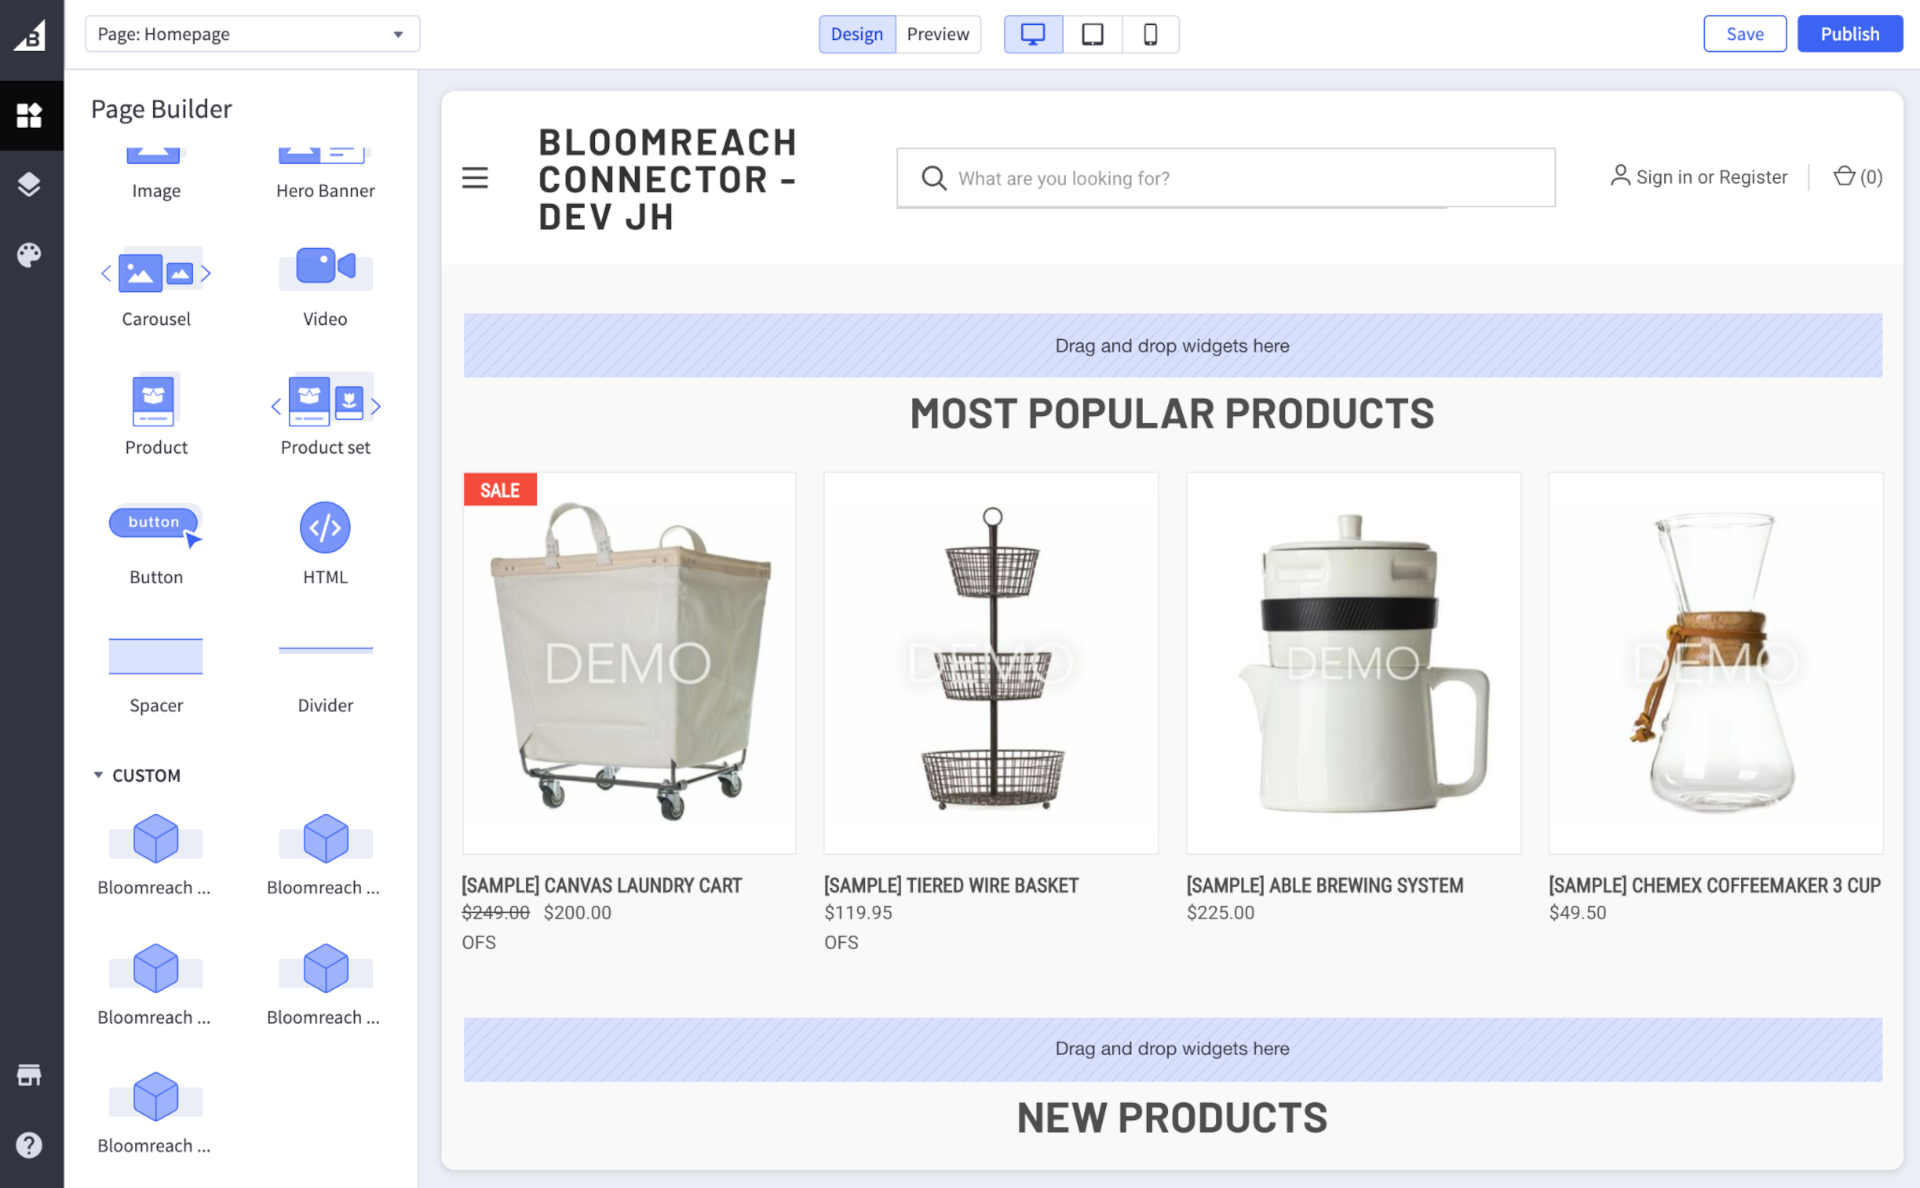
Once you have selected a Bloomreach widget type to add to your page, you’ll be able to pair that widget in BigCommerce to the widget you’ve created in the Bloomreach Dashboard. On the widget create page, you can:
- Add Widget Title (Can be any title you select. This is only for BigCommerce’s front end)
- Add Widget ID (Must be the Widget ID you created in the Bloomreach dashboard)
- Add Category ID (For a Category widget, it must be the Category ID used within the Bloomreach dashboard for Category ranking)
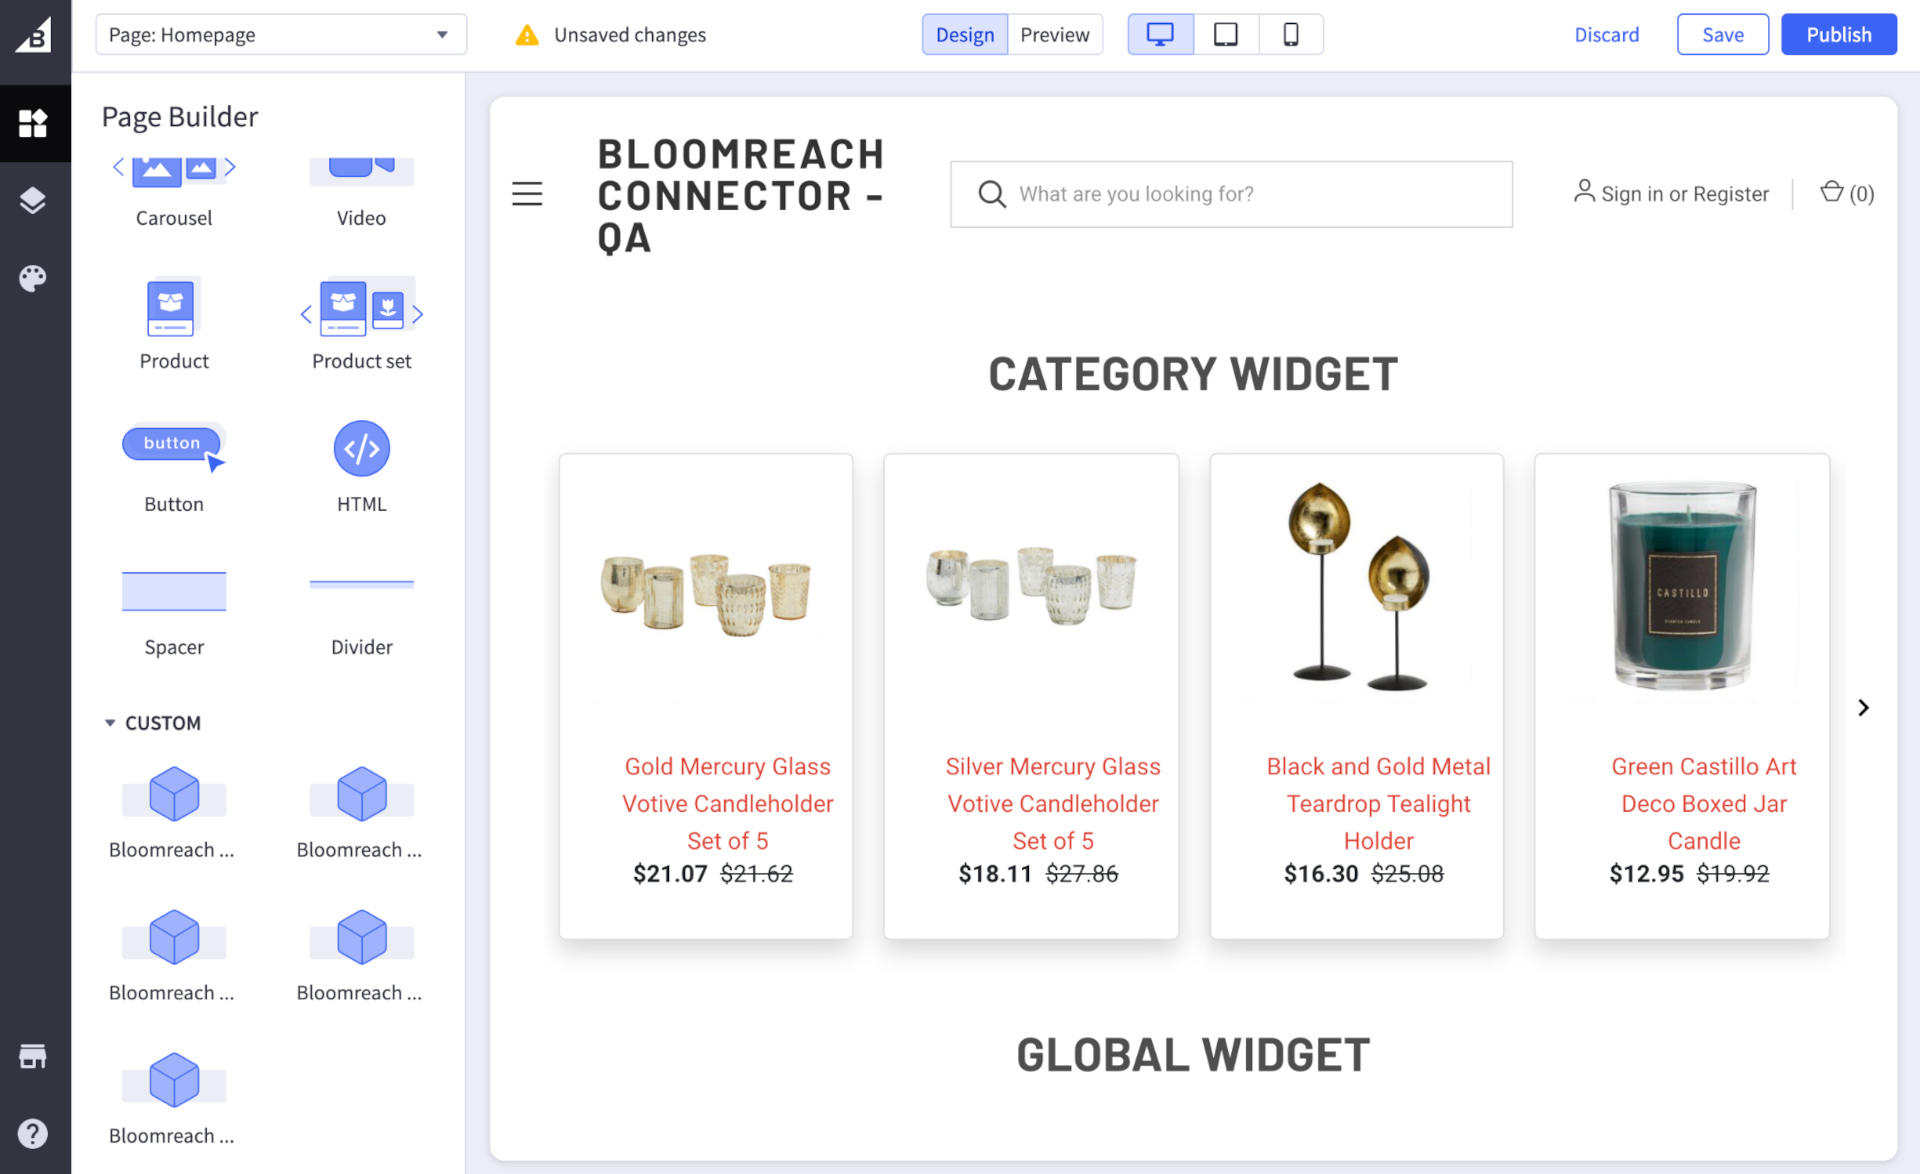
Then click Save to see the widget display:
Each Widget type has different customizable options:
| Widget type | Customization options |
|---|---|
| Category | |
| Global | |
| Item | |
| Keyword | |
| Personalized |
Note: All widgets rely on information provided by the tracking pixel. If the pixel is not enabled for your store, your widgets will not display properly.
Pixel
To start using the Bloomreach Pixel, navigate to the Settings page, then scroll down to the Pixel settings form:
From here you can:
- Enable this feature globally for your store.
Once enabled, the Bloomreach app will inject the pixel into your theme. The pixel will track users as they navigate and interact with your site. This information is passed back to Bloomreach and adds behavioural learning data to the Bloomreach algorithm.
Pixel Page Views
The Bloomreach pixel tracks 7 types of page view:
- Global Page View
- Virtual Page View
- Product Page View
- Content Page View
- Category Page View
- Search Result Page View
- Conversion Page View
Pixel Page View Data
On each page view the Bloomreach pixel collects page specific data including:
- Page URL
- Customer ID
- Product ID
- Product SKU
- Product Name
- Order grand total
- Order item info (sku, qty ordered, name, unit price)
- Event type
Pixel Events
In addition to page views and conversions, the Bloomreach pixel also tracks specific interactions the user makes on your site. The interactions tracked are:
- Add-to-cart Event
- Search Event
- Suggest Event
- Quick View Event
Search & Suggest events are captured automatically by Bloomreach. However, if you wish to capture Add-to-cart & Quick View events, you will need to make changes to the Add-to-cart & Quick View buttons throughout your themes.
For example, if you are using BigCommerce’s Roots theme, you can track Add-to-cart events on your product page by editing the following files:
- templates/components/products/card.html
- templates/components/products/list-item.html
Add the following html data attributes to the add-to-cart button(s):
data-blm-add-to-cart
data-blm-add-to-cart-sku="{{sku }}"
data-blm-add-to-cart-prod-id="{{ id }}"
data-blm-add-to-cart-prod-name="{{ title }}"
<button type="submit" name="add"
    data-add-to-cart>
    <span data-add-to-cart-text>
     {{lang "products.add_to_cart"}}
    </span>
</button>
<button type="submit" name="add"
    data-add-to-cart
    data-blm-add-to-cart
    data-blm-add-to-cart-sku="{{ sku }}"
    data-blm-add-to-cart-prod-id="{{ id }}"
    data-blm-add-to-cart-prod-name="{{ title }}">
    <span data-add-to-cart-text>
     {{lang "products.add_to_cart"}}
    </span>
</button>
If your theme also supports Quick View, you can repeat the Add-to-cart process and add the following html data attributes to the Quick View button:
data-blm-quickview
data-blm-quickview-sku="{{ sku }}"
data-blm-quickview-prod-id="{{ id }}"
data-blm-quickview-prod-name="{{ title }}"
<button name="quickview"
    data-add-to-cart>
    <span data-quickview-text>
        {{lang 'products.quick_view'}}
    </span>
</button>
<button name="quickview"
    data-blm-quickview
    data-blm-quickview-sku="{{ sku }}"
    data-blm-quickview-prod-id="{{ id }}"
    data-blm-quickview-prod-name="{{ title }}">
    <span data-quickview-text>
        {{lang 'products.quick_view'}}
    </span>
</button>
Pixel Validator
To validate and inspect the data captured by Bloomreach pixel events, you can install the Bloomreach Pixel Validator for Google Chrome. For more details on the Pixel Validator, read the Pixel Validator documentation.
Product feed delivery
Please refer to the Connect and configure catalog milestone of the Discovery Technical Integration for guidance on delivering your feed via our Catalog Management APIs.
Our suggested approach is to have Bloomreach Services set up feed integration via an internal ETL tool.
This allows light data model customization and can be set to run on a predetermined cadence.
This approach relies on the BigCommerce GraphQL API, and is subject to rate limits when pulling data from BigCommerce.
Full feeds typically take 2-4 hours to extract.
Syncing scripts
If you deleted one of the Bloomreach scripts and wish to reset it, you can sync all your installed scripts again. Syncing scripts allows you to re-install Bloomreach and fetch the latest versions of each file. To sync your scripts, navigate to the Search page, scroll down to the Sync Scripts settings form, and click Sync Scripts.
Customizing Bloomreach
To extend the data available in the Sample UI, if the data is included in the API, you can customize the autosuggest, search results page, and product card templates. So for example, if you want to add Brand before the product title, you would need to amend the autosuggest template to render out that variable.
This is done by modifying the HTML template inside the Bloomreach Discovery app. For example, you could add the Brand attribute for a product by adding code to the HTML template. If you want to add some custom CSS, just wrap the data in the class you want.
<% if (product.brand) { %>
<%- product.brand %>
<% } %>
<span class="blm-product-search-details-container__title-brand">
<%- product.brand %>
</span>
Uninstalling Bloomreach
If you wish to uninstall the Bloomreach app from your BigCommerce store and you have Recommendations & Pathways enabled, we recommend first disabling this feature before you uninstall the app. If you uninstall the app before disabling this feature your theme may end up with some leftover widgets, which will no longer work as expected without the app installed.
Updated 12 months ago
