

Building curated pages with Sequential lock
💡 Prerequisite knowledge
We recommend that you review the following guide:
- Sequential locking products: This guide gives you an overview of the Sequential lock operation.
Curated pages workflow
The Sequential lock operation makes the process of creating Curated Pages convenient and efficient. Start building a Curated Page by following the steps provided below:
- Turning ON Sequential lock
- Defining Sequential lock Range
- Customizing Product Positions
- Adding Products to the Sequential lock Range
- Applying Product Operations
- Saving Sequential lock Customizations
1. Turn ON Sequential lock
-
Create a new Category ranking rule to build a curated page with the Sequential lock operation. Go to Merchandising > Categories > Ranking rules and click + New ranking rule at the top right.
-
Enter the Category in the Search panel and hit enter/return.
-
Click the ☸ (Settings) button to reveal the dropdown. Now click the Sequential lock option.
-
A modal appears that briefly summarizes how the operation works. Toggle ON the Sequential lock operation.
2. Define Sequential lock range
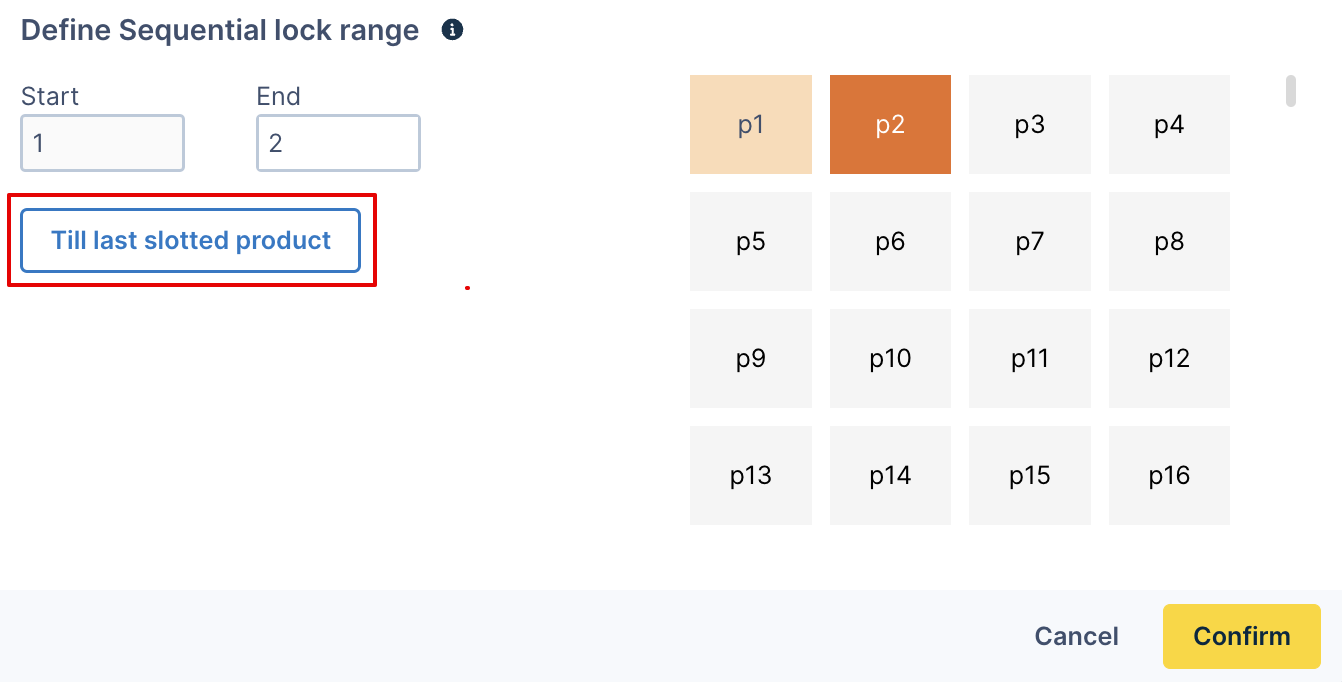
After switching ON Sequential lock, you can now define and customize the range to lock products in. By default, all products within the chosen limit will be selected for Sequential lock. Up to 1024 products can be added within the lequential lock range.
Use the input field to select the product range or click the desired product slot on the numbered grid. Once done, click Confirm to apply changes.
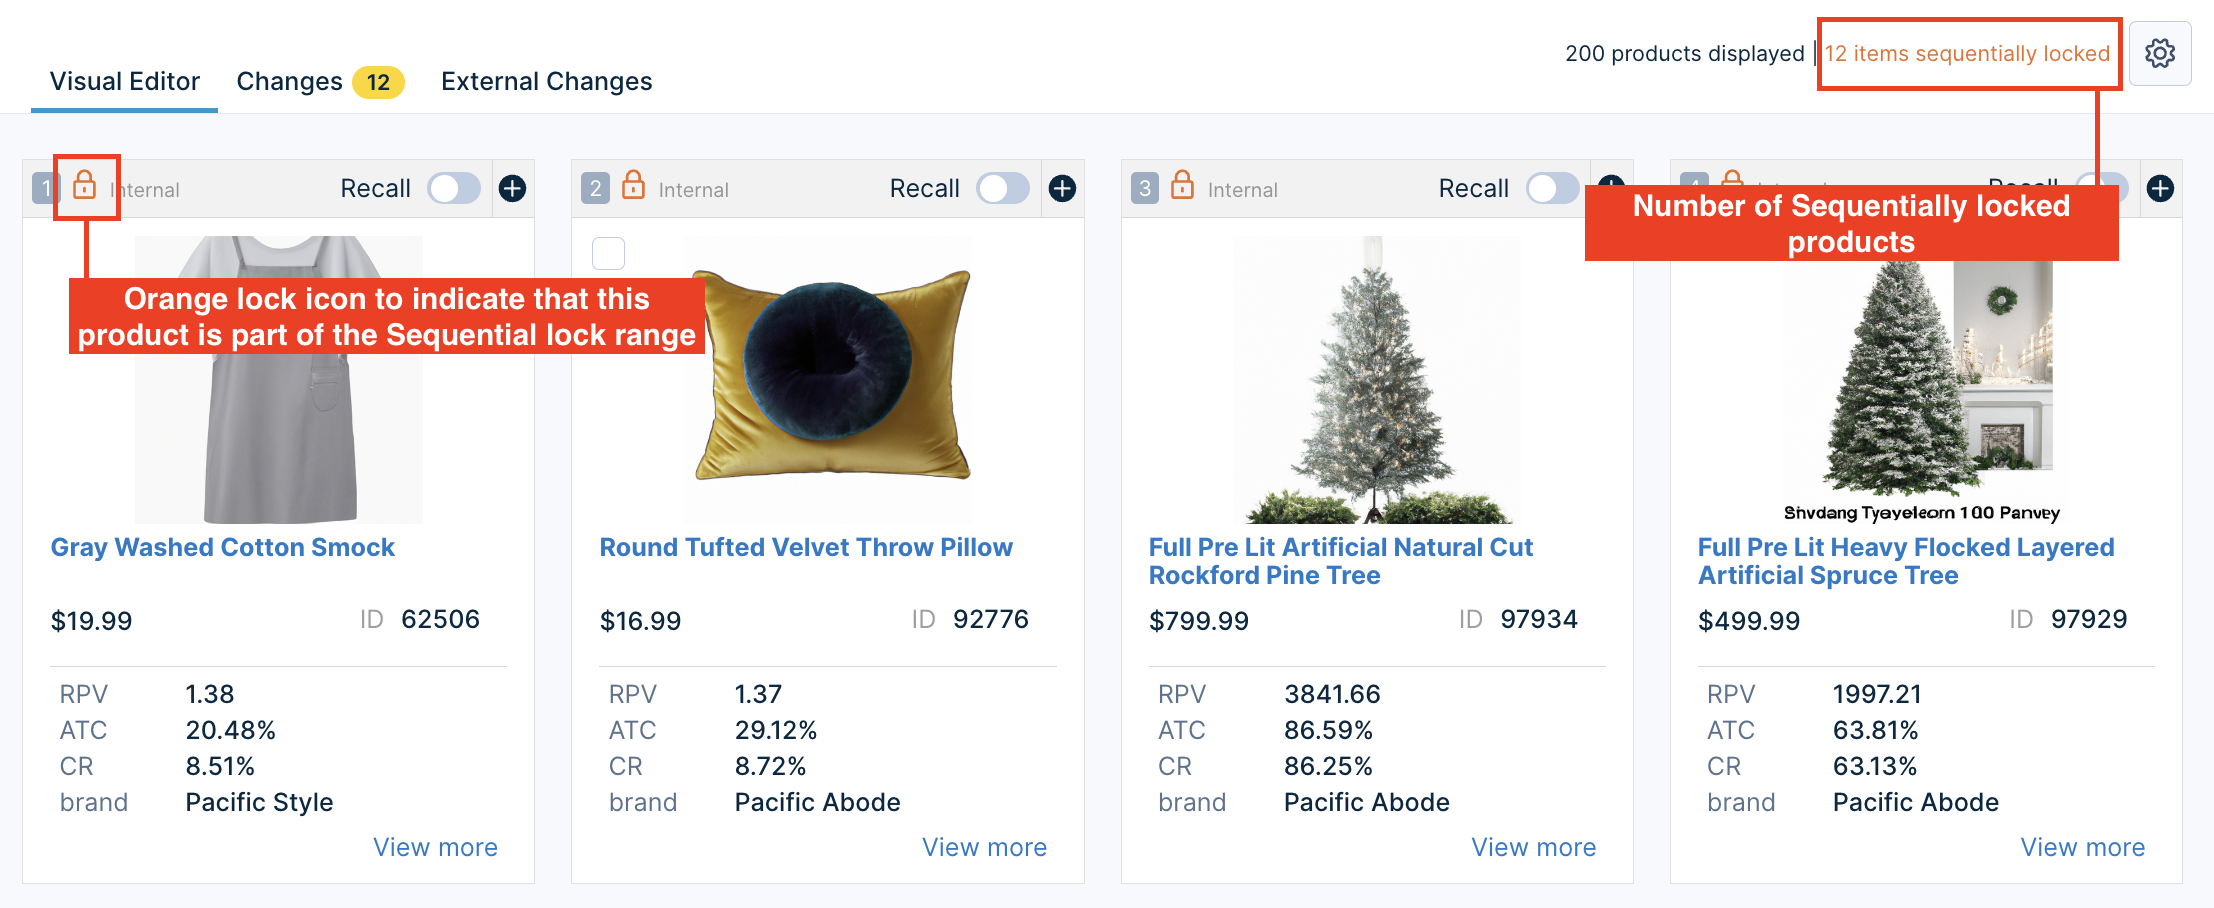
You can now see an orange lock on the products that fall in the Sequential lock range. The top right corner states the number of sequentially locked products.
Points to remember
- Please note that Sequential lock will override any PID customizations within the defined range. Products outside of this defined range will remain Algo-controlled, and you can boost, bury, and block products.
- You can use the “Till last slotted product” option while setting the range if you already have some products slotted according to your needs and want more control over the products around them by converting them all to Sequential lock.
- If you update and increase the existing custom range for Sequential lock, the new empty slots at the tail-end will be filled by the immediate products that were outside the old range (whether Boosted or Algo defined).
One merchandising rule can only have either Slotting or Sequential lock operations applied to products, not both.
3. Customize product positions
You can easily curate the product positions to their new positions within the Sequential lock range as follows:
| Changing product position using the slot selector |
 |
| Changing product position by dragging and dropping | You can simply drag and drop product(s) to their new position within the Sequential lock range. |
4. Adding products to the Sequential lock range
The Sequential lock range is dynamic, meaning that you can add more products and increase the range even after it has been set. You might need to keep updating your curated pages based on observations and performance.
This can be done by adding products to the Sequential lock range from either the existing product grid (which are currently outside the range) or adding new products to the recall set from the Left side search panel.
In each case, the Sequential lock range will be increased by the number of new products added and the subsequent products will be shifted ahead.
4a. Moving products in the Visual Editor to the Sequential lock range
There are several ways to move an out-of-range product into the Sequential lock range:
| Drag and drop the product to a position inside the range |  |
| Use the slot selector |
 |
| Use the operations menu |
 |
Slotting(Lock in Place/Position) is not supported for the products outside the Sequential lock range.
4b. Adding products to Sequential lock range using Left side panel
You can also add new products to Recall from the Left side search panel to make your curated pages even more effective. This can be used to add other related products or items that you think can be bought together, increasing the opportunities for cross-sells or up-sells.
To add a new product to recall within the Sequential lock range, you can either drag and drop it from the Left side search panel to a position within the range or use the Menu as follows:
- Click on the (+) button at the top right of the product card
- Select the option “Add to Sequential lock”
- Enter the position number that falls within the defined range. Click “Confirm”.
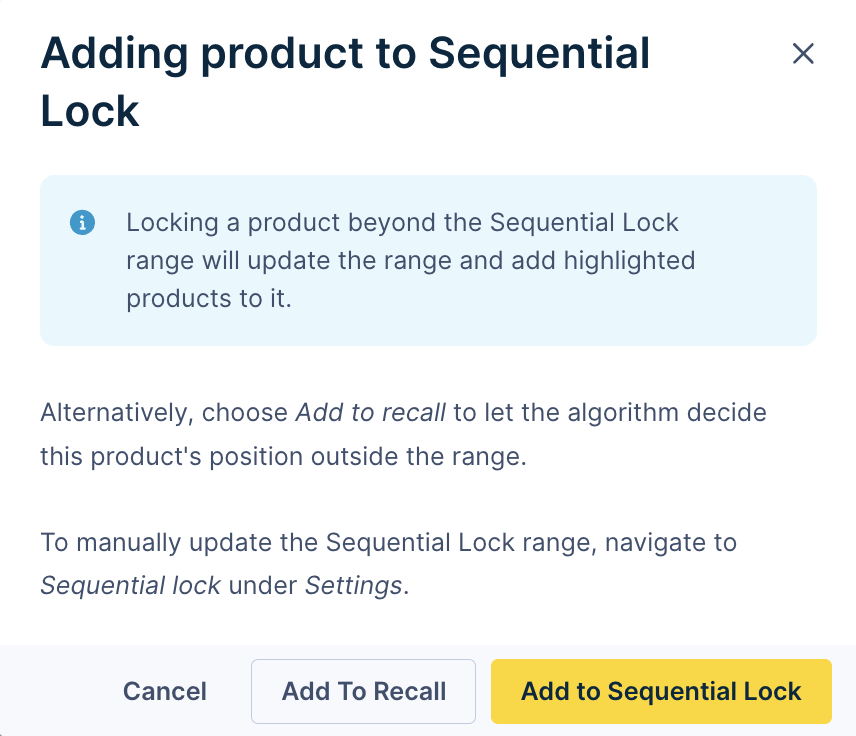
If a new product is added to recall to a position outside of the Sequential lock range (either by dragging or through the menu), you can choose between two options:
i) Add to Sequential lock: All the products before the new product’s position will automatically get Sequentially locked, and the range will be expanded till the newly added product.
ii) Add to Recall: The new product will be added to recall outside the Sequential lock range, and its position will be Algo-defined.
Here are some possible scenarios you might encounter when adding new products to the Sequential lock range:
| S.No. | Scenario | Behavior |
|---|---|---|
| 1. | All products in the grid are already Sequentially Locked | The new product will be placed at the end of the grid, within the Sequential lock range |
| 2. | Not all products in the grid are Sequentially Locked | The new product will be placed after the Sequential lock range and its position will be algo-defined |
| 3. | Maximum allowed products are Sequentially locked, and you try to add more products to the range | Since up to 1024 customizations are allowed at a time, you’d need to undo some operations (boost/bury/slotting/Sequential lock). |
5. Apply product operations
When it comes to curated pages, applying merchandising operations to products plays a pivotal role in optimizing the effectiveness and impact of these pages. By strategically manipulating the visibility and placement of products, you can highlight key offerings and drive desired customer behavior. You might want to increase/decrease the visibility of certain products based on seasonal campaigns or how they’re performing.
Merchandising operations, except Slotting[Lock in Place/Position], can be applied to products outside the Sequential lock range. These operations include:
- Boost to Top
- Bury to Bottom
- Block
Applying merchandising operations to products within the Sequential lock range will unlock the product and add it to Algo-controlled recall. All the following products in the range will move over by one position.
In the following example, the boosted product is removed from the range. It appears as the first product in the Algo-controlled recall with a green boost label.
Points to remember
- You can use Add to Recall operation both inside and outside the Sequential lock range if you’d like to ensure that the product is always part of the recall.
- A category rule can either have a Slot (Lock in Place/Position) operation or a Sequential lock operation at a time. Since both of these operations aren’t supported together, any existing slotting customizations will be removed.
6. Saving Sequential lock Customizations
Once you’ve made all the desired customizations, click Save.
Unlock Sequentially locked products
To unlock a Sequentially Locked product and remove it from the range, simply follow the steps below:
- Click on the (+) button at the top right of the product card that you want to unlock.
- Choose the “Unlock” operation.
- A confirmation message will appear.
Points to remember
- The Sequential lock range will be reduced by 1 for each product that you unlock.
- The new position of the unlocked product outside the range will be decided by the algo.
- If you unlock the last product remaining in the Sequential lock range and there is no other product in the Sequential lock range at the local site level, then no Sequential lock customization will apply. This will turn OFF Sequential lock.
Frequently Asked Questions (FAQs)
- After the curated page is saved, what happens if some of the PIDs locked in the Sequential lock range aren’t available in the feed anymore?
We will remove the unavailable product and move over the next product to its slot. So, for every out-of-stock (OOS) product, the subsequent products will move over by 1 position.
- How is Sequential lock different from Slotting [Lock in Place/Position]?
Slotting allows you to pin the products at any position within the top 100 slots.
Sequential lock allows you to lock products in the exact order from slot #1 to #1024 [maximum]. The algorithm controls the unlocked slots.