

Rule Specific Product Card Customization
💡Prerequisites
Knowledge
We recommend that you review the following guides to understand this feature guide:
- Customizable Product Card Attributes & Metrics: This article introduces you to the Customizable product card Attributes and Metrics feature.
- Global level Product Card Customization: This article overviews the process of configuring the global product card settings. The rule-level customization process has a similar workflow.
Pixel Integration
- If you are a multi-site customer, ensure to send pixel data with valid domain_key and view_id values. Avoid sending "null" values for these parameters. This is essential to display site-related metrics.
Glossary
Take a look at the following data-related terms used frequently in this guide:
-
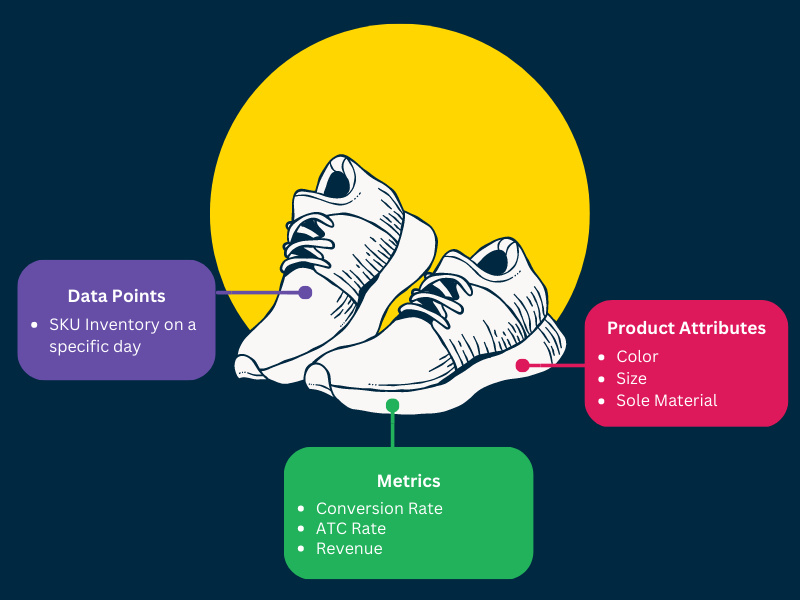
Attributes: Descriptions of a product, such as its size, color, material, etc.
-
Metrics: Key numbers that show how well a product is performing. This could include how many units are sold, how much revenue it's making, and how often the product is being viewed by customers.
-
Datapoints: Individual pieces of information that represent a numeric attribute value. SKU inventory with a numeric value is a data point by default.
Example: The visual below illustrates the product data for the product “white sneakers.”
Configuring Product Card Data for a Query Rule
The steps given below illustrate how you can select the Datapoints to be displayed on the product cards for a query or category rule. The changes you make here will override the default global product card settings for a particular query rule.
Step 1. Choose a suitable level
Before changing the product card settings for a query rule, decide what level you want to make these changes at. The scope of product card settings is different based on the level selection made:
- Account level: Product card settings will be changed for the specific query rule at the Account level.
- Site Group level: Product card settings will be changed for the specific query rule at the Site Group level.
- Site level (Site Global): Product card settings will be changed for the specific query rule at the Site level.
After making the appropriate selection, move ahead to the next step.
Step 2. Open existing Query Rule/ Create a new Query Rule
In order to make any customizations to the product cards, you can either open an already existing rule or create a new one.
| Open an existing Query Rule |
|
| Create a new Query Rule |
|
Step 3. Configure Product grid settings
Click the ☸ Settings button to reveal a dropdown menu. Choose Product grid settings. 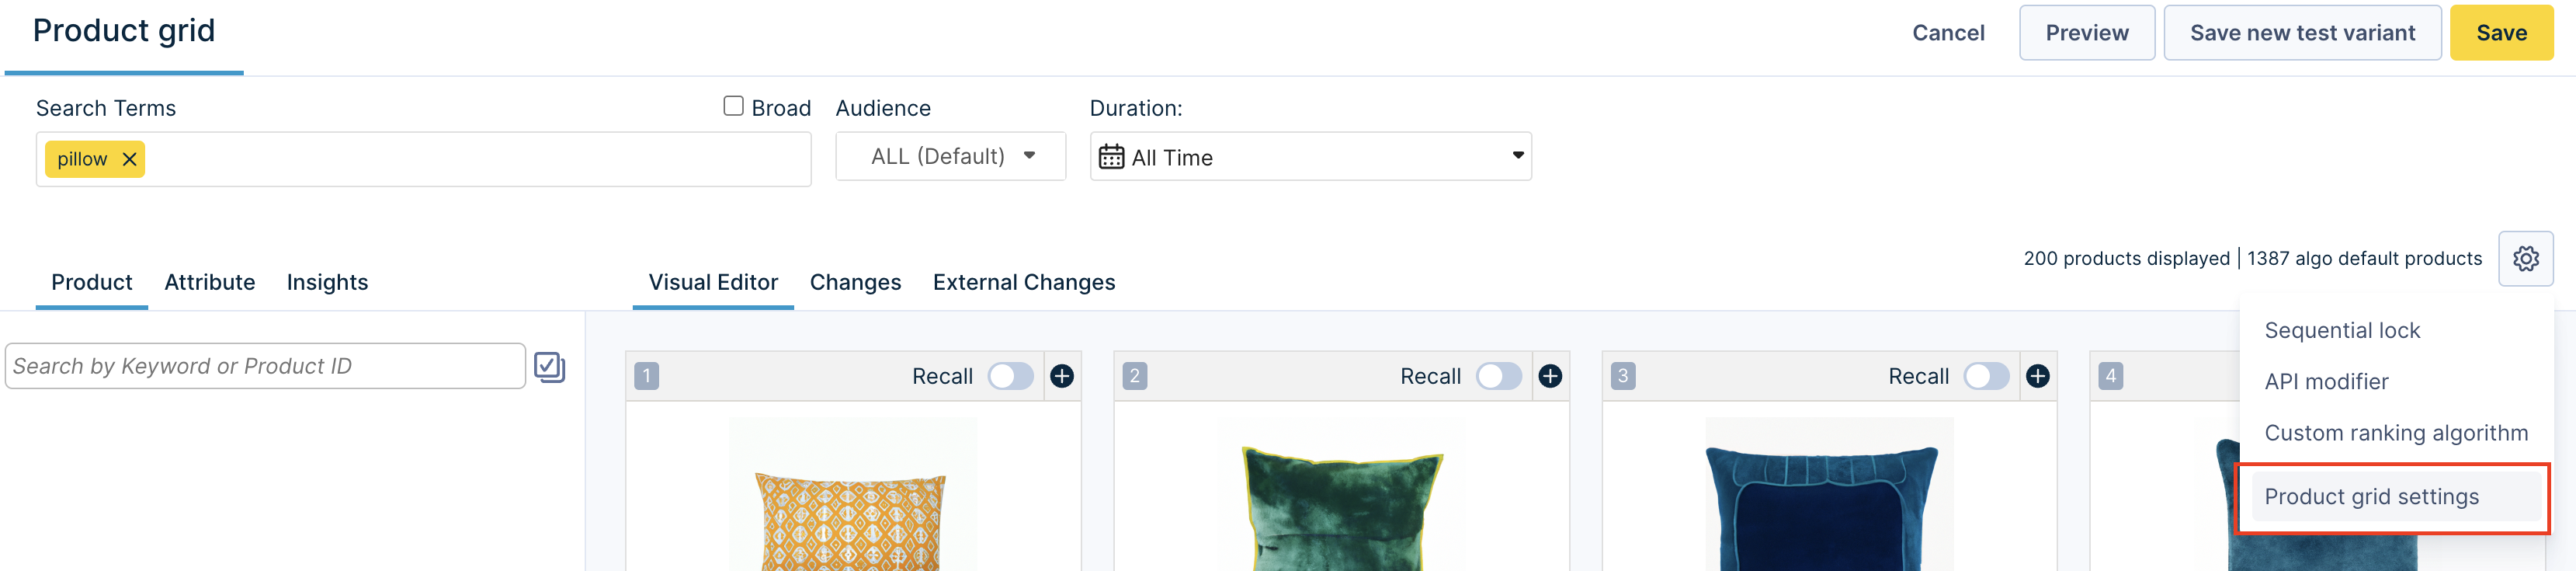
This opens up the Product card data display selection module. The module is divided into three sections:
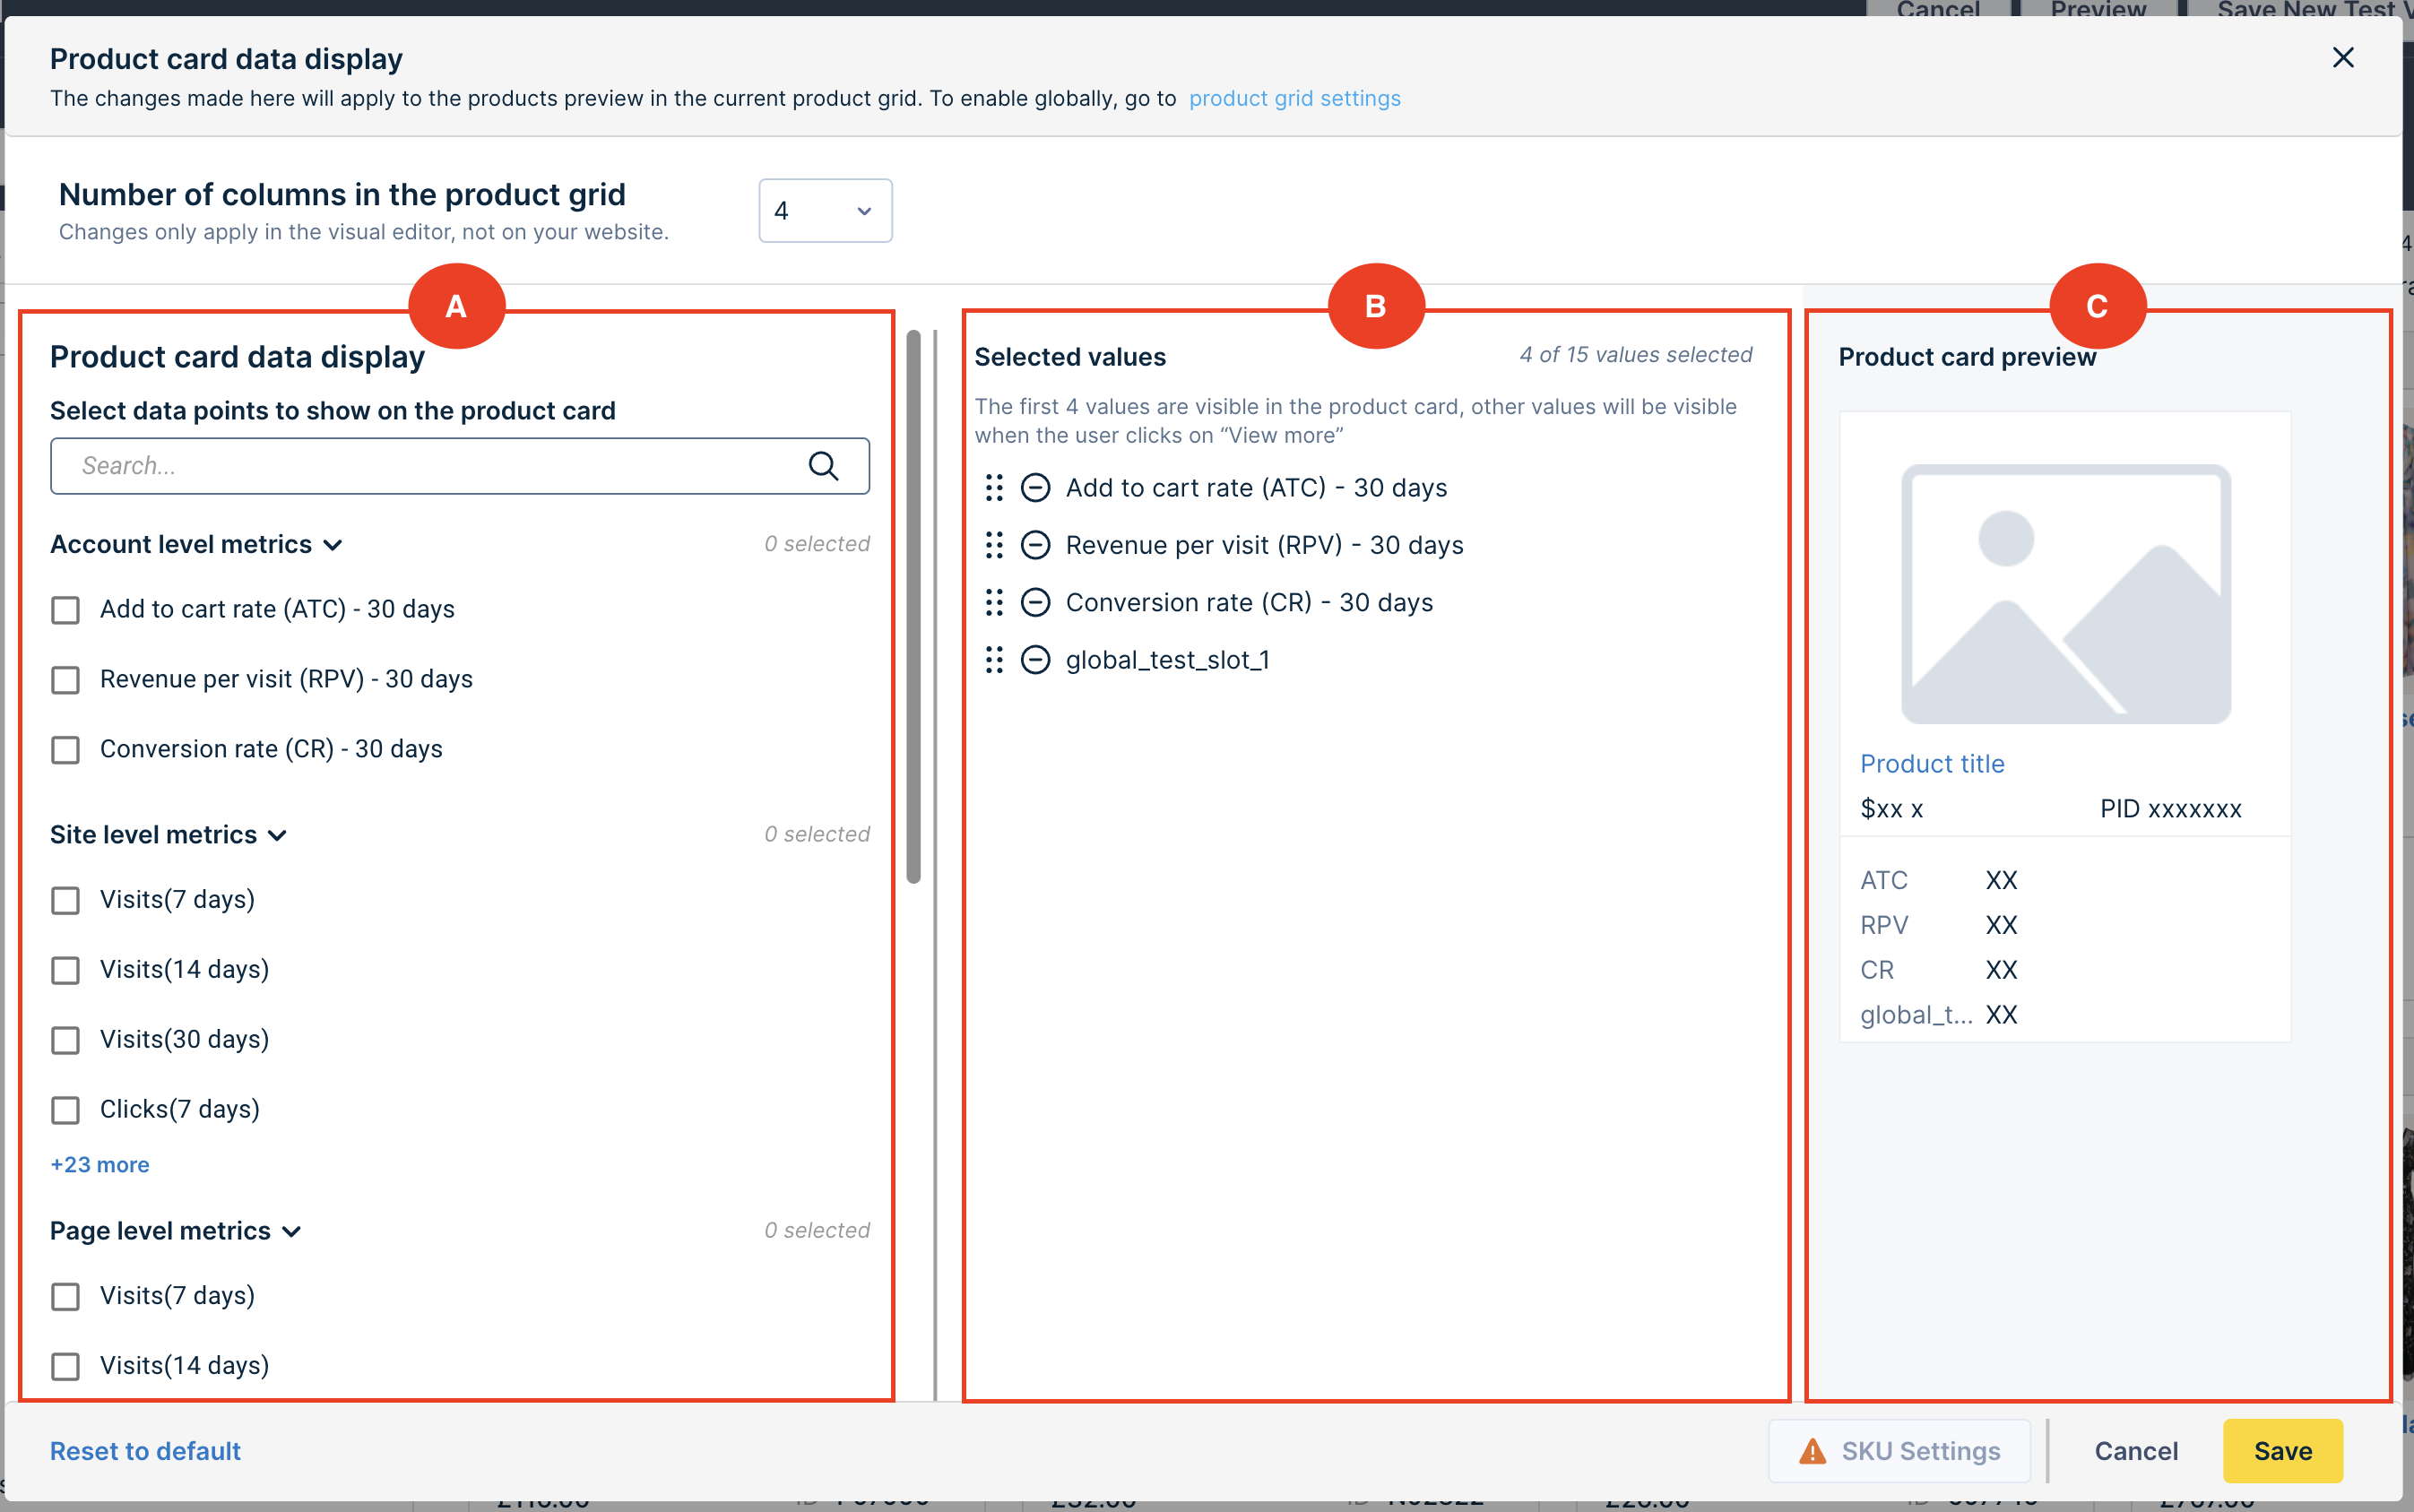
- A. Selection Panel: The first section lists the Metrics and Attributes available for selection. Tick the checkboxes to select the desired Datapoints. You can also use the search bar to find any metric/attribute quickly. You can select up to 15 Datapoints at a time. If you’ve already selected 15 values and wish to add another value, you can uncheck any of the selected values.
The following table lists and describes the available Datapoints:
| Data point | Description | Available Data |
|---|---|---|
| Account level Metrics | These include the data that we have about a product on the account level. The metrics that you have selected in the global product card settings are marked with the “Globally Selected” tag. | - Add to cart rate (ATC) - Revenue per visit (RPV) - Conversion rate (CR)(These metrics will be shown for the duration of the last 60 days) |
| Site level Metrics | These include the data that we have about a product on a site level. | -Visits (These metrics will be shown for the duration of the last 7, 14 and 30 days) |
| Page level Metrics | These include the data that we have about a product for a specific query/category. | -Visits (These metrics will be shown for the duration of the last 7, 14 and 30 days) |
| Attributes | This data comes directly from your feed and includes attributes for each product in the Product grid. The attributes that you have selected in the global product card settings are marked with the “Globally Selected” tag. | Color, Inventory, Margin |
| SKU attributes/Datapoints [if you have SKU attributes] | This data comes directly from your feed and includes SKU attributes like Inventory for each SKU of every product in the Product grid. Notes:
| Inventory for each SKU attribute value. For example, inventory for each size and inventory for each color |
Skip this section if you don’t have SKU attributes
If you wish to alter the default SKU settings for all product cards, then follow the steps below:
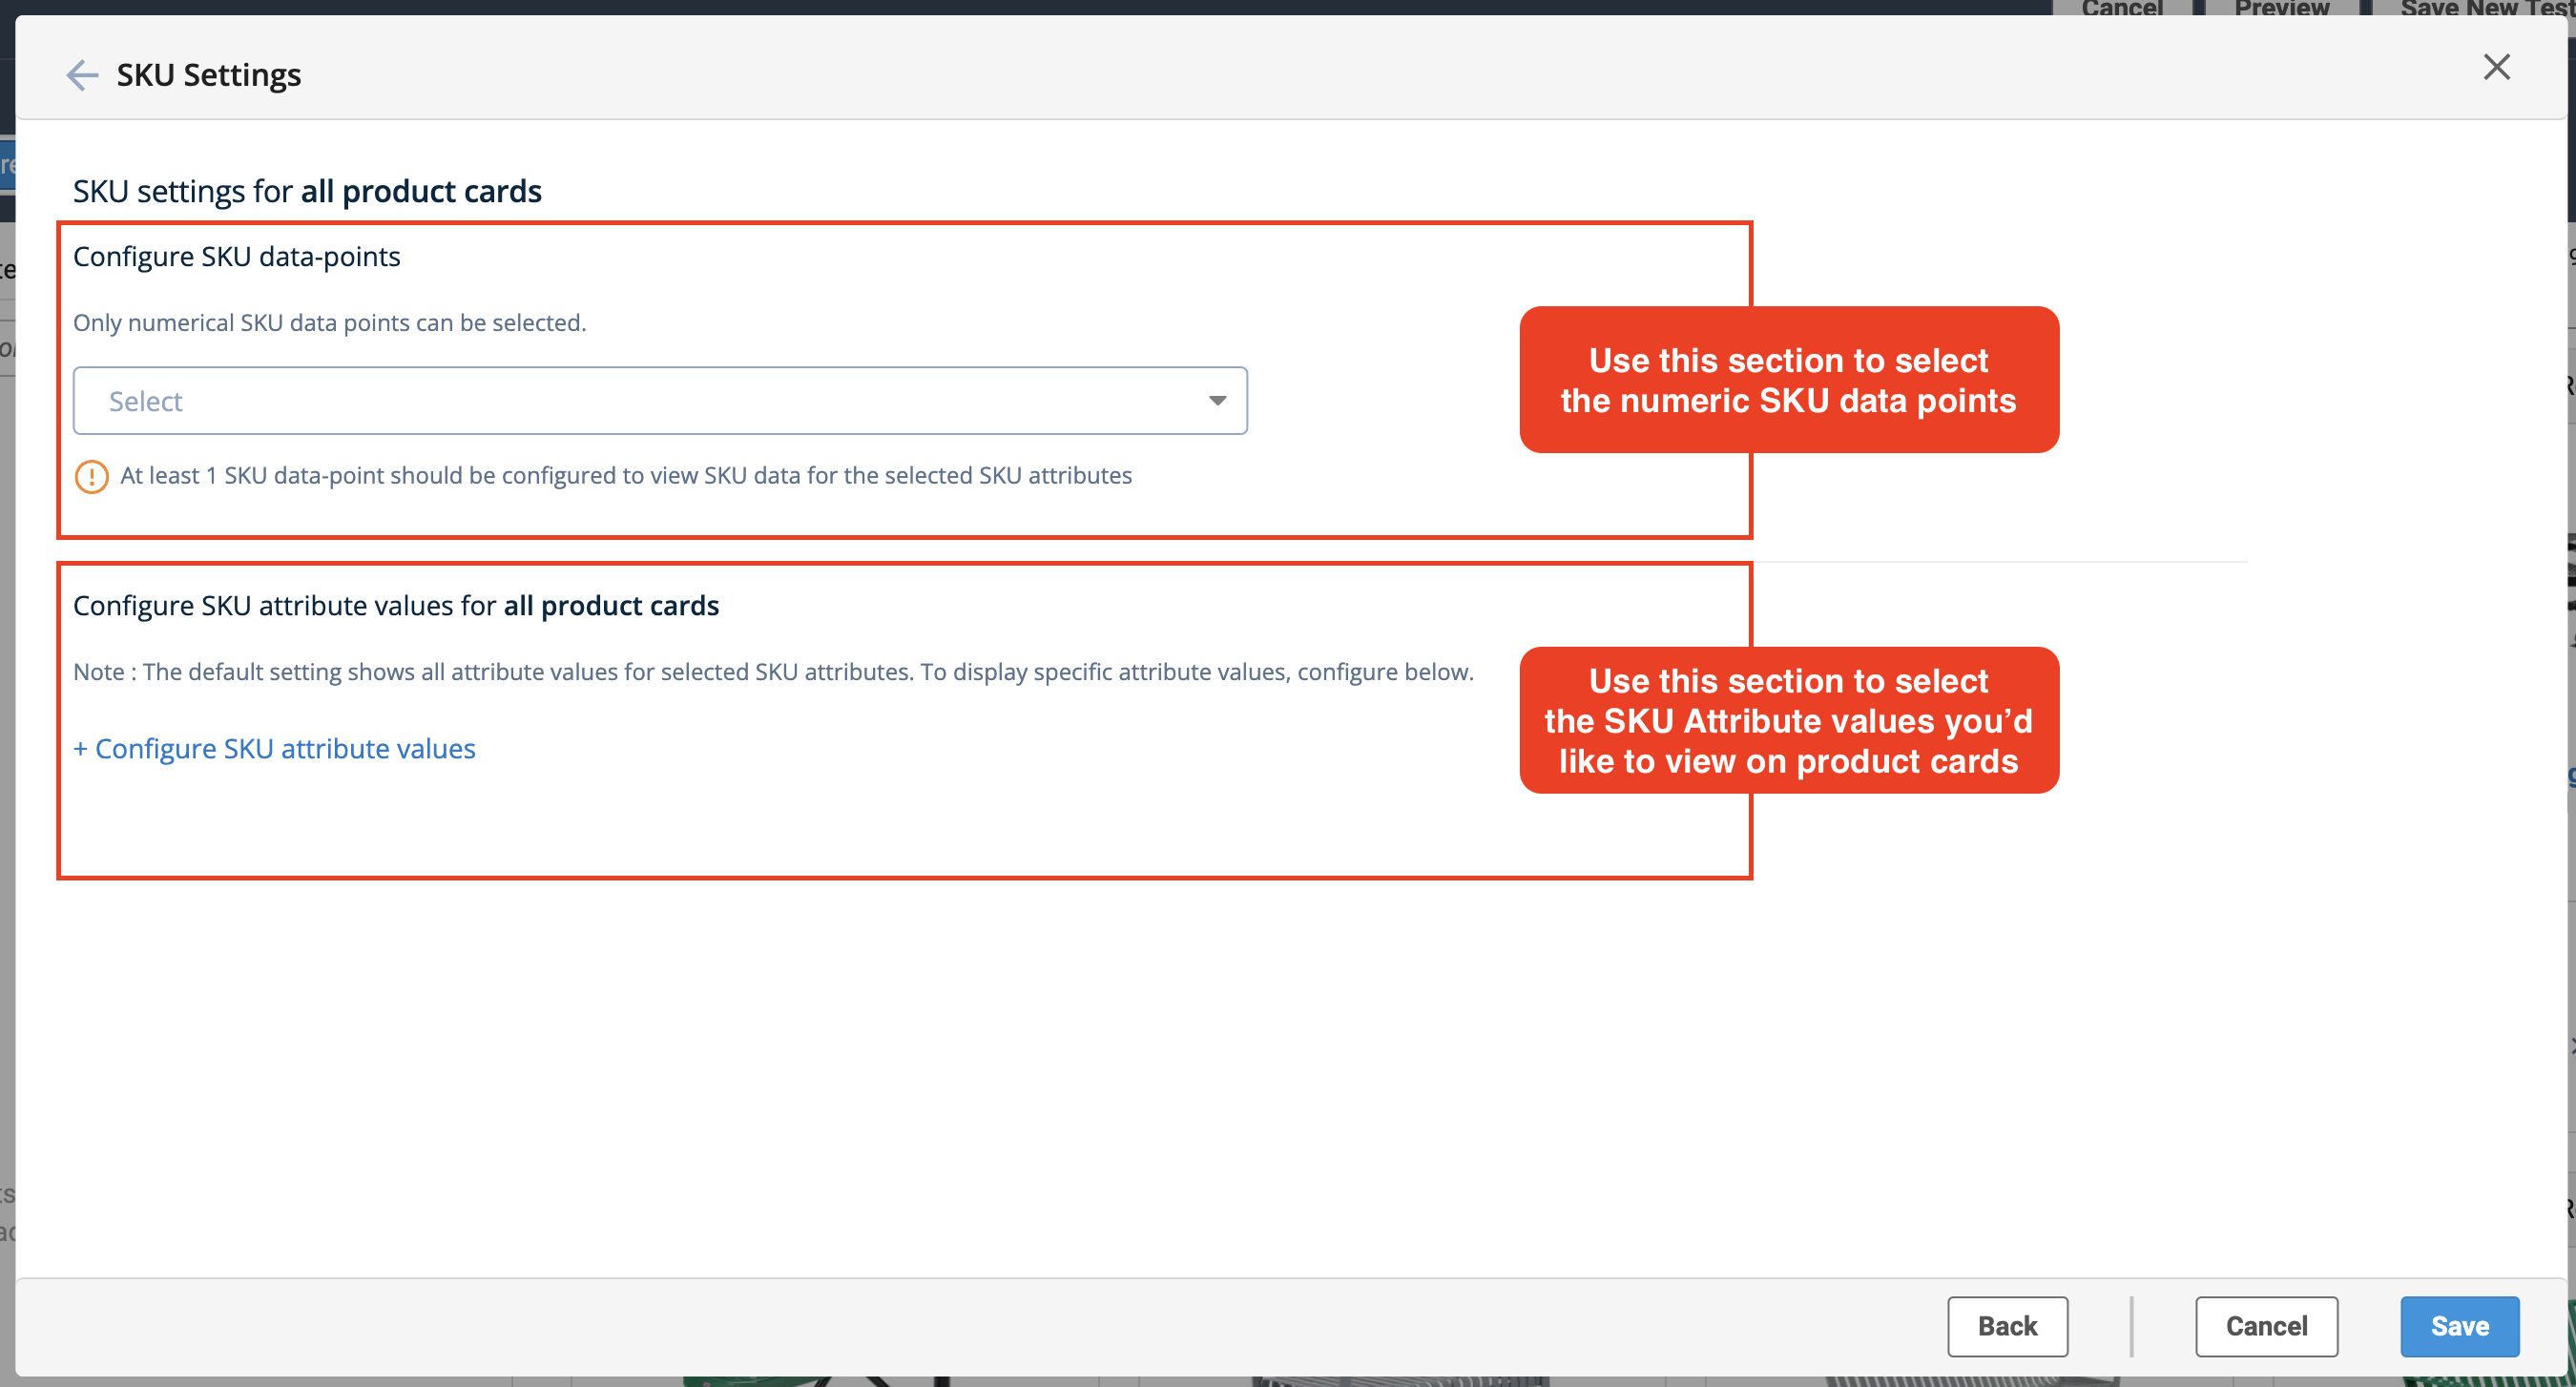
- Choose any SKU attribute/Datapoint. This activates the “SKU Settings” button. Click the “SKU Settings” button to view the SKU Settings modal.
- The SKU Settings panel provides two sections, as indicated in the illustration. The top section helps you select the Datapoints to be viewed on the product cards. The bottom section allows you to configure the SKU Attribute values that you selected in the previous step.
- Selecting Datapoints: Check the desired SKU Datapoints from the dropdown. Now click “Done.” Please note that if there are no numeric data points available, then you’ll see a “No Data Available” message.
- Configuring Attributes: Click the option “+ Configure SKU attribute values.” This displays a dropdown that you can use to select the SKU attributes. Once finished, click “Done.”
Now, select the values of the chosen SKU attributes. You can also type in the values. In the example above, we selected the values of the attribute “attr_depth.” Once you’re satisfied with the settings, click “Save.”
The updated settings will reflect in the product cards.
Please ensure that you pass the “SKU_inventory” parameter in the feed with precise case sensitivity.
- **B. Selected values Panel:**The second section shows the selected Datapoints. You can drag and drop to reorder the selected metrics/attributes by clicking down on the drag function. Please note that the first four values will be visible on the product card. Other chosen values will be visible when you click “view more.”
- **C. Preview Panel:**The third section shows the product card preview, which gives you a visual idea of how the product card appears with the selected values.
Column layout settingsUse the Column number settings to specify the number of columns in the product grid. This helps you define the number of products per row to ensure that the Visual Editor grid reflects the one on your website. This setting is visible at both the site and account levels.

Step 4. Save or Reset Changes
- If you’re satisfied with the product card customizations, click the “Save” button.
- If you wish to restore the changes, click “Reset to default”. This will reset the product card display settings to what you have set in the Global display settings.
Step 5. View data in product cards
In the Visual Editor, the product cards will display 4 metrics and a “view more” option.
To view the SKU data, hover over the SKU attribute value. To see all the attributes and metrics, click the View More option.
This reveals a modal with a summary of all attributes and metrics in the following order:
- Account level metrics
- Site level metrics
- Page level metrics
- Attributes
- SKU Data
You can use the dropdown provided to view the SKU attributes data. In the example below, “var_price” is a data point that will always be shown.
Points to remember
- For multi-query (or multi-category) ranking rules, you can switch to a different query (or category) by clicking on the blue keyword bubble in the Search Terms field. The product card settings will apply to the entire rule.
- After saving a Product card customization for a query rule, if any query of a single/multi-query rule is changed, then the Product card customization will “Reset to Default.” For instance, you made a set of product card customizations for “Chairs” query ranking rule. If you now change the query to “Sofa,” the product card customizations will be removed and reset to default global settings.
- If an attribute becomes invalid after a feed update (suppose you stop sending an attribute in the feed), then the attribute wouldn’t appear in the Selection Panel.
- Only numeric attributes are supported for SKU Datapoints. This means that you can only see the SKU-level data that you are sending as numeric displayable fields.
Updated 4 months ago