

Implement Search with Facets
This example demonstrates how to set up Bloomreach Search with facets. See the config.js file to configure the example to run for your Account and Catalog.
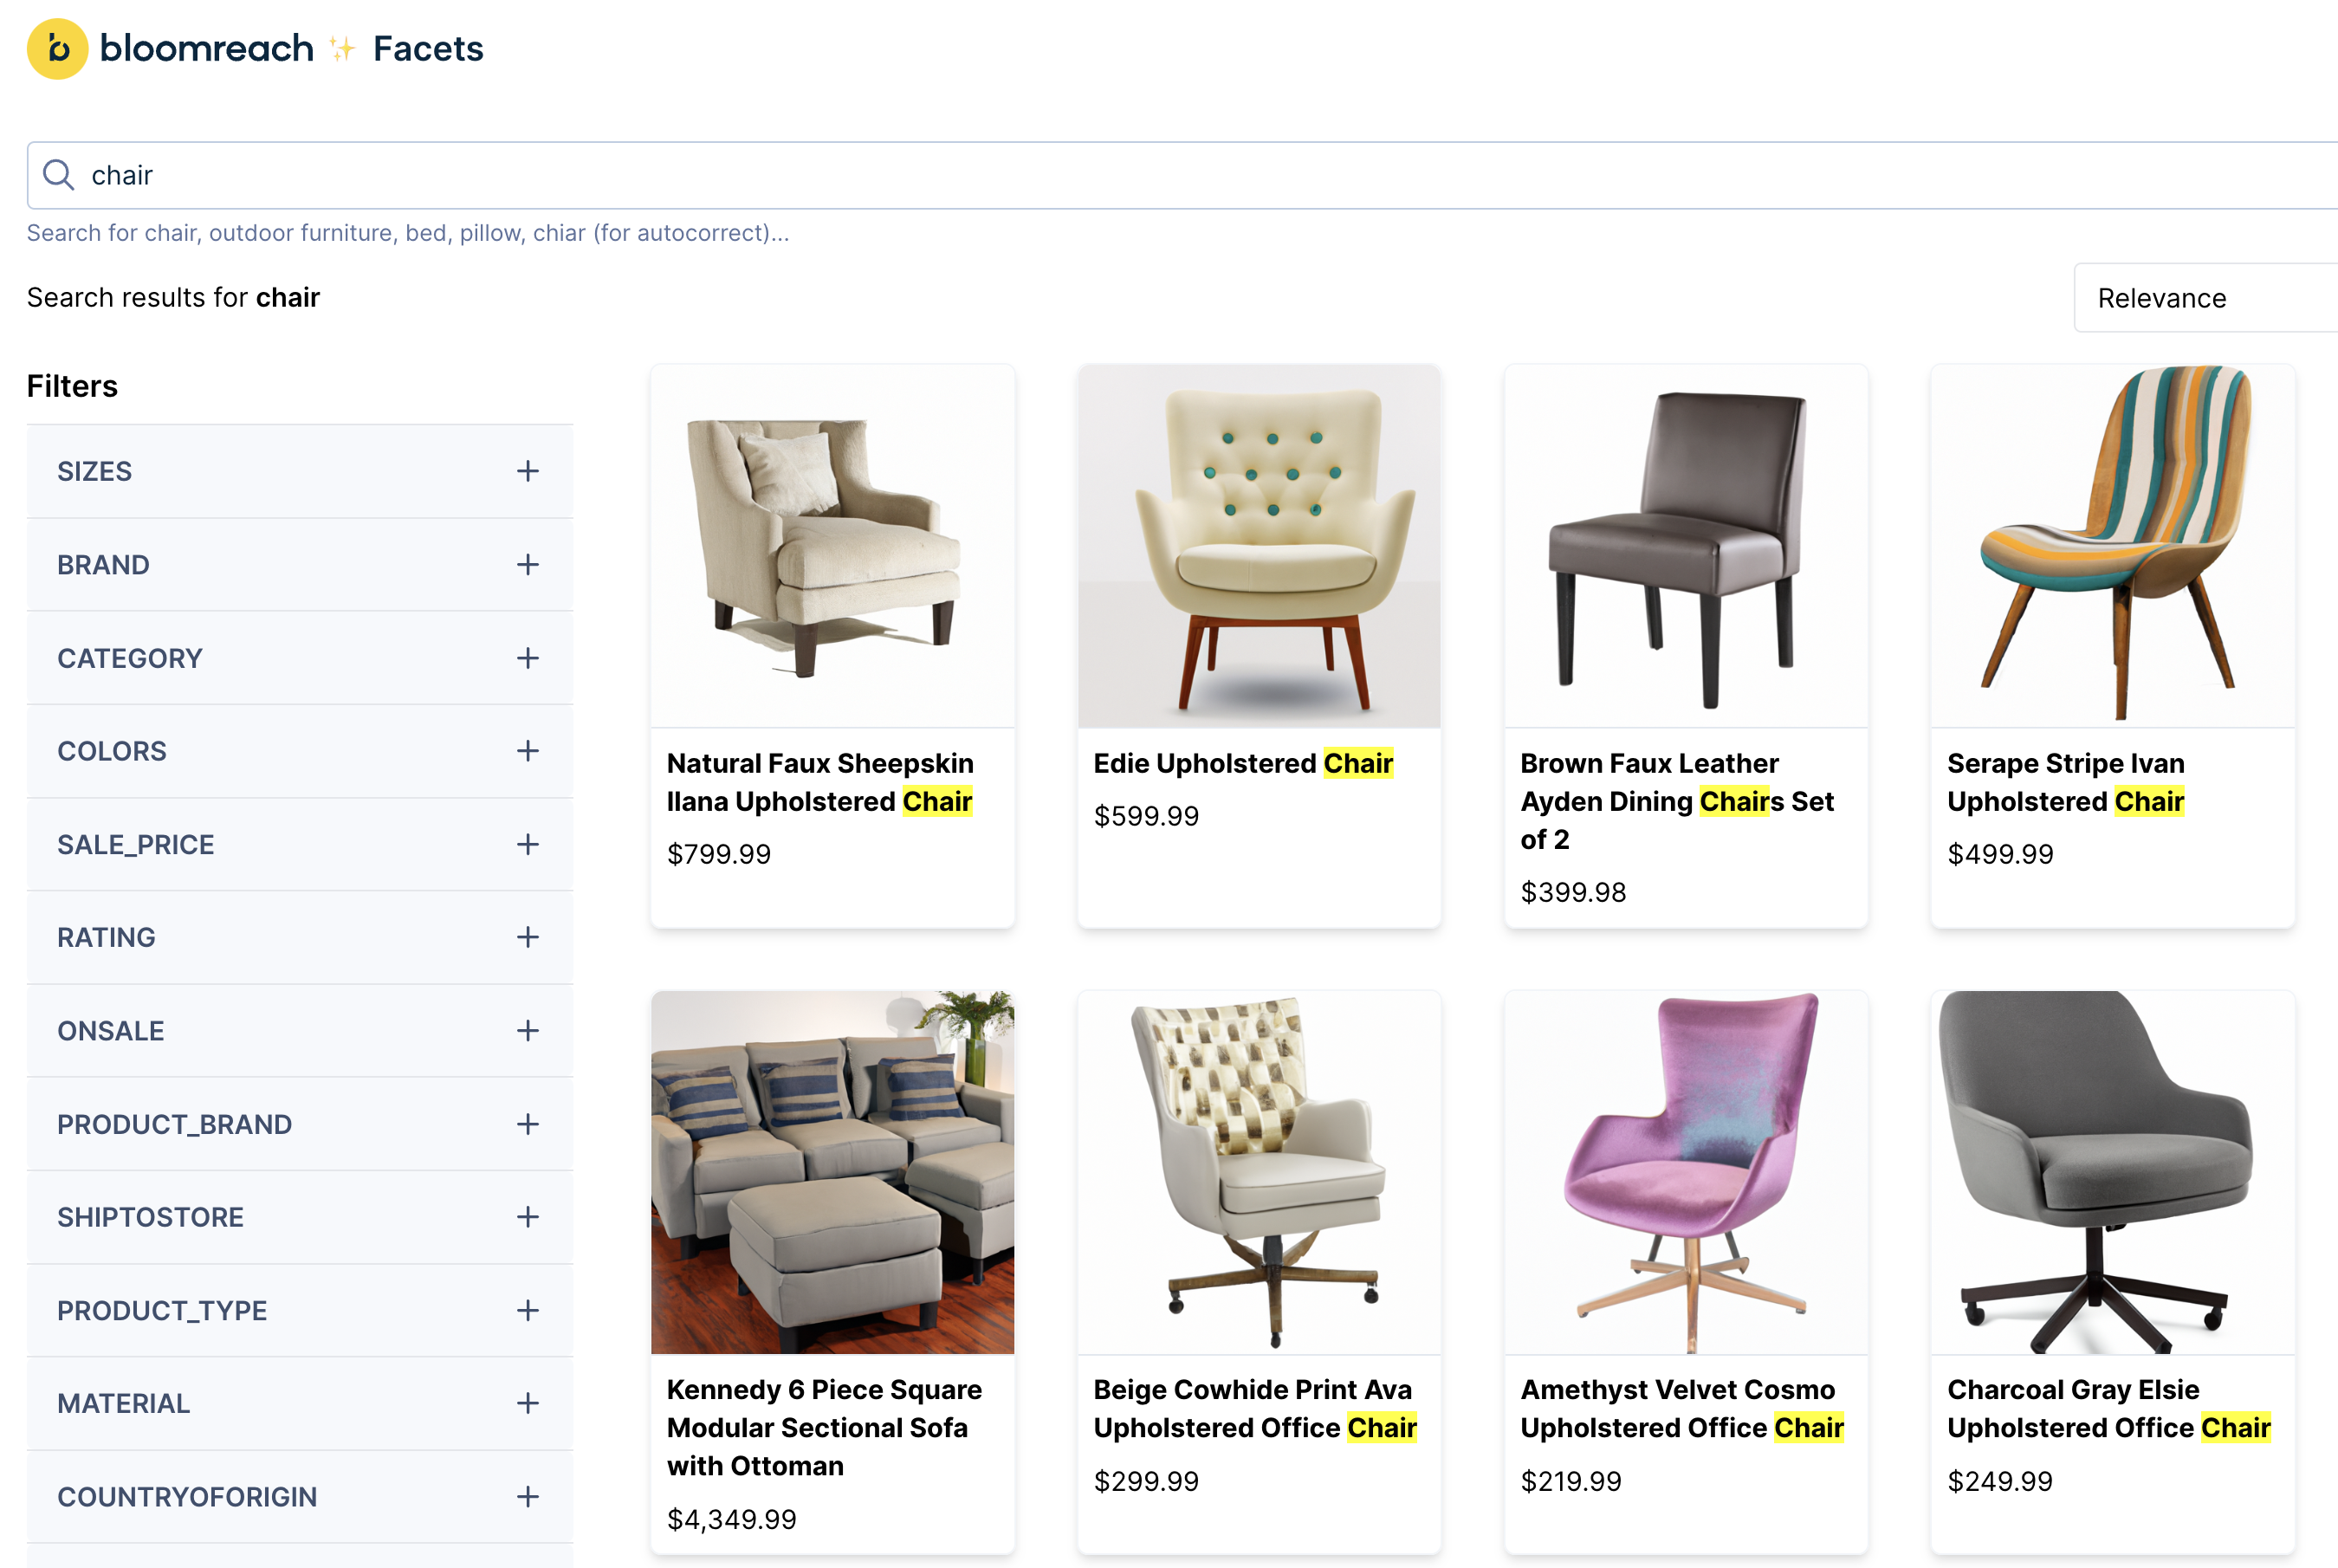
Demo preview
How to use
- Download the example or clone the repository to your local machine.
- Install the dependencies and run the development server.
npm ci
npm start
OR
Edit right away in Sandbox.
Implement search with visual color facets
The below example demonstrates how to set up Bloomreach Search with visual facets for the color facet. This frontend implementation enriches the facet UI by displaying the color palette visually.
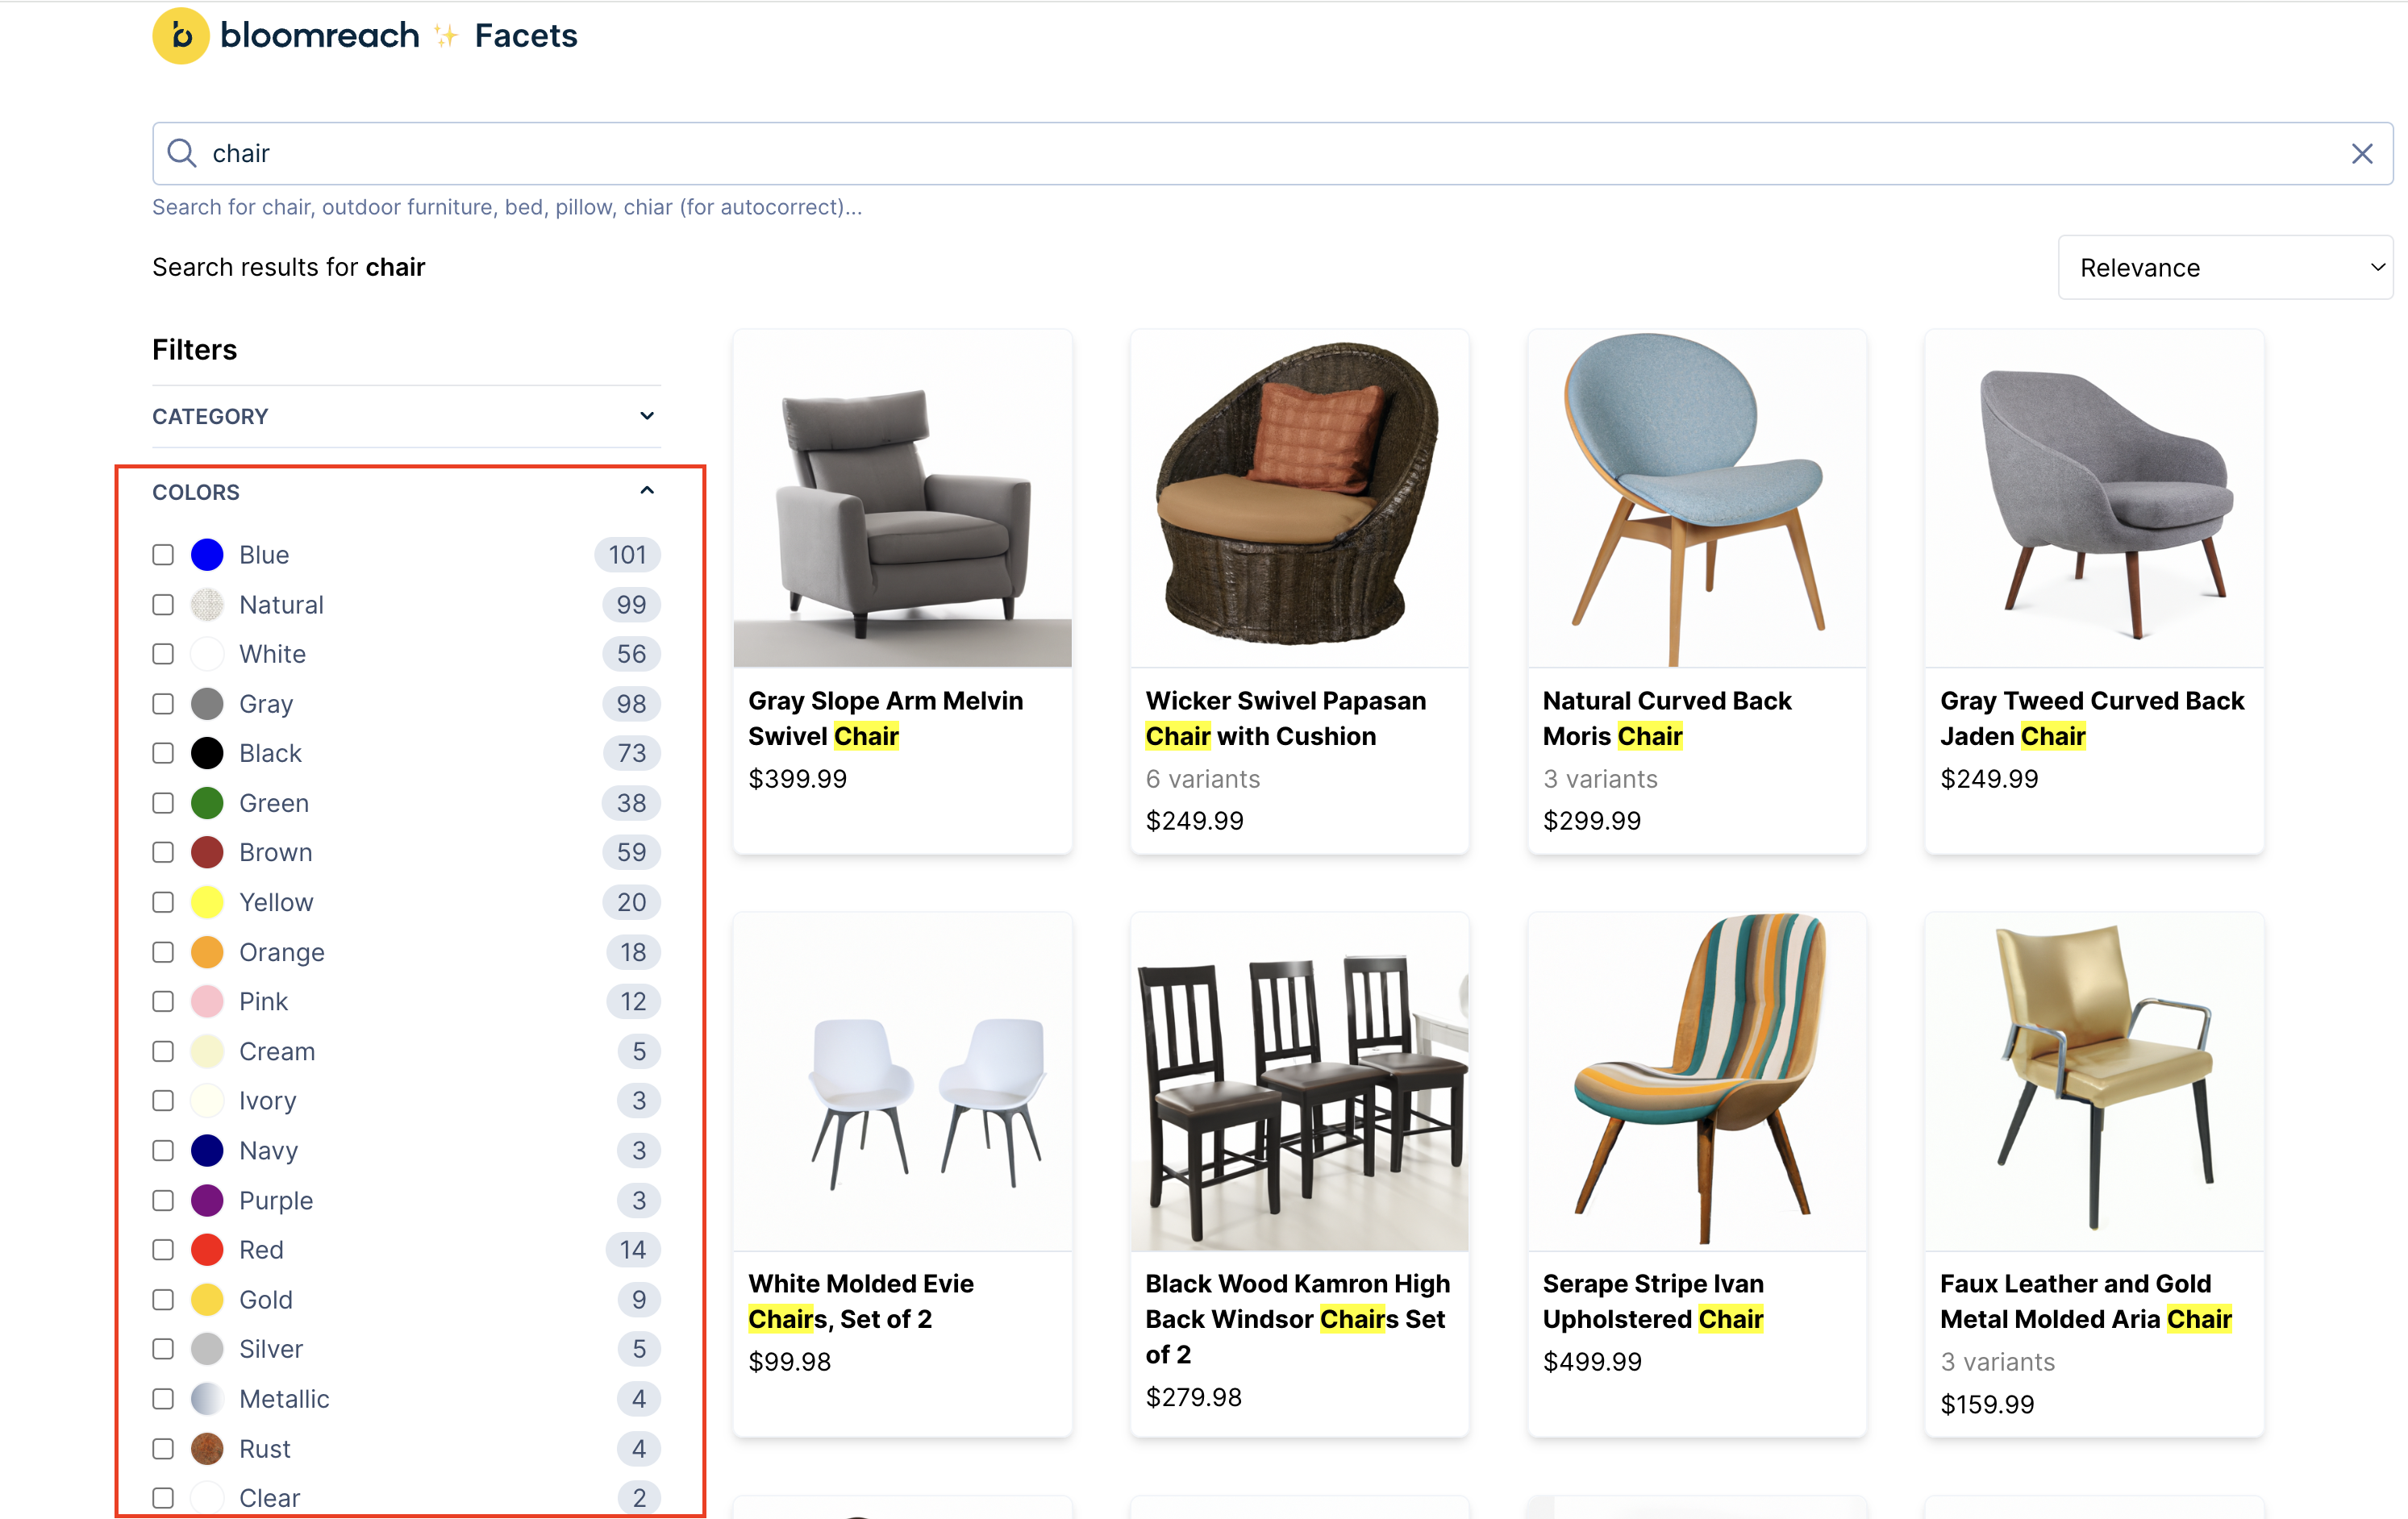
Make the faceting experience more engaging with a visual color palette
How to use
See the config.js file to configure the example to run for your Account and Catalog.
- Download the example or clone the repository to your local machine.
- Install the dependencies and run the development server.
npm ci
npm start
OR
Edit right away in Sandbox.
Add visual color facets with frontend mapping
The following section explains the code sample setup, which shows color previews and specialized visual components for color facets.
- Define color and component mappings
Create thecolorMappingandcomponentMappingobjects to determine how each facet value is visually represented.
-
colorMappingmaps color names to their respective hex codes or valid CSS color values. In this code snippet, the color 'acorn' renders the background color 'brown'.const colorMapping = { acorn: 'brown', cream: '#f7f5ca', }; -
componentMappingmaps special facet values (like 'metallic', 'rust', and 'natural') to specific visual components. In this code snippet, the value 'rust' shows an image (‘RustImg’).const componentMapping = { metallic: <div className="w-5 h-5 rounded-full border border-gray-100 bg-gradient-to-r from-slate-400 to-gray-50"></div>, rust: <img src={RustImg} alt="Rust preview" className="w-5 h-5 rounded-full border border-gray-100"/>, natural: <img src={NaturalImg} alt="Rust preview" className="w-5 h-5 rounded-full border border-gray-100"/>, }
-
Implement
getPreviewfunctionCreate the
getPreviewfunction to check if the facet value exists in eithercomponentMappingorcolorMapping. On finding the facet value, it returns the respective visual representation.function getPreview(value) { if (componentMapping[value]) { return componentMapping[value]; } const color = colorMapping[value] || value; return <div className="w-5 h-5 rounded-full border border-gray-100" style={{backgroundColor: color}} ></div> } -
Use the
FacetColorcomponentDefine and use the
FacetColorcomponent to render a list of checkboxes with visual facet options. Pass the necessary props (facet,value, andonChange). This component renders the facet options, including each facet's value and count.export const FacetColor = ({facet, value, onChange}) => { const options = facet.value.map((val) => ({ label: ( <div className="flex gap-2 items-center"> {getPreview(val.name)} {" "} {capitalize(val.name)} </div> ), value: val.name, count: val.count, })); return <CheckboxGroup options={options} value={value} onChange={onChange} />; };