Recall studio
This guide illustrates how to configure algorithms using the Recall studio.
💡Prerequisites
Permissions
Make sure that you have the Recall and ranking studio editor permission. Your Users admin can assign this role to any user who wants to create or edit an algorithm setting.
What is Recall studio
Recall studio allows you to preview, edit, and save the algorithm settings directly from the Discovery dashboard.
Configure algorithm settings with Recall studio
Navigation: Go to AI studio > Recall studio section in the Bloomreach dashboard.

On the Recall studio homepage, you’ll see the following tabs:
- Global Rules: Use this section to turn on/off, edit, or preview Global algorithm settings for your site. For example, you can use the Global Rules section to turn on precision mode for your entire site.
- Query Overrides: Use this section to change algorithm settings at a per query level. Here, you can view, add, edit, or delete Query Overrides rules for specific queries. For example, you can use the Query Overrides section to remove precision mode for specific queries where the default algorithm provides a better experience.
Note: When you enter the Recall studio homepage at the account level, you can only apply settings on the account or language-specific catalog level based on your account setup. If you enter at the site level, you can only apply settings at the site level.
Global Rules

Under the Global Rules tab, you can view the current settings enabled for all your language-specific catalogs and different sites in the account. Under the Global Rules tab, there are three columns:
- Influence: This section specifies the site scope of algorithm settings. At the account level, you can see the algorithm settings for language-specific catalogs and sites. However, if you have access to only one site in the account, then you can only update the settings of that site. Rules with a different site influence are indicated with a Read-only tag.
- Settings: This section lists the site's current algorithm settings.
- Variants: This section shows the rule variants for the A/B test.
- Enable: This section allows you to enable/disable the control rule variant.
- Last edited by: This section specifies the date and time the configurations were last edited and mentions the editor.
Customize global algorithm settings
1. View global algorithm settings
To view and edit the Global algorithm rules, hover over the Global rule and click the Edit button.

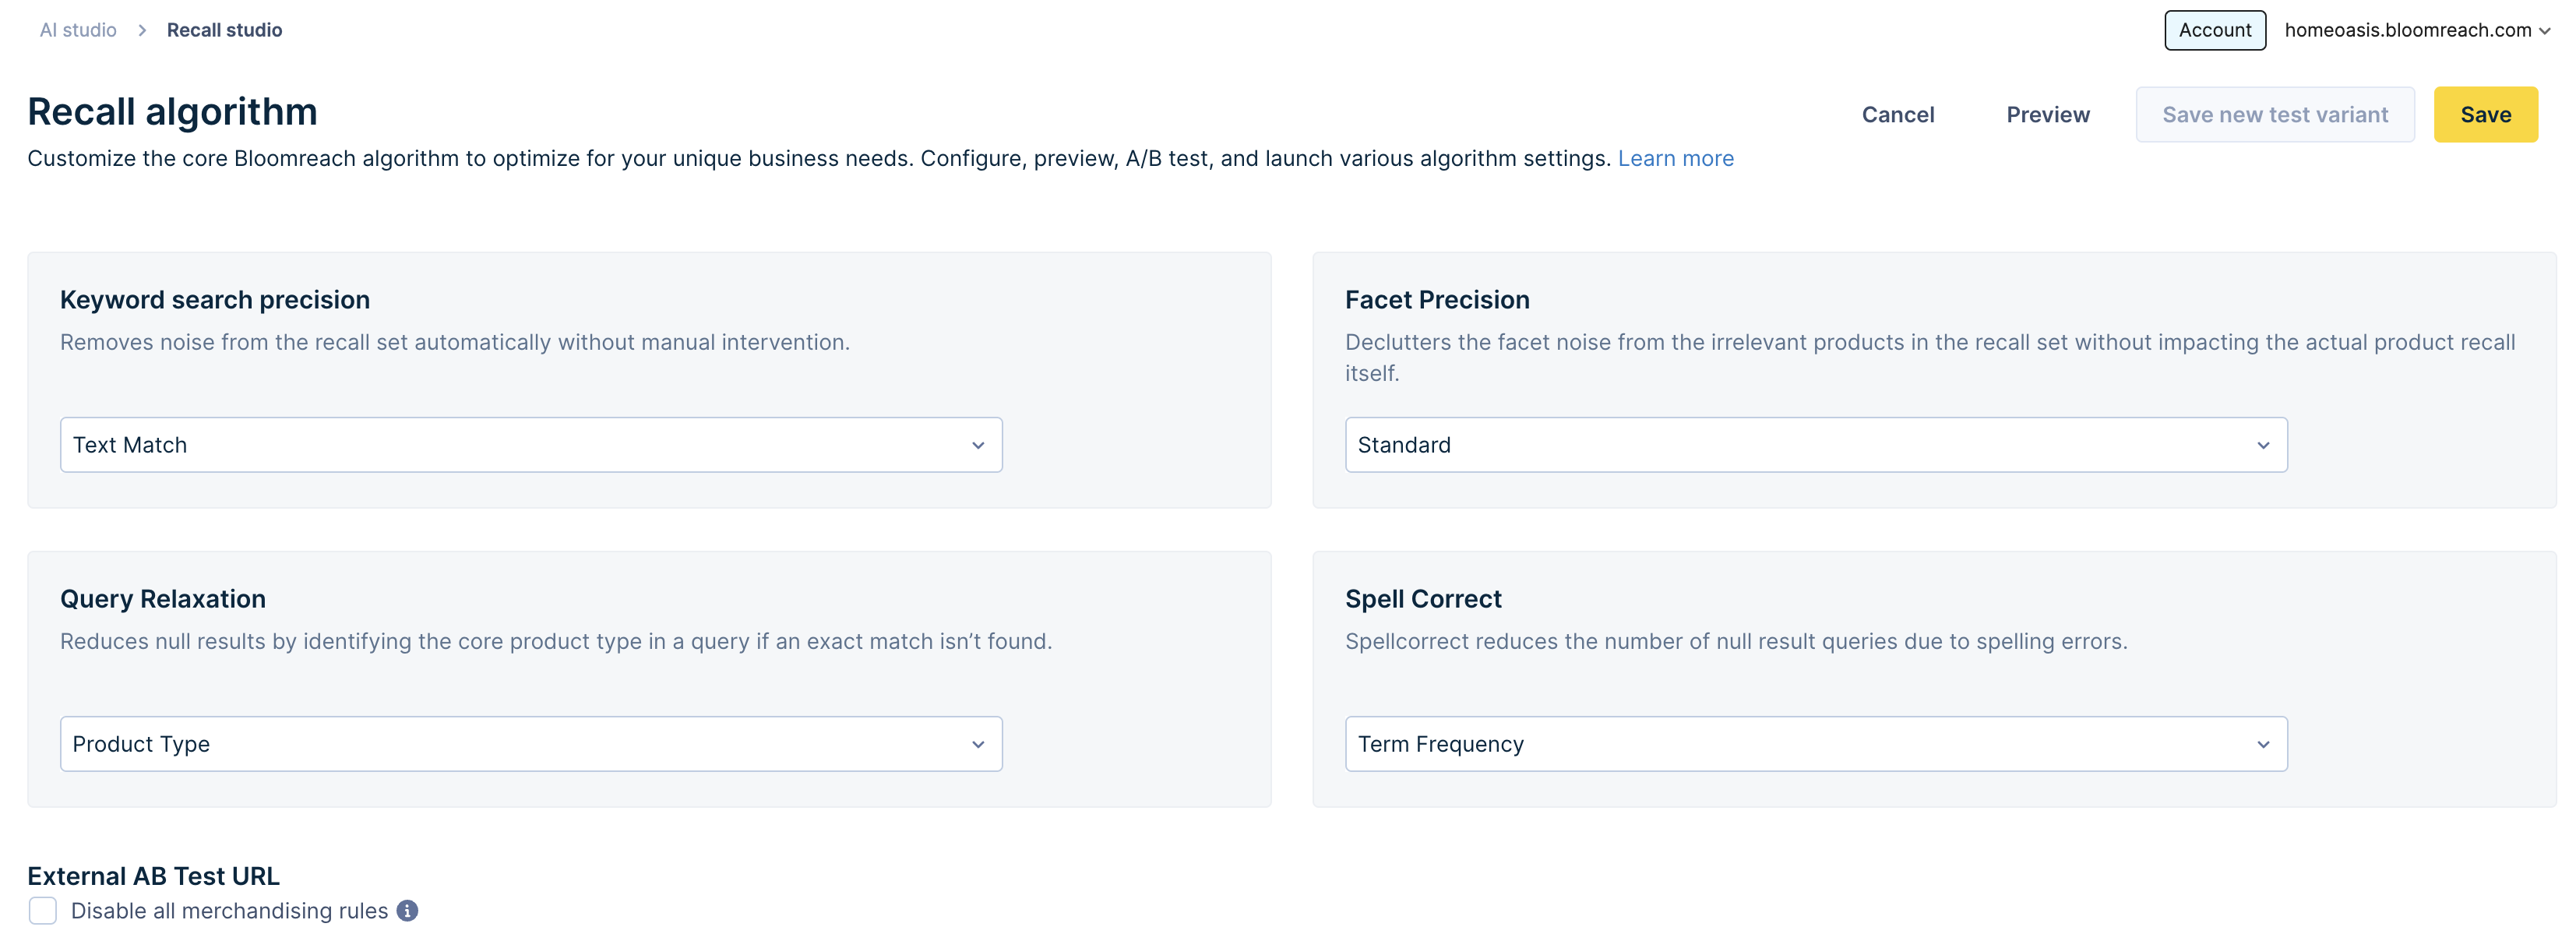
This opens up a configuration screen with dropdown controls for the following algorithms:
- Keyword search precision
- Query Relaxation
- Facet Precision
- Spell Correct
Notes:
-
In the case of multi-site accounts, you’ll see an Influence section at the top that mentions the site scope of algorithm settings.

-
Some algorithm settings are only available to English sites and not applicable to non-English sites. The following table summarizes the languages supported for each algorithm:
| Algorithm | Languages supported |
|---|---|
| Keyword search recall precision | - Text Match: All languages are supported. - Product Type Precision: All languages are supported. - Category Precision: All languages are supported. - LLM-based Precision: Only supports English. |
| Query relaxation | Query relaxation to product type supports all languages. |
| Facet precision | - Standard Facet Precision: Only supports English, French, and German. - High Facet Precision: Only supports English, French, and German. |
| Spell correct | All languages are supported. |
If an algorithm isn't supported for a particular language, it will not show up in the dropdown options.
For example, Homeoasis.com has both English and French catalogs. The values for its English catalog (Homeoasis_EN) and French catalog (Homeoasis_FR) for Search Recall Precision will differ since we don't support "Product Type Precision" for French language catalogs.
- The following are the default modes for the Keyword recall algorithms:
| Algorithm | Default Mode | How it works |
|---|---|---|
| Search Recall Precision | Text Match Precision | This mode recalls all the relevant products using the basic term match. |
| Query Relaxation | Product Type | This mode reduces null results by identifying the query intent using Bloomreach’s semantic understanding. |
| Facet Precision | Standard | This mode ranks relevant facets higher than the irrelevant facets. |
| Spell Correct | Term Frequency | This mode uses term frequency to rank the different candidates for a correction. |
2. Select and preview algorithm settings
- Select the desired algorithm setting using the dropdown controls provided.

- To view the changes, click the Preview button and explore the results with the new Algorithm settings.

- Enter the query in the search box and hit enter/return to see the results after the new algorithm configurations.
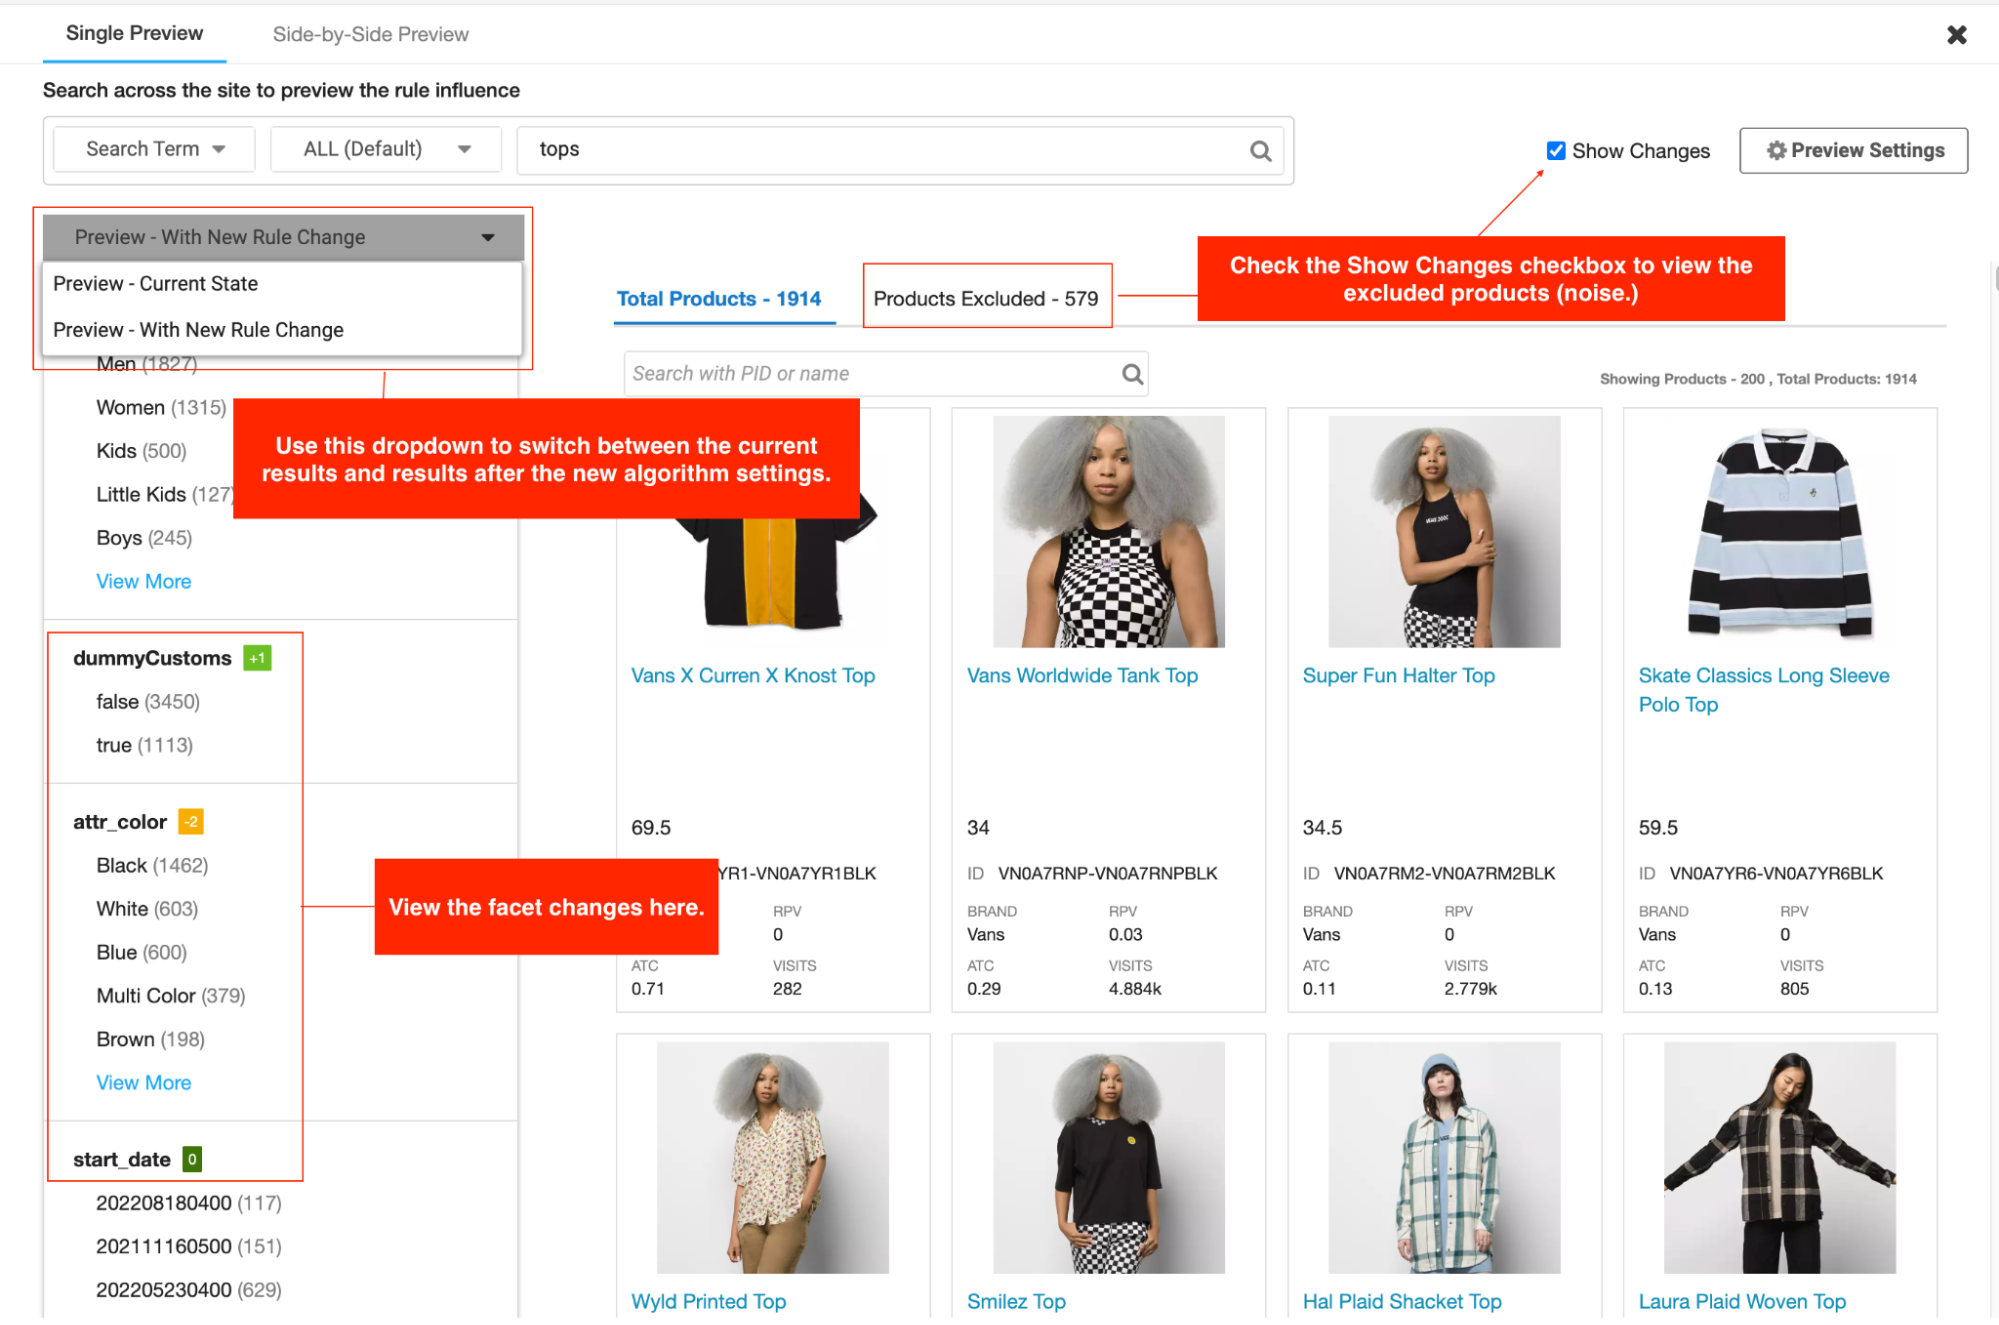
Refer to the following table to understand how facet/facet value changes are indicated in the facet UI:
| Tag | What it means |
|---|---|
| Indicates no change in the facet/facet value position. | |
| Indicates how much higher the facet/facet value is ranked now compared to where it was before. | |
| Indicates how much lower the facet/facet value is ranked now compared to where it was before. | |
| Indicates the new facets introduced after changing the algorithm settings. |
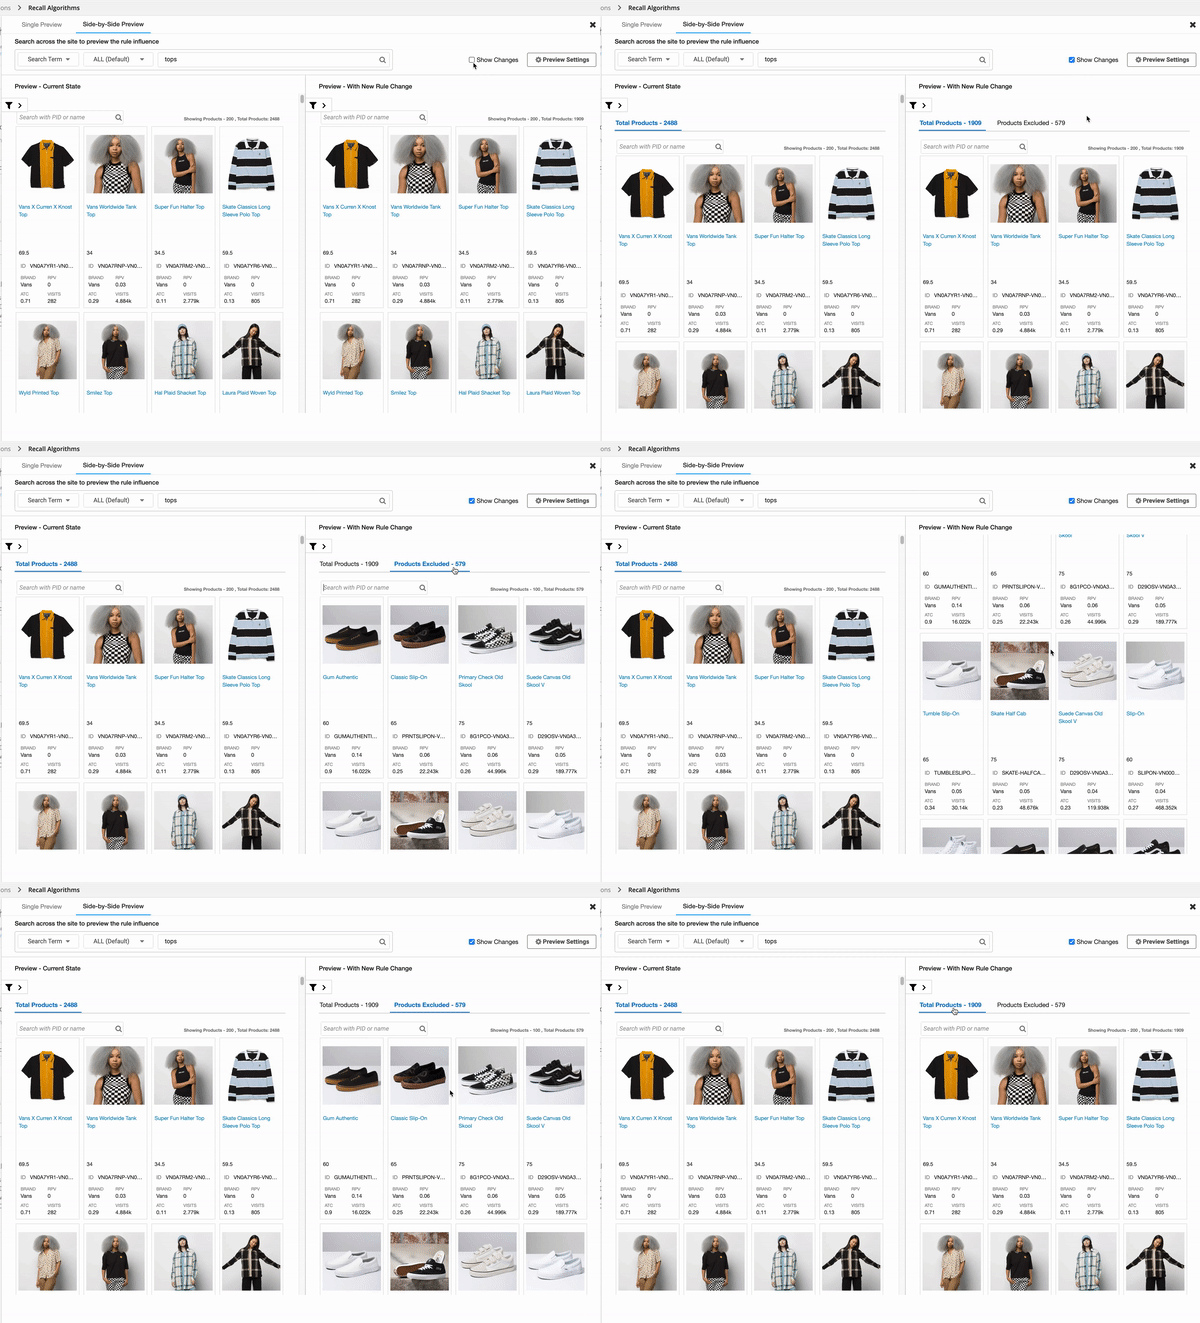
- For further exploration, go to the Side-by-Side Preview tab. Click the Show Changes checkbox
- You can now view the excluded products (noise) and compare the results with the current state. This can help you determine if the new algorithm settings are suitable for your use case or not.
- To preview the Facet Precision mode changes, click the
 filter icon to reveal all the facets. From the
 Total Facetdropdown, you can choose theExcluded Facetsoption to view the facet noise removed from the results.
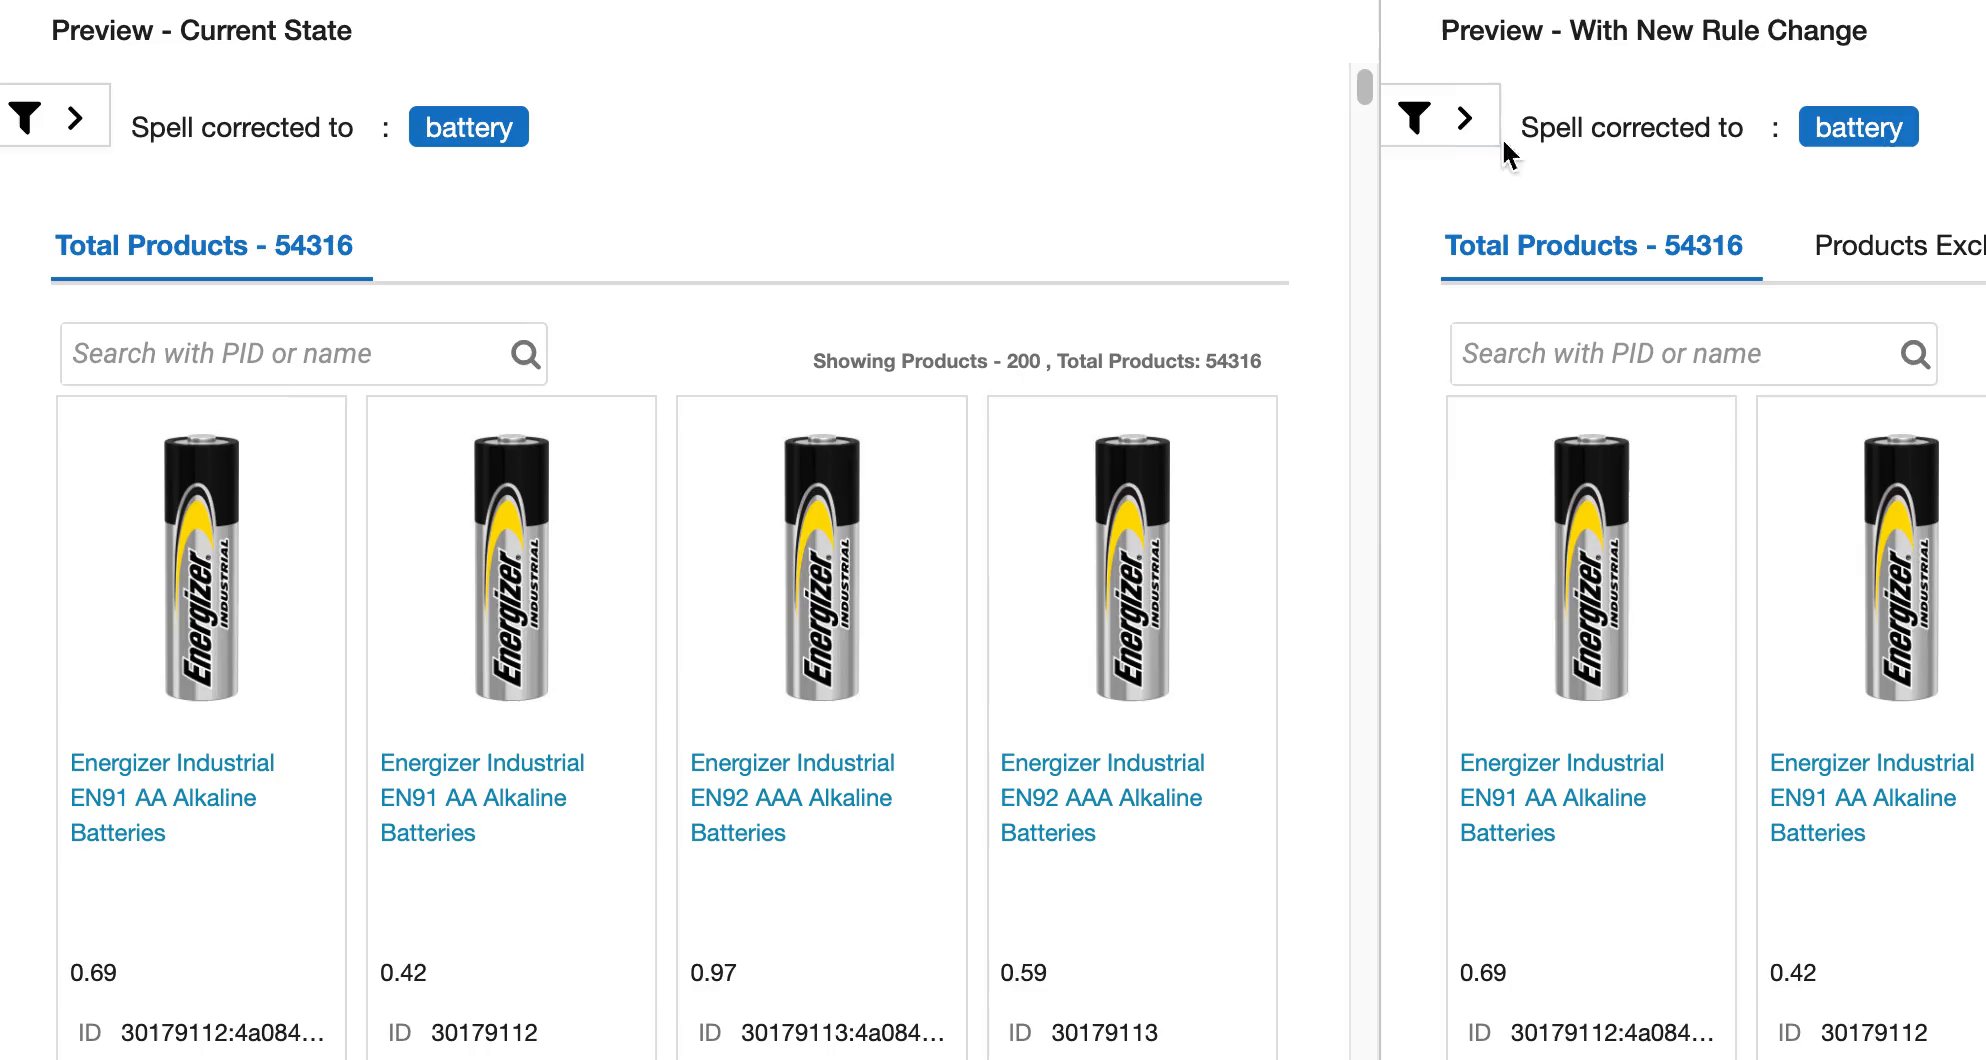
- In case you enter a misspelled query, the product results will be shown after spell-correcting the query.

In the example shown, the misspelled query "batery" is corrected to battery.
3. Enable rule globally
Once satisfied with the results, Save the rule to enable the global rule for all queries.
A/B test global algorithm settings
To A/B test the newly selected algorithm settings via dashboard or API, follow the respective steps:
A/B test via the dashboard
-
Go to the global rule and make the changes required for the new test variant. Now, click the Save new test variant button.

Disable all merchandising rules
You can optionally turn off all currently active and future merchandising rules for the selected catalog/site by clicking the checkbox provided under the External AB Test URL section. Please note that no alerts are shown on the ranking rules page if another user tries to create new rules when you disable them.

-
This opens the Rule Variants modal. Toggle ON the variants to include in the test and then click Set up new test.

-
This opens the Test Setup page. Configure the test and click Activate.
-
Now, the test is active, and the global rule displays an “In testing” status.
AB test via API
-
You can copy the external AB testing link provided in the External AB test URL section. This link can be used to run and manage the AB test via your third-party testing platform. To test the configurations for a particular query, you must replace "QUERY_PLACEHOLDER" text with that query.

-
Note that this is a self-managed A/B test. The parameters are controllable through the front-end API call.
Query Overrides
There can be use cases when you want certain queries to fall back to a different algorithm than the default Global algorithm. For instance, at the Global level, you have Category precision mode, but you want the query “tops” to use the Text Match precision mode.
Query override rules can be used to accomplish such use cases. Query overrides take precedence over Global algorithm rules.

These rules are listed under the Query Overrides tab. This section shows 4 columns:
- Queries: This section specifies the query corresponding to the query override rule.
- Influence: This section specifies the site scope of query override settings. If you've opened the dashboard on the account level, you can see the query override settings of language-specific catalogs and sites. However, if you have access to just one site, you can modify settings only for that site.
- Settings: This section lists the corresponding algorithm settings for the query override rule.
- Variants: This section shows the rule variants for the AB test.
- Enable: This section allows you to enable/disable the control rule variant.
- Last edited by: This section specifies the date and time the rules were last edited. It also mentions the editor.
Configure Query Overrides
This section illustrates the process of configuring a new query override rule.
- Click on the “+ New Override” button to open the “Configure query overrides” section.

- Specify one or more queries in the “Queries” textbox. To specify multiple queries, hit enter/return after typing each query.

Importing multiple queries
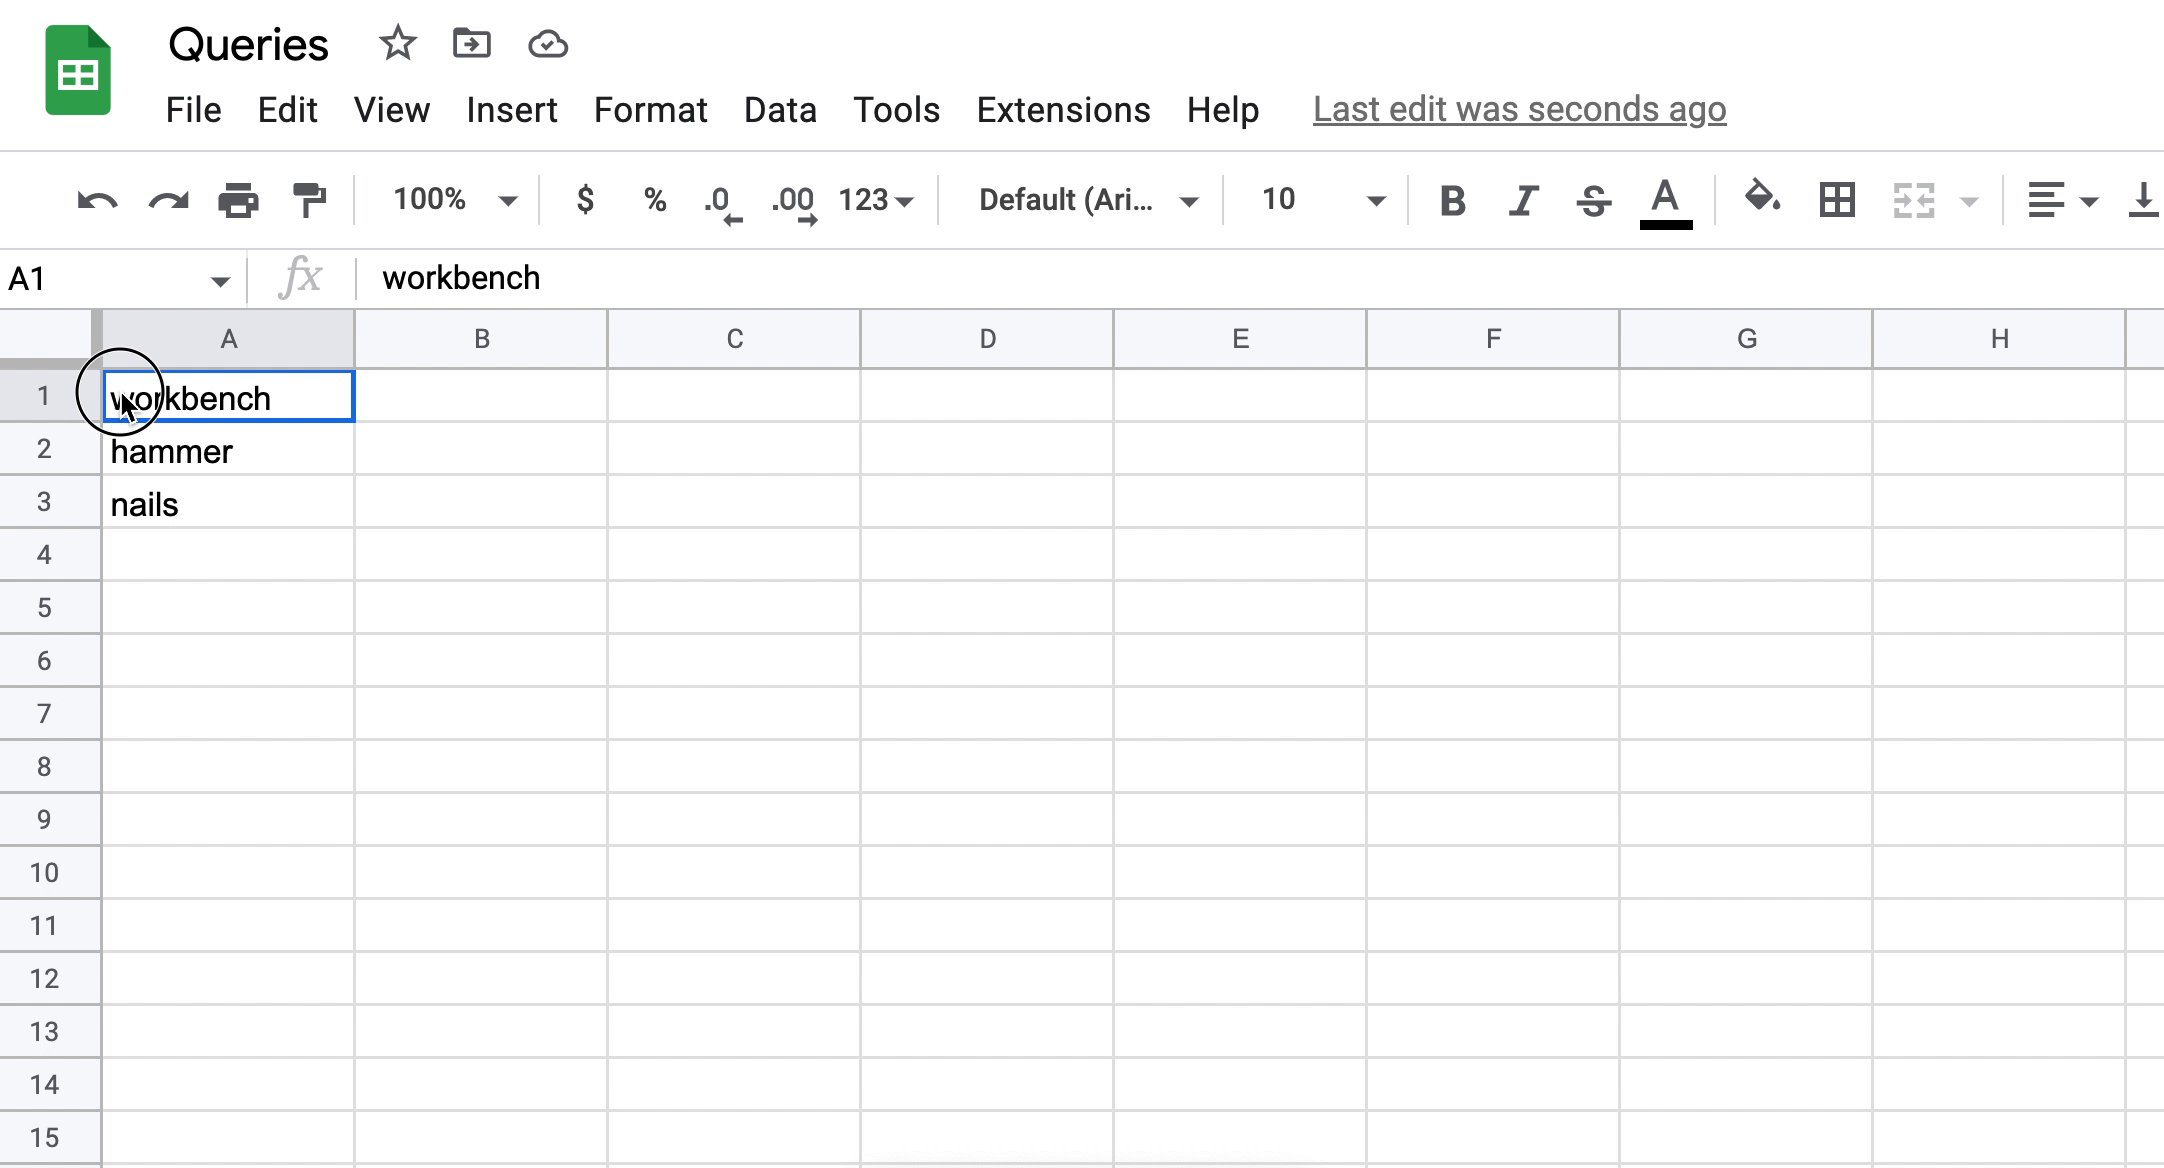
If you'd like to specify multiple queries, list the queries vertically in a spreadsheet file, copy the queries, and paste them into the Queries textbox. To toggle between different queries, click the desired query.
- Select the site influence of the override rule from the dropdown menu. If you have multiple catalogs, you need to specify the catalog that is being targeted by the current rule you’re creating. The demo here has two catalogs - Homeoasis EN (English)and Homeoasis_fr (French). The user has to decide whether the rule settings for query "chair" should be applied to Homeoasis EN or Homoasis_fr site.

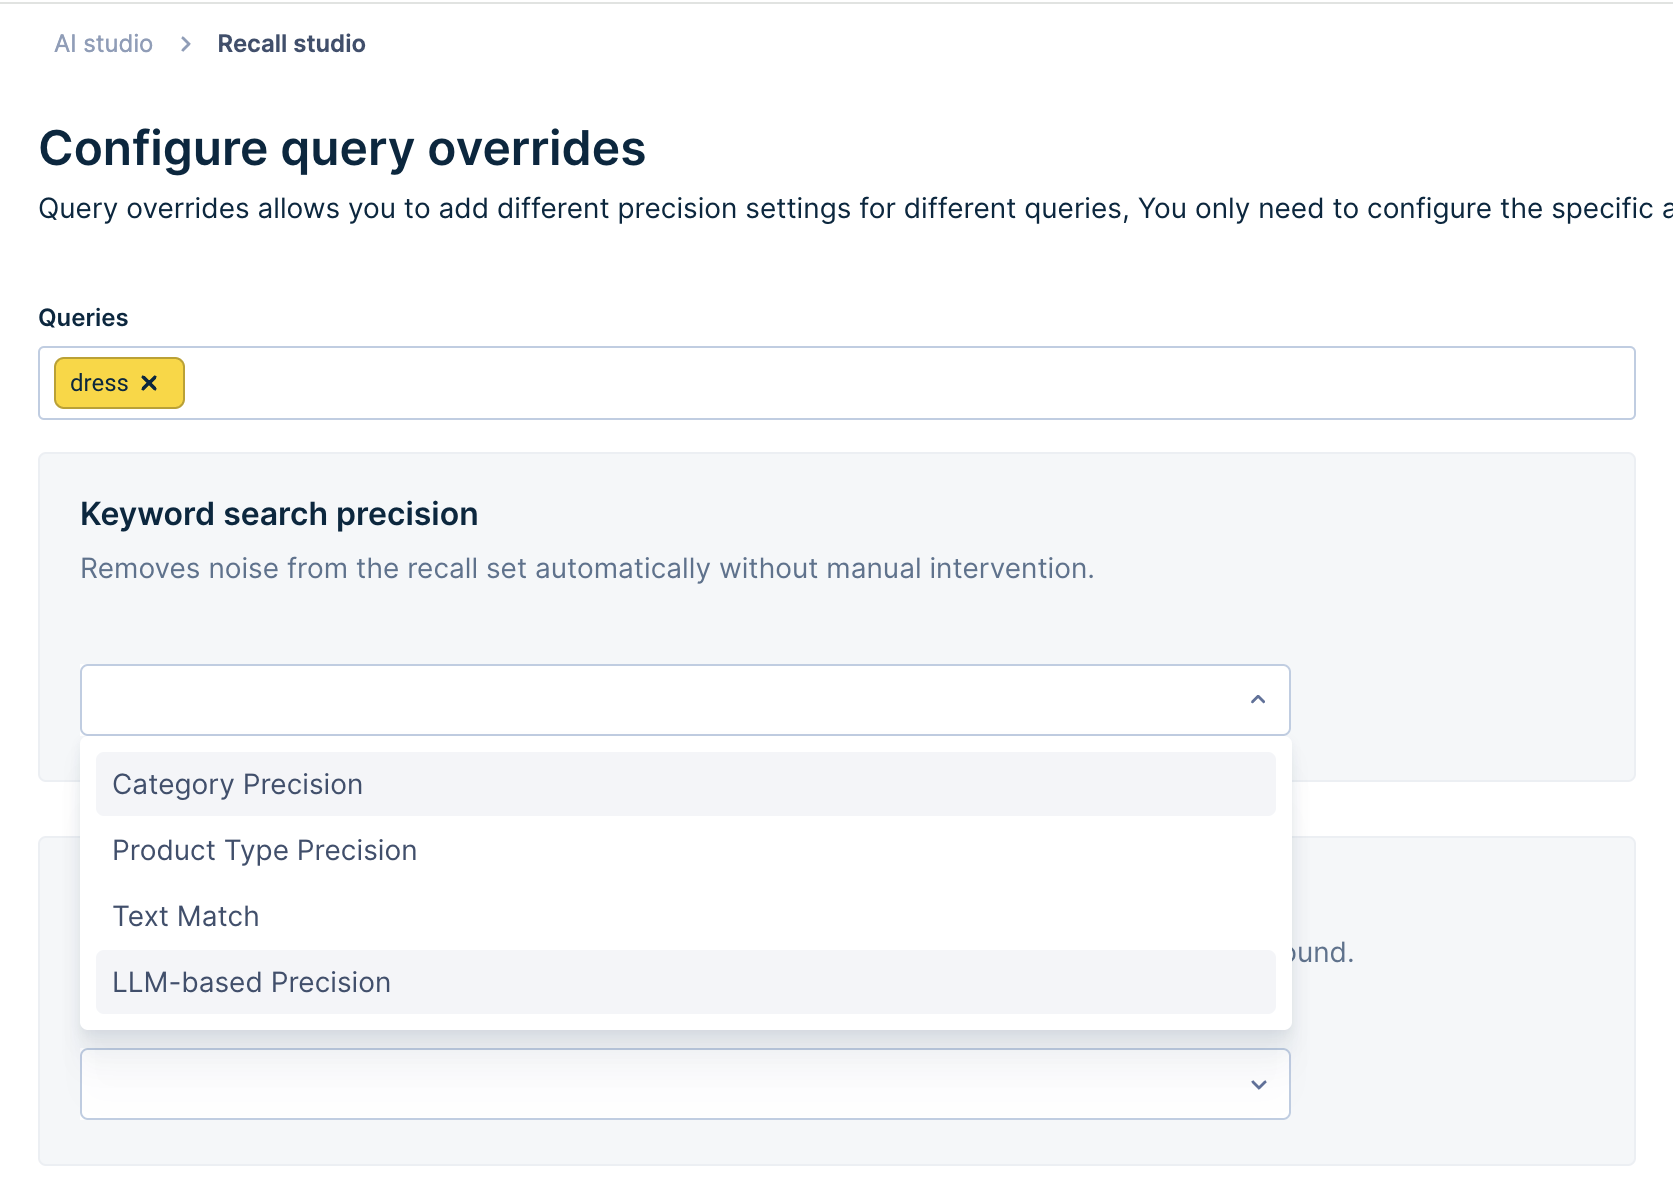
- Select the appropriate algorithm setting from the dropdown.
Notes- Category Precision, Facet Precision, and Product Type Precision modes work only for top queries.
- LLM-based Precision supports only queries with a valid product type. For instance, the query “black shoes” has the product type “shoes.”
- Click the Preview button to view the product search results for this query override rule.

- If the results look good, click the Save button.
Manage Query override rules
Edit existing Query override rules
- Hover on the Query override rule and click the Edit button.

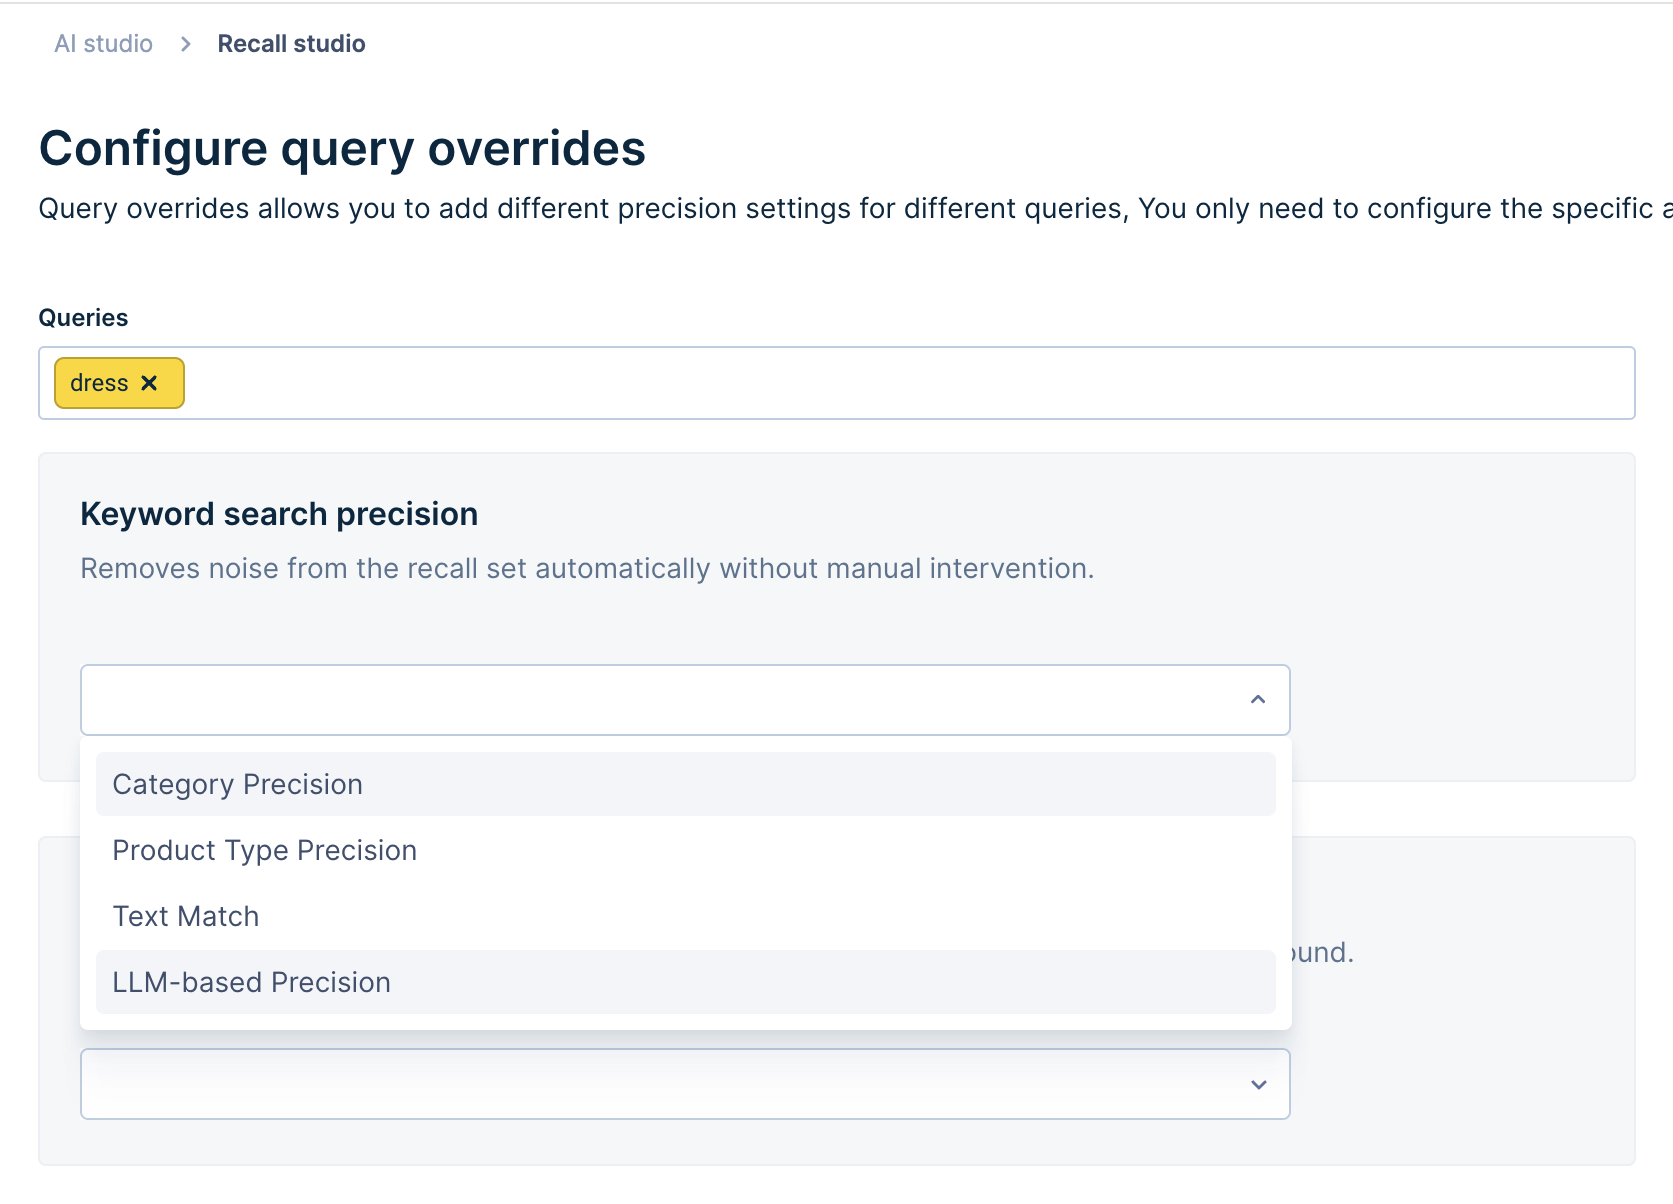
- Select the appropriate algorithm setting from the dropdown.
- Click the “Save” button.
Delete existing Query override rule
- Hover on the Query override rule and click the down arrow button. Click Delete.

- Click the Delete button in the Delete Confirmation pop-up window.
A/B test Query override rules
-
Go to the existing query override rule and make the changes required for the new test variant. Then, click on the Save new test variant button.

-
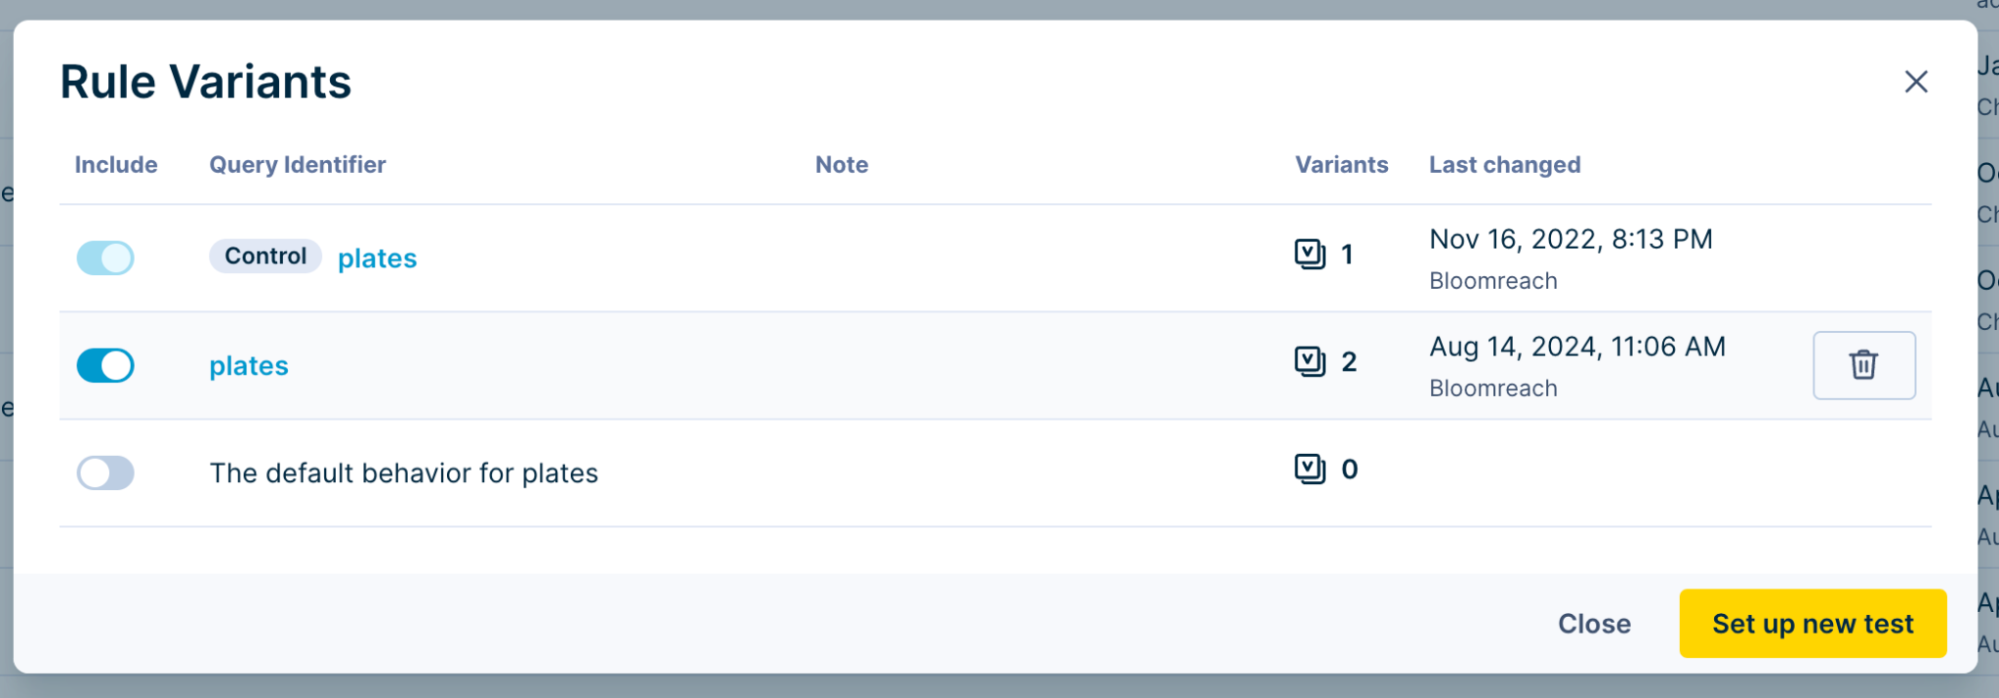
This opens the Rule variants modal. Toggle ON the variants to include in the test and then click Set up new test.
-
This opens the Test Setup page. Configure the test and click Activate.
-
Now, the test is active, and the query rule displays an “In testing” status.
Recall studio FAQs
-
How is conflict resolution managed, that is, when a setting is passed through API vs. Global rule vs. Query Override vs. any live A/B test?
Priority order works as follows:
a. Query Override on Dashboard
b. API parameters passed directly on front-end API call
c. CMS setting for any live A/B test
d. Global Rules on Dashboard
Example: Let’s say a customer has Global rules set up on the dashboard for Search Recall Precision as Text Match.
Case 1: If the customer is running a live A/B test for 50-50 traffic for text match and category precision. In this case, since CMS setting has higher priority than Global rules, CMS setting triumphs over global rules, and 50% of traffic will have text match precision, whereas the other 50% will have category precision.
Case 2: On top of case 1, if the customer is also controlling the feature for a few search queries on their end by passing search recall precision as Product Type precision. In this case, for the queries that are controlled by the customer on their end, product type precision will be applied. For all other queries, CMS settings(live A/B test) will be respected.
Case 3: On top of case 1 and case 2, the customer has a query override set up for Search recall precision as “Category Precision” for a few queries. In this case, since query overrides have higher priority, the search queries that have overrides set up will have category precision. For the queries that are controlled by the customer on their end, product-type precision will be applied. For all other queries, CMS settings(live A/B test) will be respected. -
Do all 4 settings need to be updated together on the dashboard?
No, if you wish to update/preview one setting at a time, you can achieve this by selecting the relevant dropdown value of the setting and leaving all other settings as is.
Updated 10 months ago
