

Create and manage Dynamic categories
This guide will walk you through the process of creating and starting to use a Dynamic category. Here is an overview of the entire process:
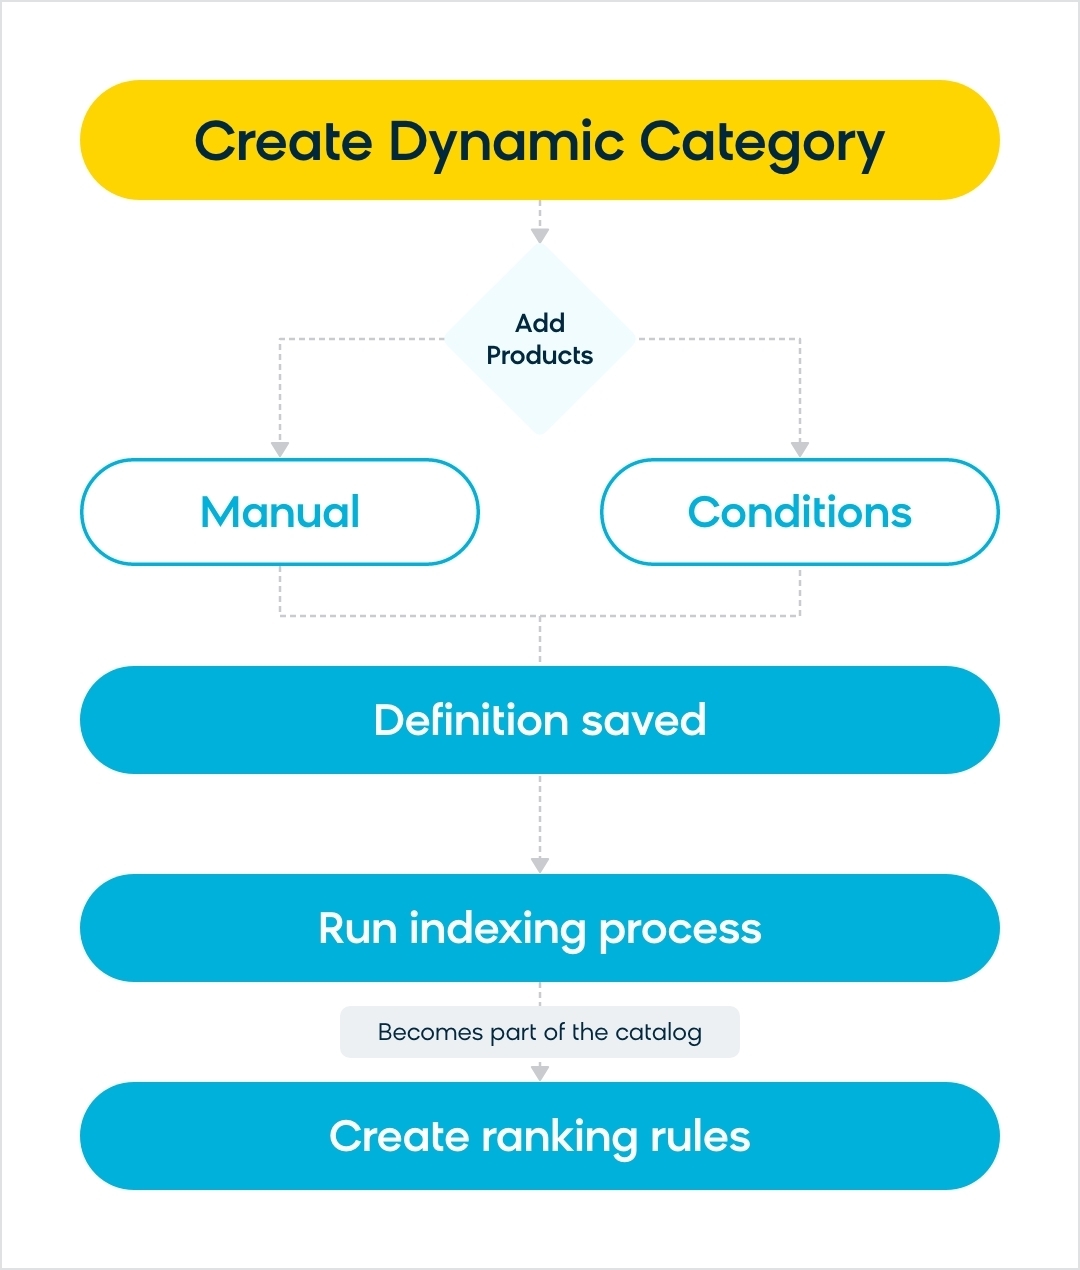
Summary of the Dynamic category creation process
Before you begin
Feature scope: Dynamic categories are linked to a Catalog. You can create and manage them from any site level.
Permissions
- Only users with the Categories merchandising editor role assigned to them on any management level higher than Site in Users application can access Dynamic categories to create or modify Dynamic categories.
- Only users with the Catalogs & events admin or Catalogs reindexing admin user roles can trigger the feed indexing to sync Dynamic categories to the catalog.
1. Create a new Dynamic category
- To create a Dynamic category, go to Setup > Merchandising > Dynamic categories in your Bloomreach Dashboard.
- Click on the “+ New dynamic category” button at the top right of the screen. You will see the category creation wizard, where you can configure your new category.
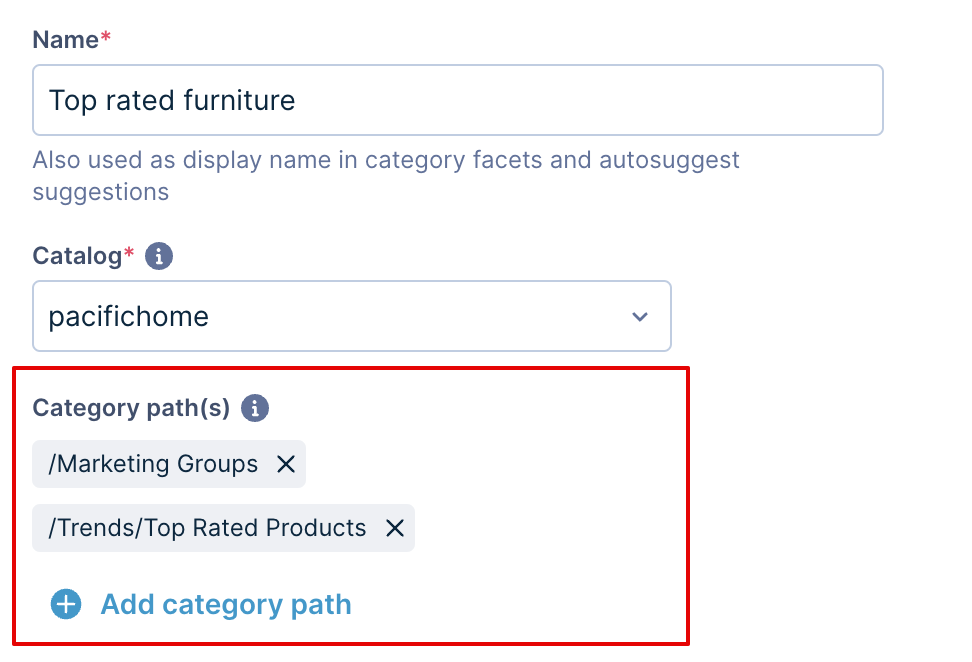
- Start by giving your category a name and choosing the Catalog to which it should be added. Next to it, you will also see all the sites powered by the selected Catalog for which the Dynamic category will be available.
Dynamic categories and the Catalog
Dynamic categories become part of your product catalog through indexing. They work and affect search results just like feed-originated categories.
Important: One Dynamic category can only be linked to one Catalog.
2. Select category paths
Select the paths associated with your category using the Category path(s) dropdown. To add more paths, click Add category path.
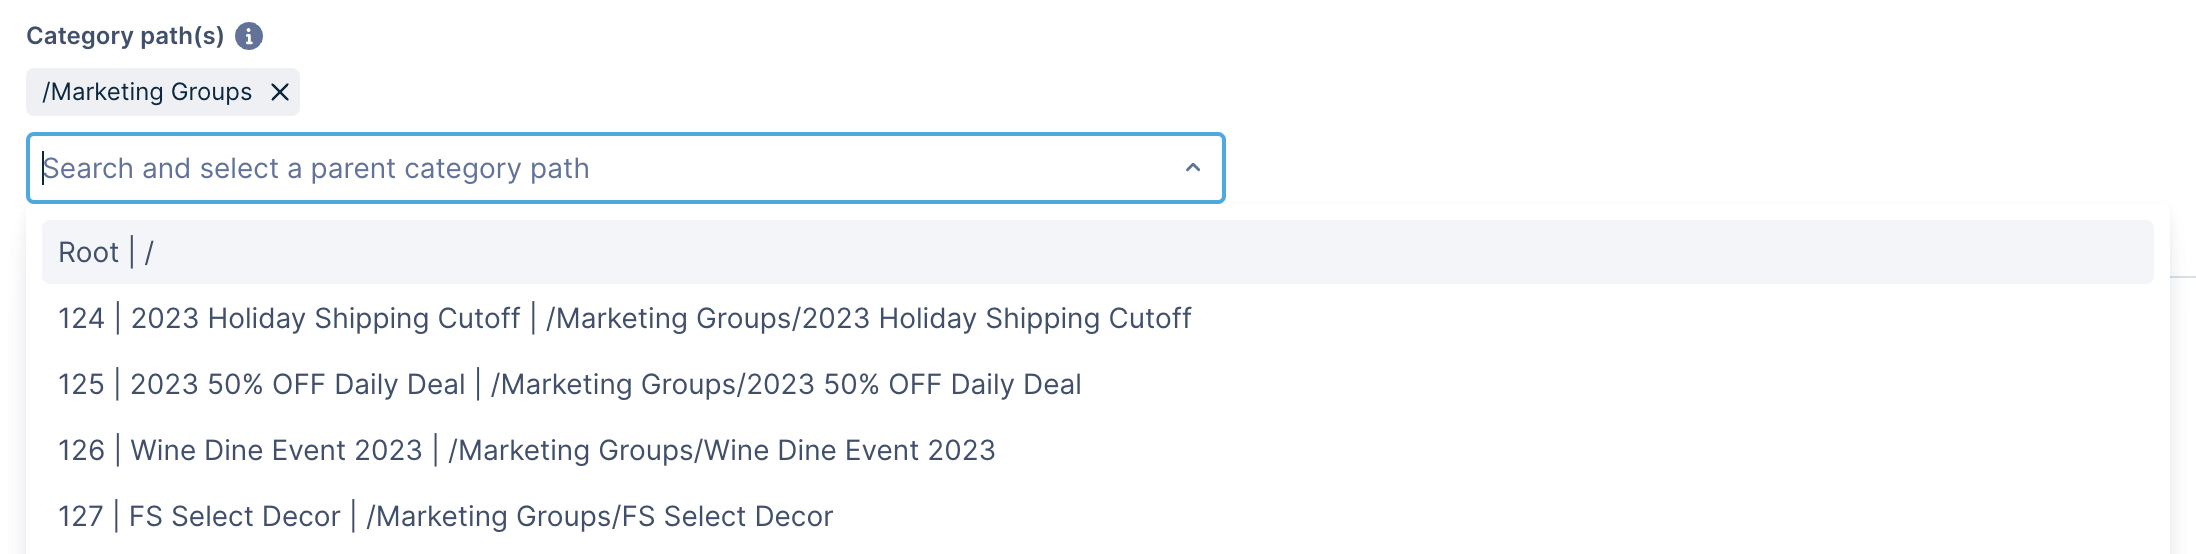
The path list displays the category ID and category name followed by its full path
Your Dynamic category is added to your site’s category hierarchy structure under all the selected parent paths.
- If no path is selected, the new category will be added to the root level by default.
- You can select up to 10 paths for a Dynamic category.
Note that the products added to the Dynamic category will become part of all the selected parent categories after Indexing (if they were not part of those categories already).
3. Add products to the category
Populate your category with desired products. You can add products to your new category manually or through conditions.
Add products through conditions
This method lets you set rules to automatically add products to a category. The category updates itself as new products meet these rules.
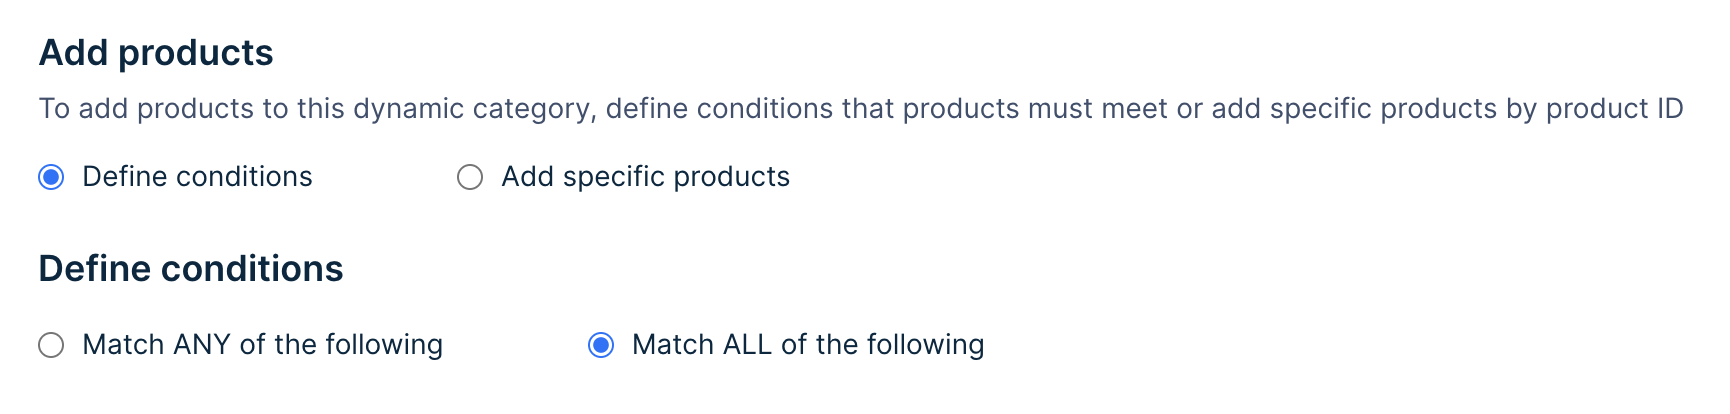
Define conditions to add matching products:
-
Select Define conditions under Add products. This opens the Configure conditions setup.
-
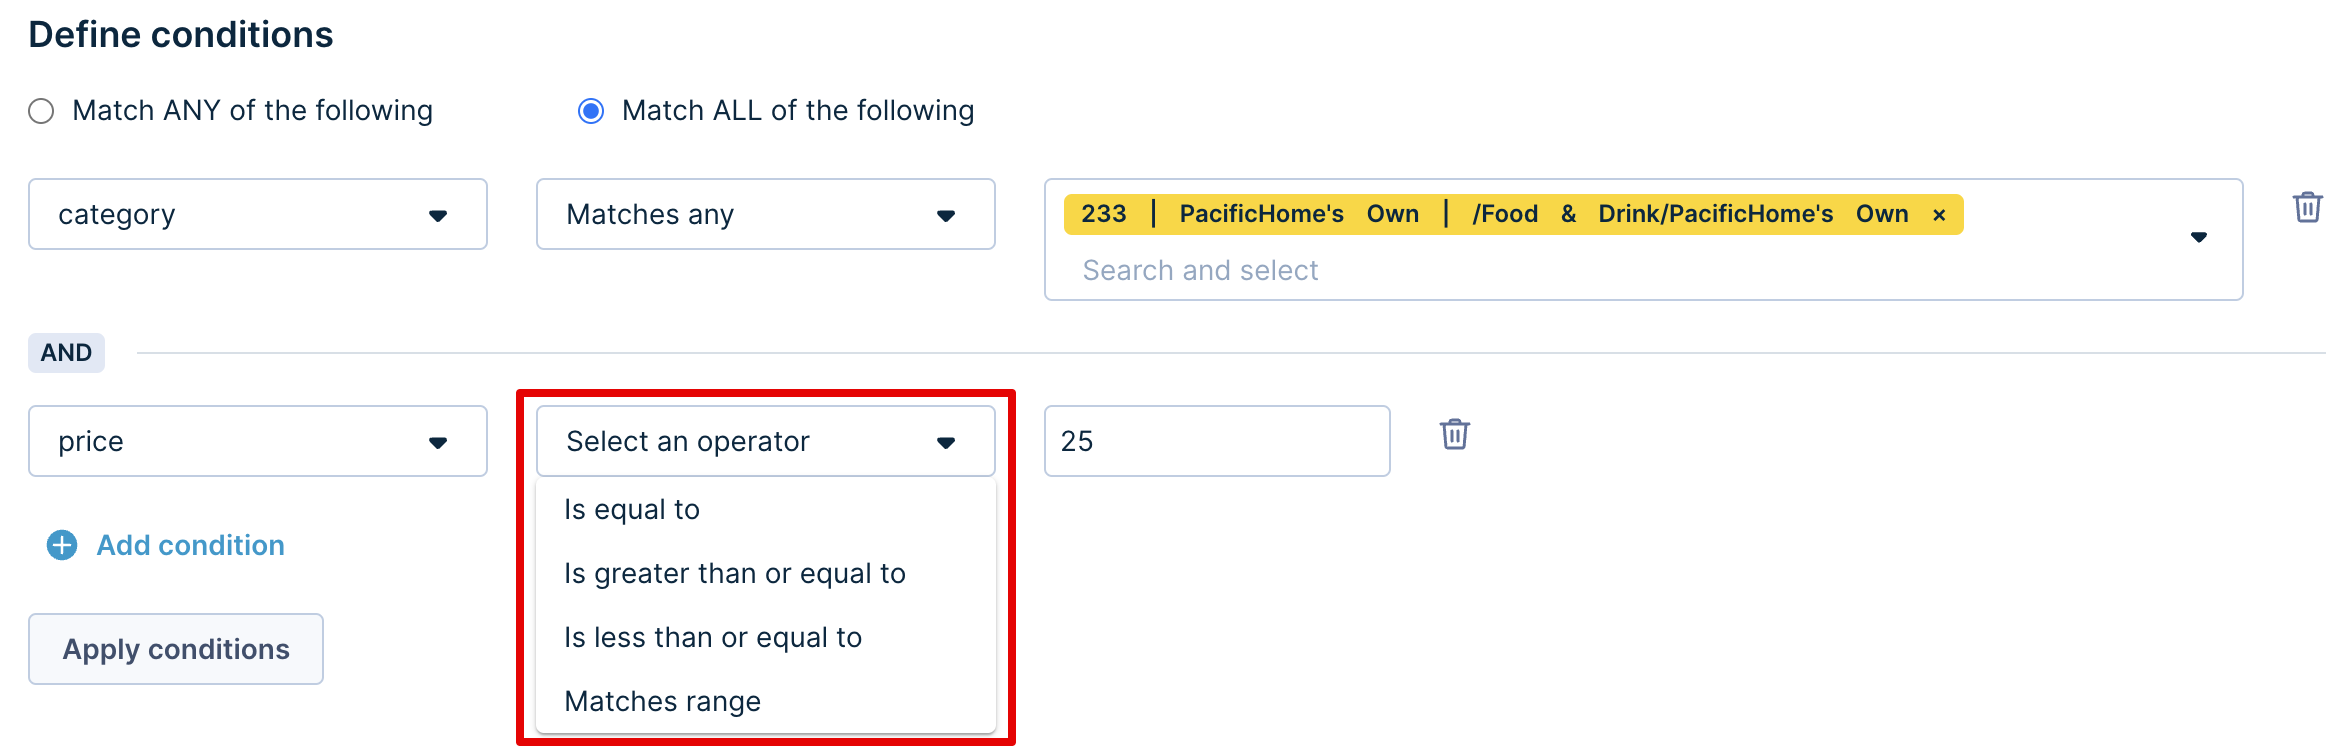
Choose how you want to match the conditions for each product:
- Match ALL of the following: Products must meet all the conditions you set. (AND operator)
- Match ANY of the following: Products must meet at least one condition you set. (OR operator)
-
Click + Add condition to add a conditional rule based on different product attributes.
-
Click + Add condition again to add more rules. For numeric attributes, additional operators are available for targeted range control.
- is equal to: The product attribute value must match the exact input value.
- is greater than or equal to: The product attribute value must be greater than or equal to the input value.
- is less than or equal to: The product attribute value must be less than or equal to the input value.
- matches range: The product attribute value is more than or equal to the minimum value and less than or equal to the maximum value.
-
Once you’re satisfied with the conditions, click Apply conditions. This will make the matching products appear in the bottom panel.
Add products manually
This method lets you manually upload specific products in bulk to your category. This gives you full control over which products appear. Note that the category will not update automatically if you add products manually.
Follow the steps given below to add products manually:
-
Select Add specific products under Add products.
-
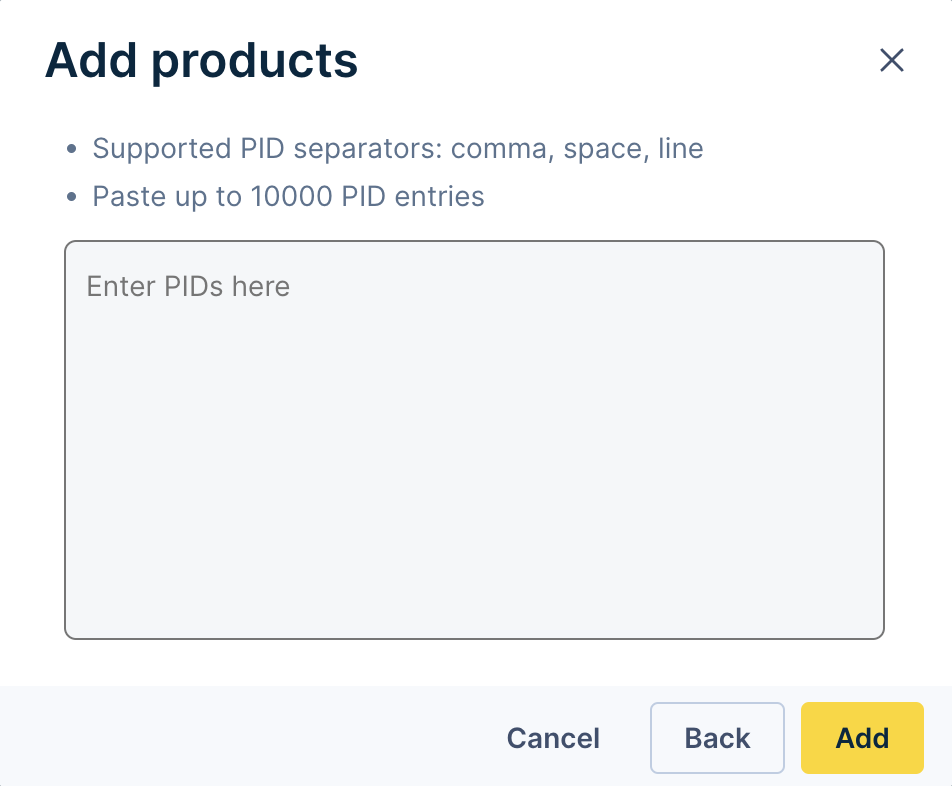
Click + Add products. This opens a modal to start adding products.
-
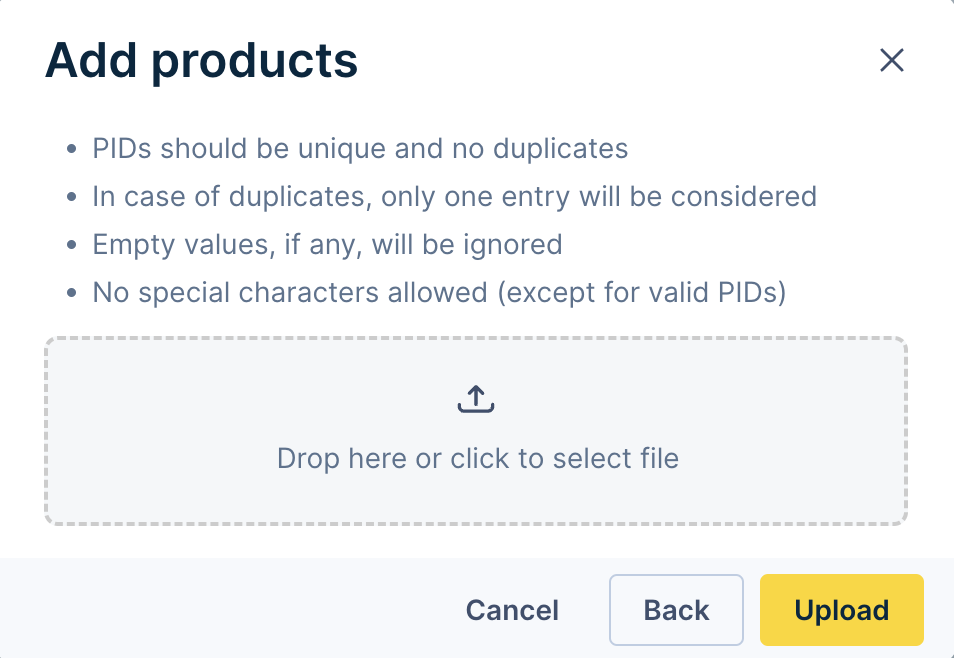
You can add products in 2 ways -
-
Copy & Paste PIDs: Copy and paste up to 10,000 product IDs (PIDs) from your catalog. Separate them with commas, spaces, or pipe symbols.
-
Upload CSV: Upload a CSV file that contains valid PIDs.
-
-
Select the desired method and click Add or Upload after adding the products. The added PIDs will appear, and the matching products will be displayed in the bottom viewing panel.
4. Save the category
After you add products, you can review them in the bottom viewing panel (Category preview) to finalize your selection. Here are some details about the preview panel:
- The products in the preview are not ordered or ranked, and their order can differ between sites. Use the site menu at the top right corner to switch between sites.
- If you added products manually, the preview will only show the first 950 products.

After reviewing the products inside the preview panel, Save your category from the button on the top right.
You can then see the new Dynamic category listed on the Dynamic categories page with the status Indexing pending. Note its unique Category ID for passing in the API call to display the category on your site.

Under the Search or Merchandising Standard packages, one Catalog can only have up to 150 Dynamic categories at a time.
To get unlimited access to Dynamic categories, contact your Bloomreach representative and upgrade to the Search or Merchandising Premium package.
5. Index Dynamic categories
Dynamic categories work just like feed-originated categories because Bloomreach integrates them into your feed through the feed indexing process.
A Dynamic category can get indexed when:
- The process is triggered by a user from the Dashboard on the Dynamic categories tab or the Catalogs application.
- Automatic catalog indexing is triggered.
All new, modified, and deleted Dynamic categories will be picked up during each indexing and updated in that catalog feed accordingly.
Run indexingIndexing can be a time consuming and resource-heavy process, especially for large catalogs.
We encourage you to group your Dynamic category changes and only run the indexing when necessary.
After indexing, the Dynamic categories will behave just like feed-originated categories. They will be visible on the All categories page, in your site's categories hierarchy, in Autosuggest (if Categories are searchable), and as a Facet value under the Category filter. Global Rules and Global Category Ranking Rules will apply to them as well. They also become ready to be merchandised and displayed on your website.
Indexing from Dynamic categories dashboard
To trigger the Indexing process from the Dynamic categories dashboard, click on the Start indexing button on the top right of the homepage.
If you do not see the button (or it is locked), you would need the required User Permission Role mentioned above to run indexing.
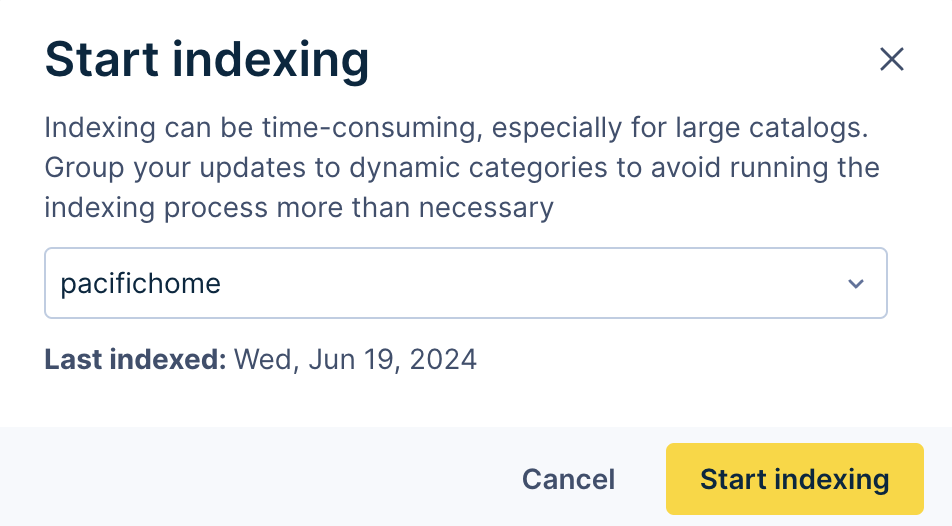
Select the catalog for which you want to run the indexing and start it.
The process can be triggered only for one catalog at a time. Note that only the catalogs with any pending changes of Dynamic categories to be indexed will be available in the dropdown.
Once the category starts indexing, its status will show as Indexing in the Dynamic categories list. Once indexing is successfully completed, its status will change to Ready to use.

Indexing time for new Dynamic categories
When there are consecutive index updates, any new attribute or Dynamic category takes up to 30 minutes to appear in the dashboard after the previous index update completes. View the index updates in the Catalogs application.
Example
- You create Dynamic category A and trigger an index update.
- Immediately after, you create Dynamic category B and trigger another index update (via API or dashboard).
- Dynamic category A appears first.
- Dynamic category B can take at least 30 minutes after A appears to show up in the dashboard.
Modify or delete Dynamic categories
Existing Dynamic categories are listed on the Setup > Merchandising > Dynamic categories tab in your dashboard.

Catalog selector
Using the Catalog Select dropdown, you can choose from all the product catalogs available for that account. The list will only display the Dynamic categories associated with the selected catalog.
Category ID
The Category ID is a unique identifier for your Dynamic category. Dynamic categories will always have an ID with the prefix brg_dyn_, which can help you distinguish them from feed-originated categories.
The Category ID is important because:
- It must be passed in the Pixels for collecting tracking data.
- It should be passed in the Product & Category Search API to fetch the Dynamic category for using it on your site.
Status
This column displays the status of your Dynamic category based on the stage of Indexing it is on. Given below are the possible category statuses:
- Indexing pending: The Dynamic category is new or has changes that have not yet been reflected in the catalog.
- Indexing: The indexing process for the catalog of which the Dynamic category is part is currently in progress.
- Processing: The indexing process is completed, and the catalog is up to date. Other processes are running to make the category available for merchandising.
- Ready to use: The Dynamic category is up to date in the Catalog, available for merchandising, and ready to be used on your site.
Modify Dynamic categories
To modify the details or rules of a Dynamic category, hover over the desired category from the list and click the Edit button that appears on the right side.

Any changes to a Dynamic category will only be reflected in the feed and become ready to use after running the indexing process.
Delete Dynamic categories
To delete a Dynamic category, hover over the desired category from the list and click on the Dropdown arrow next to “Edit” that appears on the right side.

Click Delete and confirm the deletion on the pop-up that appears.
After deletion, it will be instantly removed from the Dynamic categories and All Categories pages, but to delete it from the feed, you must run the indexing for the associated catalog.
Any ranking rules associated with the deleted category will still be available, but you can’t create new rules for that category.
Updated 4 months ago