

Configure the A/B test
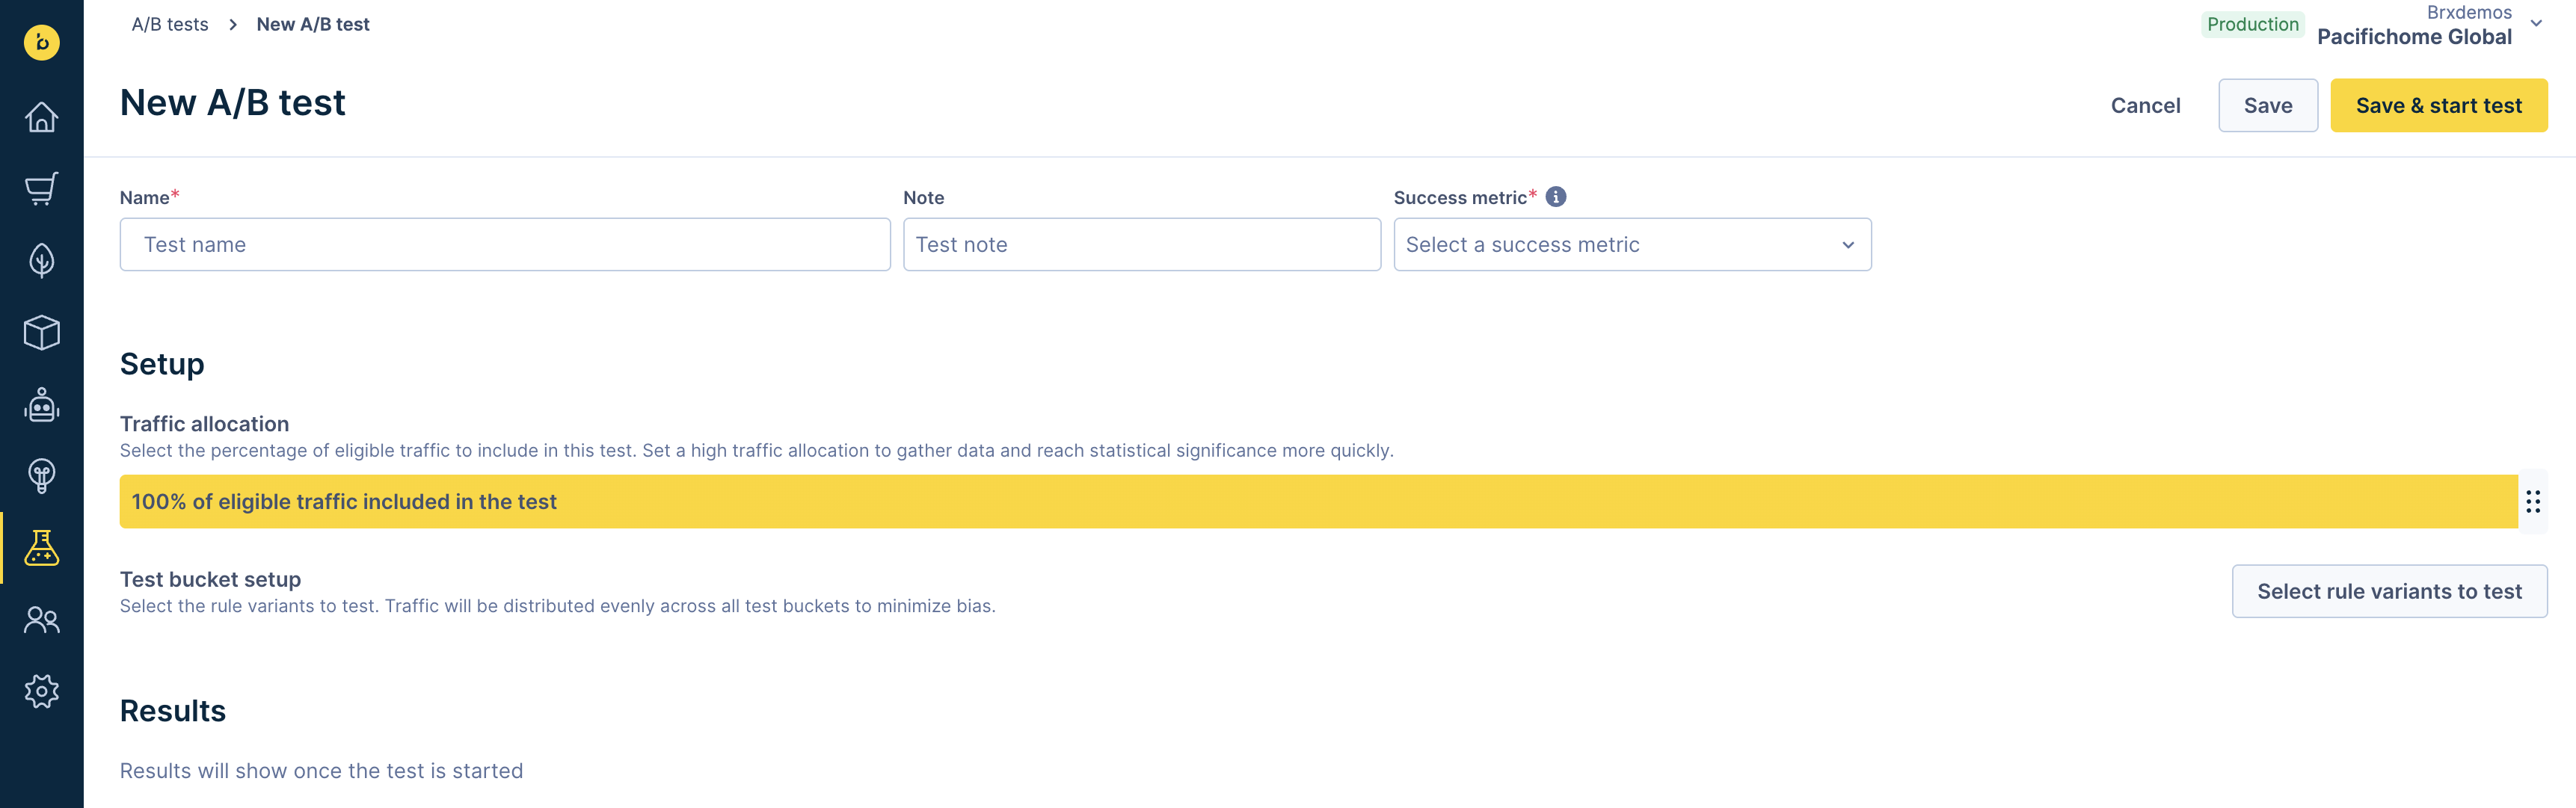
Once you start the A/B test, the New A/B test page opens. Configure the components below:
Name the test
Name your test. The test name can only contain alphanumeric characters, spaces, underscores, and hyphens. Note that the default name is automatically filled in when starting a test from a rule (method 2 or 3). Add an optional note using the Note field.

Best practice
Be specific when naming your test. The A/B tests page lists all the tests running on your site. If your test has a clear name, it's easy to find in the list. Avoid repetitive names like test1, test2, my test, my other test, or test1 for Bob.
Select success metric
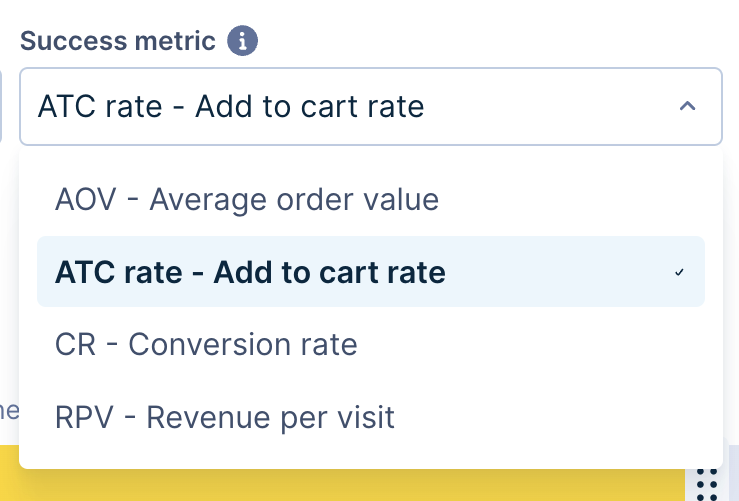
Use the dropdown to select a relevant success metric to gather data. Note that this step is only to help you set a goal; the test itself doesn't use this metric. You still have to decide the test winner on your own.
-
AOV
-
ATC Rate
-
CR
-
RPV
Allocate test traffic
Drag the slider under Traffic allocation to set the percentage of traffic to include in the test. We suggest setting a high traffic allocation to quickly gather data and reach statistical significance.

Set up the test buckets
(Skip this step if you used method 2 or 3 to start the test).
- Click Select rule variants to test.
- Now, select the rule to test. You can choose the rule types below.
- Ranking rule
- Redirect rule
- Ranking algorithm rule
- Recall algorithm rule
- Personalization rule

You can sort the rules table or click the filter names (in grey bubbles) to see specific rule types. Then, click the Select rule button next to the desired rule.
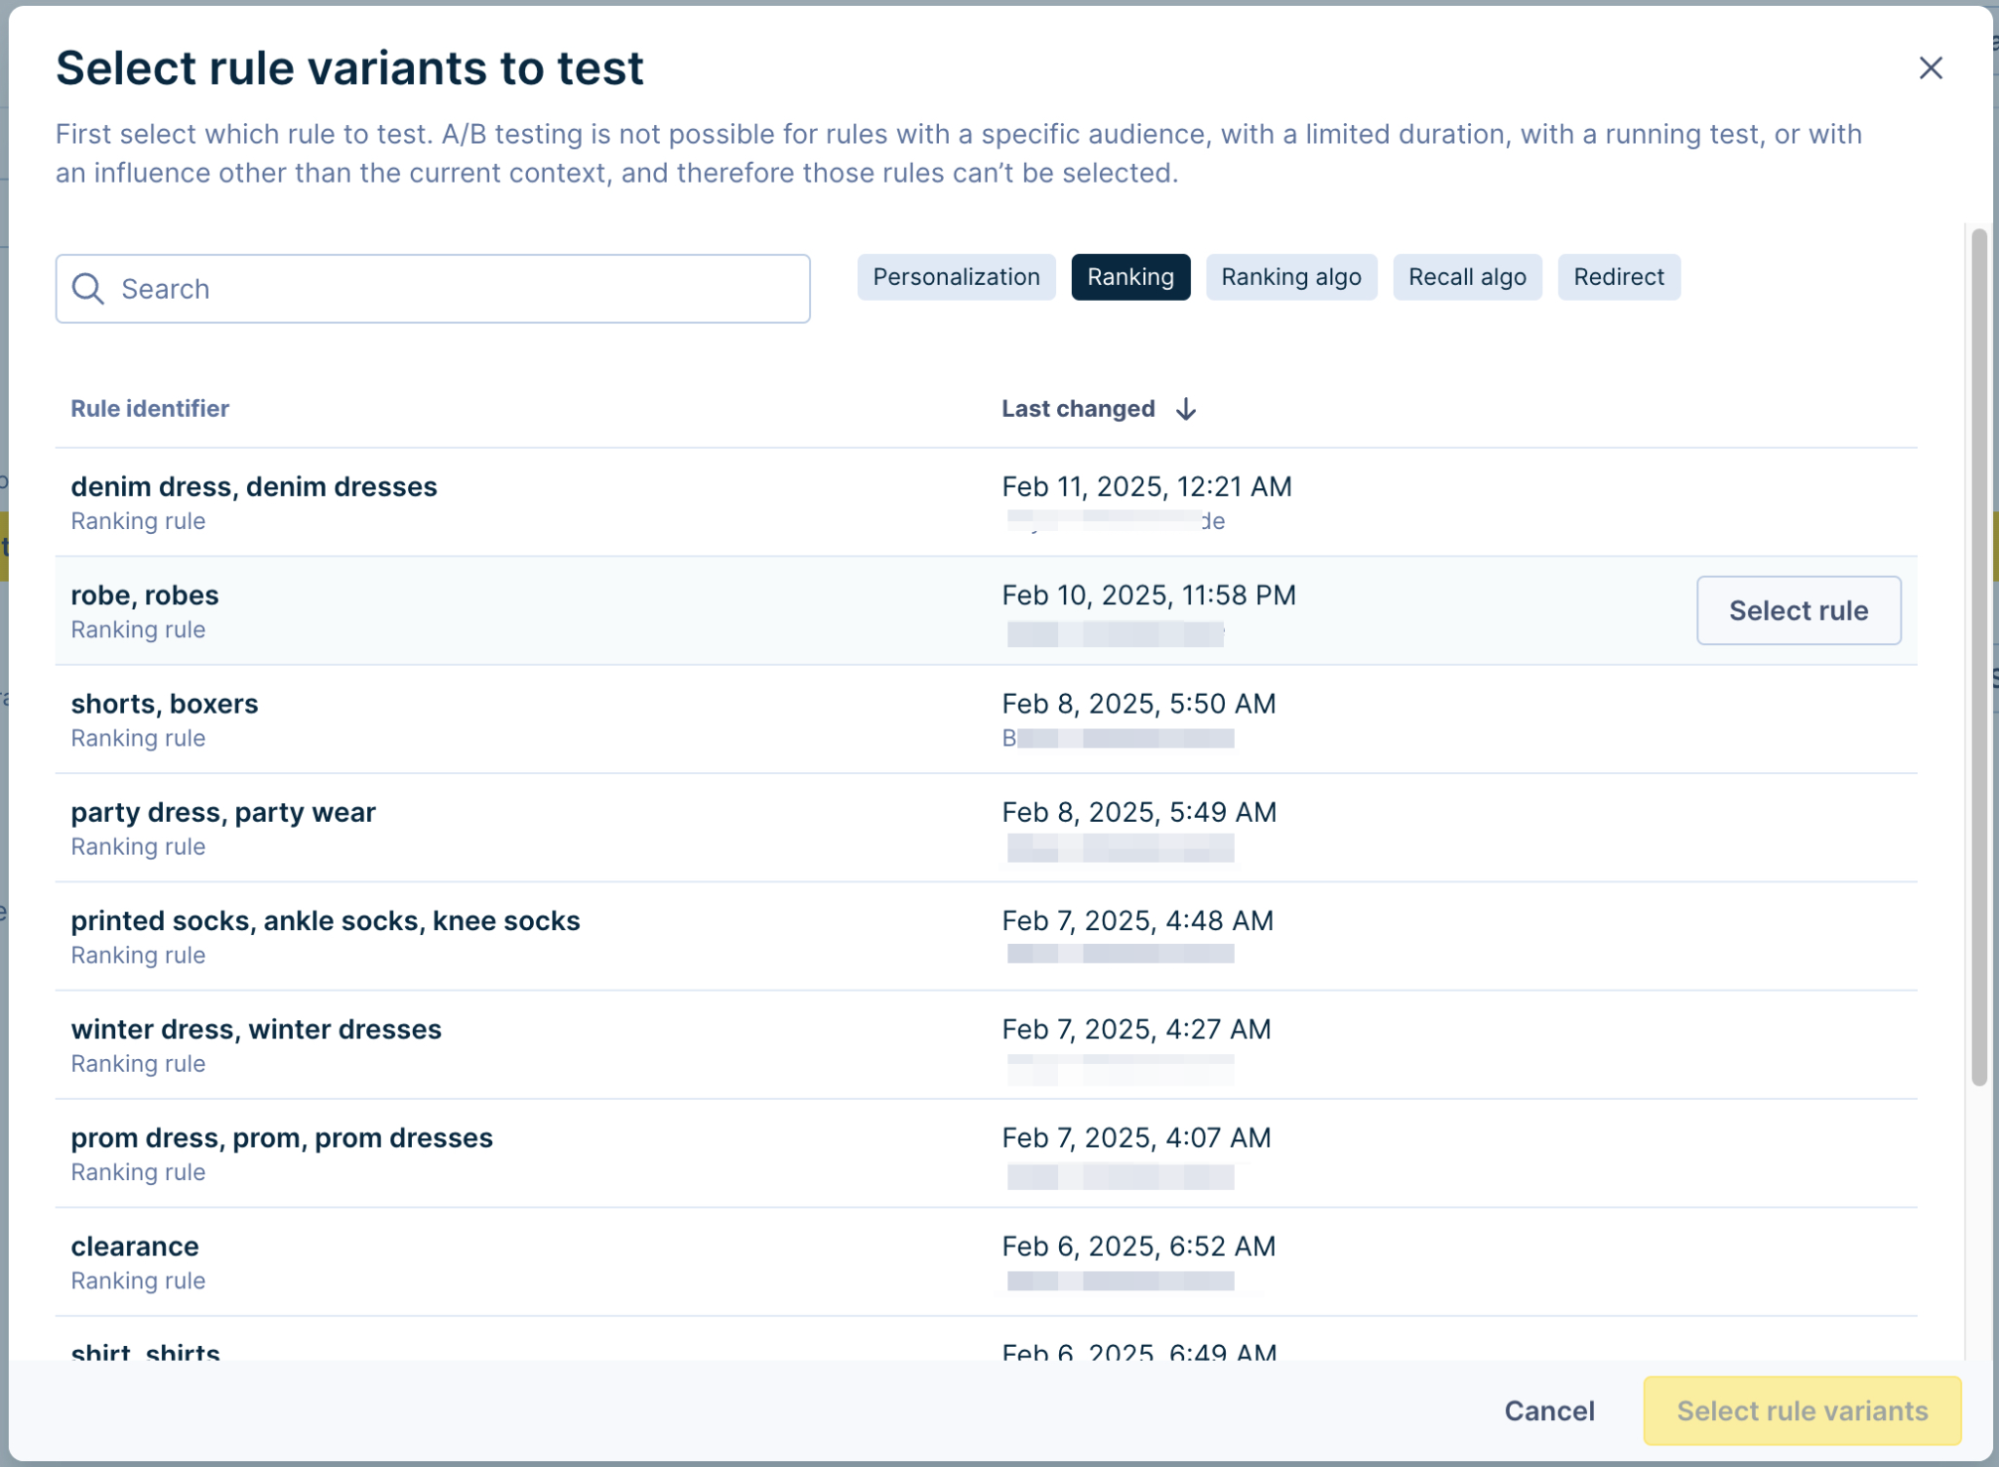
NoteWhat isn't available for selection
Rules for a specific audience, with a specific duration, with a running test, or with an influence other than the current site context can’t be selected and are, therefore, not listed.
-
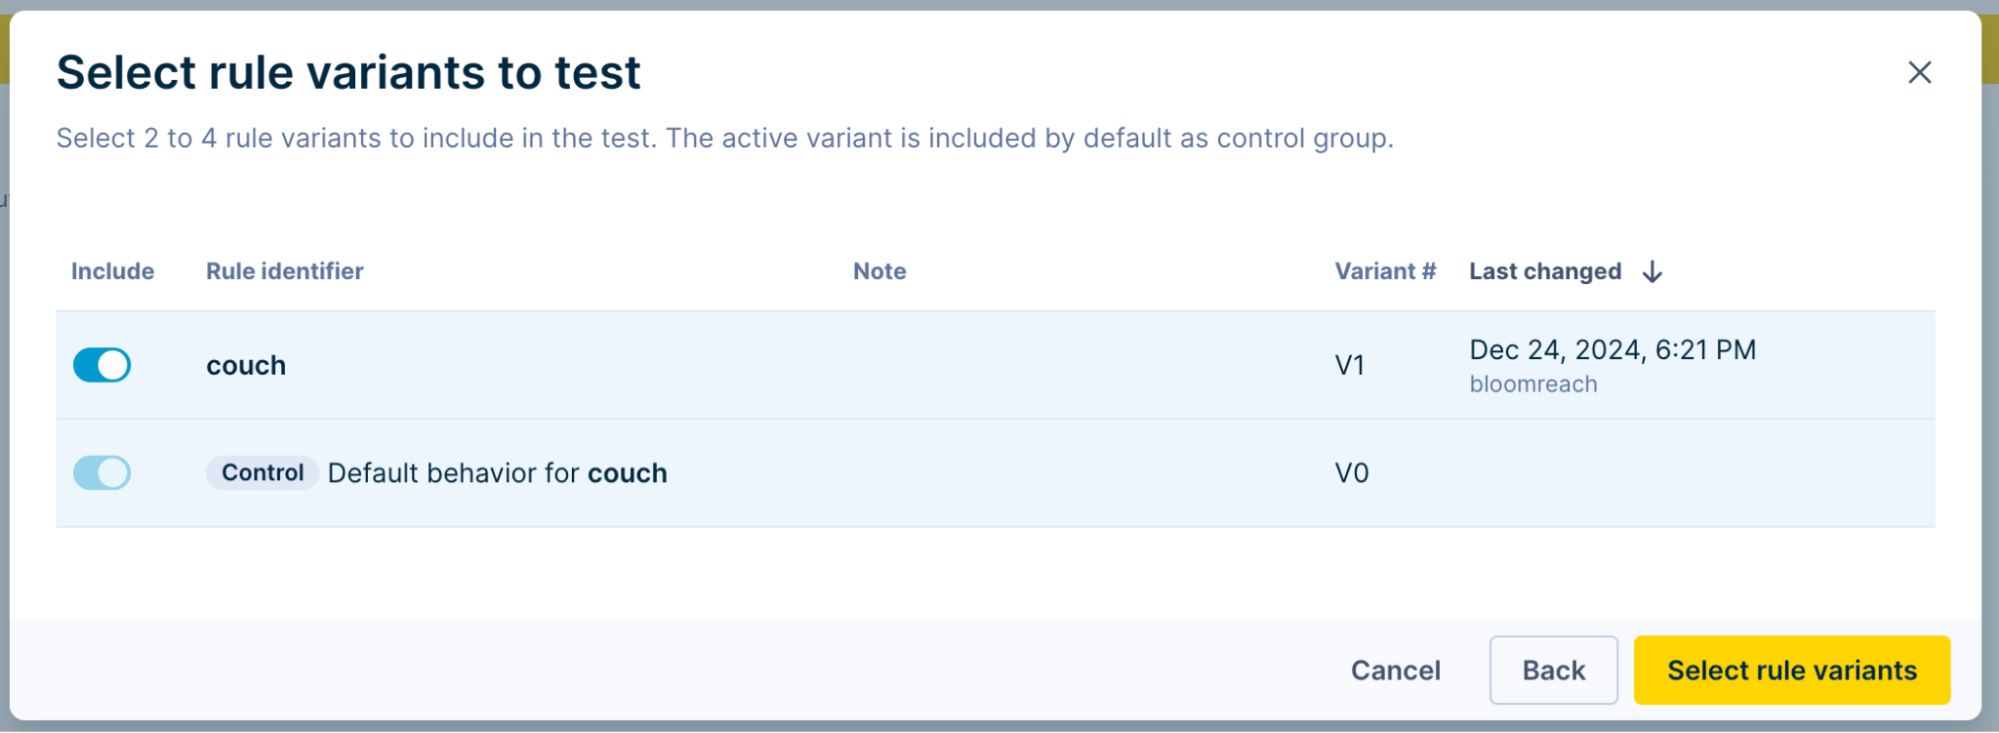
Now, select the variant(s) to include in your test. Select 2 to 4 rule variants to include in the test. To include a variant, click the toggle next to that variant. The active variant is included by default as the Control bucket. You can optionally add notes for each variant.
-
Once you've selected the variants, click the yellow Select rule variants button.
-
This returns you to the New A/B test page, and the selected variants will be visible as different test buckets.
Preview test buckets
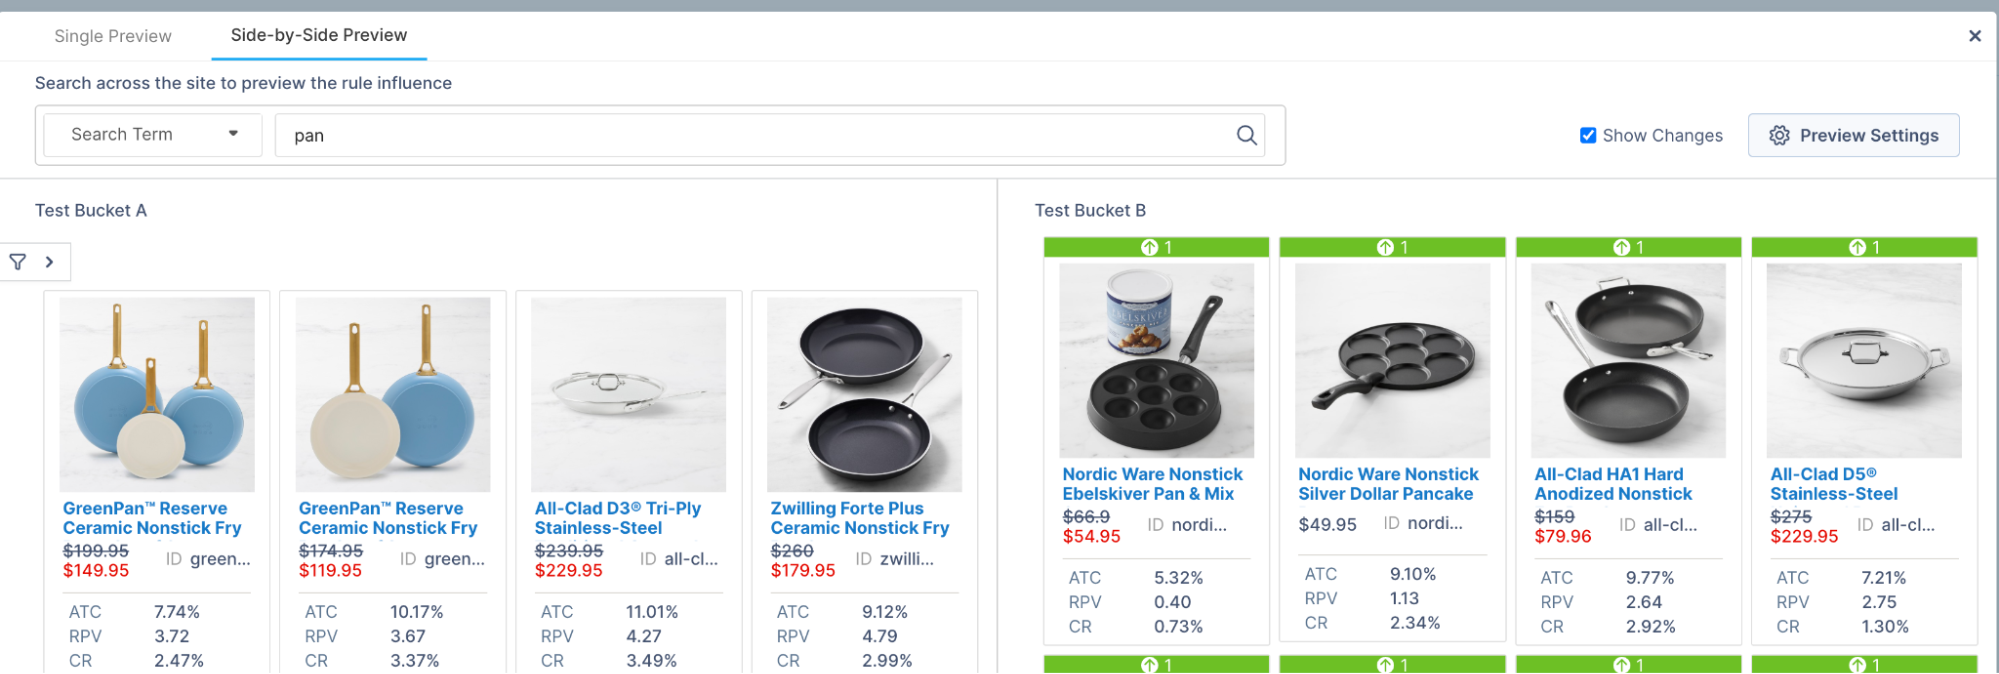
Before you start a test (and even while a test is running), you can preview the different variants that are set up. To see the test buckets, click the Preview button.

You can preview one variant or choose a side-by-side preview to look at the differences between the two (or more) variants. Check the Show Changes checkbox in the preview to annotate the products with additional information about how the changes affect their ranking.
Updated 4 months ago