
Creating Segmented merchandising rule
This guide walks you through the steps involved in the process of setting up a targeted Audience defined by Segmentations and creating a Merchandising rule for it
Segmented merchandising is facilitated through Audiences in Discovery. We need to create a new Audience with one or more Engagement Segmentations as the Audience dimensions and then use that Audience in our merchandising rules’ definitions.
Here is a detailed walkthrough of this process.
Prerequisites
Knowledge
We recommend that you review the following guides before proceeding:
- Segmented merchandising feature page: This article introduces you to the feature.
- Defining audiences for targeted changes: This article goes through the importance and setup of Audiences in detail.
Permissions
Before you proceed with the setup, make sure the dashboard users have the following permissions:
- The Engagement user must have the role access of Analyses Editor or Segmentations Exporter.
- The Discovery user must have the Site Search User or Category User role.
1. Exposing segmentations
The first step involves exposing a Segmentation from Bloomreach Engagement so that it is available to use in your Bloomreach Discovery dashboard. Here is how you can do it quickly:
- Navigate to Analyses > Segmentations in the Bloomreach Engagement dashboard.
- Hover over the desired segmentation you want to use for creating target audiences.
- Click the v action tab next to the Edit button to view a dropdown list.
- Click the Expose option. Now select the sub-option Segmented Merchandising under Discovery.
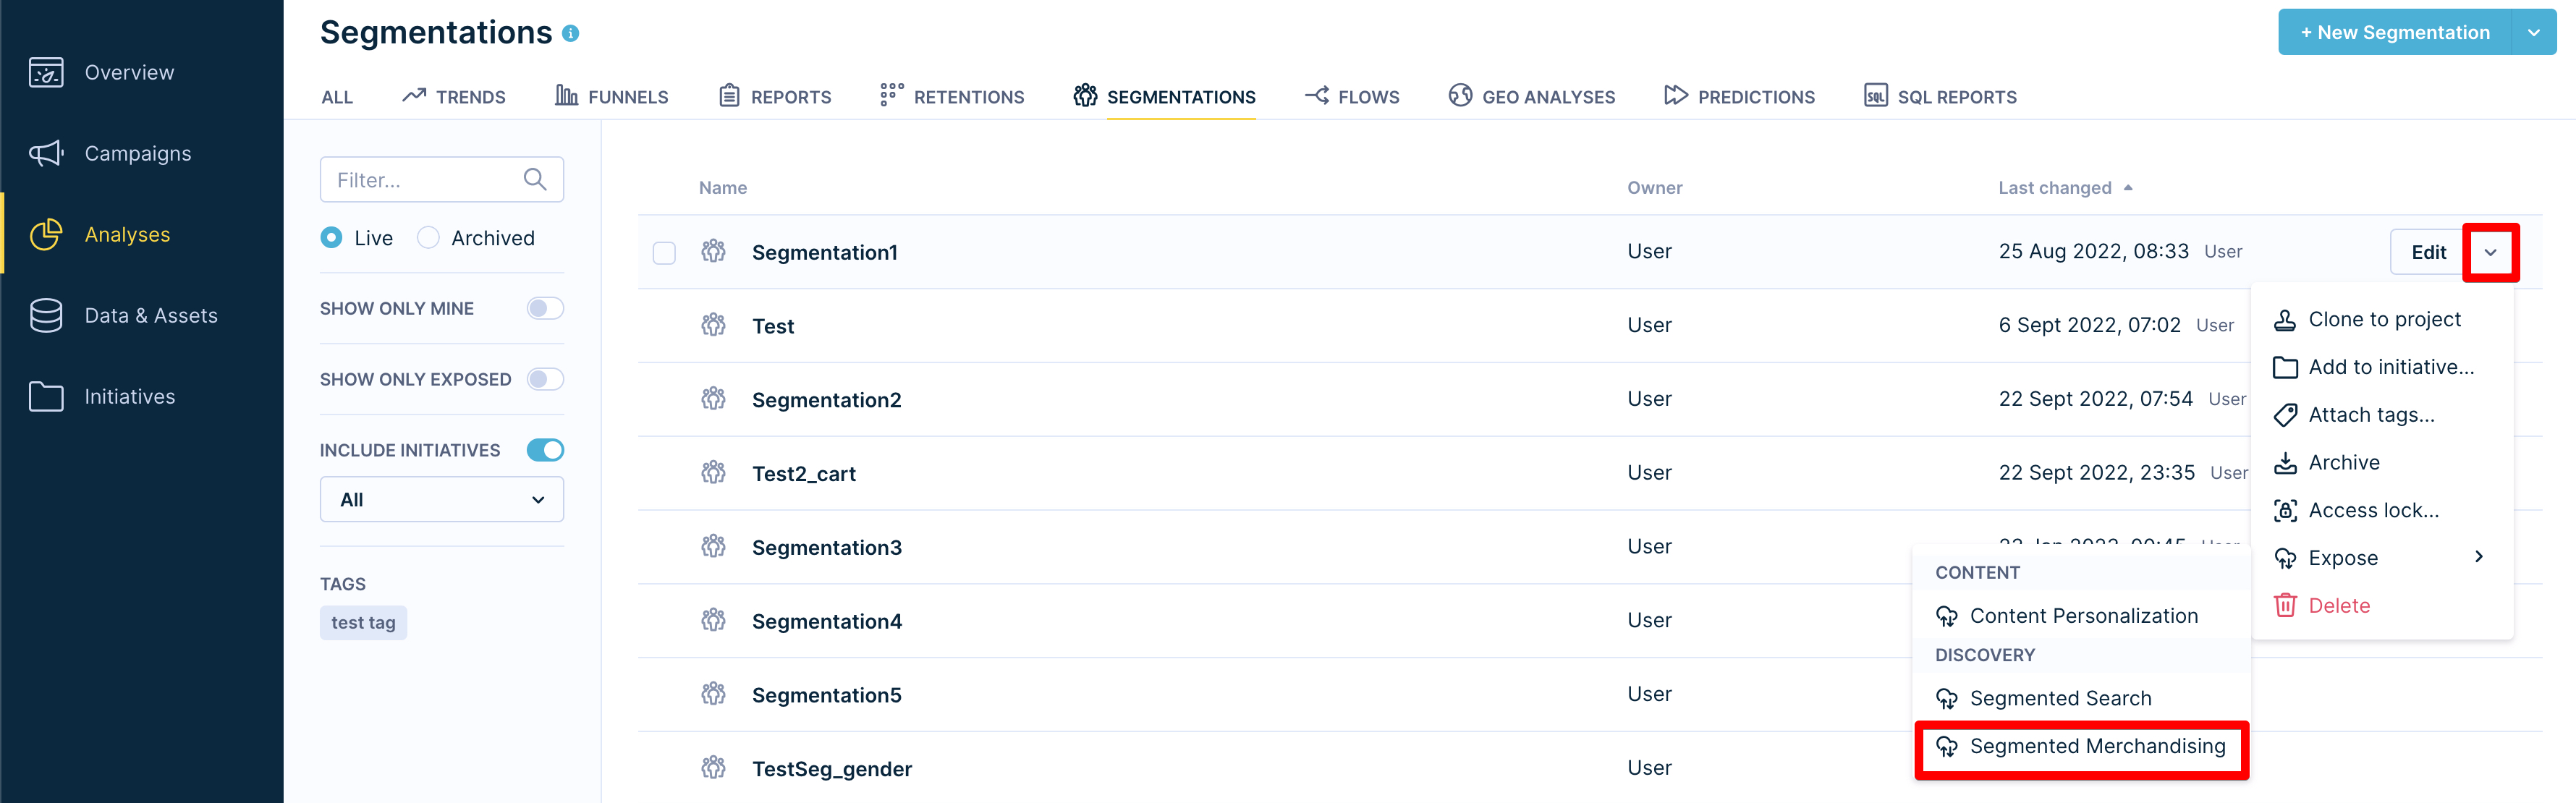
- Click “Expose” on the confirmation pop-up.
After successfully exposing a Segmentation, you will receive an email confirming the action, and a button to Create an Audience where you can use the newly exposed Segmentation.
Creating a new Segmentation
You can learn more and create new Segmentations by following the linked guide if you don’t already have the relevant ones ready for exposing.
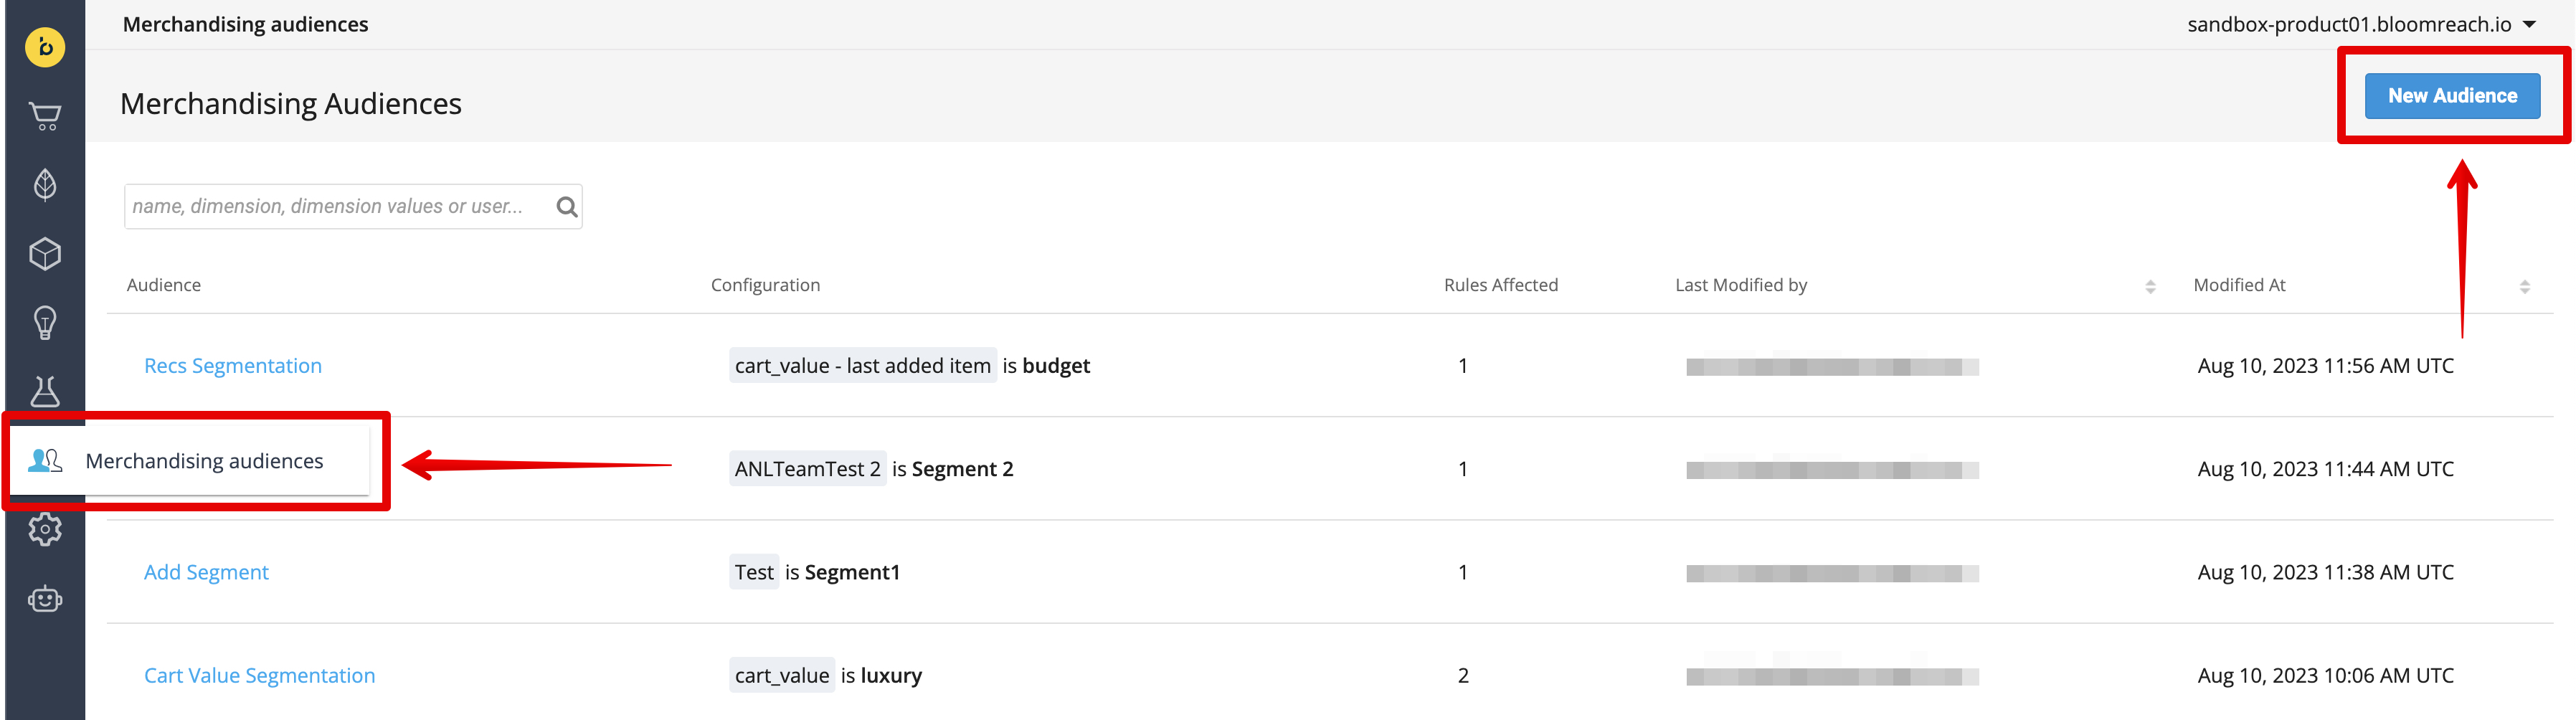
2. Creating an audience in Discovery
After exposing the required Segmentation(s), the next step is to create a Merchandising Audience with the Segmentations as its dimensions.
Creating a new audience
To create a new Audience, you can either directly use the “Create Audience” button in the confirmation email after exposing a Segmentation, or you can do it through the Discovery Dashboard by navigating to the “Merchandising audiences” tab on the left menu and clicking on “New Audience” at the top right.
Setting audience dimensions
Here, we will connect our Segmentation to the Audience that we just created. After giving the audience a name to identify it, we need to choose the attributes that define it.
Clicking on the “-- select a dimension --” dropdown will display a list of all the available dimensions to choose from (including our Segmentations). Select your exposed Segmentation and its value that will govern the audience.
You can fine-tune or broaden the scope of your Audience by toggling the match type and adding more dimensions to fulfill your requirements.
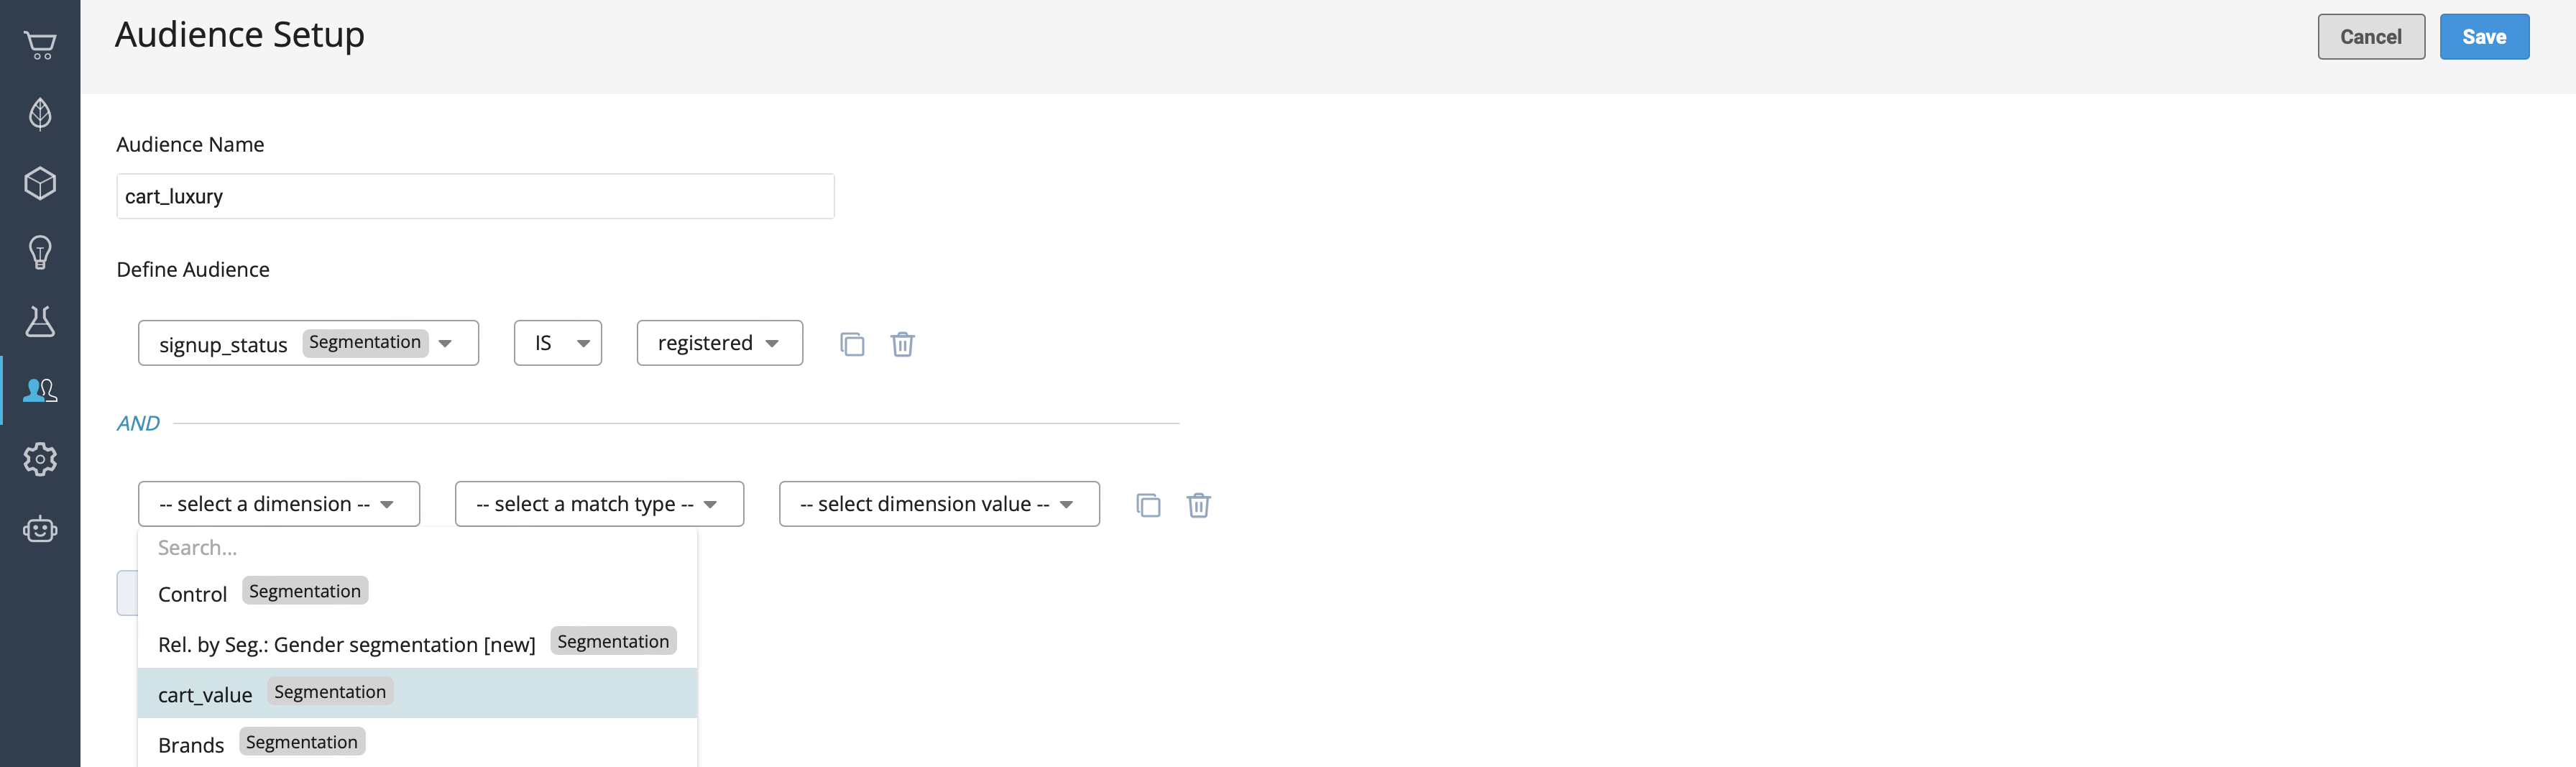
Click on Save at the top right corner of the page when you’re done.
The “Segmentation” label next to a dimension highlights that this is a Segmentation exposed from Engagement, and not a default dimension.
3. Linking the audience to a merchandising rule
In this step, we will apply our Audience to a merchandising rule. You can either create a new rule, or edit an existing one to apply the audience.
Segmented merchandising works for Global Ranking, Site Search, as well as Category Ranking rules.
The method to link the audience to a rule is the same for each case. Here we have demonstrated the steps for a Site Search rule.
- Navigate to Search & Merchandising > Site search > Ranking rules in the Discovery dashboard.
- Edit an existing rule or create a new one by clicking on “Add Search Ranking Rule” at the top right.
- On the Product Grid window, click on the dropdown labeled “Audience” and select the Audience that was created using Segmentations in the previous step. The name that you set will help you identify it.
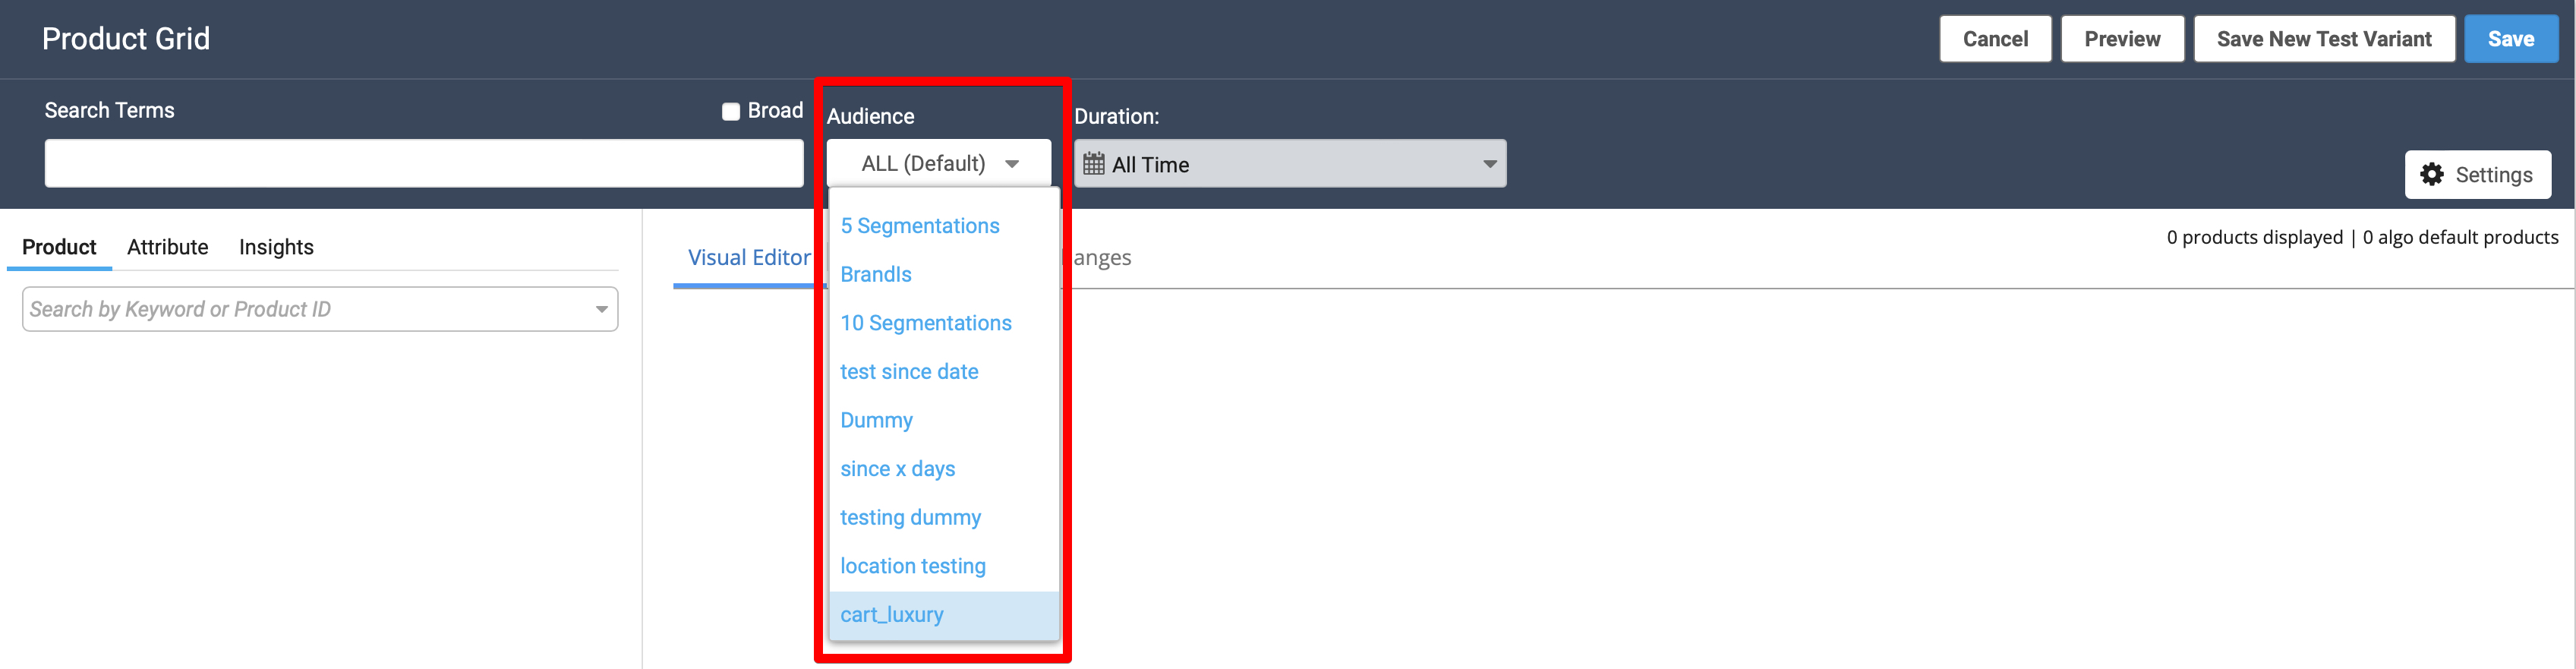
- Proceed to define and edit the rule as you normally would and hit Save when done.
Now, your merchandising rule will only apply to the selected Audience, allowing you to create unique, customizable product grids for a particular group of customers.
Conflict resolution priority
In case you don't see your rules taking effect, it might be due to some other conflicting rules. Here is the priority order that is followed to resolve conflicting rules at different levels:
- Query Override on Dashboard
- API parameters passed directly on front-end API call
- CMS setting for any live AB test
- Global Rules on Dashboard
You can use this information to troubleshoot the possible point of conflict.
Our system tries to merge the different rules whenever possible so they all get applied. In case merging is not possible, the rules will take precedence in the following order:
- PID Blocking
- Attribute Include Only / Attribute Exclude
- PID Slot (Lock in place and lock in position)
- PID Bury / Attribute Hard Bury (100 strength)
Note: In case of PID Bury / Attribute Hard Bury, they are shown at the end of the recall set hence we tend to show them at the same level. PID bury has the same precedence as Attribute Hard bury (100 strength), but has higher precedence than Attribute soft bury ( < 100). PID bury is basically using hard bury with the attribute "pid".
- Boost to Top (PID-based)
- Attribute Soft Boost/Bury + Numeric soft boost
Updated 6 months ago