
Magento Extension User Guide [community-supported]
The Discovery Magento Extension is a community-supported tool. It is fully Open-Sourced and open to contributions.
The Extension module provides the option to connect with Bloomreach Search, Merchandising, Recommendations, & Pixel integration.
To install/uninstall/upgrade the extension, please follow the Installation guide
Authentication
To integrate any options from this extension, you need to fill the app configuration settings. To do this, you can follow these steps to configure settings:
Please have your Bloomreach Account ID, Authentication key, Domain key, and Tracking cookie. Contact Bloomreach Support for more details.
-
Login to admin, if not already logged-in
-
Go to Store > Configuration
-
Find the Bloomreach section
-
Click on the Settings tab under Bloomreach
-
In Settings, click Fill all options. You can get these setting values from your Bloomreach account.
- Account Id
- Domain Key: This may vary for each store view. If you have multiple locales enabled in Magento2 store, then you can configure multiple locales in Bloomreach as well for each locale. This will help you to get information in the correct language.
- Auth Key
- Tracking Cookie
- Search Endpoint

Configuring multiple sites
The Magento Extension provides native support for multiple sites to be powered from a single Magento instance.
To set up individual configurations for a different site/store, select the relevant site from the "Scope" dropdown, as highlighted in the screenshot below.
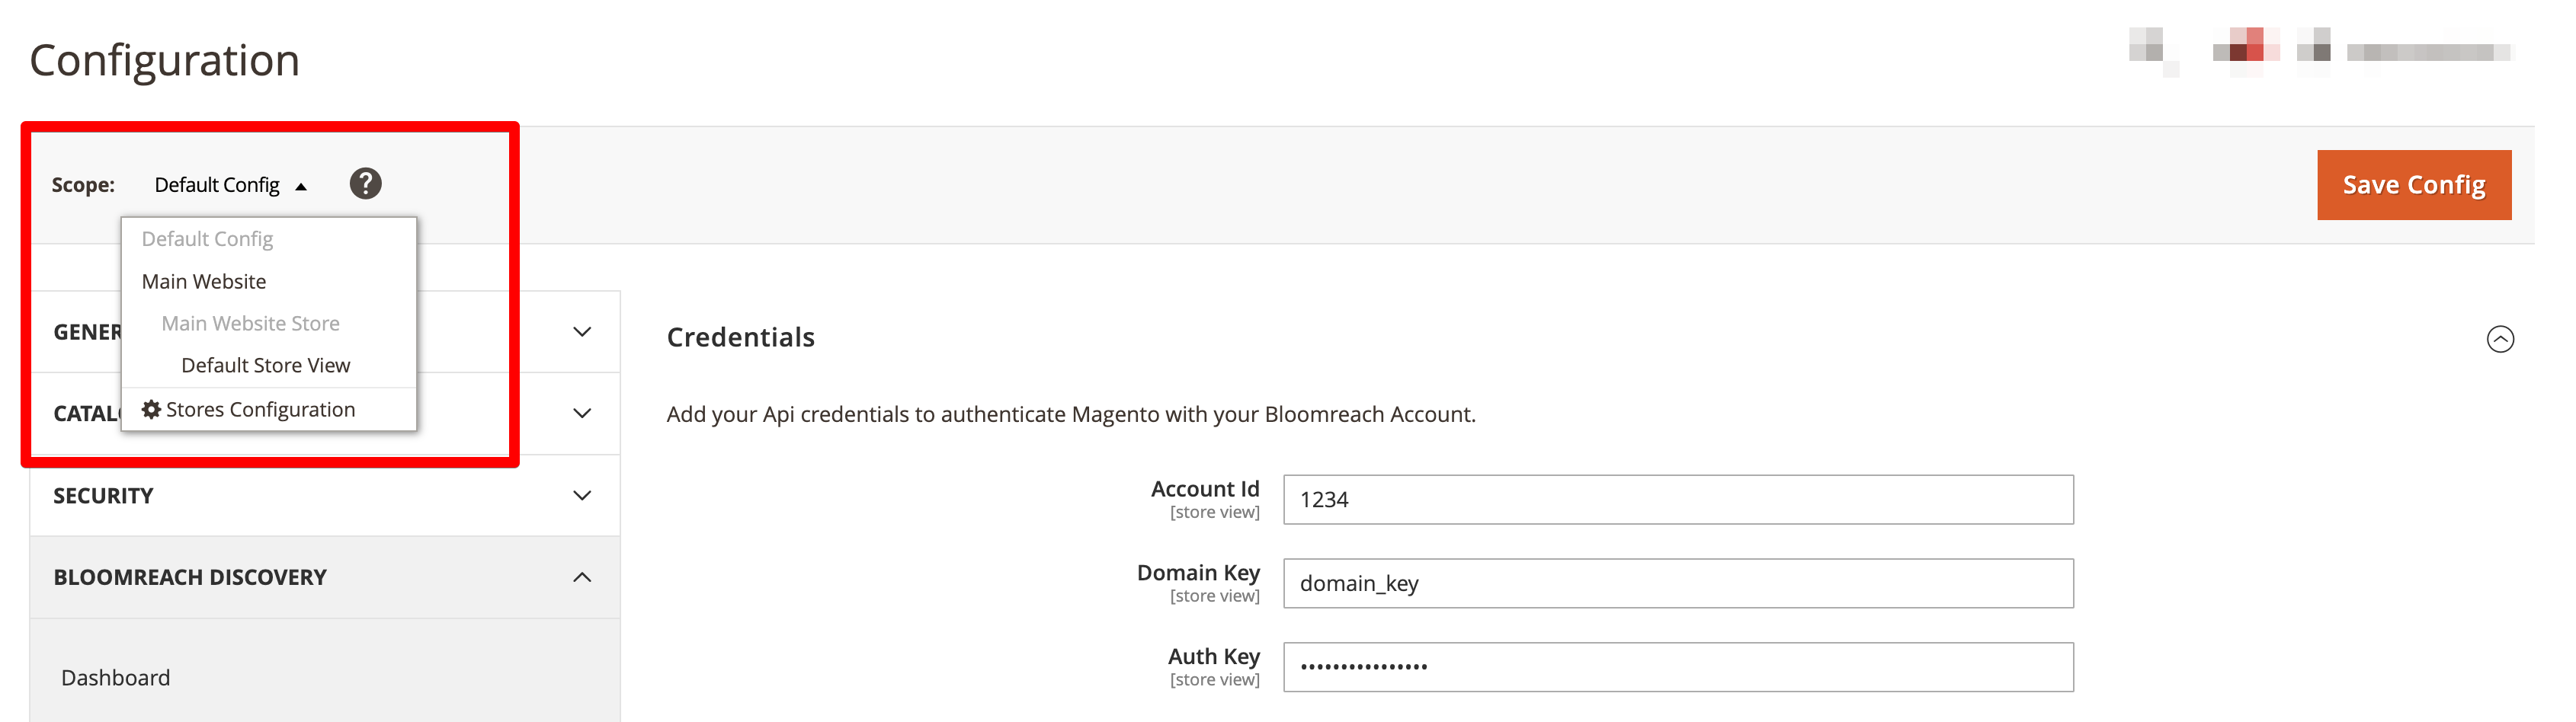
You can then tweak the settings individually for each of the scopes as per your need. It is strongly recommended to set a different Domain Key for each site.
Search Module Options
Autosuggest
Enable a seamless product search experience that is fast and secure.
To enable Autosuggest, configure it from the admin panel.
- Login to admin, if not already logged-in
- Go to Stores > Configuration
- Find the Bloomreach section
- Click on the Search tab under Bloomreach
- Set Enable Autosuggest to Yes
- Enter or cross-verify your frontend quick search input selector (id/css path)
- Here, you can set the No. of Terms, products, and categories to show by default in Quicksearch result popup
- Click Save Config then Clean/Flush the cache

After configuration, you can type any text in the quick search bar in the frontend to view the result.
Site Search
Replace existing search result pages with more efficient and faster search results.
To configure Site Search, you can follow the same steps above for configuring Autosuggest. Both configuration groups are on the same page.
- Login to admin, if not already logged-in
- Go to Stores > Configuration
- Find the Bloomreach section
- Click on the Search tab under Bloomreach
- Set Enable Site Search to Yes
- Do not change Css Selector value until you know what exactly you are going to do
- You may configure other options as you like
- Click Save Config then Clear/Flush the cache

After configuration, you can submit a search in the frontend to see the search result page.
Category
Replace existing product listing pages or category view pages with Bloomreach product listing pages.
Category works similarly to Site Search and has the same configuration options.
- Login to admin, if not already logged-in
- Go to Stores > Configuration
- Find the Bloomreach section
- Click on the Category tab under Bloomreach
- Set Enable for Category to Yes
- Do not change Css Selector value until you know what exactly you are going to do
- You may configure other options as you like
- Click Save Config then Clear/Flush the cache

Once done then you can visit any category page to see the effect.
Pixel
You can enable Bloomreach pixel by setting Enable Pixel to Yes, under the Bloomreach Settings tab. The pixel collects customer behavioral data, such as which products or categories they view, or what they have added-to-cart and which orders they have placed.
You can install the Bloomreach Pixel Validator for Chrome to validate these events.
You can use this data to provide related information and products to customers through the Personalized Recommendation widget.
Pixel event data:
- Visit Homepage or any CMS page
- Visit Category page
- Visit Product Page
- Search and land into search result page
- Add-to-cart (any product)
- Quick view of any product (not integrated by default, see manual integration steps below)
- Placed an order and land into order success page after order completion
Data collected by Bloomreach:
- Page url
- User id (logged-in customer unique id encrypted hash)
- Product id
- Product Sku
- Product Name
- Order grand total
- Order item info (sku, quantity, name, unit price)
- Event type
All events listed above are already integrated in this extension, except Quick view events. There is a pixel already integrated for Add-to-cart events, which you can find in the template at this path: Bloomreach/Connector/view/frontend/templates/product/. This path contains two files:
- list.phtml
- view/addtocart.phtml
These files can be used as a reference to integrate Add-to-cart events when you have a custom or 3rd party theme. Refer to this sample code for Add-to-cart events:
<button type="submit"
       data-blm-add-to-cart
       data-blm-add-to-cart-sku="<?= $block->escapeHtml($_product->getSku()) ?>"
       data-blm-add-to-cart-prod-id="<?=  /* @noEscape */ $_product->getId() ?>"
       data-blm-add-to-cart-prod-name="<?= $block->escapeHtml($_product->getName()); ?>"
       title="<?= $block->escapeHtmlAttr($buttonTitle) ?>" class="action primary tocart"
       id="product-addtocart-button">
      <span><?= $block->escapeHtml($buttonTitle) ?></span>
</button>
Quick View eventsMagento does not contain a Quick View feature by default, so Quick View events are not added in the current extension. You can add a Quick View button event if you have integrated any 3rd party quick view extension.
To integrate a Quick View event, you can override any file where a Quick View button is added. Then add the following attribute to that Quick View button/anchor. Replace sku, prod-id, and prod-name with the respective getter functions of the product object.
Here is a example of how the Quick View event integration may look:
data-blm-quickview
data-blm-quickview-sku="Chair123"
data-blm-quickview-prod-id="60765"
data-blm-quickview-prod-name="Weathered Gray Wood Jozy Dining Chairs Set of 2"
<button type="button"
data-blm-quickview
data-blm-quickview-sku="<?= $block->escapeHtml($_product->getSku()) ?>"
data-blm-quickview-prod-id="<?= /* @noEscape */ $_product->getId() ?>"
data-blm-quickview-prod-name="<?= $block->escapeHtml($_product->getName()) ?>"
title="<?= $block->escapeHtmlAttr($buttonTitle) ?>"
class="action quick-view">Product feed delivery
Please refer to the Connect and configure catalogmilestone of the Discovery Technical Integration for guidance on delivering your feed via our Catalog Management APIs.
Our suggested approach is to use our Reference Bloomreach Feed Module for Magento, which includes a set of reference codes that you can download, customize, and host.
This uses the most reliable and fast mechanism to pull the product feeds using Magento's PHP API.
You can also contact Bloomreach Services to set up feed integration via an internal ETL tool.
This allows light data model customization and can be set to run on a predetermined cadence. This approach relies on the Magento GraphQL API and is subject to rate limits when pulling data from Magento.
Full feeds typically take 2-4 hours to extract.
Recommendation Widget
This widget allows you as Admin to add widgets into any CMS page or block on the page. There are various Recommendation widget type options:
- Global Trending
- Category
- Keyword
- Personalized
- For specific Item
You can select the widget type when you insert the widget.
How to enable Recommendation Widget
- Navigate to the Recommendations tab under the Bloomreach Section
- Set Enable Recommendation Widget to Yes
- Click Save Config, then Clean/Flush Cache

How to use Recommendation Widget
- Insert the widget into any CMS Page or block, then see the effect on the frontend.
- Or you can use frontend builder with any of the below methods
-
Method 1 - Insert html container and widget: Read this Magento guide on how to insert a html container and widget.
-
Method 2 - Insert widget using CMS block:
- First create a CMS Block in admin, then insert a widget in the CMS block and save it.
- Read this Magento guide on how to insert a CMS block in page builder.
- You can use Content > Widgets > Add new to insert on a page, then add/select widget options in page

Please make sure you have already created these widget rules in the Bloomreach Dashboard, where you will get Widget id, which is required to load any widget in Magento. For each widget type, you will have a different widget id in Bloomreach Main Dashboard.
Updated 22 days ago