

How to migrate to Loomi for Shopify
Migrating to Loomi for Shopify moves your setup to Data hub and adds support for more markets. This guide walks you step by step, from staging to production. For more information on who benefits from the migration and what changes, see Migrate to Loomi for Shopify.
Prerequisites
Before you start migration work, confirm the following:
- Data hub access: Loomi for Shopify requires Data hub. Make sure your team can access and configure integrations there before you begin.
- Shopify staging or development store: You need a non-production store to validate the migration safely.
- Current setup inventory: Know which Bloomreach products you use today, whether you have custom consent or tracking logic, and which campaigns, reports, or templates depend on your current catalog names or event names.
- Required identifiers for Marketing: Ensure your project uses the required identifiers expected by Loomi for Shopify:
email_id,shopify_id,cart_id, andcookie. These ID names must match exactly. - Consent management: For the standard Web SDK setup, ensure your cookie banner includes the following consent categories before you enable tracking:
- Marketing and Analytics
- Sale of Data
1. Set up a staging environment
Use a Shopify staging or development store to validate the migration before modifying your live store.
WarningDon't delete your current live integration during testing. Your existing integration and Loomi for Shopify use the same Shopify app — deleting the live integration stops your storefront tracking immediately and can't be restored through the UI.
2. Review your current setup
Before you configure Loomi for Shopify, review your existing setup to understand what will be affected:
- Which Bloomreach products you use — Marketing, Search, or both.
- Whether you use custom consent logic.
- Whether you use custom web tracking or a legacy Bloomreach tracking implementation.
- Which campaigns, reports, or templates reference current catalog names or use the legacy
searchevent.
3. Create the integration in Data hub
Follow the steps in Integrate Loomi for Shopify to connect your Shopify store, configure consent management, and select your destination products.
When you reach the token step, use the integration token shown in the Bloomreach: Loomi app in your Shopify admin (Apps > Bloomreach: Loomi). This token is specific to the Loomi for Shopify integration.
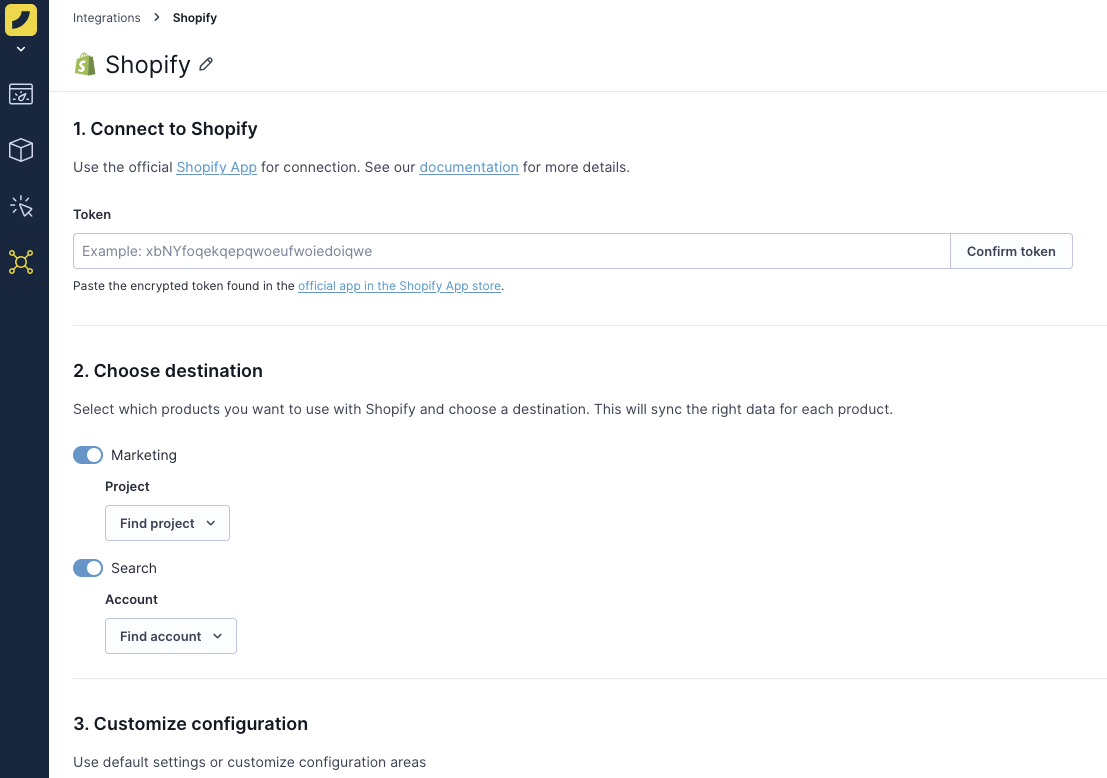
Don't use any of the following tokens as they authenticate different things and won't work here:
- Marketing project token — authenticates your Marketing project, not the Shopify integration.
- Search project token — authenticates your Search project, not the Shopify integration.
- Event Stream ID — identifies a Data hub event stream, not the integration itself
4. Configure Shopify Markets
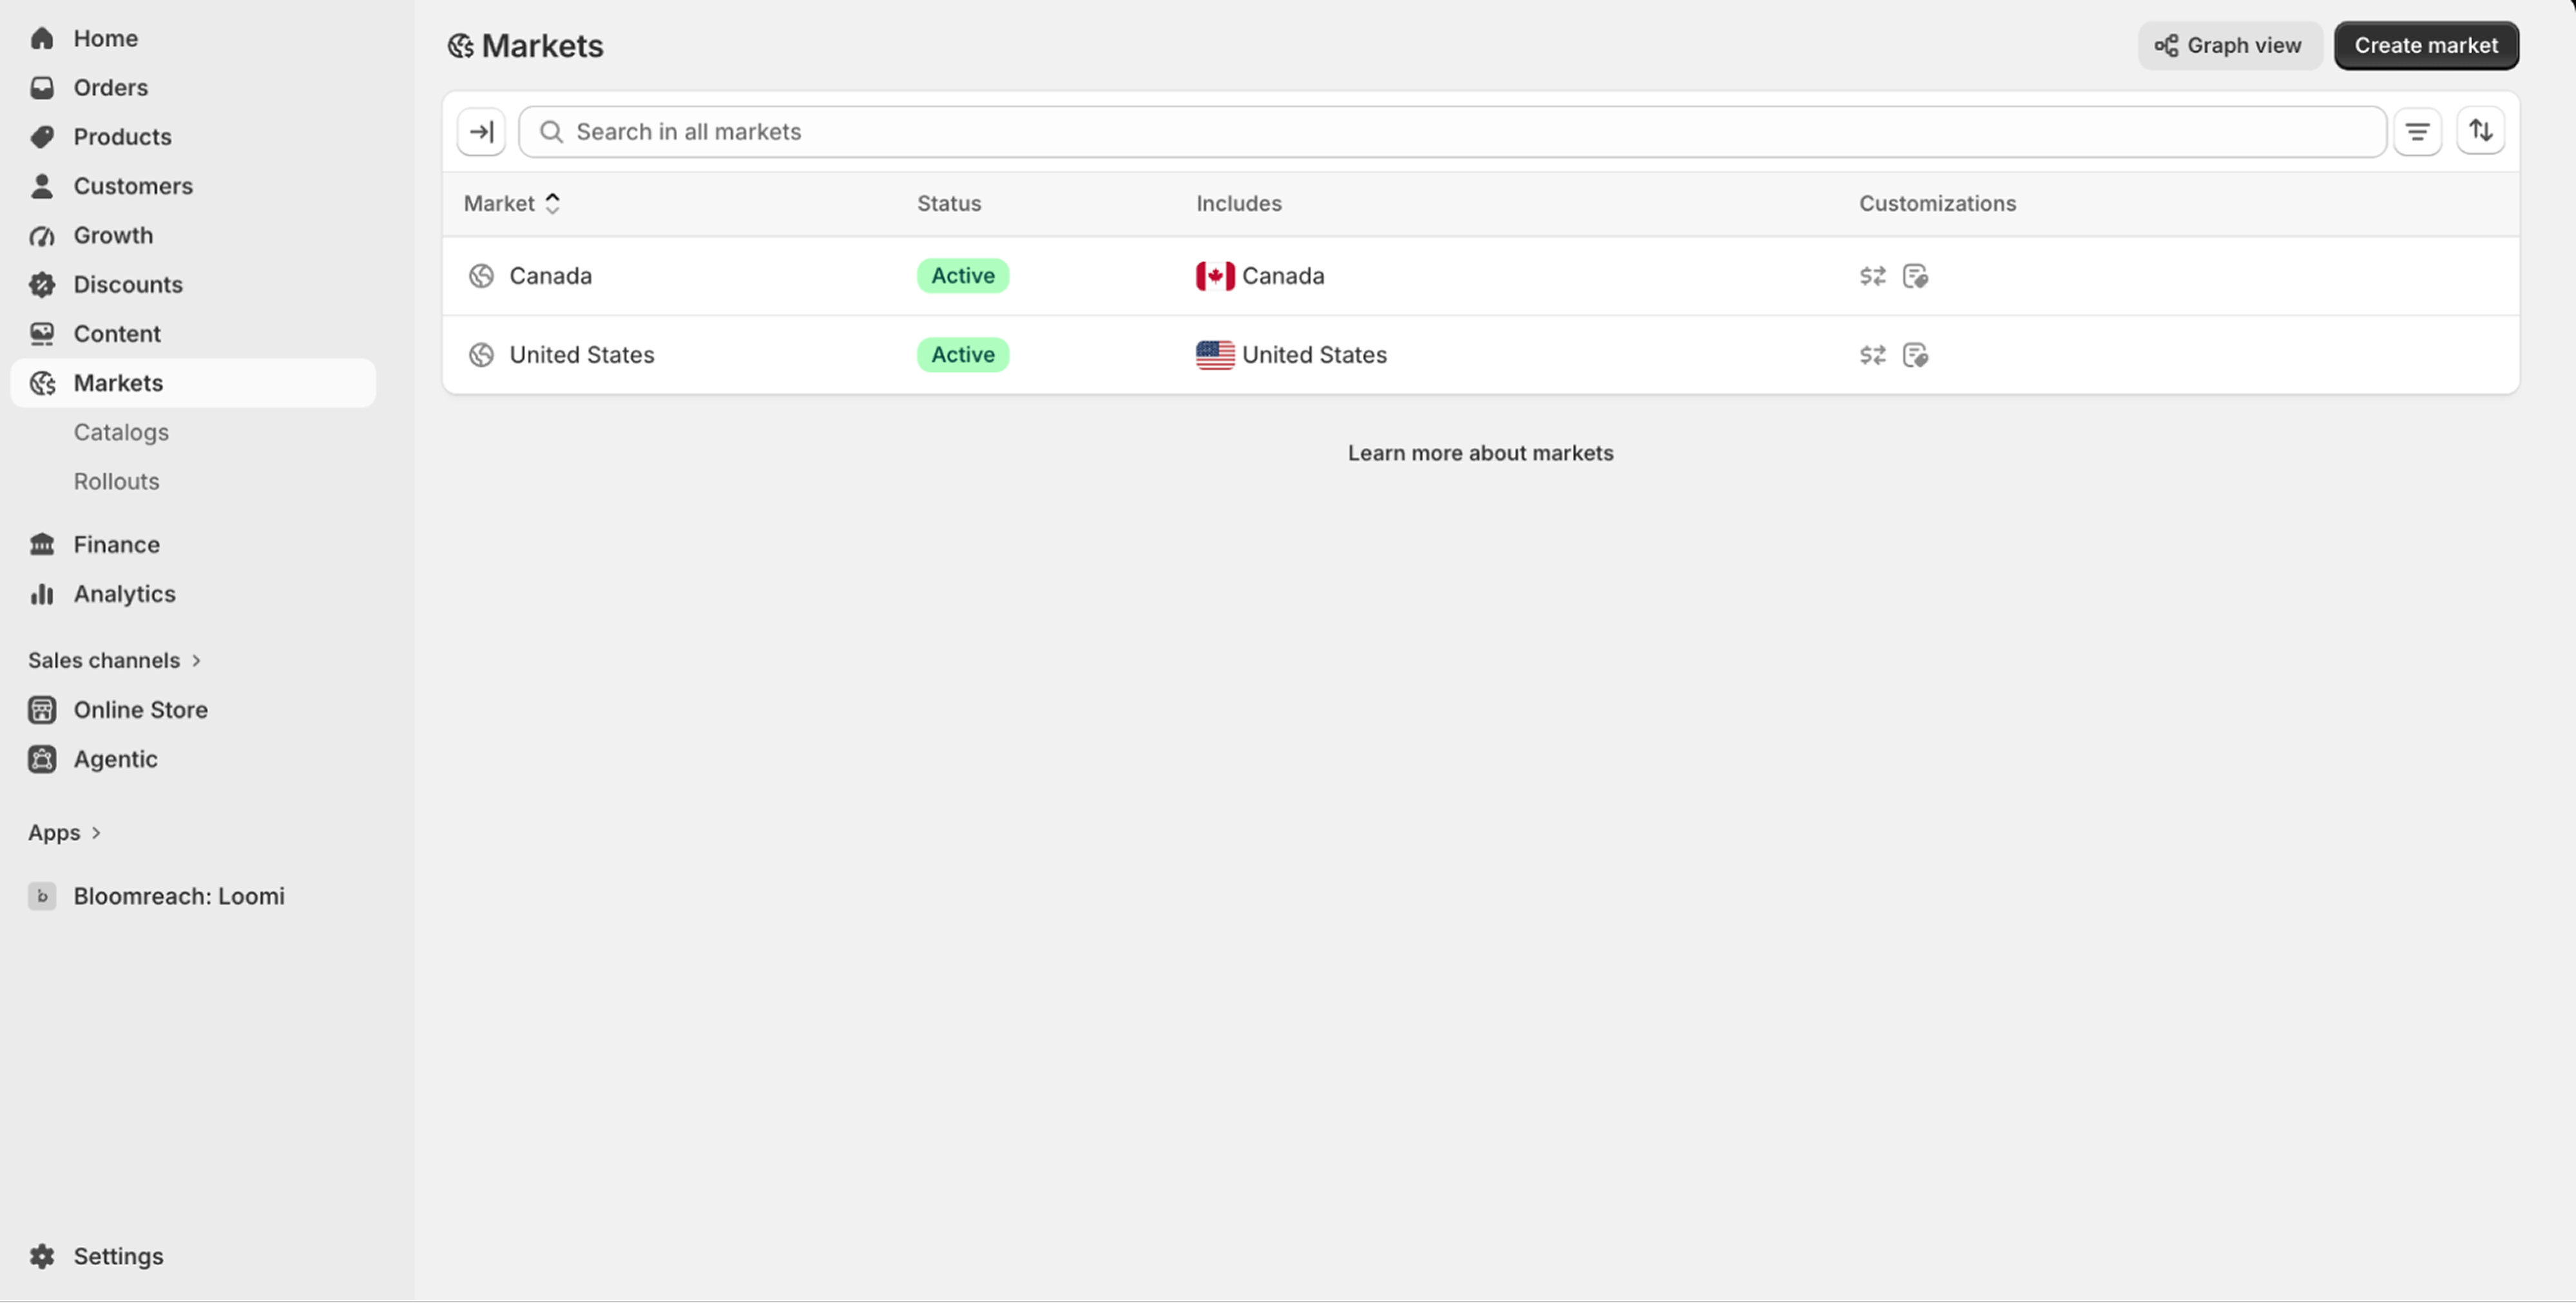
During integration setup, if your store uses Shopify Markets, add each active country-language combination in the Markets, countries and languages section of the integration. Each configuration creates its own item collection in Data hub. You need one integration per store, not one per market.

NoteIf you are missing Shopify markets during setup, ensure the market has a configured domain or language and is active in Shopify. Draft or incomplete market setups may not load correctly in Data hub
5. Set up web tracking
ImportantLegacy Shopify integrations can conflict with Loomi for Shopify during migration:
- If you still use Discovery Shopify App v2 search, collection, or autosuggest app blocks, some events may not trigger reliably, including search, category view, autosuggest, and some add-to-cart events. To avoid tracking gaps, move these use cases to Loomi for Shopify app blocks.
- Legacy Shopify integrations aren't designed to work together with Data hub event streams or the unified Web SDK snippet. Adding the unified Web SDK to a storefront that still uses a legacy integration can break web tracking. To keep tracking working on a legacy integration, use your original Marketing SDK snippet rather than the unified Web SDK snippet. To use event streams and the unified Web SDK, migrate the storefront to Loomi for Shopify first.
If web tracking stops after adding the Web SDK snippet, also check that google_analytics: false is set in your tracking configuration. Omitting it can cause the SDK to wait on window.ga, which no longer loads by default in newer Google Analytics setups. This can surface as a tracking failure.
Before you set up new web tracking during integration configuration, check your store for any legacy tracking code or an older Shopify pixel implementation. The review tells you which of the two paths below applies to you.
| Setup | Steps |
|---|---|
| Standard | For standard implementation, follow Set up web tracking for Loomi for Shopify to enable the Web SDK and configure event tracking in Data hub. Then disable your legacy tracking implementation to avoid duplicate or conflicting events. |
| Custom | For custom web-tracking implementation, install and configure the Bloomreach: Loomi app and complete the Data hub integration. Custom tracking changes how events are collected, but it doesn't remove the need for the core app and Data hub setup. |
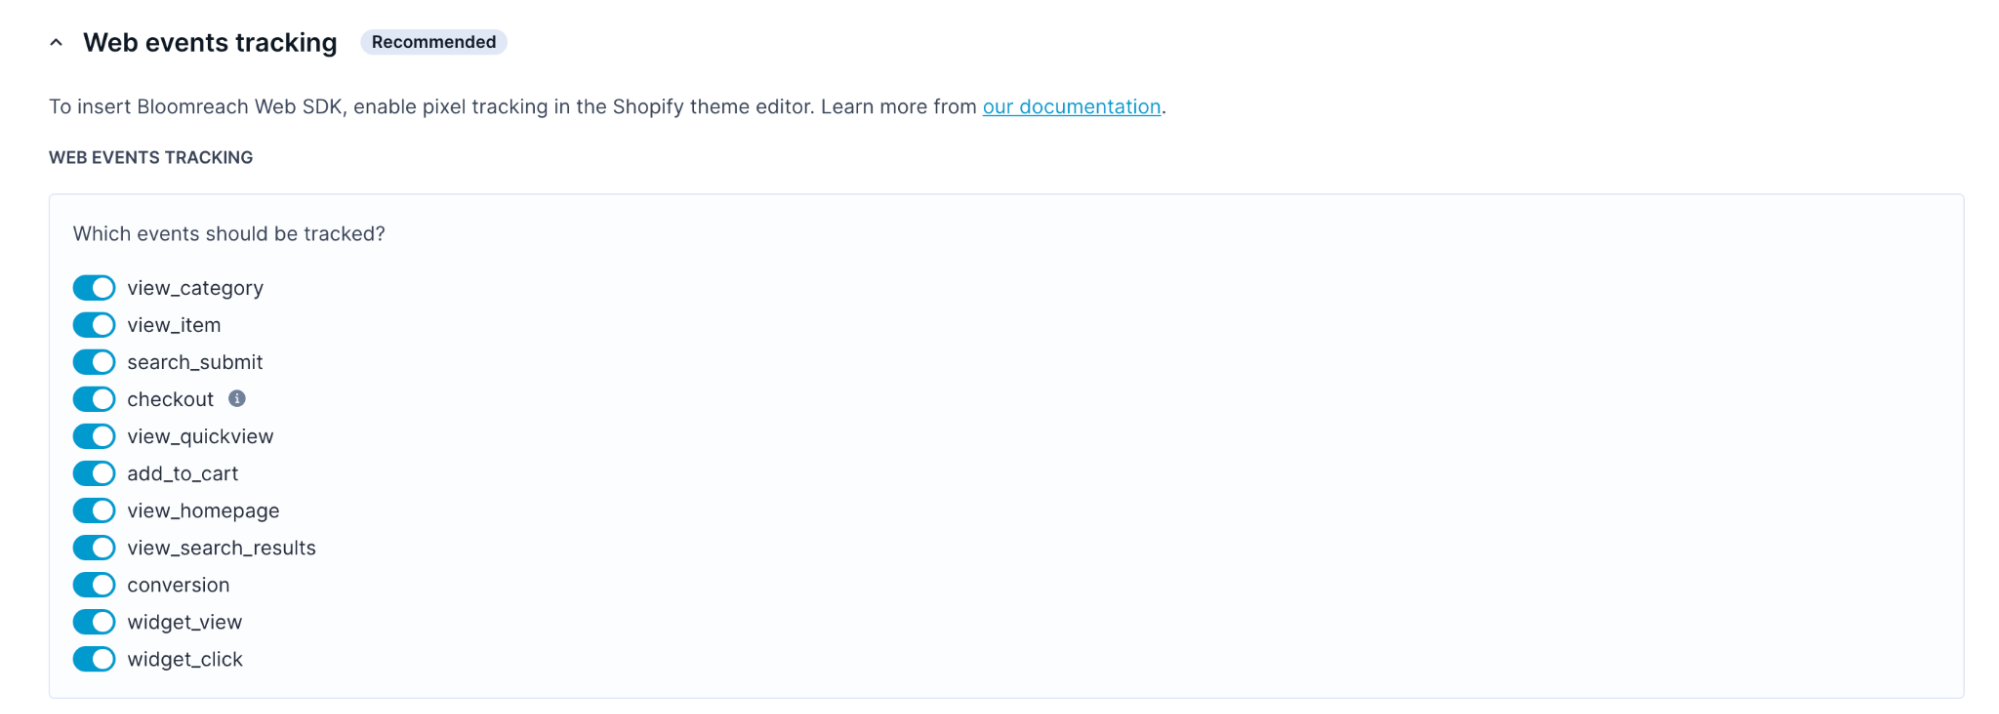
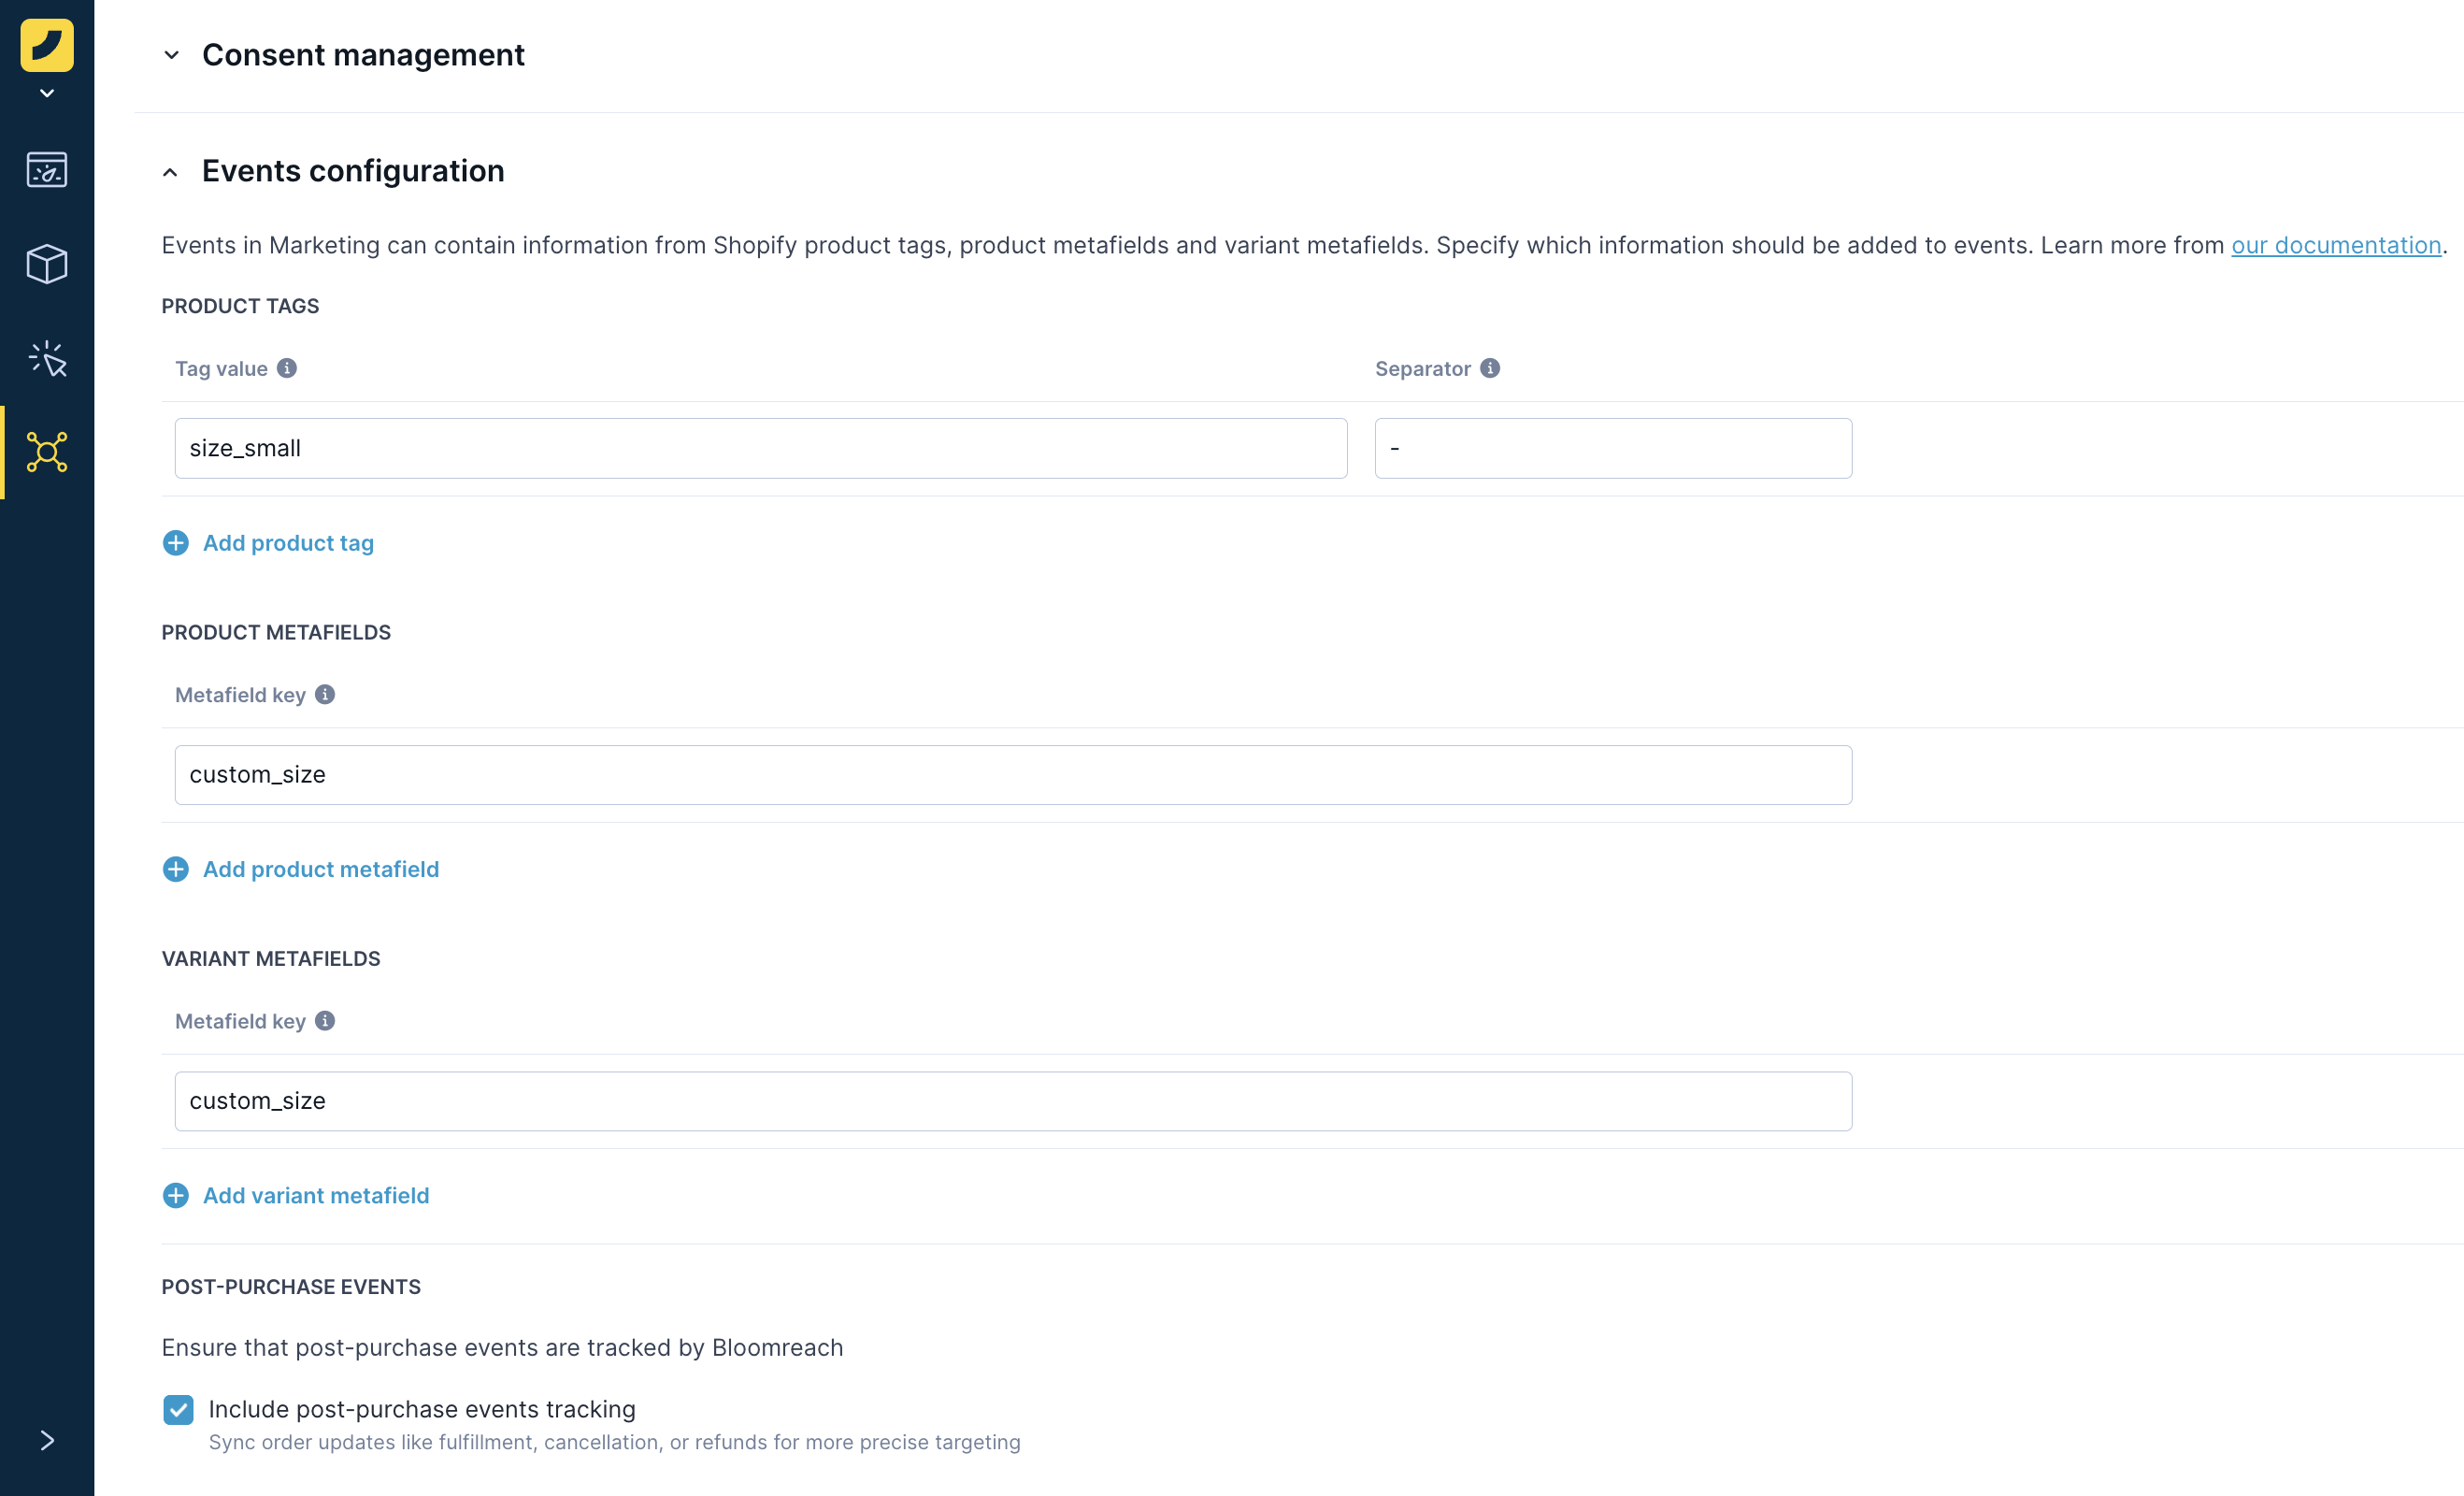
NoteIf you need richer event data, first review the built-in event enrichment options in Data hub — product tags and product variant metafields. Use a custom tracking implementation only when those options don't cover your use case.
If your store already has a server-side Search pixel, don't add a Search destination in the Loomi for Shopify event stream — that creates duplicate tracking.
Avoid duplicate historical events
When you migrate a store from the legacy Shopify connector to Loomi for Shopify, both integrations can try to import the same historical events—for example, purchase, purchase_item, and cart_update—causing duplicities. Follow these steps to keep only one integration as the source of truth at a time.
-
Turn off historical event sync when you set up Loomi for Shopify. Disable the Import historical data toggle in the integration configuration to skip the initial historical sync for stores that already have data from the legacy connector.

-
Let Loomi for Shopify create its item collections and event streams, then confirm it's receiving live customers, consents, and events correctly.
-
Validate your event and product counts before and after you enable the new feed to confirm the numbers match your expectations.
-
Stop the legacy Shopify integration only after you've validated the new feed. Customers, consents, and events now flow to your project through Loomi for Shopify and Data hub instead.
Avoid resyncing historical events after both integrations have run in parallel. A resync at that point reintroduces the duplicate data you just eliminated.
6. Configure the item collections (catalogs)
Finally, review the item collections created in Data hub or set up a new one.
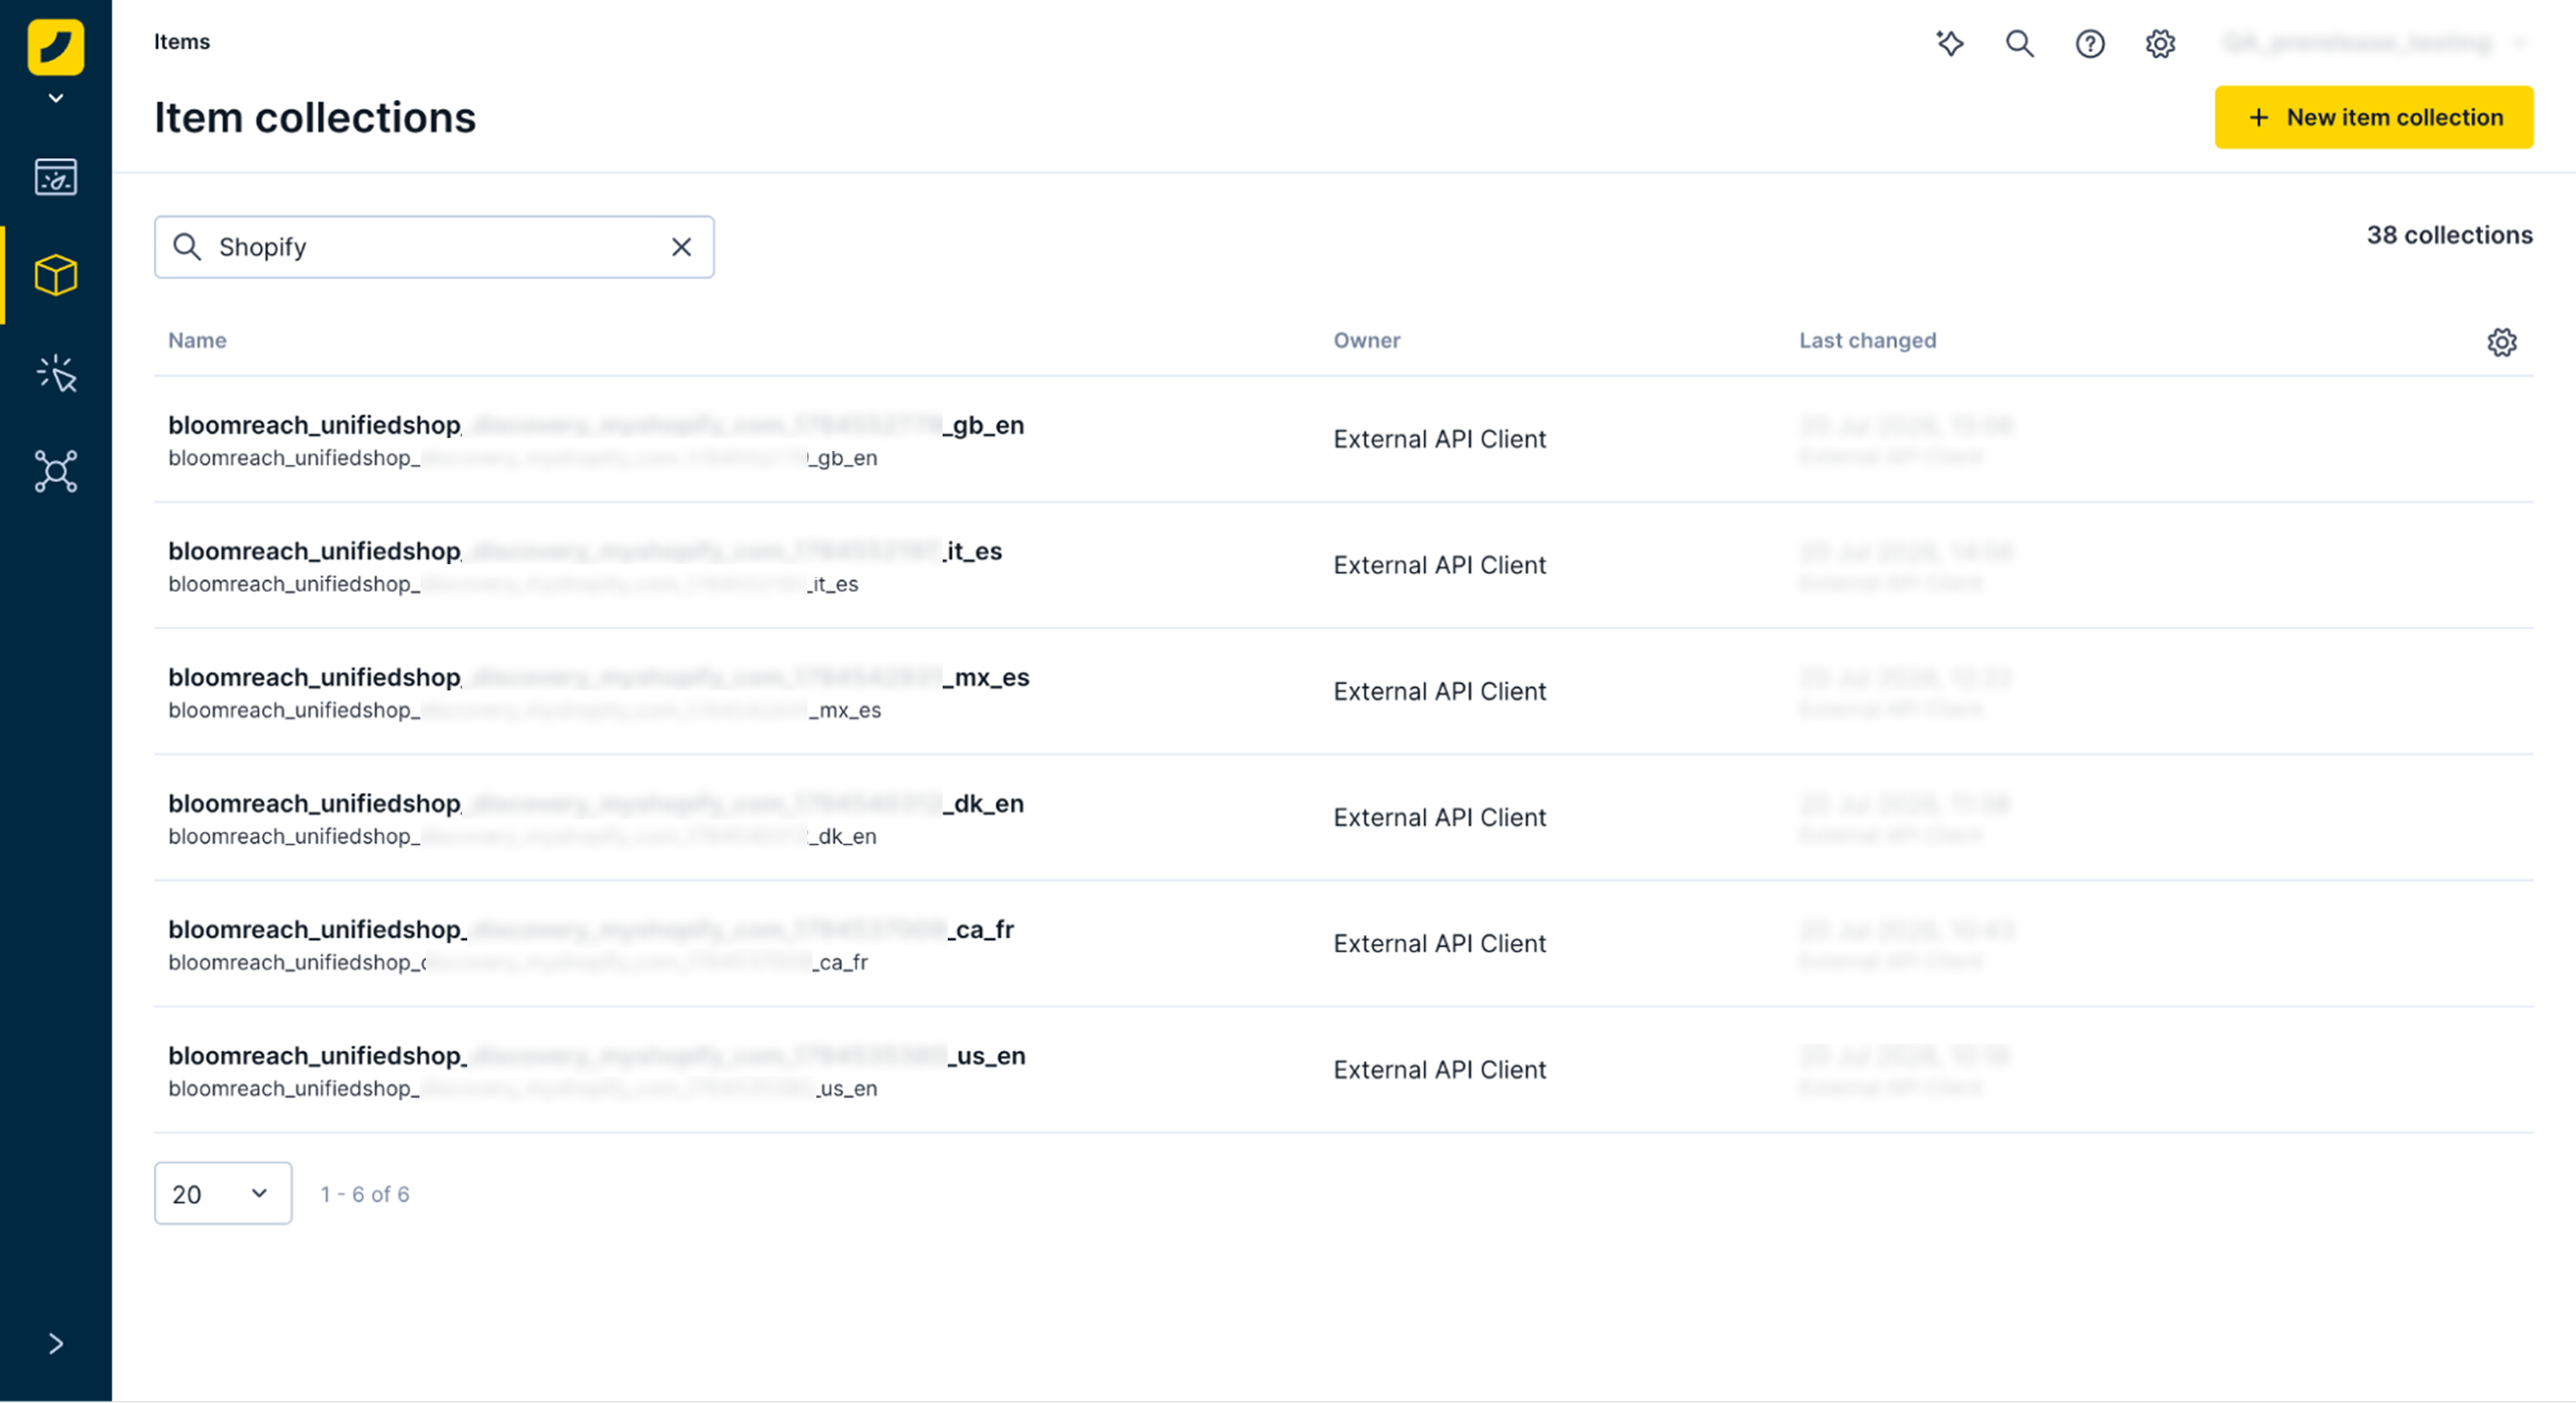
Item collections are the containers in Data hub that store and manage your catalog data, making it available to Search, Marketing, and related use cases. If you configured Shopify Markets, each active country-language combination creates its own item collection with localized product data and currency.
In Data hub, go to Items and open the item collection created for your store. Confirm the following:
- The expected item collection exists for your store or market configuration.
- Product and variant data is present and matches your Shopify catalog structure.
- If you use multiple markets, each required country-language combination has its own item collection.
- Any downstream references to your previous catalog are updated to use the new item collection.
If you need to adjust how catalog data is structured, review the schema and destinations for the collection before go-live.
NoteIf your business depends on market-specific pricing, availability, or language, keep those country-language combinations as separate item collections in Data hub.
7. Validate before go-live
Before you launch Loomi for Shopify on your production store, review downstream dependencies, particularly catalog references and event-name dependencies in campaigns, reports, or templates.
Data and tracking
- Product and variant data is syncing correctly.
- Customer consent updates behave correctly.
- Key storefront events are arriving as expected:
view_item,view_category,search_submit,view_search_results,add_to_cart,checkout, and purchase-related events. - Switch from Marketing SDK to the Web SDK replaced the legacy
searchevent withsearch_submitandview_search_resultssuccessfully.
Live experience
For Search:
- Events are validated using the Bloomreach Tracking Console.
- Search, autosuggest, collections, and recommendations widgets render correctly with live data.
For Marketing:
- Incoming events are correct. Open a customer profile in your project to verify.
- Campaigns and templates render correctly with the new item collection and event data.
Cleanup
- Reports or templates that use the legacy
searchevent are updated to usesearch_submitorview_search_results. - Campaigns, recommendations, or templates that reference old catalog names are reconnected to the new catalogs created by the migration.
8. Roll out to production
After staging validation is complete, repeat the approved configuration in your production store. Run a final QA pass on storefront behavior, event tracking, and any Bloomreach-connected campaigns or use cases before going live.
See also
Updated 3 days ago