

Set up event stream security and permissions
Setting up event stream security and permissions involves two sequential steps: configuring permission rules that control what data each stream accepts, then configuring the authentication model that matches your stream type. Work through permissions first, and authentication options build on top of the rules you define.
Prerequisites
Before configuring event stream security:
-
You need at least one event stream created in Data hub, typically one per tracking source.
-
You need the Workspace Admin role for Data hub to access event stream configuration.
Configure permissions
Each event stream lets you define rules for three types of data: customer identifiers, customer properties, and event types. You can configure these manually or start from a template.
Start with a template
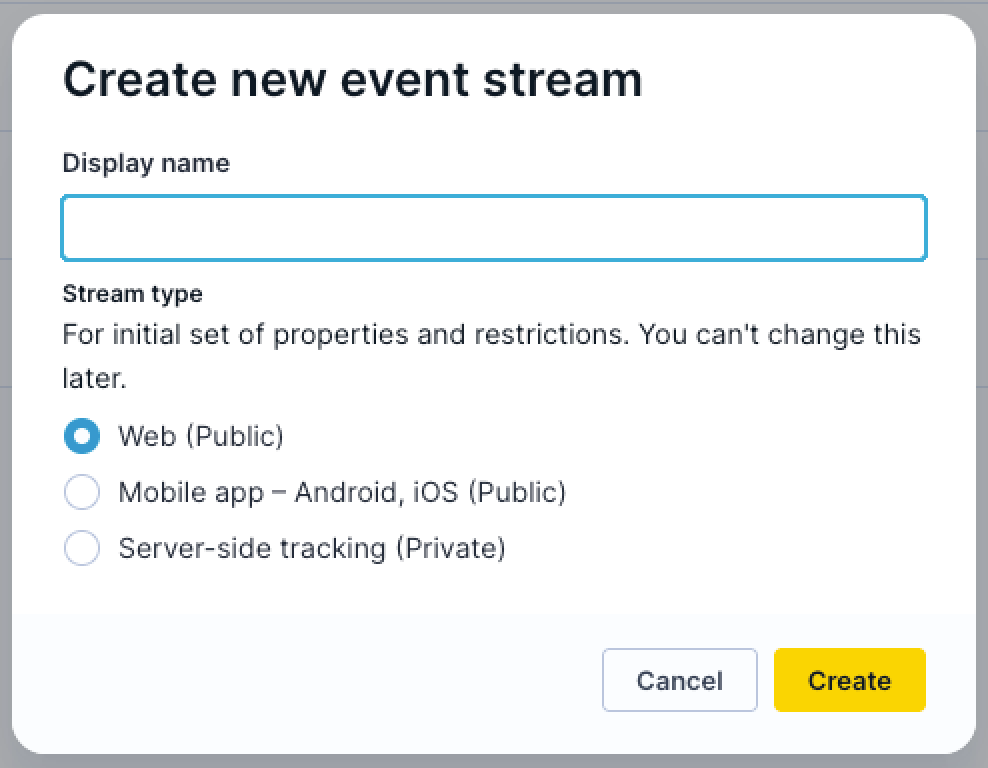
When you create a new stream, Data hub offers permission templates based on common use cases. Templates give you a starting configuration that you can adjust to match your requirements.
- Public stream templates pre-configure common SDK identifiers and a standard set of web event types, such as
page_visit,view_item, andpurchase. Use these as a baseline for browser and mobile app tracking. - Private stream templates include customer properties such as email address and phone number, and sensitive event types such as
consentandpurchase. Use these for backend tracking with shared secret authentication.
NoteTemplates include signed-only options for some identifiers, event types, and properties. Signed-only permissions only take effect if you later enable JWT validation on the stream. If you don't plan to use JWT, set those items to Allow or Deny instead.
Review the template defaults before saving. Add or remove items based on the specific events and identifiers generated by your tracking implementation.
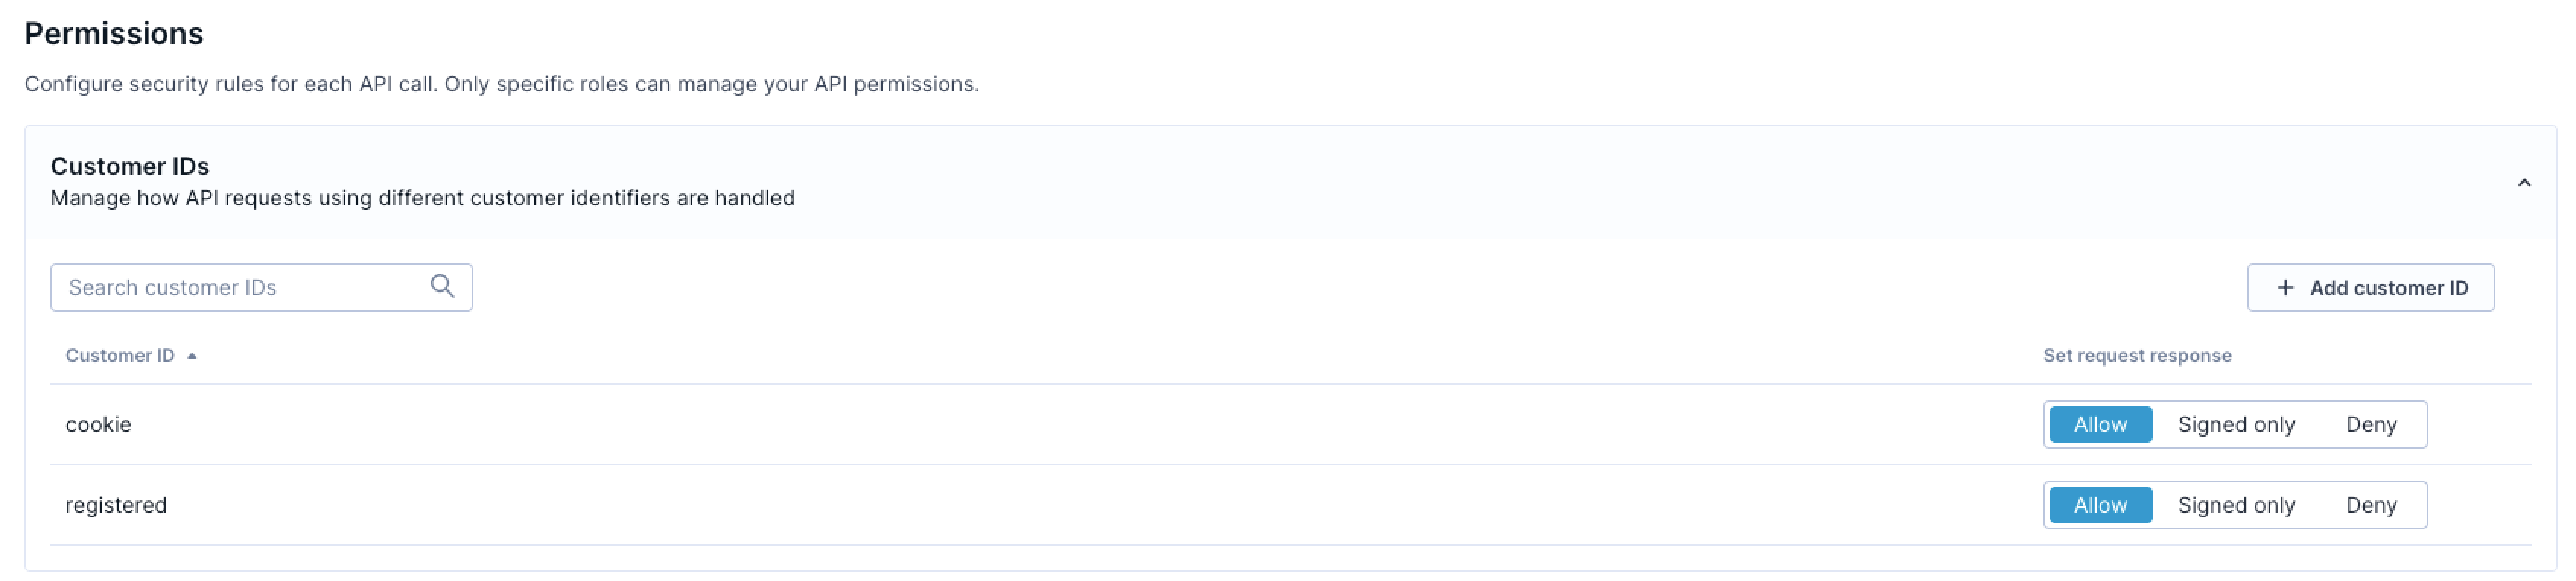
Configure customer ID permissions
Customer ID permissions control which identifiers can link events to customer profiles.
-
Open your event stream in Data hub.
-
Navigate to the Permissions section.
-
For each customer identifier, select one of the following:
-
Allow: Accepted from this stream without a signature.
-
Signed only: Only accepted when the request includes a valid JWT containing this identifier. Applies to public streams with JWT validation enabled.
-
Deny: Always rejected from this stream.
-
-
For identifiers not explicitly listed, set a default behavior for undefined IDs.
-
Click Save changes.
Start with a minimal allow-list. Only permit the identifiers your front-end tracking legitimately produces. For example, cookie IDs for anonymous visitors and a registered ID after login. Deny everything else.
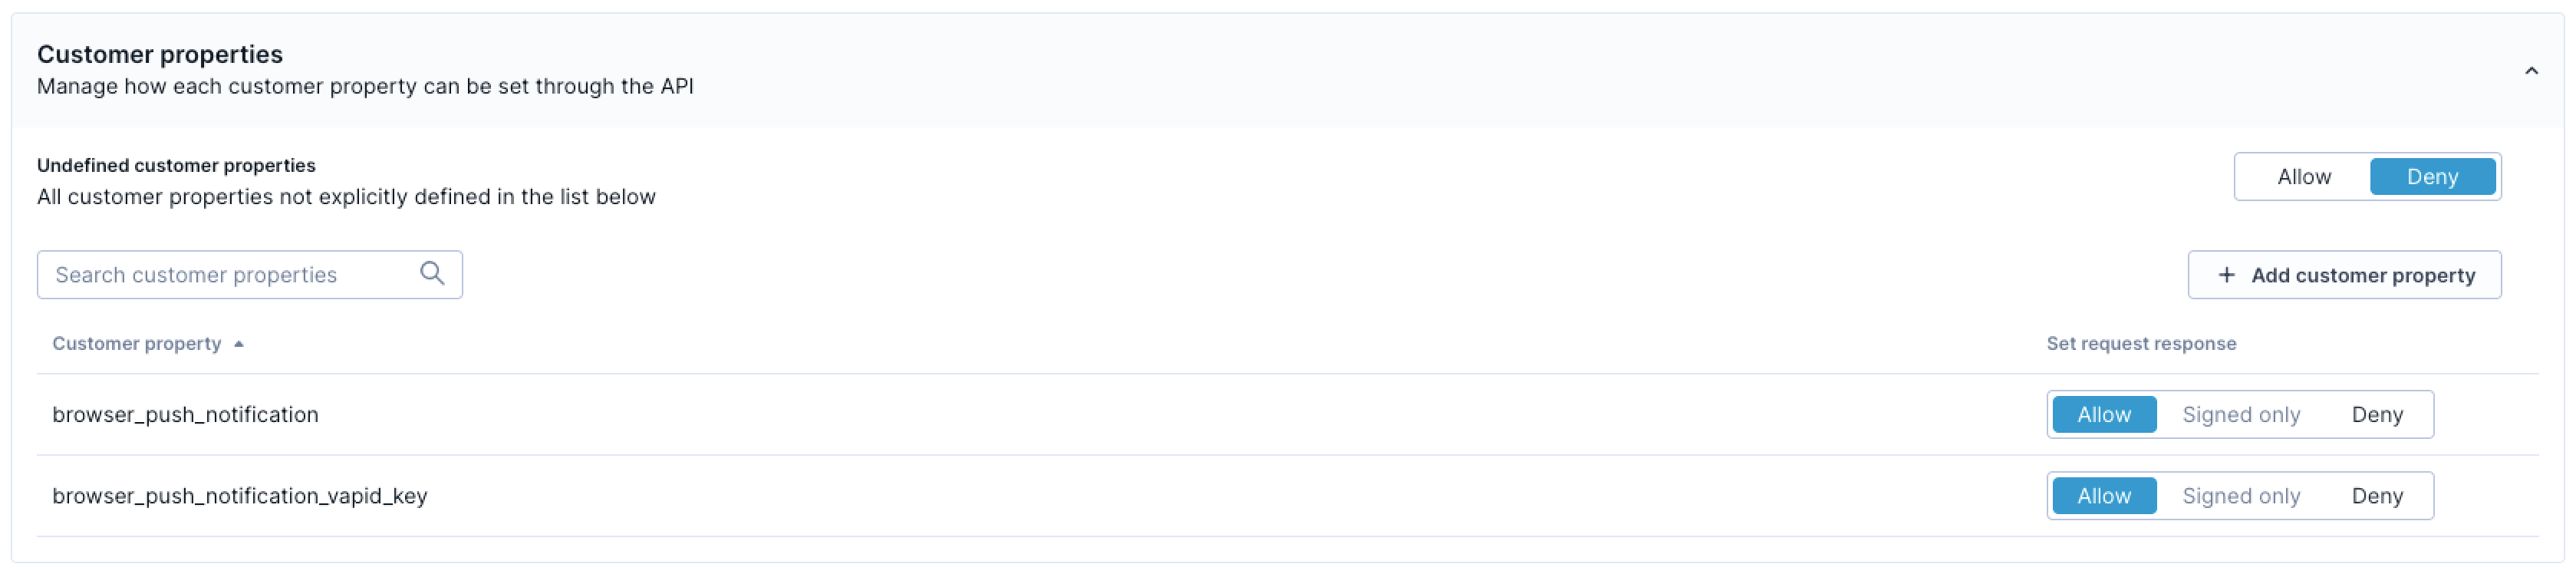
Configure customer property permissions
Customer property permissions determine which profile attributes can be updated through the stream.
-
In the Permissions section, locate the customer properties section.
-
For each property, select Allow, Signed only, or Deny.
-
For properties not explicitly listed, set a default behavior for undefined properties.
-
Click Save changes.
Deny undefined properties on public streams to prevent data pollution. Reserve sensitive properties, such as email addresses and phone numbers, for private streams or, if needed, mark them as signed-only once you have JWT validation enabled.
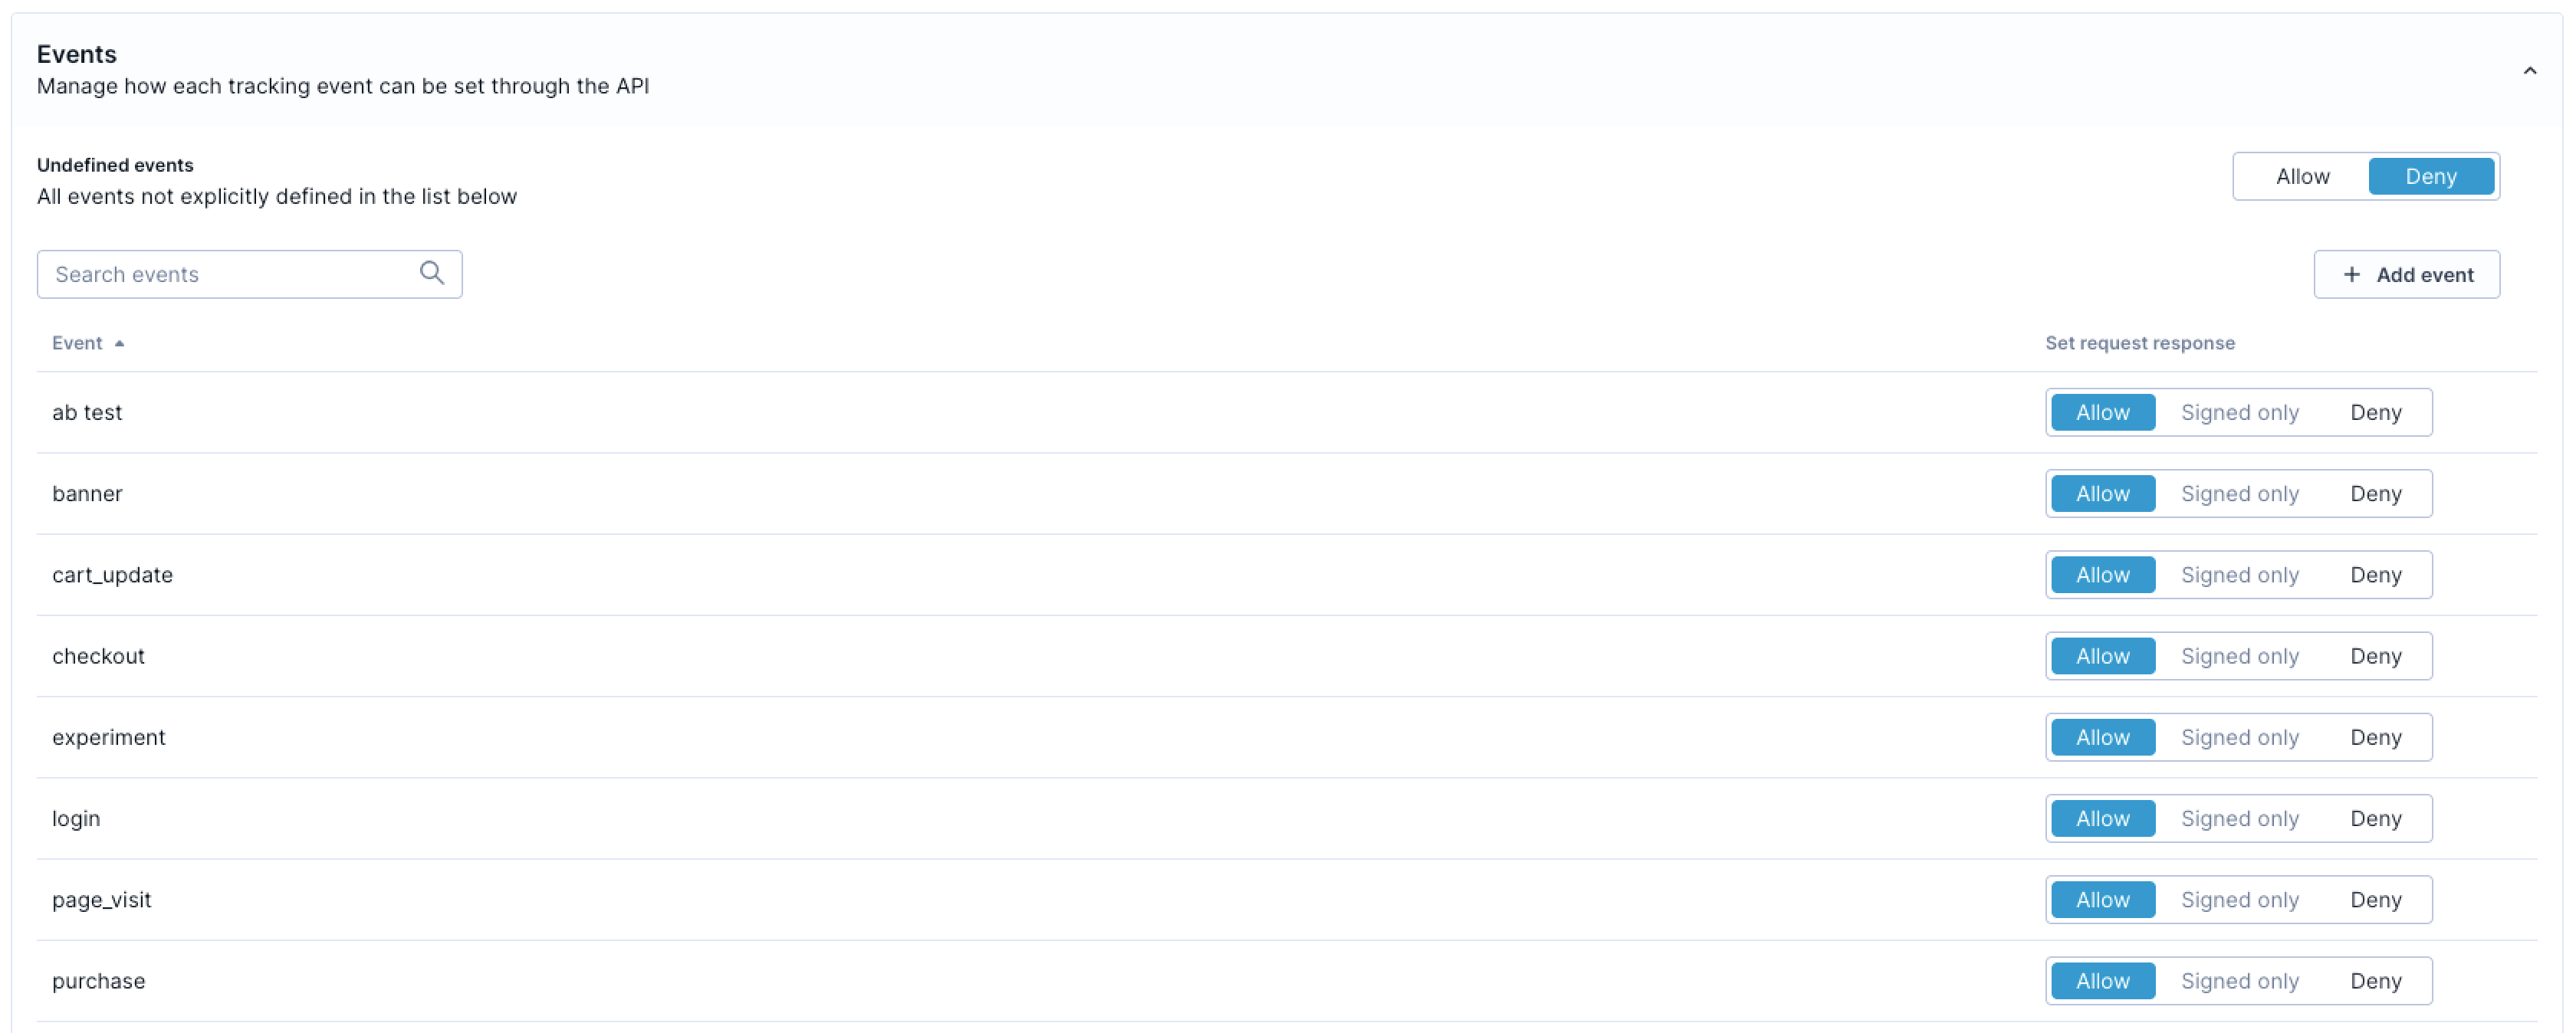
Configure event type permissions
Event type permissions specify which events the stream accepts.
-
In the Permissions section, locate the event types section.
-
For each event type, select Allow, Signed only, or Deny.
-
For event types not explicitly listed, set a default behavior for undefined events.
-
Click Save changes.
Deny undefined event types to prevent schema drift. If a new event type needs to be tracked, define it in your data model first, then add it to the stream's allow-list.
NotePermission changes propagate across the system within a few seconds.
Configure authentication
Choose the authentication model that matches your stream type. Public streams use a stream ID by default. Private streams require a shared secret key. JWT validation is an optional enhancement for public streams that need stronger identity verification.
Public stream: stream ID (standard)
All public event streams authenticate with a stream ID token. This is the default method for browser and mobile app tracking. No additional setup is required beyond including the stream ID in your tracking code.
-
Navigate to Events > your stream > Access security in Data hub.
-
Copy your stream ID from the API Credentials section.
-
Add the stream ID to your tracking snippet as the
stream_idparameter.
The stream ID is visible to anyone who inspects your front-end code or network requests. This is expected. The stream ID identifies which stream receives your data, and doesn't grant unrestricted write access on its own. Restrictive permissions are what prevent unauthorized data from entering the stream.
Private stream: shared secret key
Private streams require both a stream ID and a shared secret key. The secret proves that requests originate from your backend infrastructure.
Additional prerequisite: Your backend must be able to store a secret securely and include it in every tracking request.
-
Open your private event stream in Data hub.
-
Navigate to the Access security tab.
-
In the API authentication keys section, click + Create new key to generate a shared secret key.
-
Copy the key secret immediately. It's displayed only once.
-
Store it securely in your backend configuration, for example, as an environment variable.
-
Configure your server-side tracking to include both the stream ID and shared secret key in every request.
You can rotate the shared secret key at any time through the interface. Old secrets are invalidated immediately when you delete them.
Public stream: JWT validation (optional)
JWT validation adds cryptographic identity verification to a public stream. When enabled, you can mark specific customer IDs, event types, and properties as signed-only, meaning they're accepted only with a valid JWT issued by your backend.
This is optional. Configure it only if your implementation requires verified customer identities on a public stream. For example, you need to ensure that purchase events or registered customer IDs can't be forged by anonymous clients.
Additional prerequisites:
-
Your backend must be able to generate and sign JWT tokens.
-
You need the signing keys created in the steps below.
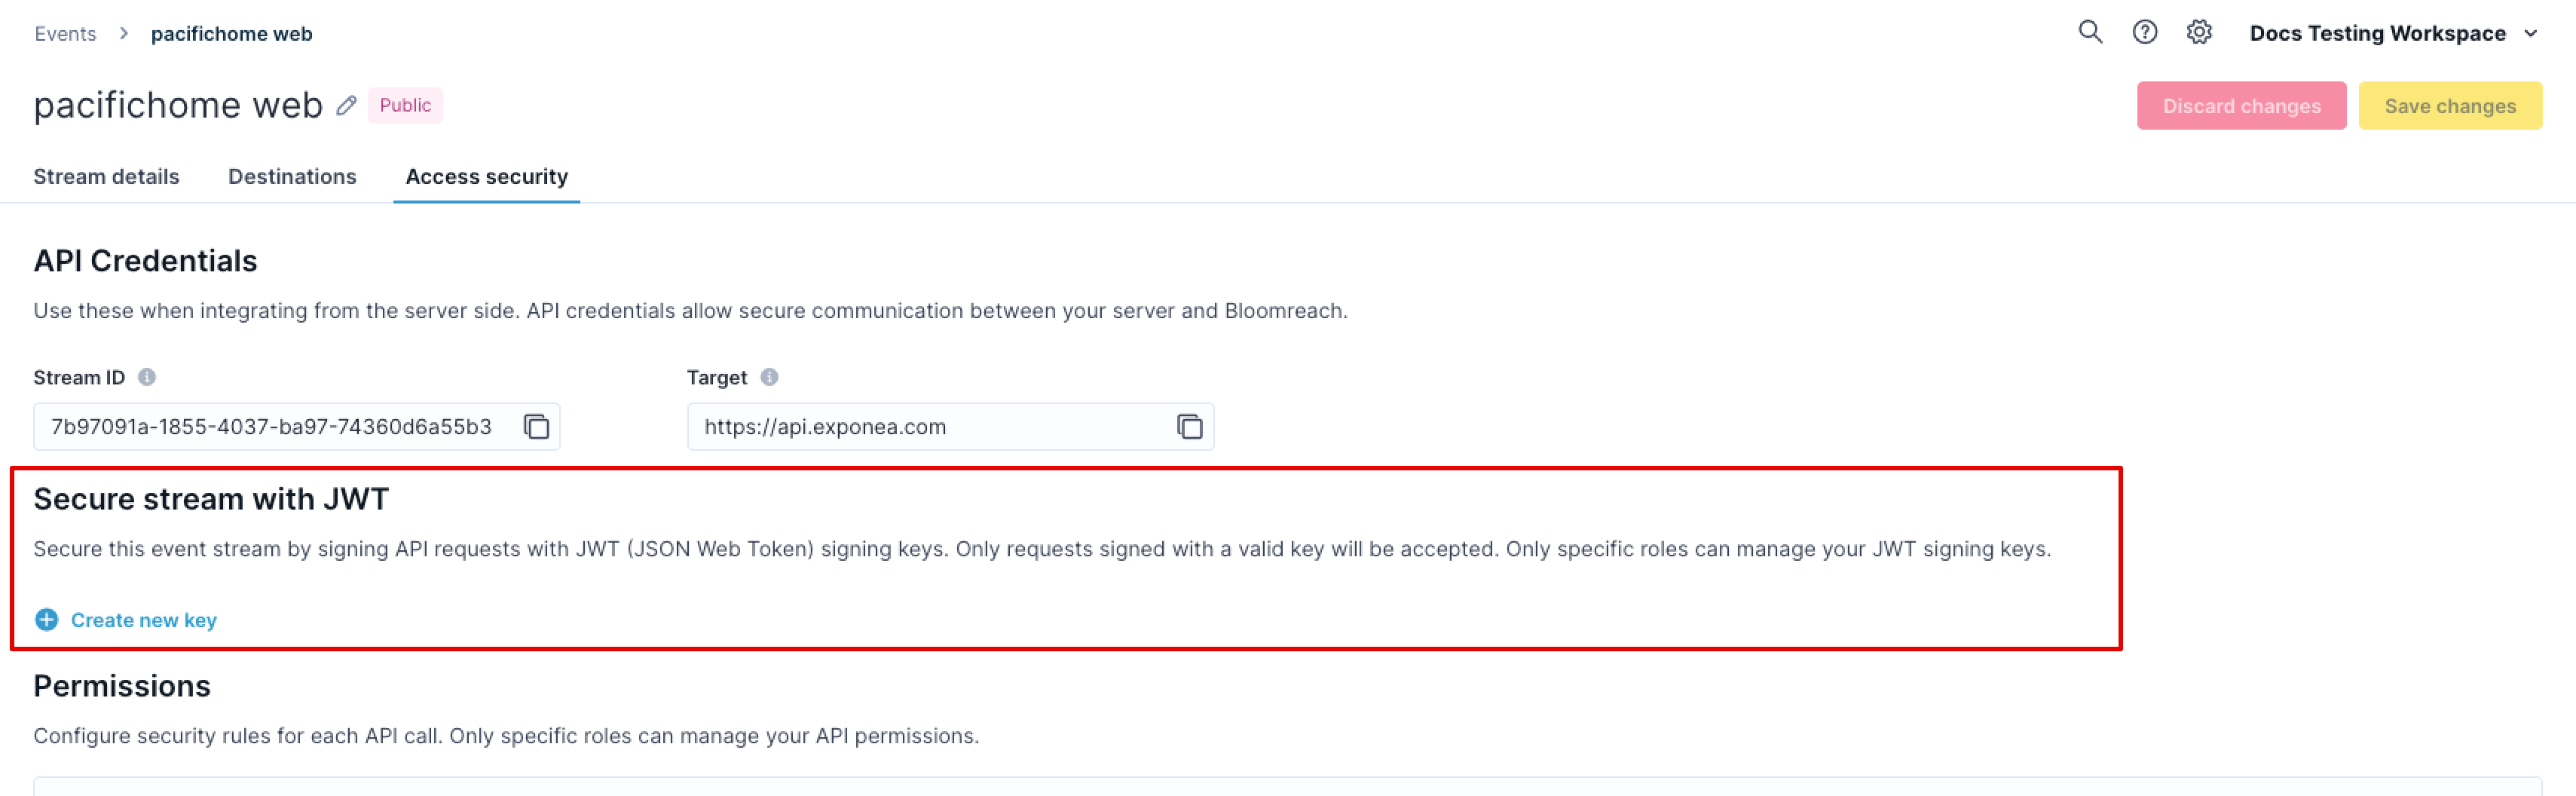
Create JWT signing keys
-
Navigate to Events > your stream > Access security in Data hub.
-
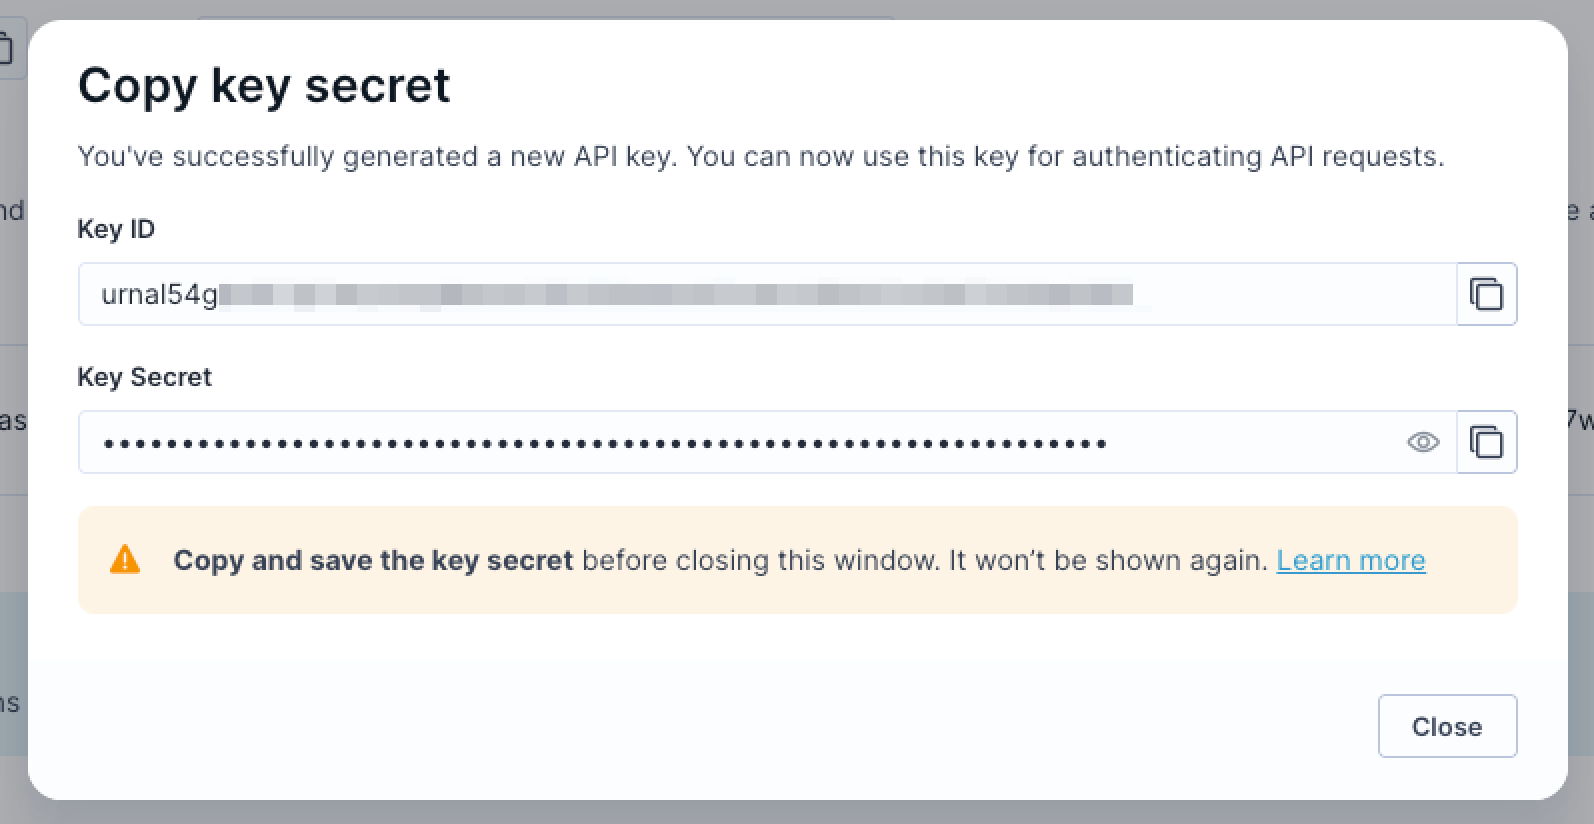
In the Secure stream with JWT section, click + Create new key.
-
Copy the key secret immediately. It's displayed only once.
-
Store the key secret securely in your backend configuration.
-
Note the Key ID (
kid): your backend must include this in the SDK configuration when signing tokens.
You can create multiple signing keys and rotate them over time. Key changes propagate within a few seconds. For zero-downtime key rotation, see Rotate JWT signing keys.
Configure your backend
Configure your backend to generate JWT tokens when users authenticate:
-
Include signed customer IDs in the token payload using the
idsfield, for example{"ids": {"registered": "user123"}}. -
Set the token expiry (
expclaim) to match your session duration. Don't exceed 90 days. -
Sign tokens using the HMAC algorithm (
HS256,HS384, orHS512) with your signing key secret. -
Include the Key ID (
kid) in the JWT header.
For complete token specification and backend code examples, see JWT authentication for the Web SDK.
Update your stream permissions
Once your backend is generating tokens and your SDK is configured to send them, update your stream permissions to enforce signed-only for the identifiers, events, and properties that require JWT:
-
In the Permissions tab, locate the customer IDs, event types, or properties you want to secure.
-
Change their permission from Allow to Signed only.
-
Click Save changes.
From this point, any request attempting to use those schema objects without a valid JWT is rejected.
ImportantEnable signed-only permissions only after your SDK is already sending valid JWTs. Switching to signed-only before deploying your SDK updates will immediately start rejecting traffic from clients that haven't received the update yet. See Migrate to JWT-secured tracking for a safe rollout sequence.
Configure your SDK
Pass the JWT to the SDK so it can automatically attach tokens to tracking requests. For implementation details, choose your platform:
Identity transfer compatibility
NoteThis section applies only if you enabled JWT signed-only permissions for customer IDs.
JWT signed-only permissions for customer IDs are incompatible with Bloomreach's identity transfer setting for campaign URLs. You must disable identity transfer before enabling JWT signed-only customer ID permissions.
Identity transfer tokens in campaign URLs don't include JWT signatures. If your stream requires a JWT to accept a customer ID, link clicks from campaigns will fail to update customer profiles, and the event stream rejects them because they lack a valid JWT.
Data hub displays a warning and prevents the configuration if you try to enable JWT signed-only customer ID permissions while identity transfer is still active.
Disable identity transfer before enabling JWT
-
Navigate to your Marketing project settings.
-
Go to Project settings > Tracking.
-
Locate the Transfer identity to URL links setting.
-
Select Disable all identity transfers.
-
Save your changes.
-
Return to Data hub to configure JWT signed-only permissions.
NoteDisabling identity transfer means campaign link clicks won't automatically identify customers. You'll need an alternative identification method for campaign tracking, such as requiring a login before accessing personalized content.
Rotate JWT signing keys
You can rotate JWT signing keys without downtime by keeping the old key active while transitioning to a new one.
-
Create a new signing key in Events > your stream > Access security > Secure stream with JWT.
-
Update your backend to sign new tokens with the new key.
-
Wait for all existing tokens signed with the old key to expire. This depends on your token lifetime (check your
expconfiguration). -
Once no valid tokens with the old key remain in circulation, delete the old key from Data hub.
Key changes propagate within a few seconds. Deleting a key immediately invalidates all tokens signed with it, so don't delete the old key until you're certain no active sessions still hold tokens signed with it.
Migrate to JWT-secured tracking
NoteThis section applies only if you're adding JWT validation to an existing stream that currently uses standard stream ID authentication.
You can transition from unsecured tracking to JWT-secured tracking without dropping any existing traffic, as long as you phase the rollout correctly.
Migration considerations (FAQs)
Can I enable JWT on an existing stream without breaking current tracking?
Yes. Creating signing keys and updating your SDK to send JWTs doesn't break anything on its own. The only breaking change is switching permissions to Signed only. Until you do that, the stream accepts both signed and unsigned requests.
What happens to in-flight requests during the transition?
In-flight requests without a JWT are processed normally as long as permissions are still set to Allow. Once you switch to Signed only, requests without a valid JWT are rejected immediately.
Should I create a new stream or update the existing one?
Update your existing stream. This avoids updating the stream_id across your entire front-end infrastructure and keeps your historical data continuous.
Rollout sequence
Follow this sequence to migrate with zero downtime. Don't enable signed-only permissions at the same time as you deploy your SDK updates — phase these steps separately.
Create your signing key
Generate a JWT signing key in Events > your stream > Access security > Secure stream with JWT. Store the secret securely in your backend.
Deploy backend JWT generation
Implement JWT generation on your backend for authenticated users. Set the exp claim to match your session duration.
Update your SDK
Update your front-end tracking code to include the auth object (Web SDK) or equivalent JWT configuration (mobile SDKs) and deploy to production. At this point, updated clients send JWTs, but the stream still accepts unsigned traffic from older clients.
Wait for session turnover
Monitor your traffic and wait for existing sessions to expire and clients to update.
-
Web tracking: 24–48 hours is typically sufficient.
-
Mobile apps: May take longer depending on app store update adoption.
Enable signed-only permissions
Once JWTs are flowing from your updated clients, switch the relevant customer IDs, event types, and properties from Allow to Signed only in the Permissions tab.
From this point, your stream rejects any request that attempts to use those schema objects without a valid JWT.
Validate your setup
NoteUse the Bloomreach Tracking Console Chrome extension to test and verify your integration, or debug tracking issues.
After configuring permissions and authentication, validate your setup by running these checks:
-
Trigger tracking events from your implementation.
-
Verify events appear in your Marketing project under Data & Assets > Customers.
-
Check Data & Assets > Data manager to confirm events are being recorded with the correct properties.
-
Test that denied event types and properties are rejected: send a request containing a denied event type and confirm it doesn't appear in Marketing.
-
Test identifier stripping: send a request containing both an allowed and a denied customer ID and confirm only the allowed ID is associated with the profile.
If you enabled JWT validation, also verify:
-
Confirm that signed-only events sent with a valid JWT are accepted.
-
Confirm that signed-only events sent without a JWT are rejected.
-
Test with an expired JWT token and confirm the request is rejected.
-
Verify your token refresh callback is working: check that tracking resumes automatically after a 401 response triggers a token refresh.
Updated 2 days ago