

Unified SSO for Microsoft Entra ID (formerly Azure Active Directory)
Single sign-on (SSO) authentication for Microsoft Entra ID (formerly Azure Active Directory) lets your team access Bloomreach using their existing company credentials.
This guide explains how to configure Microsoft Entra ID as your identity provider using SAML 2.0 authentication.
Prerequisites
Before configuring SSO in Microsoft Entra ID, ensure you have:
- Admin role in Bloomreach
- Admin access to your Microsoft Entra ID identity provider
- Active SSO feature on your Bloomreach account (contact your Customer Success Manager for activation)
Configure Microsoft Entra ID SSO
To use Microsoft Entra ID SSO login, you must first configure it in the Microsoft Entra admin center.
InfoYou'll switch between Microsoft Entra and Bloomreach multiple times during this configuration. Keep both dashboards open to streamline the process.
- Microsoft Entra ID: Create and set up the enterprise application (Step 1-3).
- Bloomreach: Download service provider metadata (Step 4).
- Microsoft Entra ID: Upload metadata, configure claims, and get metadata URL (Step 5-7).
- Bloomreach: Complete the configuration (Step 8).
Create an enterprise application
Open the Microsoft Entra admin center and go to Enterprise applications:
- Go to Manage > Enterprise applications from the left menu.
- Click + New application.
- Select + Create your own application.
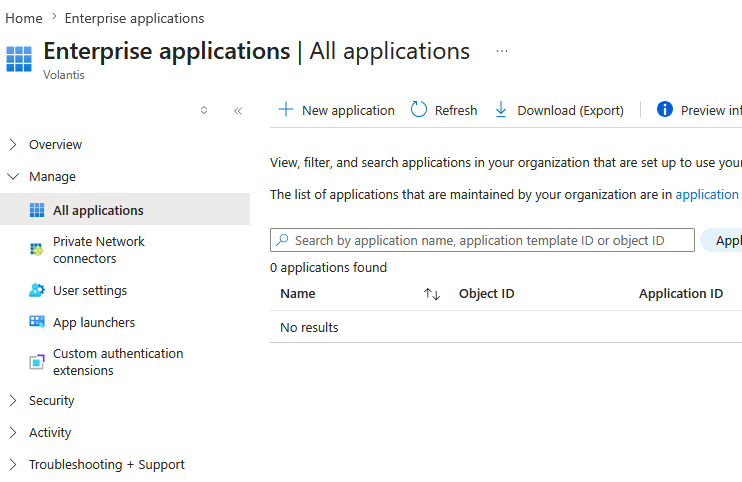
Creating new application in Microsoft Entra ID Enterprise Applications page.
Set up the application
In the modal window, configure your new application:
- Enter a name, for example: Bloomreach.
- Select Integrate any other application you don't find in the gallery (Non-gallery).
- Click Create.
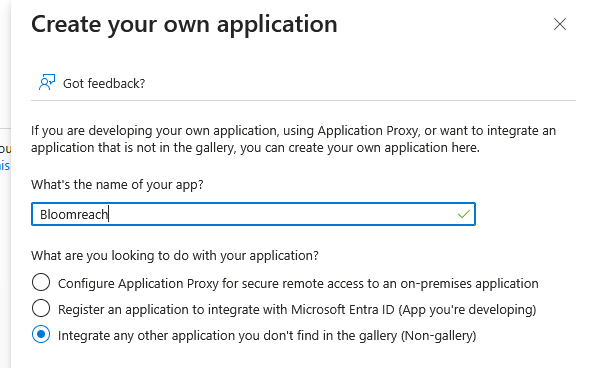
Create application with the application name.
Select SAML authentication
Configure SSO for the application:
- From the left Manage menu, select Single sign-on.
- Choose SAML from the available sign-on methods.
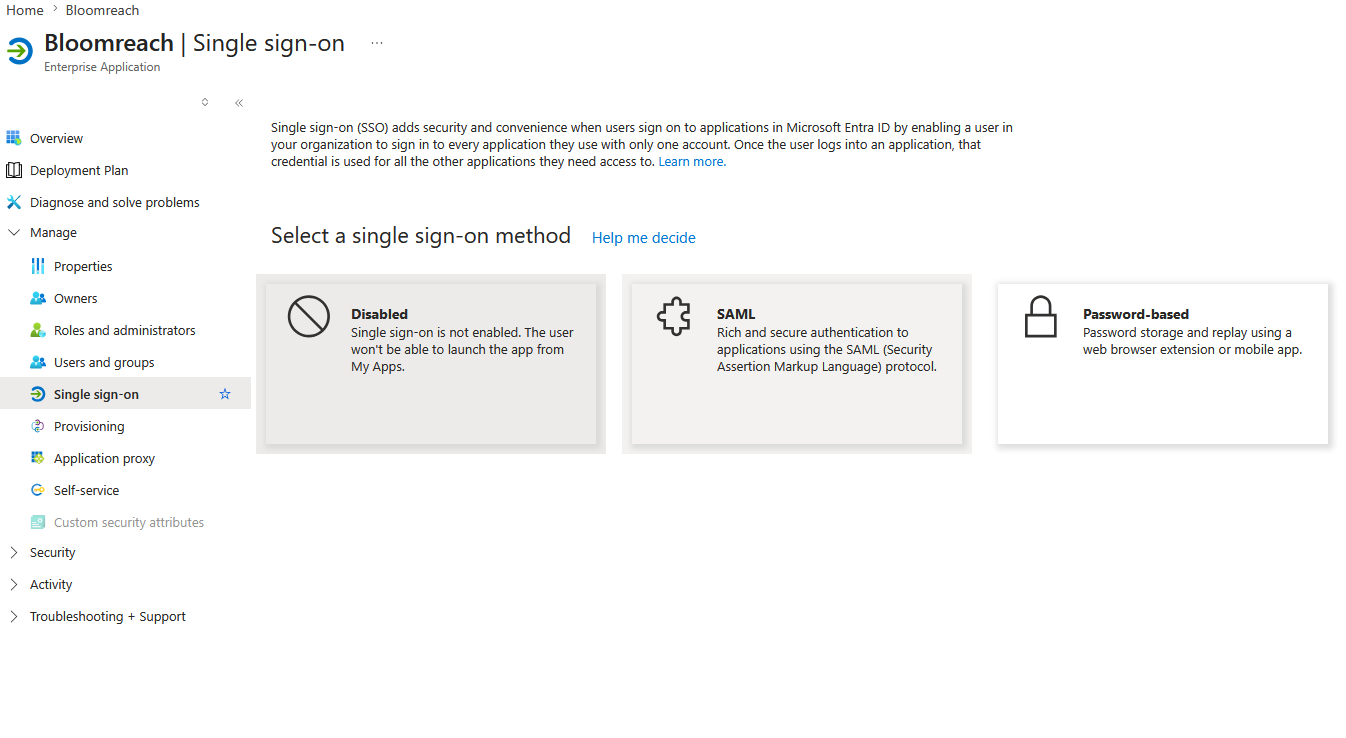
Choose SAML in single sign-on options.
Enable SSO and download service provider metadata
Switch to Bloomreach to enable SSO and download service provider metadata:
- Go to Administration > Settings > Single sign-on > Preferences.
- Enable the Single sign-on integration toggle.
- Click Download service provider metadata.
- Save the file as
service-provider-metadata.xml
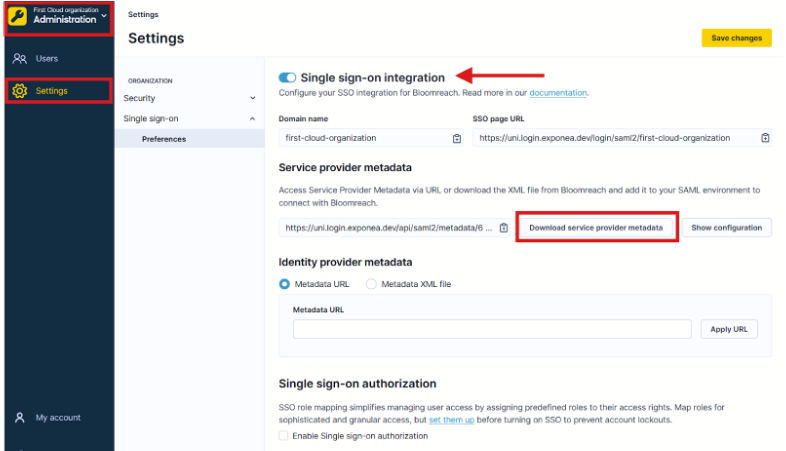
Enable SSO and download service provider metadata from Bloomreach settings.
Upload metadata
Return to the Microsoft Entra admin center and:
- Click Upload metadata file.
- Select the XML file you downloaded from Bloomreach Administration section.
- Review the Basic SAML Configuration extracted from the metadata.
- Click Save.
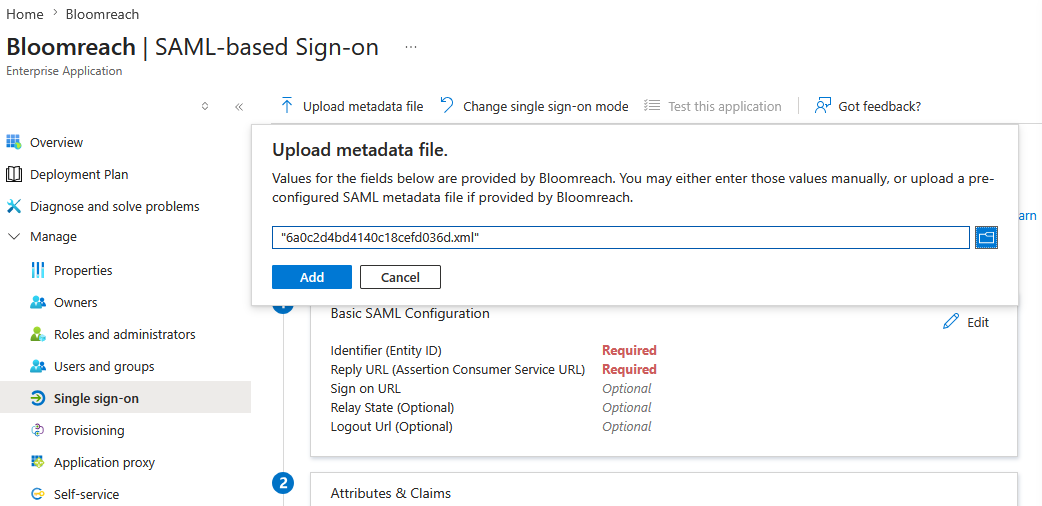
Upload metadata to Microsoft Entra ID.
Configure attributes and claims
Set up the required user attributes for authentication:
- Go to the Attributes & Claims section.
- Click Edit.
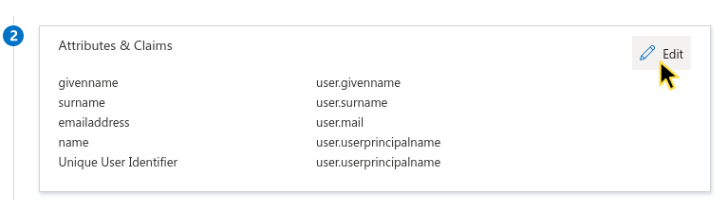
Attributes and claims in Microsoft Entra ID.
- Remove all Additional claims (keep the Required claim unchanged).
- Add the following three new claims using + Add new claim.
| Claim name | Source | Source attribute |
|---|---|---|
email | Attribute | user.userprincipalname |
first_name | Attribute | user.givenname |
last_name | Attribute | user.surname |
Configure optional claims:
- Mobile phone claim (
user.mobilephone) if you have mobile phone data available. - Email address claim (
user.email)and unique name ID claim if users can't receive emails to the email addresses defined in theuser.userprincipalnamefield.
Get metadata URL
Get the metadata URL from the Microsoft Entra admin center:
- Go to SAML Signing Certificate.
- Copy the App Federation Metadata URL to your clipboard. You'll need it in the next step.
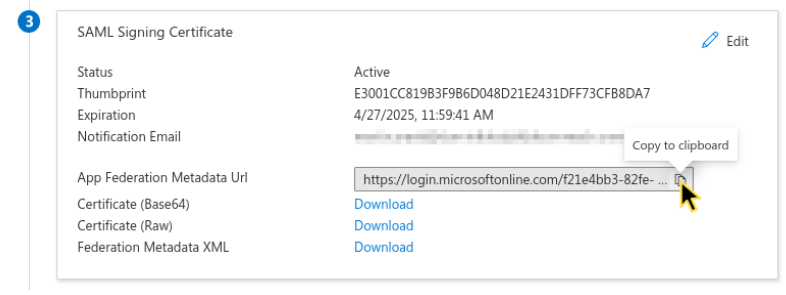
Copy the App federation metadata URL to the clipboard.
Complete the configuration
Finish the configuration in Bloomreach:
- Go to Administration > Settings > Preferences.
- Paste the URL into the Metadata URL field under Identity provider metadata.
- Click Apply URL. Verify that the metadata contains a valid single sign-on URL and that the encryption/signing certificates haven't expired.
- Click Save changes.
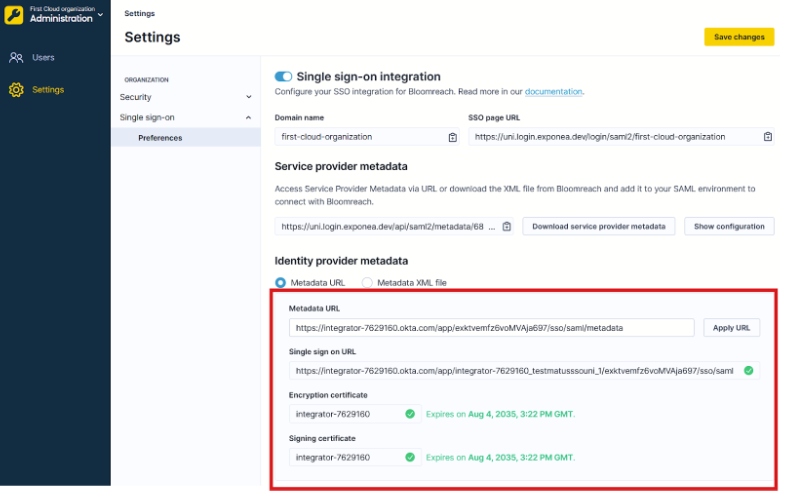
Paste the metadata URL to Bloomreach.
- Go to Administration > Settings > Security > Authentication settings.
- Enable single sign-on as an allowed authentication method.
- Optionally disable other authentication methods to enforce SSO.
- Click Save changes.
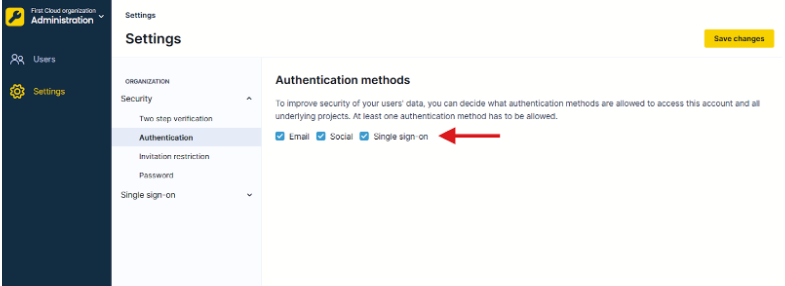
Enable SSO in Bloomreach.
All users you assign to the application in Microsoft Entra ID can now log in to Bloomreach and access their subscribed Bloomreach products using SSO.
Next steps
- Assign users to the application in Microsoft Entra ID.
- Assign user roles via SSO (see Unified SSO authorization for Microsoft Entra ID).
- Test the SSO login with a test user.
- Communicate the change to your team.
Updated 18 days ago