

Set up event streams
This guide walks you through creating and configuring event streams in Data hub to capture real-time customer data for the Search and Marketing platforms.
Prerequisites
Before you begin, ensure you have:
-
Data hub workspace access with Event streams Admin role.
-
Marketing project and/or Search account provisioned.
-
Access to your app or website's code to implement tracking.
-
DNS management access for custom domain configuration (optional).
Create and configure event streams
Create an event stream
-
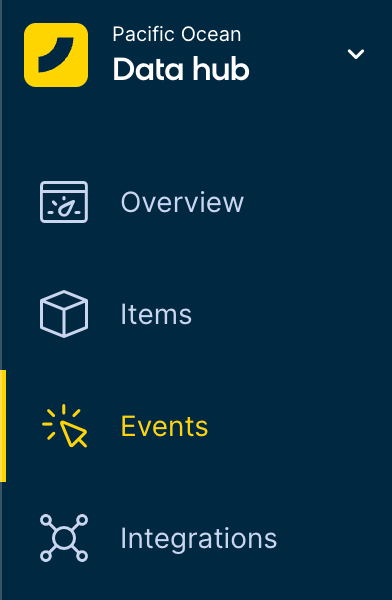
Log in to Data hub and navigate to Events in the navigation menu on the left.
-
Click + New event stream at the top right corner of the page.
-
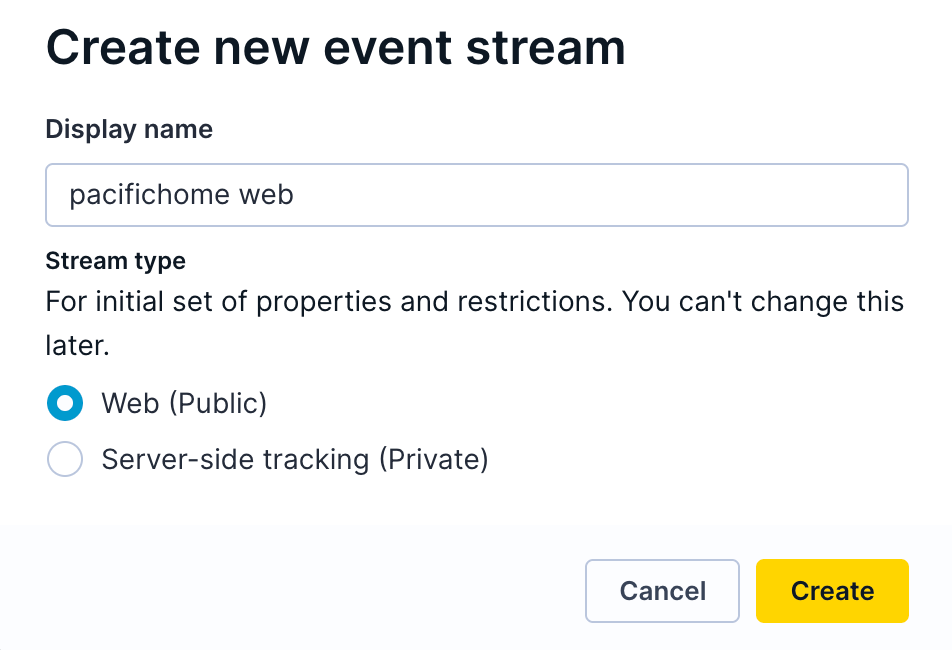
Name your event stream descriptively (include locale identifiers for multi-locale setups).
-
Select the Stream type based on the data source (Web or Server-side tracking).
-
Click Create to generate the event stream.
Configure custom tracking domain (optional but recommended)
Custom domains improve tracking reliability and data quality. A custom domain can be used as your Data hub tracking API endpoint.
You can configure custom domains in your Data hub workspace settings (Workspace settings > General > Domains). For detailed DNS configuration, see Custom domain management.
Copy integration credentials
After creating your event stream:
-
Open the event stream details page (redirected automatically after you create a new stream).
-
Copy the API Credentials from the Access Security tab or the
<script>tag: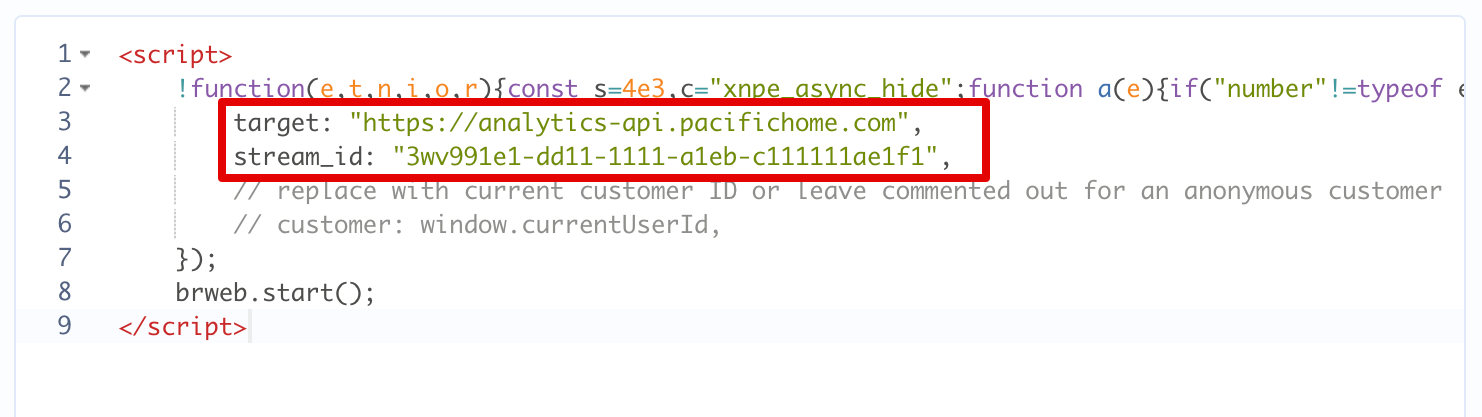
- Target (API endpoint): Your default Data hub tracking base URL (or set up a custom tracking domain).
- Stream ID: Unique identifier for the event stream.
-
Store these credentials safely for your tracking implementation.
Connect destinations
Connect your event stream to process and store data:
-
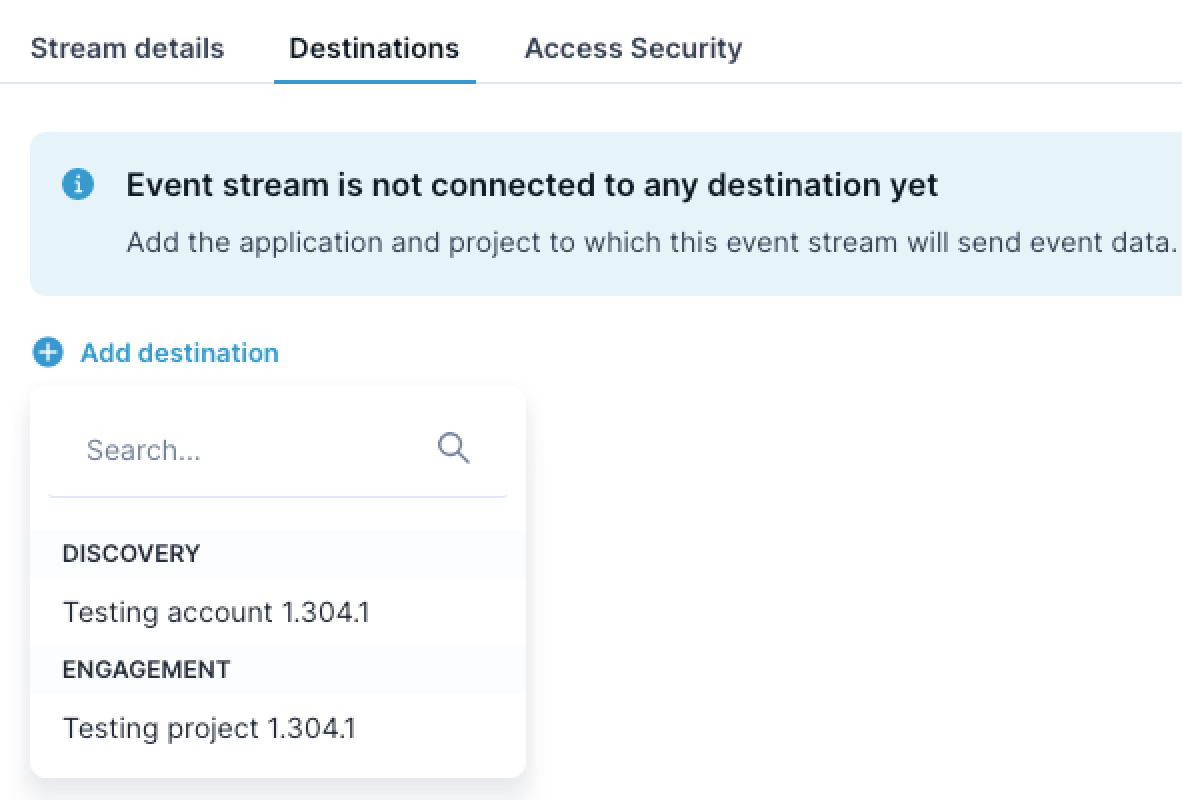
On the event stream setup page, switch to the Destinations tab.
-
Click + Add destination and select one from the available options:
-
Marketing: Choose your target project from the list.
-
Search: Select your Search account.
-
-
Repeat for additional destinations (maximum one destination per type).
-
Click Save changes in the top-right corner.

Adjust tracking trust controls
Event stream security and permissions control what data can flow through the stream into Data hub. Configure permission rules to prevent data pollution and separate untrusted client-side tracking from trusted backend tracking.
Permission types
Configure three types of rules for the event stream:
-
Customer ID permissions: Control which identifiers (cookie, registered, loyalty card) can link events to customer profiles.
-
Customer property permissions: Determine which profile attributes (email, phone, membership status) can be updated through the stream.
-
Event type permissions: Specify which events (
page_visit,purchase,consent) the stream accepts.
Read the Tracking trust controls guides to learn more about the use cases and working of stream security and permissions.
NoteThe system provides default permissions based on the stream’s type (public or private). You may need to customize these for your specific tracking needs. Your Bloomreach technical consultant will guide you on which identifiers, properties, and event types to allow for your use case.
Configure permissions
-
On the event stream setup page, switch to the Access Security tab.
-
Scroll to the Permissions section.

-
The permission templates are pre-configured for each stream type (public or private). Review the permissions and adjust based on your requirements:
- Toggle allow/deny for specific customer identifiers.
- Enable or disable customer properties.
- Select which event types to accept.
-
For private streams, generate a shared secret key to authenticate tracking API requests:
- Click Create new key in the Keys section.
- Copy the secret immediately (displayed only once).
- Store it securely in your backend configuration.
-
Click Save changes to apply the permission rules.
Permission changes take effect within five seconds across the system. For detailed permission strategies and use cases, see Event stream permissions.
Deploy tracking implementation
Choose your tracking method and implement it on your website or application:
For Bloomreach Web SDK tracking:
-
Add Data hub Web snippet to your website's HTML
<head>section.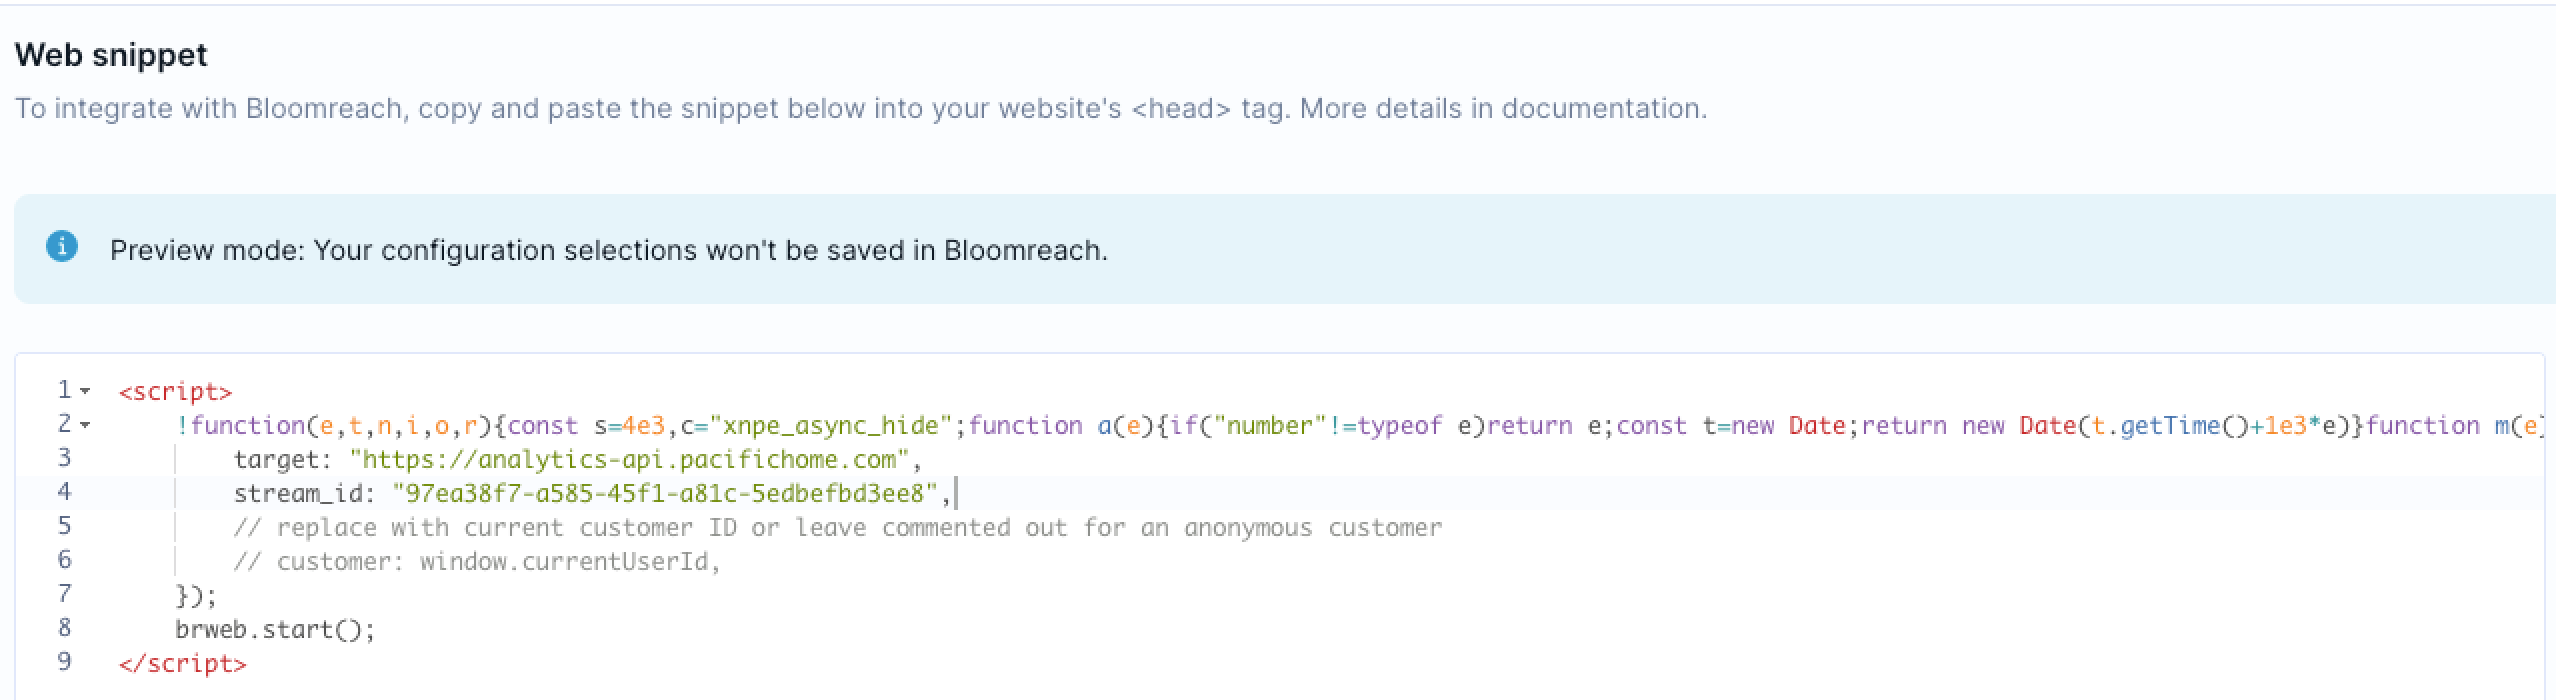
-
Configure the snippet with your stream ID and target endpoint.
-
Set up the required event triggers for customer interactions.
For API tracking:
-
Configure your backend to send HTTP POST requests to your Data hub tracking API endpoint at different interaction points.
-
Include the
stream_idas a query parameter in the request. -
Format event payloads according to the event schema requirements.
Validate tracking implementation
Verify your tracking works correctly across systems:
Browser validation:
-
Install the Bloomreach tracking console extension (Chrome or Edge).
-
Navigate to your website with tracking deployed.
-
Open the extension to monitor tracked events in real time.
-
Verify all required events fire with correct data.
Marketing validation:
-
Open your connected Marketing project.
-
Navigate to Data & Assets > Customers.
-
Search for recent customer profiles.
-
Check Data & Assets > Data manager to verify:
-
Customer properties are populating.
-
Events are recording correctly.
-
Search validation:
-
Ensure you have configured test metadata in your tracking implementation:
-
Add
test_data=trueto event metadata. -
Optionally include
debug=truefor real-time validation.
-
-
Open your connected Search account.
-
Navigate to Setup > Event diagnostics to review incoming events.
-
Check Setup > Event alerts for any tracking errors or warnings.
For troubleshooting tracking issues, see Pixel Errors on Pixel Monitor.
Migrate from existing tracking
If you're using Marketing or Search tracking separately, follow this migration path to move your tracking logic to Data hub.
Migration prerequisites
Before migrating:
-
Align with your Bloomreach CSM to confirm migration readiness.
-
Activate Data hub module in your account.
-
Grant the Event streams Admin role to your team members.
Migration process
From Marketing tracking
-
Follow the SDK migration guide.
-
Update your tracking implementation to use Data hub endpoints.
-
Test before switching production traffic.
From Search tracking
-
Reimplement your pixel integration using Data hub SDK.
-
Note that the new SDK won't read from Search's existing
br_datavariables. -
Plan for a complete tracking reimplementation.
Adding products to existing implementations
If you're adding Search to an existing Marketing implementation, follow the specific approach below to avoid data conflicts.
Compatibility warningYou can't run both the Marketing JavaScript SDK and Bloomreach Web SDK (Data hub) simultaneously on the same website. These SDKs cause unexpected cookie collisions, leading to the loss of visitor identification and tracking data. You must switch completely from one SDK to the other.
Add Search to existing Marketing tracking
For existing Marketing customers adding Search tracking through Data hub:
-
Migrate the Marketing snippet: Replace your existing Marketing tracking with the Bloomreach Web SDK using the
exponeaalias for backward compatibility. -
Extend with Search metadata: Add Search-specific metadata and events to your unified tracking implementation.
-
Avoid separate Search pixels: Don't add a separate Search tracking pixel alongside the unified Web SDK.
This unified approach ensures that both platforms receive data without conflicts while maintaining your existing Marketing functionality via alias configuration.
Development environment setup
Configure separate event streams for development and production:
Marketing developers:
-
Create a development event stream connected to your DEV Marketing project.
-
For production deployment:
-
Create a new event stream with production credentials, or
-
Reconnect your existing event stream to the PROD Marketing project.
-
Search developers:
-
Connect your event stream to your Search account.
-
During development, include test metadata in your events:
-
Add
test_data=trueto event metadata. -
Optionally include
debug=truefor real-time logging.
-
For test event configuration, see Track debug events in Integration mode.
Best practices
Multi-destination tracking
When connecting both Marketing and Search:
-
Use one event stream connected to both destinations.
- You can't use multiple
stream_ids on one website.
- You can't use multiple
-
All events forward to both destinations after a successful connection.
Filter unwanted events (optional)
If you want to keep the data in Marketing clean when using it with Search:
-
Go to Data & Assets > Data manager in Marketing.
-
Add Search-specific event types (
suggest_click,search_submit). -
Set these events to Forbidden status.
-
Save your configuration to prevent these events from being stored.

Support resources
For additional support, contact your Bloomreach consultant or visit Help Center.
Updated 2 days ago