

Create destinations
Data hub rolloutData hub provides new unified API integration methods for sending data to multiple Bloomreach products. Access is being rolled out in phases. For new implementations, we recommend using Data hub where available. Existing product-specific integrations remain fully supported for Engagement, Discovery, and Clarity.
Configure destinations to deliver items and attributes to Bloomreach Engagement and Discovery.
Prerequisites
Knowledge
Understanding of item collection concepts.
Process
Ensure that you review the items and validate the schema.
Permissions
For the Data hub, ensure you have the Item Collections Admin permissions.
For Engagement destinations, appropriate access management roles to view synced catalog data.
For Discovery destinations, appropriate user permissions to view the synced catalog data.
Setup
For Engagement destinations, the target Engagement project must be connected to your Data hub workspace.
For Discovery destinations, there must be an existing Discovery catalog in the staging or production environment.
Steps to create a destination
1. Navigation
-
Go to Data hub > Items in your Bloomreach workspace.
-
Locate and open the existing item collection from the item collections listing page.
-
Click the Destinations tab.
-
Click + Add destination.
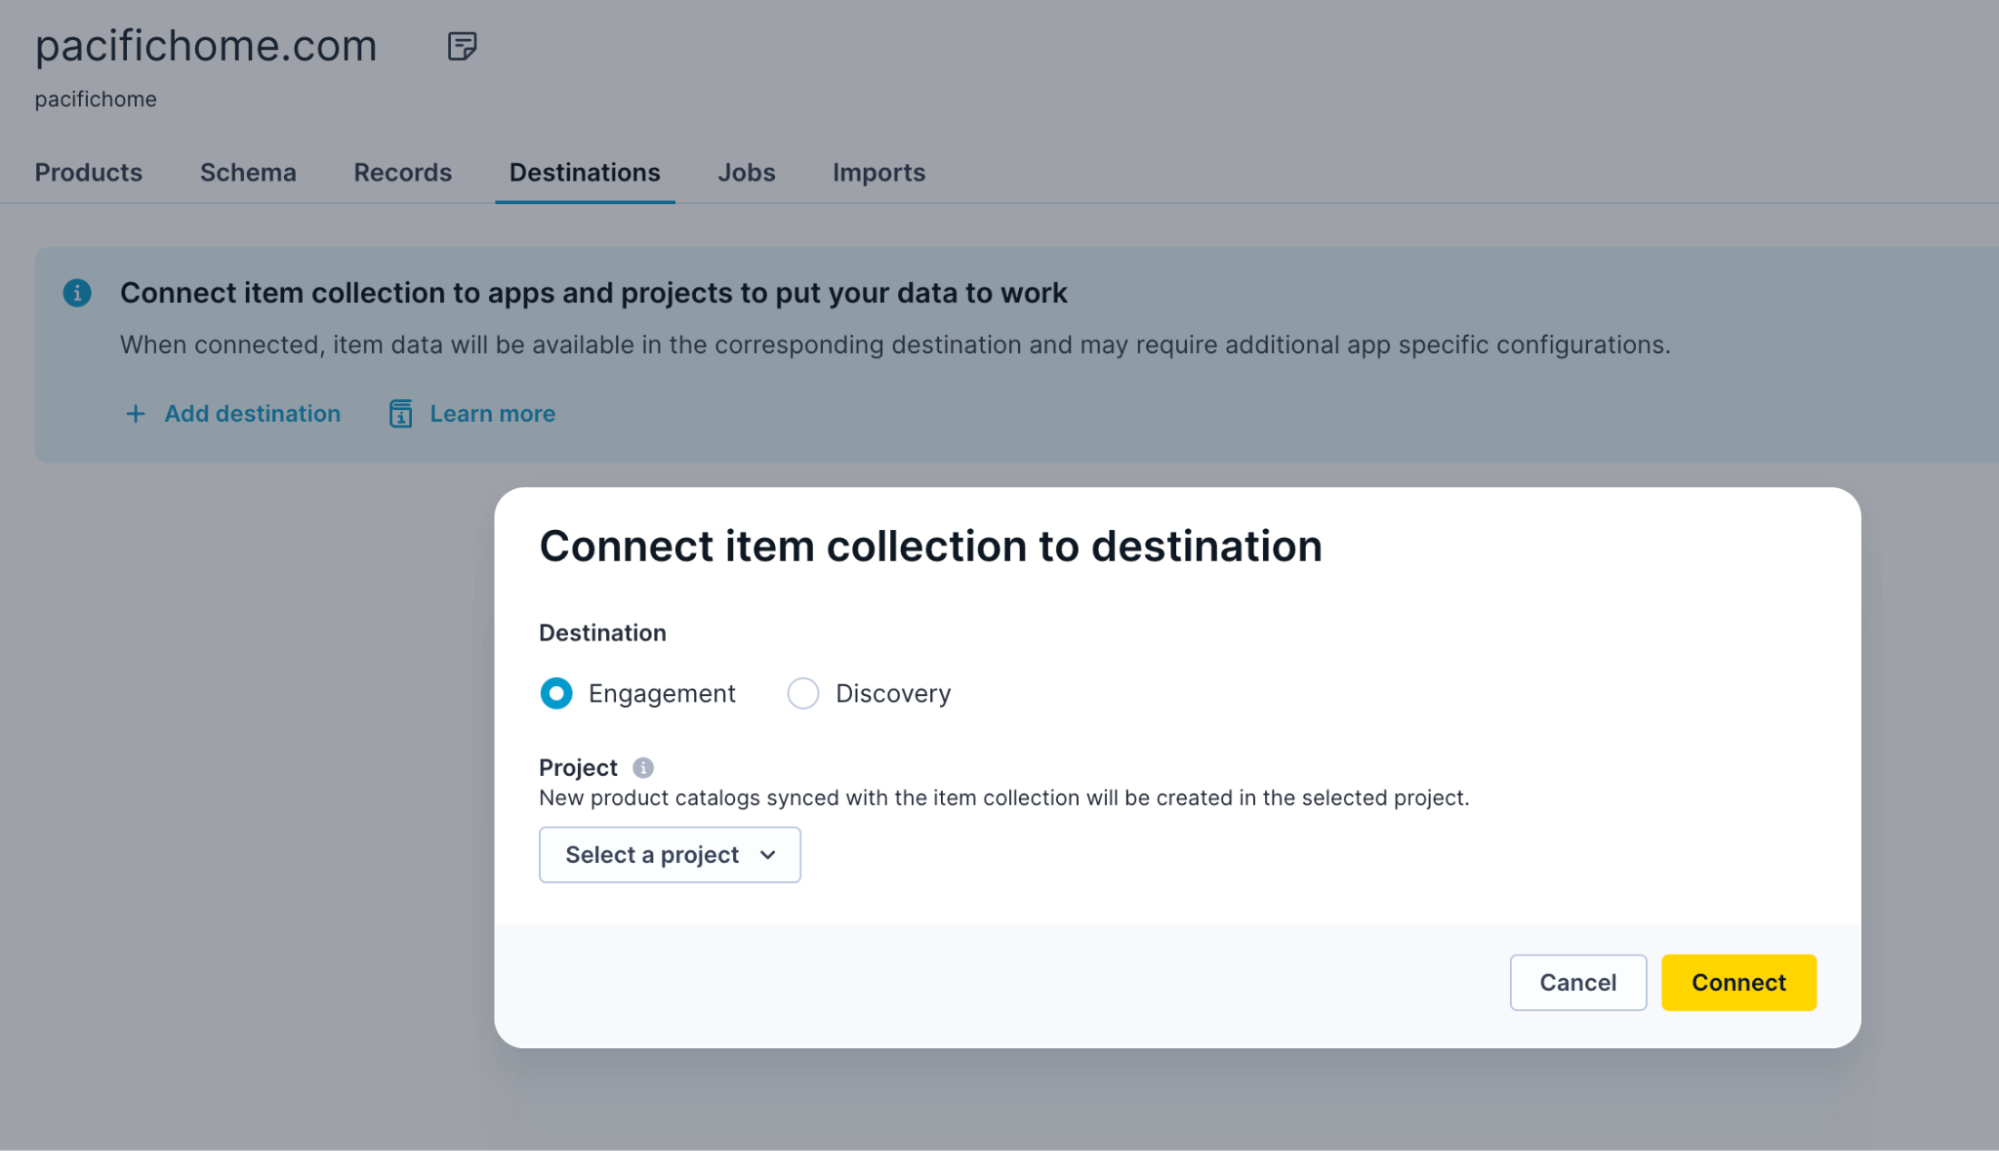
2. Choose and connect a destination
-
Choose a relevant destination:
-
Select Engagement as the destination. Choose which Engagement project linked to the workspace that should receive your items.
-
Select Discovery as the destination. Choose your target Discovery catalog and environment (staging or production).
-
-
Click the Connect button.
-
Click Review and save configuration. Review the modifications and deselect any changes you don't want to save. Click Save configuration. The system triggers a sync job automatically.
3. Go to destinations
Engagement destination
On sync completion, click Go to destination under the Destinations tab. This redirects you to the Bloomreach Engagement application to verify data under Data & Assets > Catalogs.
Click View next to the created product or variant catalogs. Under the Attributes tab, you can control the attribute searchability settings.
Discovery destination
The sync job overwrites any existing data in the Discovery catalog. Check the Jobs tab for status, then log into your Discovery environment to see the synced data in the Catalogs application.
How Engagement destinations work
When you create an Engagement destination, you select which Engagement project should receive your items. Data hub automatically creates catalogs in that project to store your product data.
For item collections with variants, the system creates two catalogs:
-
Product catalog lookup: Contains product-level data for looking up products by their product ID.
-
Variant catalog lookup: Contains variant-level data with denormalized product attributes for looking up individual variants.
The system keeps these catalogs synchronized with your item collection data and maintains the schema configuration automatically.
How Discovery destinations work
When you create a Discovery destination, you select a target catalog in a specific Discovery account and environment (staging or production). Data hub synchronizes item data and attribute configurations to the selected Discovery catalog, maintaining consistency with your schema. View the data received in the Catalogs application. Here, configure the searchability, facetability, and displayability settings.
NoteDiscovery catalogs must exist before you can select them as destinations. Data hub synchronizes data into existing Discovery catalogs but doesn't create or delete them.
Data synchronization with destinations
Once you configure a destination, Data hub automatically synchronizes your items whenever data changes. You don’t need to manually trigger syncs.
What syncs automatically
-
New items added to your collection.
-
Updated items when records change.
-
Schema modifications that affect item attributes.
-
Item deletions when corresponding records are removed.
NoteModification synchronizations can impact downstream services. Carefully review all changes.
Monitor sync status
Check the jobs interface to see the destination sync job status. Each sync operation creates a job showing how many items were synced, whether the sync succeeded or failed, and any errors encountered during synchronization.
The destinations view in your collection also displays the last sync date and current status for each destination.
FAQs
Can I have multiple Engagement destinations for the same collection?
No. Each collection supports one Engagement destination and one Discovery destination. If you need to send data to multiple projects or catalogs, you'll need separate collections.
What happens to my Engagement catalogs if I delete the destination?
Deleting an Engagement destination also deletes the catalogs created in that Engagement project. The system warns you before deletion, but this action removes the catalog data from Engagement.
What happens to my Discovery catalog if I delete the destination?
Deleting a Discovery destination removes the connection between the Data hub and that catalog, but the catalog itself remains in Discovery. The catalog will no longer receive updates from Data hub.
Updated 4 months ago