

Specify data mapping
Data mapping transforms your source file's structure into the format Bloomreach needs for your Item collection. Specify how each column in your source data corresponds to records for your items, and configure how the system handles special cases like empty values.
This guide walks you through the data mapping process.
Prerequisites
Process
- Create an Item collection. This serves as a container for your imported records.
- Create a new import and selected the import type and data source.
- Identify your data structure type.
Permissions
Ensure you have the Imports Admin and Item Collections Admin permissions.
Knowledge
Knowledge of which columns contain essential product information. Keep your source data handy for reference.
Understanding data transformation
Your source data undergoes a multi-step transformation during the import. Understanding these stages helps you make more informed mapping decisions.
Transformation flow
- Rows become records, which become items as per the schema.
- Columns become fields, which become attributes.
Records represent the raw data from your import, while items are the final structured entities in your Item collection.
Import row structure
Choose an option based on your source data structure.

Choose import row structure based on your source data.
Map columns to record level types
When you import product and variant data together, you specify whether each column applies to the product, variant, or both levels. This mapping tells the system where to store each piece of information.
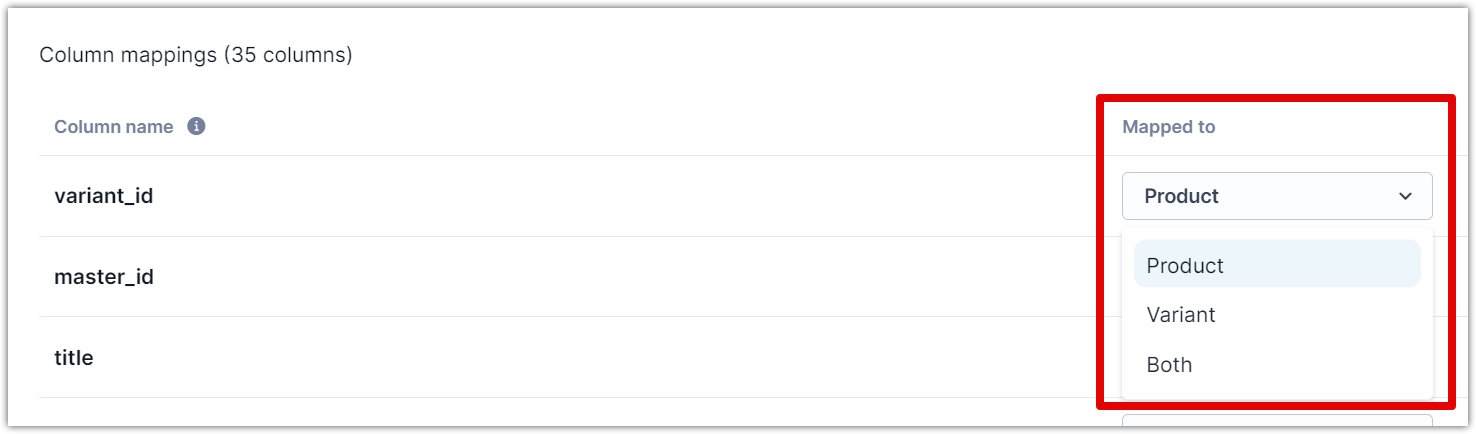
Specify whether each column applies to product, variant, or both levels.
Product level
Select this when the column contains information that applies to all variants of a product. Common examples include brand, product description, or category.
Variant level
Select this when the column contains information specific to individual variants. Common examples include size, color, or variant-specific SKUs.
Both levels
Select this when the column's value applies differently depending on the row type. This option handles cases where some products set a value at the product level while others set it at the variant level.
When to use both
The "Both" option solves a common scenario in ecommerce data. Consider product pricing:
- Product A has one price for all variants (product-level price).
- Product B has different prices for each variant (variant-level price).
- Your import file uses the same "price" column for both situations.
Mapping the price column to "Both" lets the system store the price at the appropriate level based on whether the row represents a product or a variant.
For custom attributes in Discovery destinations, the same custom attribute name has one effective configuration. If a custom attribute is defined at both product and variant levels, Discovery uses the variant-level configuration for that custom attribute. Use distinct custom attribute names when product-level and variant-level custom values both need to be available in Discovery. System attributes follow their own Discovery destination behavior.
Configure record identifiers
Based on your data structure, configure the product record identifier and variant record identifier.

Configure product and variant identifiers to establish unique records in your item collection.
Configure column mappings
Refine how each column behaves during import.
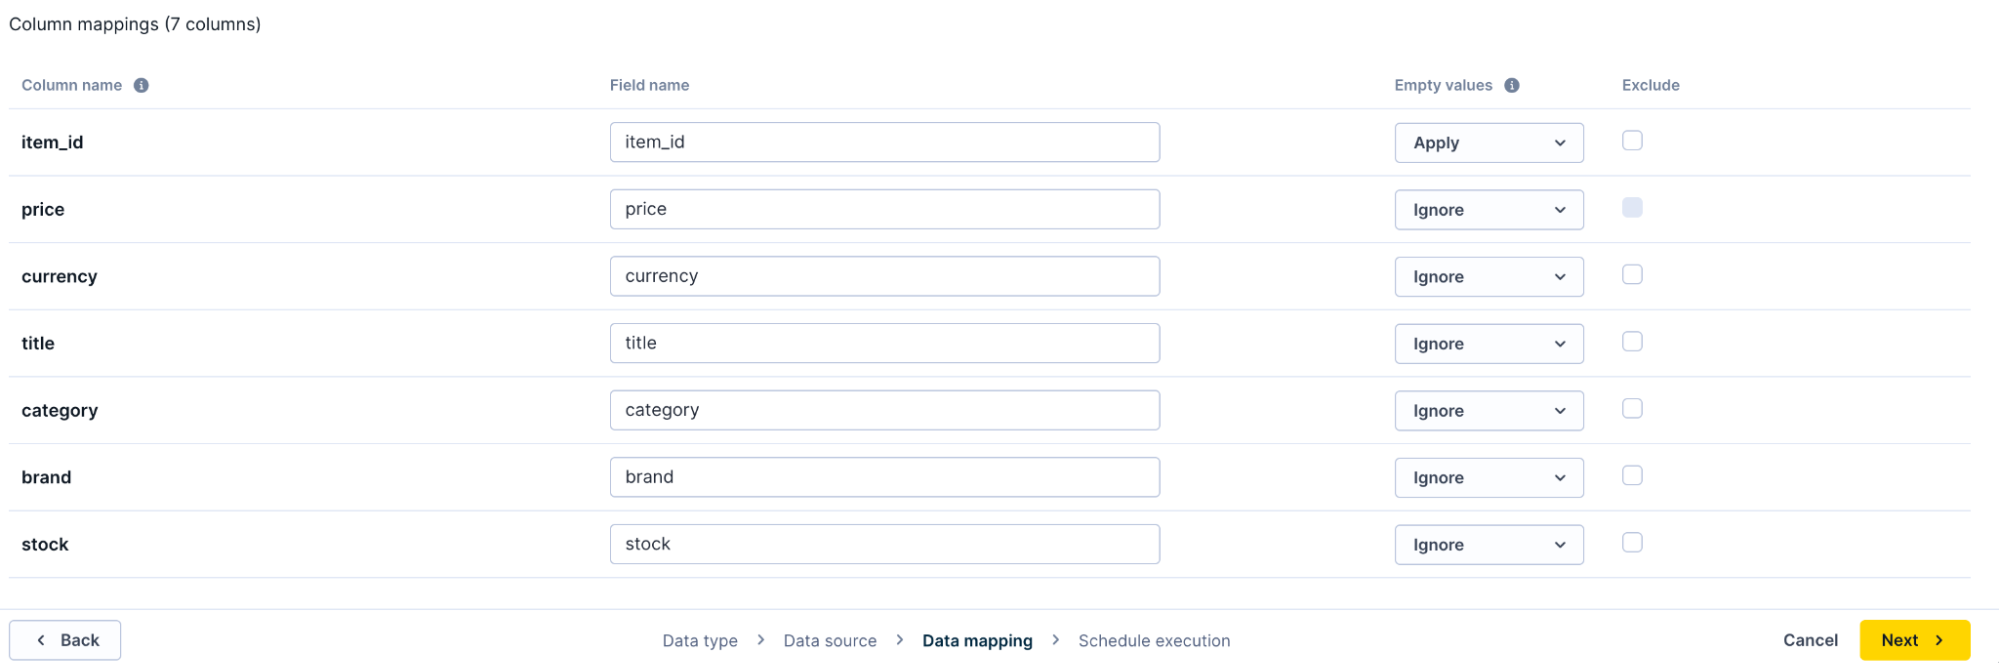
Refine column behavior by configuring field names, empty value handling, and exclusions.
Field name
Transform your source column names into standardized field names that match your item collection schema. Renaming improves consistency across different imports and aligns with your naming conventions.
Example: Rename prod_desc to description or item_color to color for cleaner, more maintainable field names.
NoteRenaming is typically an edge case scenario. It's usually only necessary when multiple imports feed into the same collection, and these imports use different column names to represent the same information.
For instance, if Import 1 uses the field
pricefor the price column, but Import 2 has adisplay_pricecolumn that should also map to price to maintain consistency with Import 1.
Handle empty values
Empty values in your source data can have different meanings depending on your business logic. Configure how the system processes empty values for each column.
- Ignore (default): Don't include the field in the import when the source value is empty. The field won't exist in the resulting record. Use this when empty values have no semantic meaning in your data and you want Bloomreach to ignore the empty values.
- Apply: Import the field with an empty string value when the source is empty. Use this when your business logic treats empty values differently from missing values. The record’s field value will always be updated with the value from the source. This way, you can use an empty value in the source to delete the value from a record.
NoteImporting many empty values impacts processing speed and storage. Only include empty values when they serve a business purpose.
Exclude irrelevant columns
Source files often contain columns irrelevant to your Item collection, such as internal tracking codes, profit margins, or supplier information. Exclude these columns from import to improve performance and maintain a clean data structure.
Excluded columns never reach your Item collection, reducing processing time and storage requirements.
Configuration example
Here's how these settings work together for a typical product import where the source row structure is both products and variants:
Source data sample
| product_id | variant_id | name | price | size | color |
| P123 | Basic T-Shirt | 19.99 | |||
| P123 | V001 | Basic T-Shirt | Small | Black |
Configuration
| Column | Map to | Rename to | Empty values | Exclude |
| product_id | Product | item_id | Skip | No |
| variant_id | Variant | variant_id | Skip | No |
| name | Both | title | Skip | No |
| price | Both | price | Skip | No |
| size | Variant | size | Include | No |
| color | Variant | color | Default: "Not specified" | No |
This configuration:
- Renames key identifiers to standard names.
- Maps
product_idto product level. - Maps
size,variant_id, andcolorto the variant level. - Maps
nameandpriceto both levels because they appear on both row types. - Includes empty size values.
- Provides a default string value for missing colors.
Best practices
Start with required fields
Configure your product and variant identifiers first, then add other essential configuration properties. This ensures your basic structure is correct before handling edge cases.
- Define row structure: Determine how your data is organized into rows.
- Set identifiers: Set unique identifiers for your data.
- Exclude unnecessary columns: Remove any columns that aren't needed for the import.
- Map columns: Choose appropriate mappings for each column.
- Rename columns: If you are importing data from multiple sources with the same data but different column names, rename columns to ensure consistency.
Test with a small sample
Import a subset of your data first to verify your mapping configuration produces the expected results. Fix any issues before importing your complete catalog.
Document your mapping decisions
Keep notes about why you chose specific configurations, especially for the "Both" mapping option or custom default values. This helps when troubleshooting or updating Imports later.
Review performance regularly
If imports run slowly, check whether you're importing unnecessary empty values or excluded columns. Streamlining your configuration often improves speed.
Next steps
Click Next and schedule the import.
Updated 2 months ago