Promotions query component
Introduction
Goal
Create a new "Promotions" page component, extending the query base component, that renders documents of the "Promotion" type.
Prerequisites
Before starting:
- Follow the previous tutorial to create the "Promotion" document type.
- Obtain an authorization token for the Site Management API if you haven't already done so.
- Have the Site Management API, Base components and SPA SDK and React SDK reference documentation handy.
To perform the Site Management API request in this tutorial it is recommended to use the Postman collection for the Site Management API. However, you can use any other method or tool you like such as the Site development app or curl or httpies.
Approach
In the Promotion document type, you created a promotion document type and some promotion documents.
In this tutorial, you will create a React page component that renders current promotions (i.e. promotions that haven't expired).
You will extend the query base component and override its default configuration so that it queries only promotion documents with an expiry date in the future.
The corresponding React implementation will consist of two components:
- "Promotion", rendering a single promotion document
- "Promotions", rendering a list of Promotion components
Define the Promotions component using the Site Management API
Before you start, add your channel to your development project if you haven't done that already, and make sure it has your local SPA URL configured.
Use the Site Management API's component endpoint to create a new "promotions" component in the "brx-reference-spa" component group.
PUT <your-content-host>/management/site/v1/channels/<channel-branch>/component_groups/brx-reference-spa/components/promotions
Use the following request body:
{
  "id": "brx-reference-spa/promotions",
  "extends": "base/query",
  "hidden": false,
  "system": false,
  "xtype": null,
  "ctype": "Promotions",
  "label": "Promotions",
  "icon": null,
  "parameters": [
    {
      "name": "documentTypes",
      "valueType": "string",
      "required": true,
      "hidden": false,
      "overlay": false,
      "defaultValue": "brxsaas:Promotion",
      "displayName": null,
      "system": false,
      "config": null
    },
    {
      "name": "sortField",
      "valueType": "string",
      "required": true,
      "hidden": false,
      "overlay": false,
      "defaultValue": "brxsaas:expirydate",
      "displayName": null,
      "system": false,
      "config": null
    },
    {
      "name": "sortOrder",
      "valueType": "string",
      "required": false,
      "hidden": false,
      "overlay": false,
      "defaultValue": "Ascending",
      "displayName": null,
      "system": false,
      "config": {
        "value": [
          "Ascending",
          "Descending"
        ],
        "valueListProvider": null,
        "sourceId": null,
        "type": "dropdown"
      }
    },
    {
      "name": "dateField",
      "valueType": "string",
      "required": true,
      "hidden": false,
      "overlay": false,
      "defaultValue": "brxsaas:expirydate",
      "displayName": null,
      "system": false,
      "config": null
    },
    {
      "name": "hidePastItems",
      "valueType": "boolean",
      "required": true,
      "hidden": false,
      "overlay": false,
      "defaultValue": "true",
      "displayName": null,
      "system": false,
      "config": null
    }
  ],
  "fieldGroups": []
}
Note the following in the configuration above:
- The "brx-reference-spa/promotion" component extends the "base/query" component.
- The following default configuration parameters of the "base/query" component are overridden with new default values:
- "documentTypes" is set to "brxsaas:Promotion", the technical name for the "Promotion" document type.
- "sortField" is set to "brxsaas:expirydate", the technical name for the "Expiry Date" field.
- "sortOrder" is configured with an enumeration of possible values ("Ascending" and "Descending") and set to "Ascending" by default.
- "dateField" is set to "brxsaas:expirydate", the technical name for the "Expiry Date" field.
- "hidePastItems" is set to "true" so that promotions with an expiry date in the past are excluded.
Implement the Promotion React component
Let's start with the Promotion component which will render the "Promo Code" and "Text" values for a single promotion document.
First, define a corresponding interface in components/brx.d.ts for the "Promotions" document type:
interface Promotion {
  name: string[];
  text: string[];
  promocode: string[];
  expirydate?: number;
}
Create a folder components/Promotions. Both the Promotion and the Promotions components will live inside this folder.
Let's also define some styles before implementing the component.
Create components/Promotions/Promotion.module.scss with the following contents:
.promotion {

  margin-bottom: 1em;

  &__promocode {
    padding: 0.5em;
    text-align: center;
    font-size: 1.5em;
    font-weight: bold;
    background-color: cornflowerblue;
  }

  &__text {
    padding: 1em;
    text-align: center;
    background-color: lightgrey;
  }
}
Next, create the actual Promotion component in components/Promotions/Promotion.tsx:
import React from 'react';
import { Document } from '@bloomreach/spa-sdk';
import { BrManageContentButton, BrPageContext } from '@bloomreach/react-sdk';

import styles from './Promotion.module.scss';

interface PageProps {
  document: Document;
}

export const Promotion = React.forwardRef(
  ({ document }: PageProps) => {
    const page = React.useContext(BrPageContext);
    const { promocode, text } = document.getData<Promotion>();

    return (
      <div className={page?.isPreview() ? `${styles.promotion} has-edit-button` : `${styles.promotion}`}>
        <BrManageContentButton content={document} />
        {promocode && <div className={`${styles.promotion__promocode}`}>{promocode}</div>}
        {text && <div className={`${styles.promotion__text}`}>{text}</div>}
      </div>
    );
  },
);
Note the following about the component implementation:
- It assumes a reference to a document is provided by the parent component (which you will implement in the next section).
- It retrieves the promocode and text properties from the document, using the Promotion interface defined earlier.
- It renders promocode and text.
- It imports and applies the styles defined earlier.
- If the page is rendered in a preview context (i.e. in the Experience manager app), it renders a "Manage Content" button.
Implement the Promotions React component
Create the Promotions component in components/Promotions/Promotions.tsx:
import React from 'react';
import { Document, Pagination as BrPagination, Reference } from '@bloomreach/spa-sdk';
import { BrProps } from '@bloomreach/react-sdk';

import { Promotion } from './Promotion';

interface PromotionsModels {
  pagination: Reference;
}

export function Promotions({ component, page }: BrProps): React.ReactElement | null {
  const { pagination: paginationRef } = component.getModels<PromotionsModels>();
  const pagination = paginationRef && page.getContent<BrPagination>(paginationRef);

  if (!pagination) {
    return page.isPreview() ? <div /> : null;
  }

  const documents = pagination
    .getItems()
    .map((ref) => page.getContent<Document>(ref))
    .filter<Document>(Boolean as any);

  return (
    <div>
      {documents.map((document) => (
        <div key={document.getId()}>
          <Promotion document={document} />
        </div>
      ))}
    </div>
  );
}
Note the following about the component implementation:
- It retrieves the pagination object returned by the query component.
- It retrieves the documents from the pagination object.
- It renders a Promotion component for each document in documents.
Export the Promotions component in components/Promotions/index.tsx:
export { Promotions } from './Promotions';
Finally, add the required wiring to make the Promotions component available in the application.
At the bottom of components/index.tsx, add:
export * from './Promotions/Promotions';
In components/App.tsx, add Promotions to the list of components imported from './components' as well as to the mapping in the App class.
You are now ready to test the Promotions component.
Add the Promotions component to the homepage
Open your channel in the Experience manager app and make sure the "Promotions" project is selected. Add the homepage to the project if you haven't already.
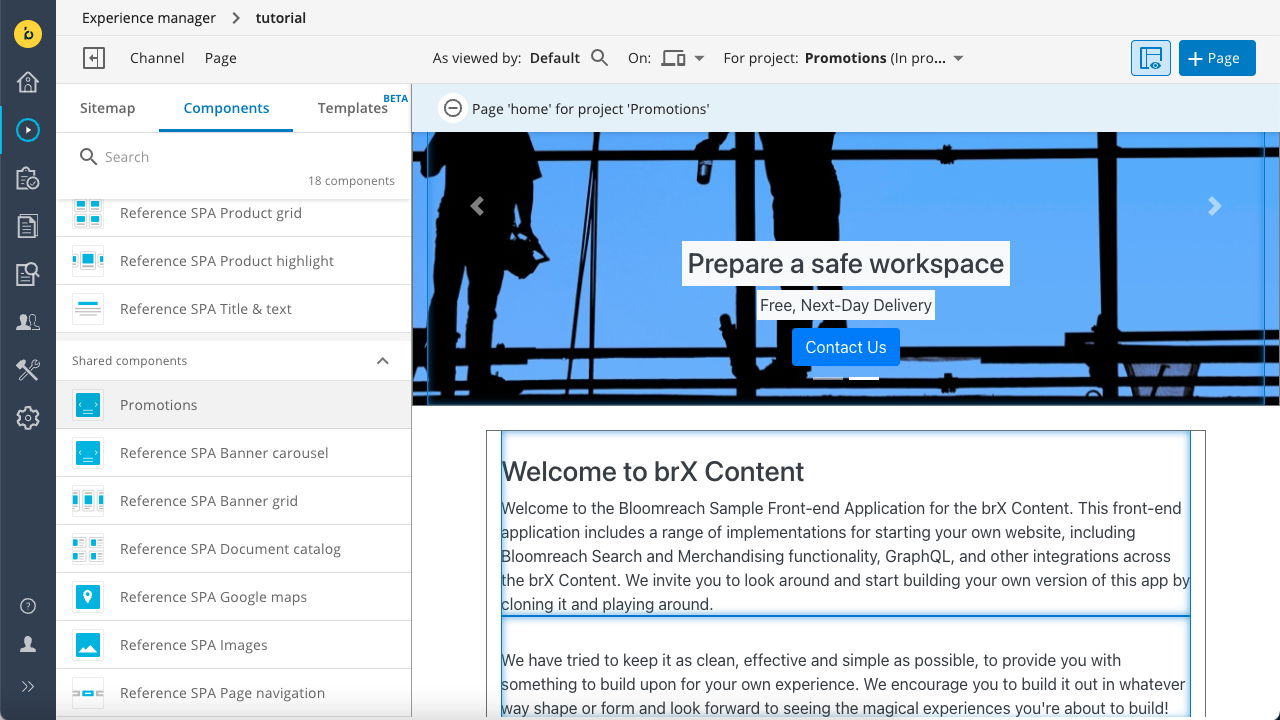
Open the left sidebar and click on the Components tab. The list of available components should include Promotions:

Click on Promotions and add it to the container on the homepage.
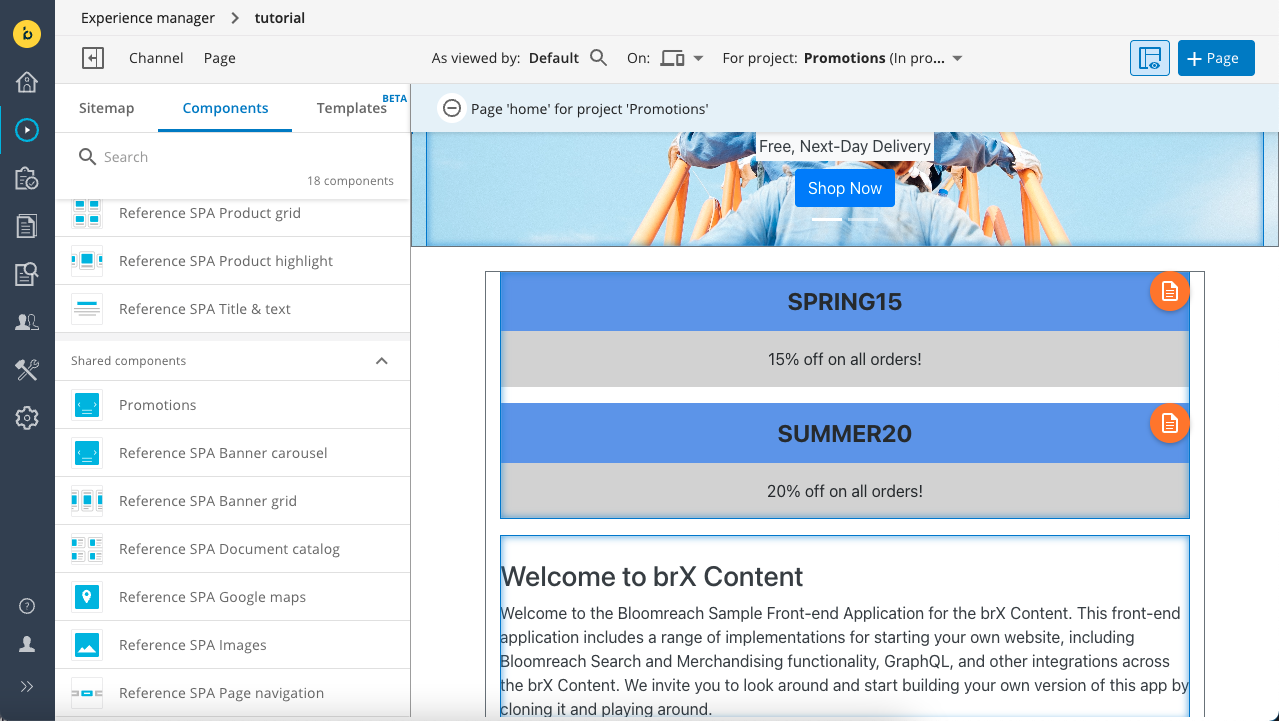
If you did everything right, it should automatically show the promotions you created:

The promotions should be sorted in order of their expiry dates and "Manage content" buttons should appear if the content buttons overlay is active.
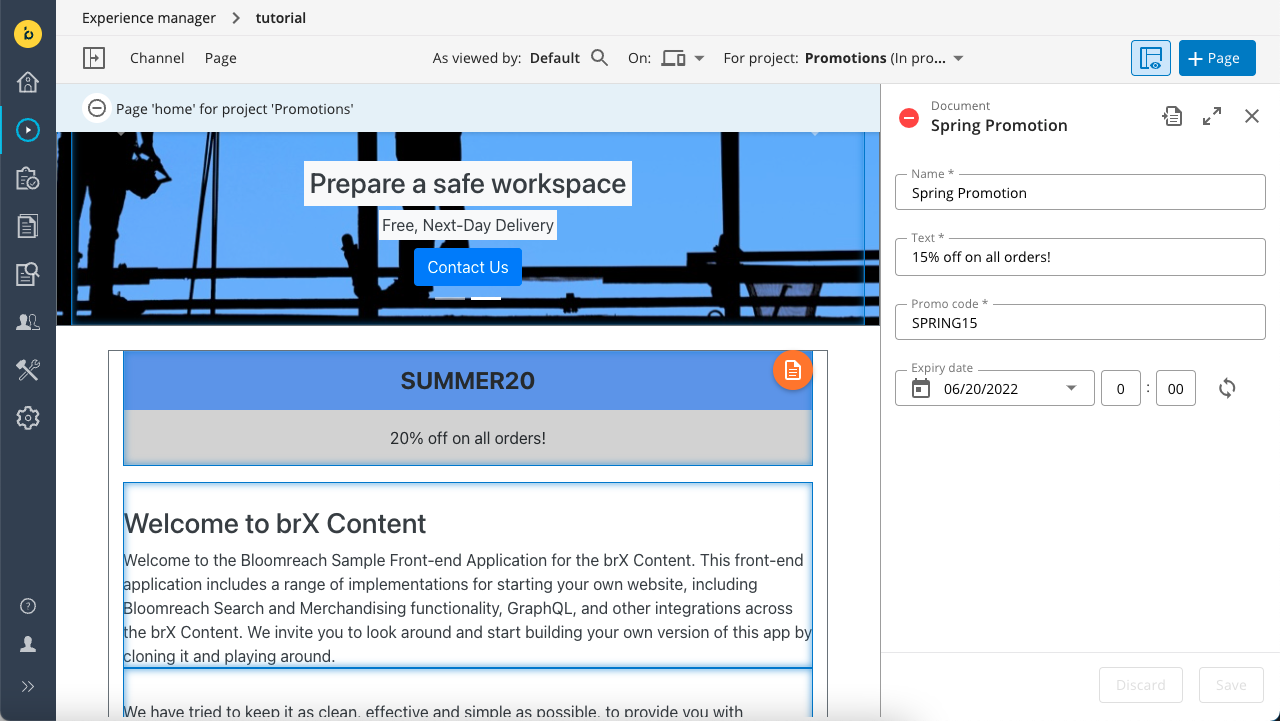
Click on the "Manage content" button for one of the promotions. The content editor will appear in the right sidebar.
Change the expiry date of the promotion to a date in the past. After you click Save, the promotion should no longer be displayed:

Change the expiry date back to a date in the future and save again and close the editor.
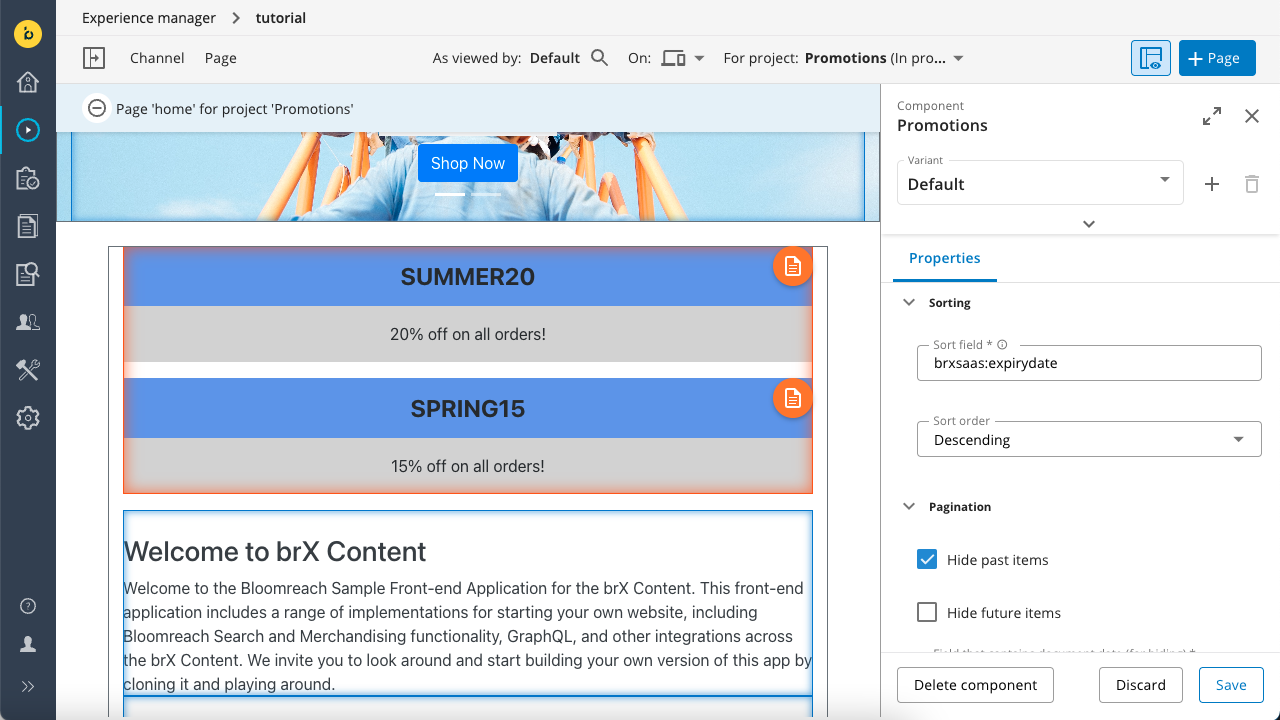
Now click inside the component on the page to open the component configuration in the right sidebar:

You'll see all the default values you configured for the component using the API.
Try changing the Sort order using the dropdown and toggle the checkboxes for Hide past items and Hide future items to see what happens.
If everything works as expected, you completed this tutorial!
Updated 9 months ago
