Promotion document type
Introduction
Goal
Create a "promotion" document type using the content type editor.
Prerequisites
Before starting:
- Read About Bloomreach Content, Development Environment, Content modeling, and Development workflow.
- Have the Content Type Editor reference documentation handy.
- Have the Content Type Management API reference documentation handy if you want to use it instead of the content type editor to create the new type.
- Have the Content Management API reference documentation handy if you want to use it instead of the content editor to create new documents.
- Have or create a channel based on the Reference SPA template.
Tip
In the next tutorial, you'll create a page component to render current promotions.
Create a development project with content type changes enabled
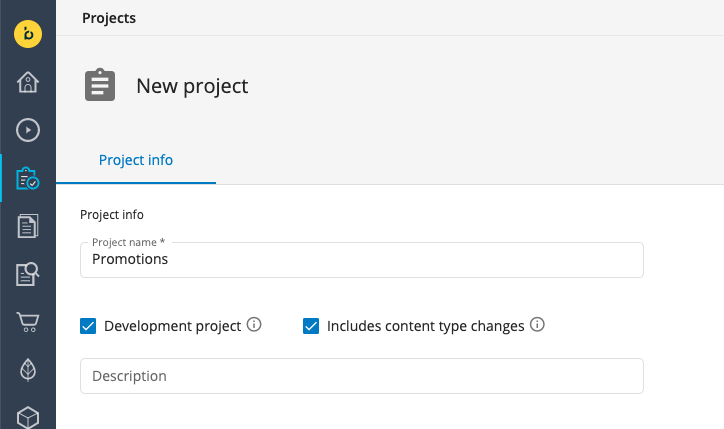
Create a development project and make sure to check the Include content type changes checkbox:
Add your channel to the project.
Create the promotion document type
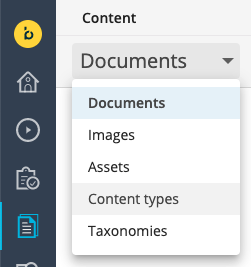
Navigate to the Content app and from the dropdown in the top left, choose Content types:
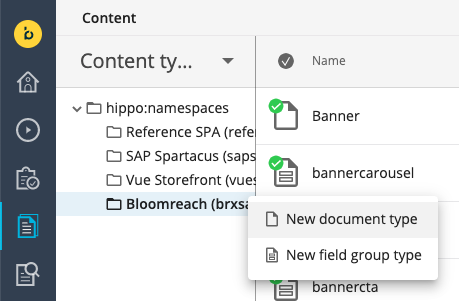
Browse to the "Bloomreach (brxsaas)" namespace folder and from its context menu, choose New document type:
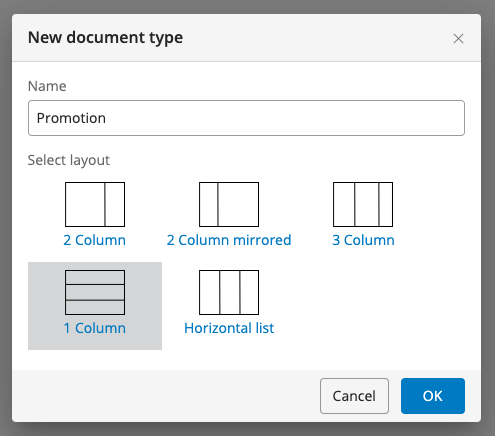
In the New document type dialog, enter "Promotion" in the Name field, choose the 1 Column layout, and click OK.
A new, blank "Promotion" document type will be opened in the content type editor. Add the following fields:
| Field type | Path | Required | Default caption |
|---|---|---|---|
| String | name | ✓ | Name |
| Text | text | ✓ | Text |
| String | promocode | ✓ | Promo code |
| Date | expirydate | Expiry Date |
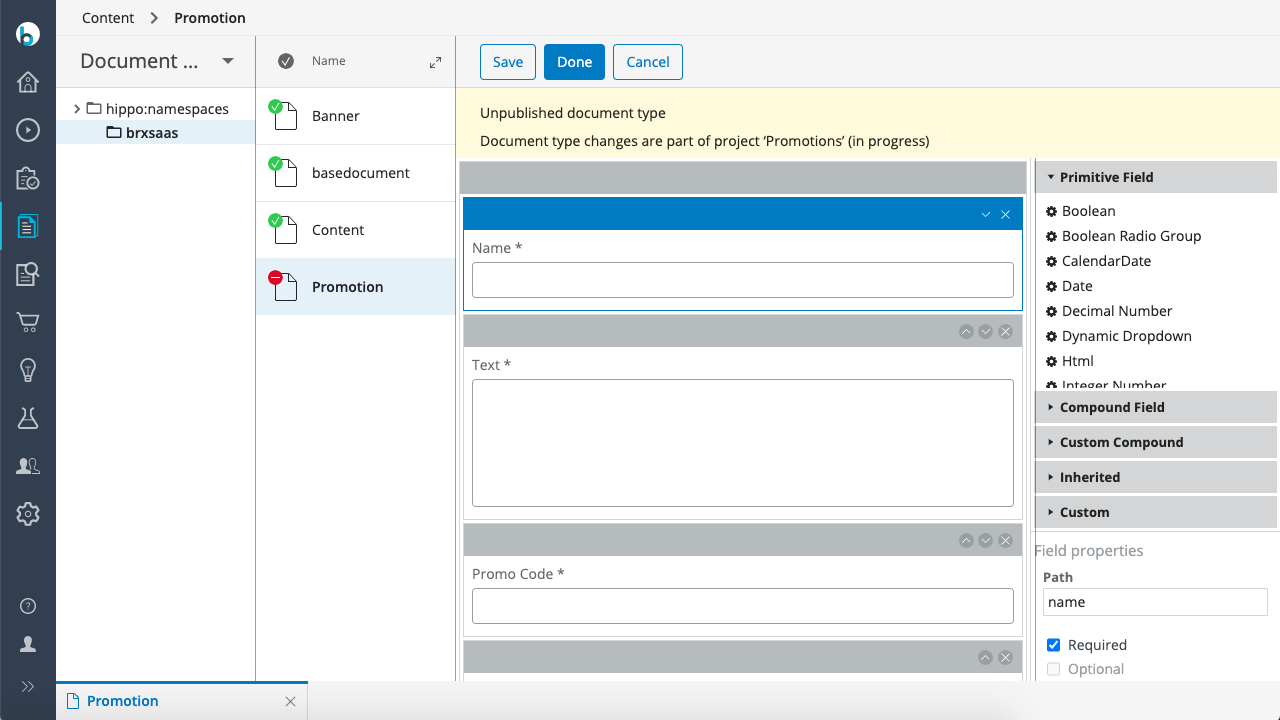
Click Done to save the document type.
Alternatively, you may use the Content Type Management API's Content Type endpoint to create the new type:
PUT https://<your-content-host>.bloomreach.io/management/contenttypes/v1/development/Promotion
Use the following JSON payload:
{
    "name": "Promotion",
    "enabled": true,
    "type": "Document",
    "presentation": {
        "displayName": "Promotion",
        "layout": "one-column"
    },
    "fields": [
        {
            "name": "name",
            "type": "String",
            "required": true,
            "multiple": false,
            "presentation": {
                "caption": "Name",
                "hint": "",
                "layoutColumn": 1,
                "displayType": "Simple"
            },
            "validations": {
                "maxLength": null
            },
            "defaultValue": [
                ""
            ]
        },
        {
            "name": "text",
            "type": "String",
            "required": true,
            "multiple": false,
            "presentation": {
                "caption": "Text",
                "hint": "",
                "layoutColumn": 1,
                "displayType": "Text"
            },
            "validations": {
                "maxRow": null
            },
            "defaultValue": [
                ""
            ]
        },
        {
            "name": "promocode",
            "type": "String",
            "required": true,
            "multiple": false,
            "presentation": {
                "caption": "Promo Code",
                "hint": "",
                "layoutColumn": 1,
                "displayType": "Simple"
            },
            "validations": {
                "maxLength": null
            },
            "defaultValue": [
                ""
            ]
        },
        {
            "name": "expirydate",
            "type": "Date",
            "required": false,
            "multiple": false,
            "presentation": {
                "caption": "Expiry Date",
                "hint": "",
                "layoutColumn": 1,
                "timeSelectable": true
            },
            "validations": {},
            "defaultValue": []
        }
    ]
}
Create promotion documents
From the dropdown in the top left, choose Documents.
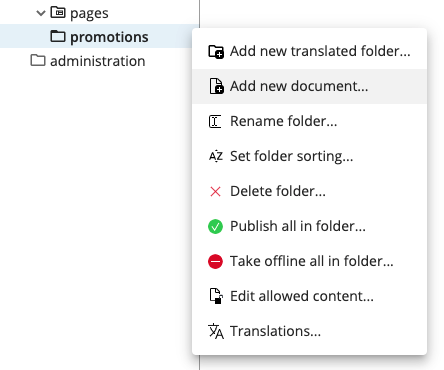
Select your channel's root folder and create a subfolder named "promotions".
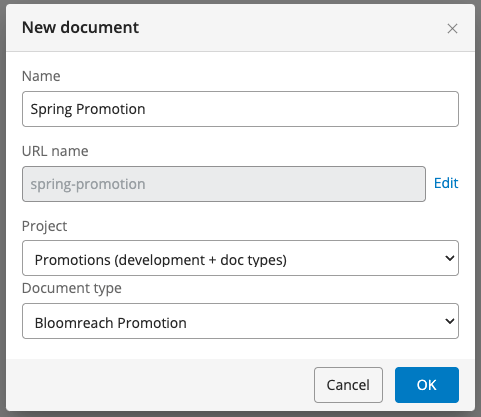
In the new "promotions" folder, create a new "Promotion" document. Give it a name, for example "Spring Promotion". Make sure to select your development project and the Promotion document type.
A new empty "Promotion" document will be opened in the document editor.
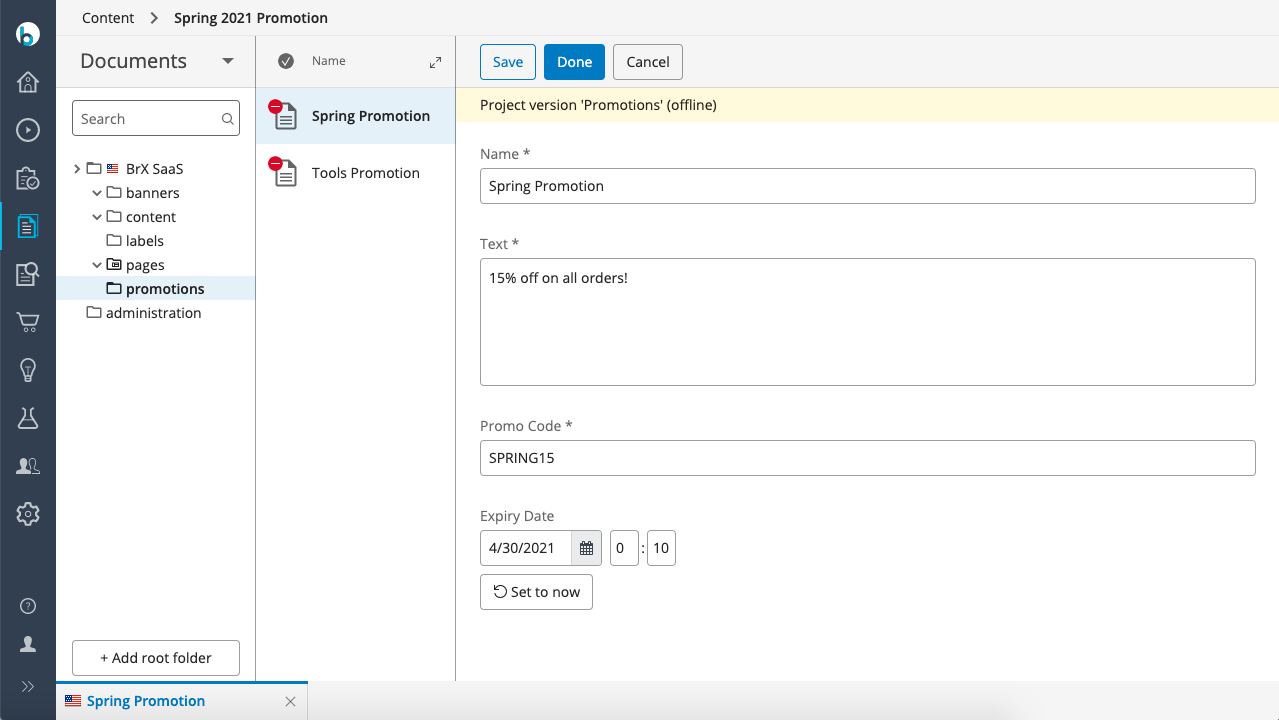
Enter some content in all the fields, for example:
- Name: "Spring Promotion"
- Text: "15% off on all orders!"
- Promo Code: SPRING15
- Expiry Date: (choose a date in the near future)
Tip
Note the message at the top of the editor: Project version: 'Promotions' (offline). Because the new document is of a document type under development, it is automatically added to the appropriate development project.
Click Done to save the document.
Alternatively, you may use the Content Management API's Document endpoint to create the new document:
PUT https://<your-content-host>.bloomreach.io/management/content/v1/project/<project-id>/document/content/documents/<channel-root-folder>/promotions/spring-promotion
Use the following JSON payload:
{
    "contentType": "Promotion",
    "fields": [
        {
            "name": "name",
            "value": [
                "Spring Promotion"
            ]
        },
        {
            "name": "text",
            "value": [
                "15% off on all orders!"
            ]
        },
        {
            "name": "promocode",
            "value": [
                "SPRING15"
            ]
        },
        {
            "name": "expirydate",
            "value": [
                "2021-04-30T00:10:00Z"
            ]
        }
    ],
    "name": "spring-promotion",
    "displayName": "Spring Promotion",
    "path": "/content/documents/tutorial/promotions/spring-promotion"
}
Create a couple more promotion documents. In the next tutorial, you'll create a page component to render current promotions.
Updated over 1 year ago
