

Implement segment-based content personalization in your SPA (Marketing)
TipFor content personalization using segmentations managed in an external Customer Data Platform, see Implement Segment-Based Content Personalization in Your SPA (External CDP).
Introduction
Goal
Render pages in your SPA that use content personalization based on segmentations managed in Marketing.
Background
Content SaaS provides page-level content personalization based on segmentations managed in Marketing.
This page explains how to render such personalized pages in your SPA frontend.
Prerequisites
Segment-based content personalization in Content SaaS works together with the Marketing SDK. You need to have a Marketing account to make it work.
You must also add the Marketing integration and Synchronize segmentations from Marketing.
Before implementing personalization in your website you should already have the SPA SDK (v15.4.3 or greater) installed in your SPA.
Enable personalization in the Reference SPA
If you cloned the Reference SPA after March 28, 2023, segment-based personalization using Marketing is already included and you only need to configure your Marketing project token and API base URL.
In your .env file, you'll find the following parameters commented out:
# NEXT_PUBLIC_PERSONALIZATION_PROJECT_TOKEN=
# NEXT_PUBLIC_PERSONALIZATION_API_URL=
Uncomment them and add the appropriate values, for example:
NEXT_PUBLIC_PERSONALIZATION_PROJECT_TOKEN=1a23456b-1234-12ab-12a3-ab1c23d456ef
NEXT_PUBLIC_PERSONALIZATION_API_URL=https://cloud-api.exponea.com
If you cloned the Reference SPA before March 28, 2023, you can either merge the latest version into your copy or follow the manual steps in the next section.
Implement personalization in your SPA:
Add the Marketing SDK snippet
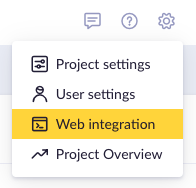
Get the Marketing SDK snippet. Log in to Marketing. In the top right corner click settings and choose Web Integration.
In the Event tracking window, click the Copy to clipboard button.
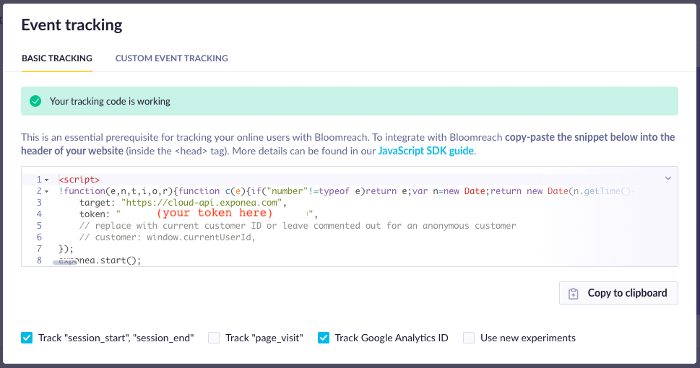
In your SPA, find the file in which the HTML <head> is rendered. The exact file depends on which implementation of the Reference SPA you used as a starting point. Paste the snippet you just copied inside the <head>. More details can be found in the Marketing Javascript SDK guide.
Make sure you are using version 3.0.0 or later of the Marketing SDK snippet. To confirm the version of your snippet, search for a string "snippetVersion". The snippet should contain
["snippetVersion"]="v3.0.0".Version 3.0.0 or later is required to support up to 30 exposed segmentations in Marketing (previous versions support only 5).
Use the Bloomreach Segmentation library
Add the @bloomreach/segmentation library to your SPA to make the segmentation feature work. In the root folder of your SPA project, run the following command:
npm install @bloomreach/segmentationIn your SPA, import the segmentation library:
import { initializeSegmentation } from '@bloomreach/segmentation';Call initializeSegmentation from the library.:
initializeSegmentation();The initializeSegmentation function should be called on each render of the page.
That’s all!
The Marketing SDK sets a cookie called __exponea__etc__ with the ID of the user.
The segmentation library retrieves the segment IDs for the user, based on the project token and the user ID, and stores them as comma separated values in a cookie called __br__segment_ids.
The SPA SDK reads the value of the __br__segment_ids cookie and passes it in a __br__segmentIds query parameter to the Delivery API's Pages endpoint.
In the response from the API you get personalized content.
TipVersion 14 or later of the
@bloomreach/segmentationlibrary is required to support up to 30 exposed segmentations in Marketing (earlier versions only support 5).
Updated 3 months ago