Milestone 3: Set up a development project
Note
To make the most of this tutorial, acquire our publicly available credentials to log in to a shared developer environment. (This is different from your personal developer trial account credentials that leads you to a private trial environment.)
Milestone overview
Goal
Set up a development project to develop your channel using your local front-end app in the Experience manager.
Estimated time to complete
2-5 minutes
Summary
In this milestone, you will prepare the front-end app you created in the previous milestone for use in a preview context in the Experience manager, then create a development project in Bloomreach Content and configure it to use your local front-end app for the channel preview.
Note
A project is a set of related channel configuration and content changes that is developed in isolation from the live site. The changes contained within a project, once reviewed and ready, can be "merged" into the "core" (i.e. the live site).
Note
A development project is a special project in which developers can make site configuration changes and use a local development version of their front-end app in the Experience manager preview.
Note
A site configuration is a collection of configuration items required to deliver a site, such as page layouts and components.
Prepare the front-end app
Before you can use your front-end app to render the channel preview in the Experience manager application, you need to make one small change.
In src/App.js, add the path property to the BrPage element as in the following code snippet:
<BrPage configuration={{
          path: `${window.location.pathname}${window.location.search}`,
          endpoint: 'https://developers.bloomreach.io/delivery/site/v1/channels/getting-started/pages',
          httpClient: axios
        }} mapping={{ Content }}>
        </BrPage>
This ensures that any request parameters in the site URL are passed on to the Delivery API's Pages endpoint. This is required for the preview in the Experience manager application to work correctly.
Create a development project
You are now ready to create your development project. Watch a short demonstration before you start:
In Bloomreach Content, open the Projects application:
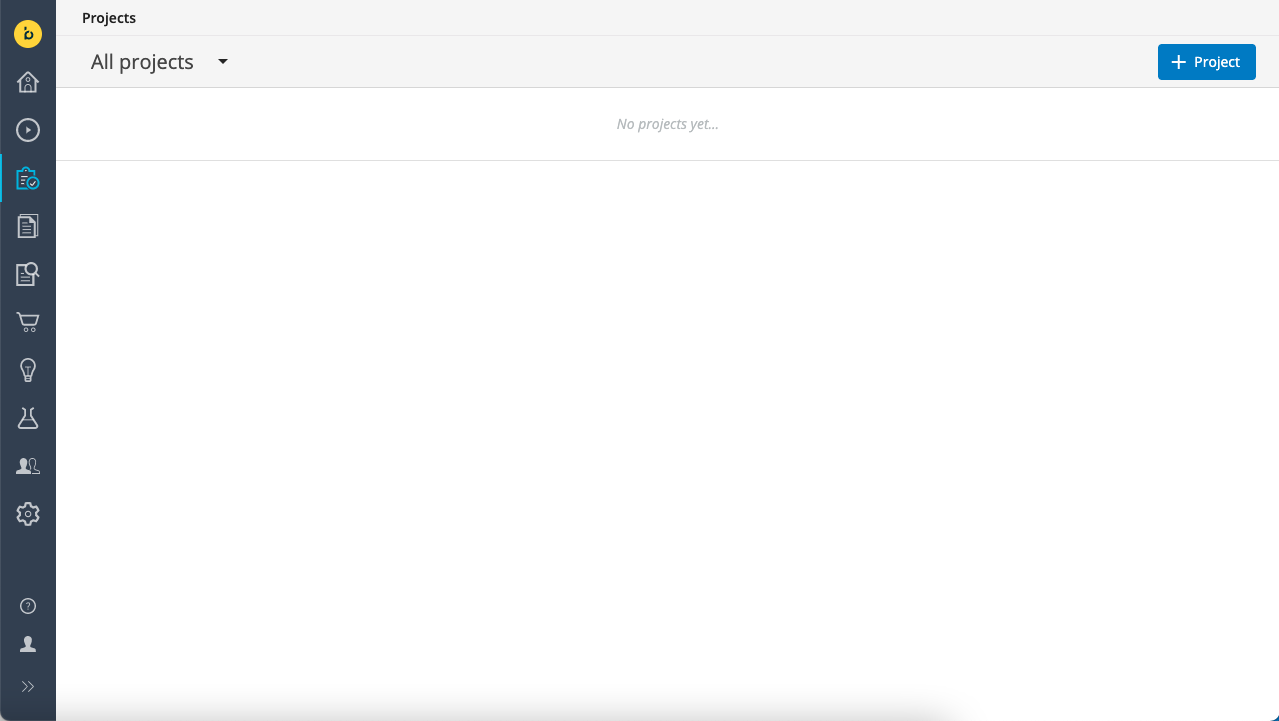
Click on the + Project button in the top right to create a new project.
Give your project a name (for example, "Getting Started") and make sure to check the checkboxes for both Development project and Includes content type changes:
Note
A content type defines the data structure and the editing template for a class of documents used to manage content in a channel.
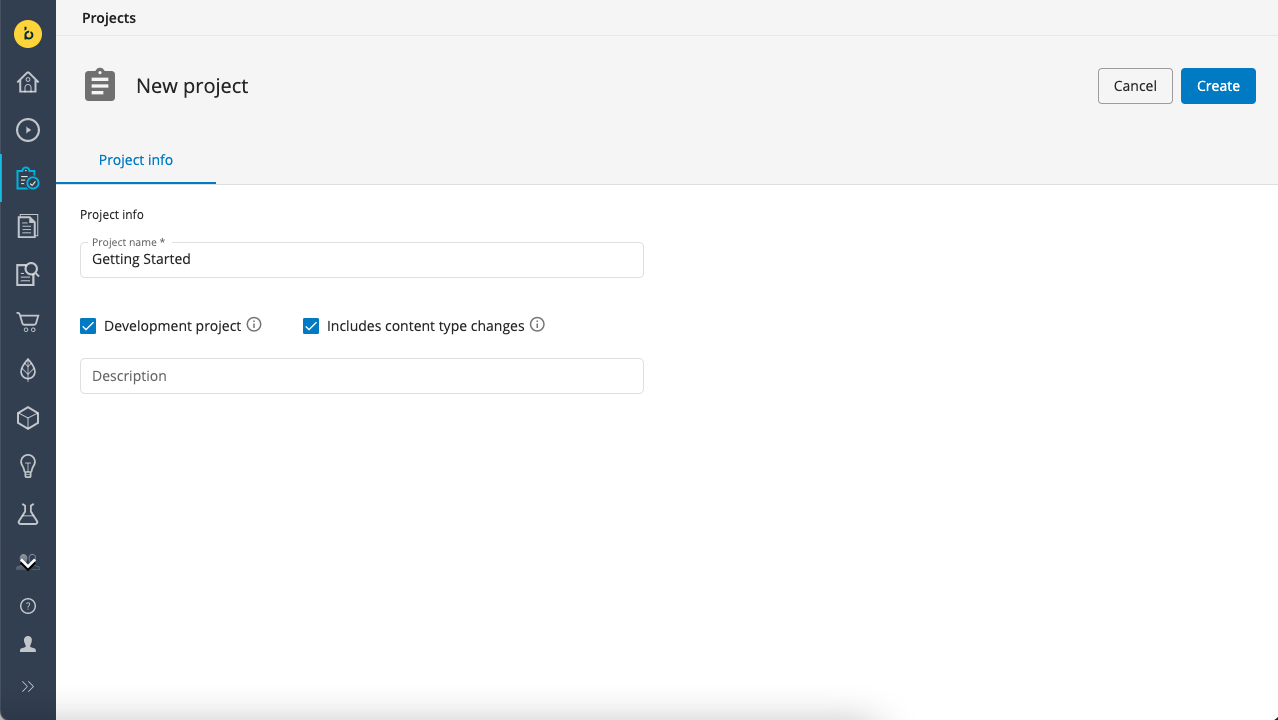
Click on Create to create the project.
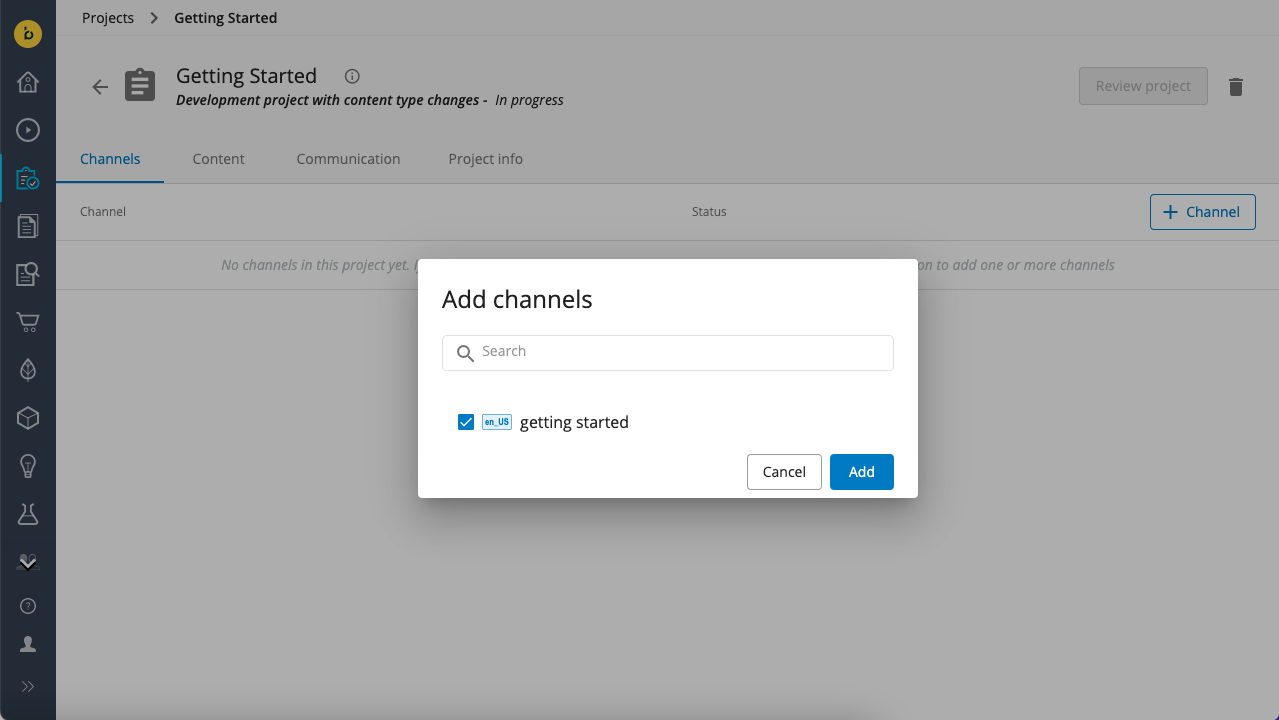
Once the development project is created, click on the + Channel button, select the "getting started" channel you created in Milestone 1, and click Add:
Note
You will see the channel listed in the project with a unique identifier between parentheses ("getting-started-vsQ3J" in the screenshot below). When you added the channel to the project, a branch of the channel's configuration was created, similar to how code can be branched in a version control system like Git. The unique identifier refers to that branch and you will use it in the next milestone to perform operations on the site configuration using the Site Management API.
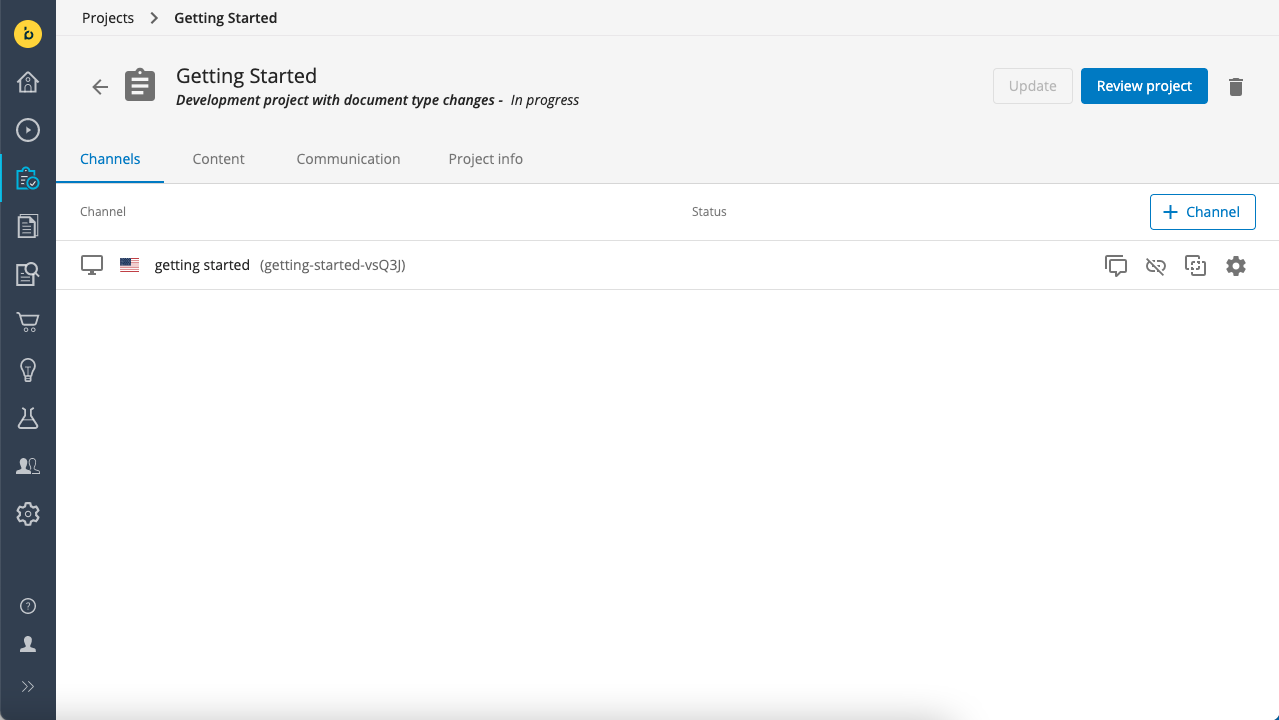
The next step is to configure your project to use your local front-end app to render the preview in the Experience manager app.
Click on the cogwheel icon (at the far right) for your channel. In the dialog that pops up, you can see the Channel front end URL is set to the standard placeholder front-end app provided by Bloomreach.
You can either set the front-end URL for the project for all users, or just for yourself.
For now, under For me, use, select the 3rd radio button, enter http://localhost:3000/ in the text box, and click Set:
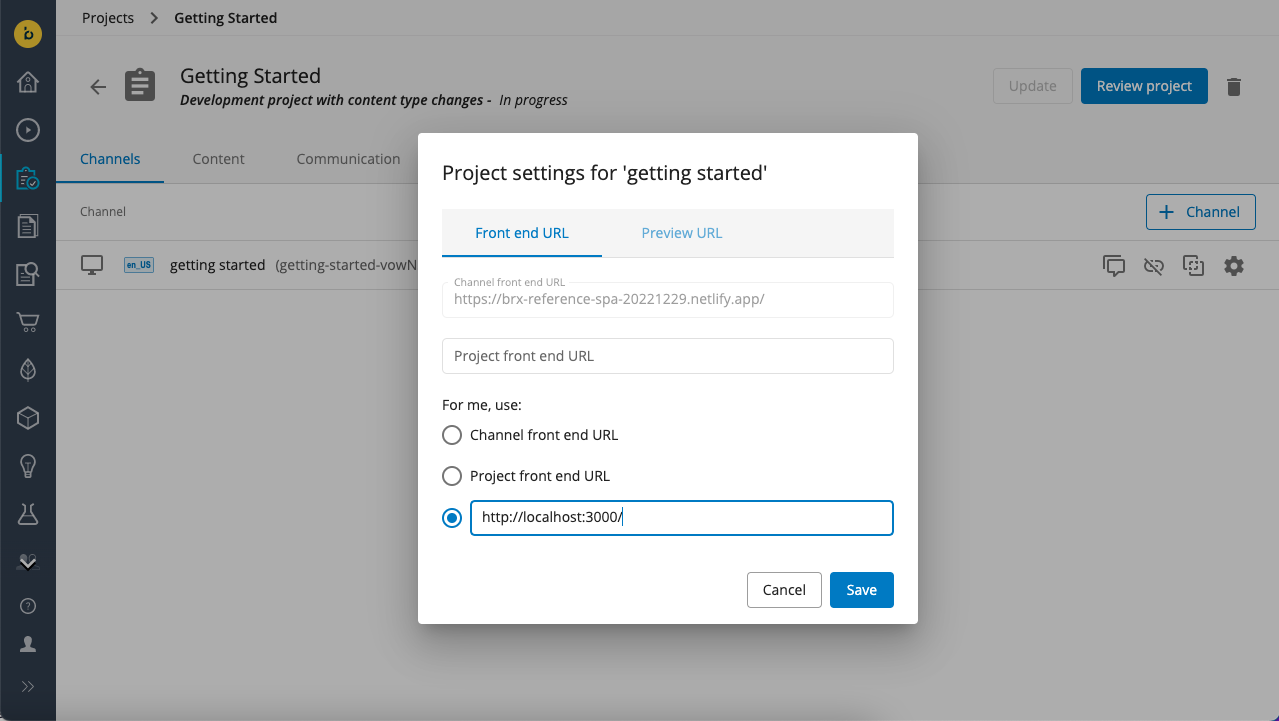
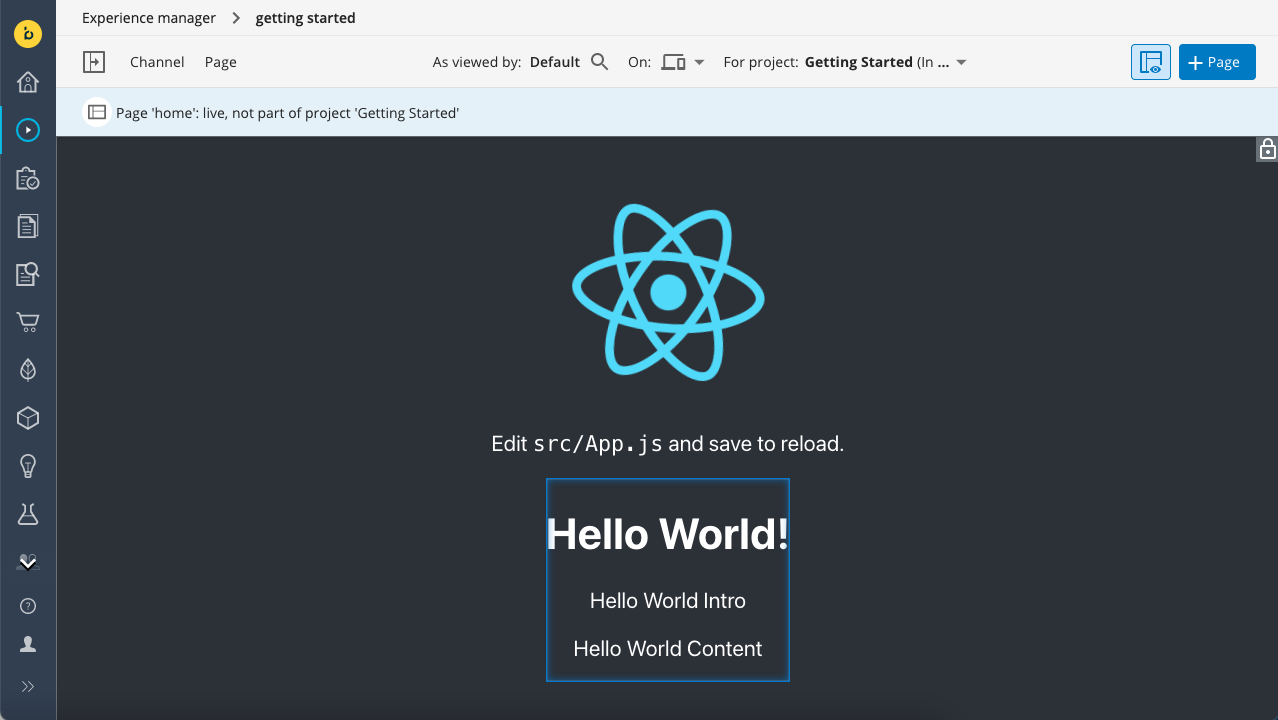
Now click on the channel to open it in the Experience manager app.
You should see the channel preview as rendered by your own front-end app. Also note that your development project is selected in For project at the top:
Tip
To see the difference with the "live site", use the For project selector to switch to "core", then back to your project.
Your development project is now set up and you are ready to start development!
Full code
Find the complete code for milestone 3 in React, Angular, and Vue in Github:
https://github.com/bloomreach/content-getting-started/tree/Milestone_3_Set_up_a_Development_Project
Next
In the next milestone, you will start actual site development and configure a basic "Hello World" component and develop the accompanying front-end code for the component.
Updated about 1 year ago
