Use dialogs within custom integrations
Introduction
Goal
Open a dialog from within a custom integration.
Background
Custom integrations can open a dialog. A dialog cannot be configured as a standalone integration and must be opened from a custom integration. In the configuration of these integrations, some properties can be included to be used for the dialog, such as the dialog title. The dialog can for example be used to pick a value for a field from a list.
API
The same client library that is used for integrations can be used for dialogs. The dialog is opened by the Bloomreach Content application and gets a header bar with a title and a button to close the dialog. The dialog will be shown in an iframe.
ui.dialog.open(options)
Opens a modal dialog. See the table below for the keys this object can contain. Returns a promise. The behavior of the promise depends on how the dialog is closed (see ui.dialog.close() and ui.dialog.cancel()). When a dialog is already open the promise is rejected directly with the error code "DialogExists" to prevent nested dialogs.
ui.dialog.options()
Returns a promise that resolves with the options object of the current open dialog. The code running in the dialog can use this to, for example, get the current value of the field passed in the options. When no dialog is open, the promise is rejected with error code "IncompatibleParent".
ui.dialog.close(value)
Closes the open modal dialog and resolves the Promise returned by ui.dialog.open() with the given value. When no dialog is open, the Promise is rejected with error code "IncompatibleParent".
ui.dialog.cancel()
Closes the open dialog and rejects the Promise returned by ui.dialog.open() with error code "DialogCanceled". When no dialog is open, the Promise is rejected with error code "IncompatibleParent".
Dialog options
The following dialog options are available:
value (Transferable, optional) | A value that can be processed by the dialog. For example the current value of the field of a Document Field Integration. It can be used by the dialog to preselect the "current item". It's up to the integration to pass the stored string itself or something else (e.g. a JavaScript object). The passed value has to be transferable though, so it can be passed across iframe boundaries. |
size (DialogSize, optional) | The size of the dialog. Choice from DialogSize enum: 'small', 'medium' or 'large'. Default is 'medium'. |
title (string, mandatory) | The title text of the dialog. |
url (string, mandatory) | The URL for the iframe in the dialog, loading the dialog. The URL can either be absolute or relative to the URL of the integration. |
Code example
For simplicity, this is a plain HTML/JavaScript example. Integrations can be developed using your JS framework and tools of choice, e.g. Angular, Vue, React, etc.
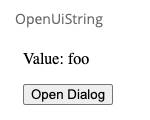
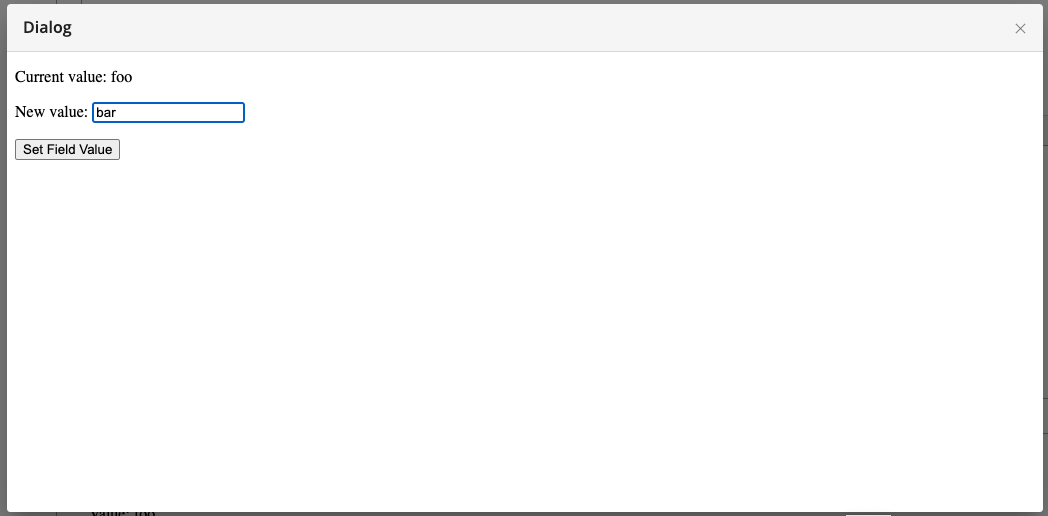
This example adds a dialog to the Document Field Integration example. Instead of setting the field value directly, the button in the integration opens a dialog, and clicking on a button inside the dialog sets the field value.
The HTML for this integration is very similar to the one in the Document Field Integration example: it renders a button and loads the appropriate scripts:
<!doctype html>
<html>
  <head>
    <title>Document Field Integration Example</title>

    <script type="text/javascript" src="https://unpkg.com/@bloomreach/[email protected]/dist/ui-extension.min.js"></script>
    <script type="text/javascript" src="index.js"></script>
  </head>
  <body>
    <p>Value: <span id="fieldValue"></span></p>
    <button id="openDialogButton">Open Dialog</button>
  </body>
</html>
The script is also a variation on the one from the Document Field Integration example, replacing the setFieldValueButton() method with a new method dialogButton(). This method enables the button, configures the dialog, and adds an event listener to the button to open the dialog when the button is clicked. It then waits for a response from the dialog and uses it to set the field value:
document.addEventListener('DOMContentLoaded', async () => {
  try {
    const ui = await UiExtension.register();
    const brDocument = await ui.document.get();
    const value = await ui.document.field.getValue();

    showFieldValue(value);
    initDialogButton(ui, brDocument.mode);

  } catch (error) {
    console.error('Failed to register extension:', error.message);
    console.error('- error code:', error.code);
  }
});

function initDialogButton(ui, mode) {
  const buttonElement = document.querySelector('#openDialogButton');
  if (mode !== 'edit') {
    buttonElement.style.display = 'none';
    return;
  }

  buttonElement.style.display = 'block';
  buttonElement.addEventListener('click', async () => {
    try {
      const curvalue = await ui.document.field.getValue();
      const dialogOptions = {
        title: 'Dialog',
        url: './dialog.html',
        size: 'small',
        value: curvalue,
      };
      const response = await ui.dialog.open(dialogOptions);
      await ui.document.field.setValue(response);
      showFieldValue(response);
    } catch (error) {
      if (error.code === 'DialogCanceled') {
        return;
      }

      console.error('Error after open dialog: ', error.code, error.message);
    }
  });
}

function showFieldValue(value) {
  document.querySelector('#fieldValue').innerHTML = value;
}
The dialog itself also needs an HTML file, which is very similar to index.html: it renders a button and loads the appropriate scripts:
<!doctype html>
<html>
  <head>
    <title>Dialog Example</title>

    <script type="text/javascript" src="https://unpkg.com/@bloomreach/[email protected]/dist/ui-extension.min.js"></script>
  </head>
  <body>
    <p>Current value: <span id="currentValue"></span></p>
    <p>New value: <input id="newValue" type="text"/></p>
    <button id="setFieldValueButton">Set Field Value</button>
    <script type="text/javascript" src="dialog.js"></script>
  </body>
</html>
The script for the dialog adds a 'click' event listener to the button inside the dialog to close the dialog and return the value "Hello Dialog":
let ui;
(async () => {
  try {
    ui = await UiExtension.register();
    const options = await ui.dialog.options();
    document.querySelector('#currentValue').innerHTML = options.value;

  } catch(error) {
    console.error('Failed to register extension:', error.message);
    console.error('- error code:', error.code);
  }
})();

const buttonElement = document.querySelector('#setFieldValueButton');
buttonElement.addEventListener('click', async () => {
  if (ui == null) {
    console.log("UI Extension not properly registered");
    return;
  }

  const newValue = document.querySelector('#newValue').value;
  ui.dialog.close(newValue);
});


Updated over 1 year ago
