Bloomreach Engagement integration
Use segmentations managed in Engagement to personalize your content.
Introduction
Segment-based content personalization is a feature that brings Bloomreach Content and Bloomreach Engagement tohether by integrating Channels in Bloomreach Content with Engagement Projects.
Watch the video below for an introduction:
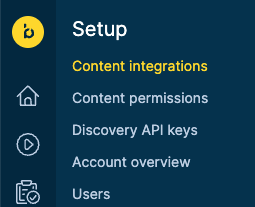
This integration can be found in the Content integrations section of your environment (Setup -> Content integrations).
Thanks to the backend-to-backend synchronization between Bloomreach Content and Engagement, you can assign an Engagement project to multiple channels. But a Channel can be assigned to just one Engagement project (or none if you choose not to make use of the feature). When you assign a Channel to an Engagement project, the channel's core and all its branches are connected to the project. It is not possible to connect a specific branch of a Channel to a different project, only the core of a Channel can be assigned to a project.
Keep in mind
Assigning a Channel to an Engagement project can only be done if it hadn't previously been assigned. If you want to assign the same Channel to a different Engagement project, you must first delete it from the other project.
Important
If you had segmentations added manually before, you need to configure the connection to ensure that segment-based content personalization works as before.
Front-end implementation
In addition to setting up the backend synchronization, you must also implement segment-based personalization in your SPA.
Which roles can set up the integration?
Content Site Admins can:
- add Engagement project integrations to manage different sets of campaigns, segments, and segmentations,
- create Engagement projects to import campaigns and segmentations that belong to these projects,
- view and delete Engagement projects to manage their previously imported campaigns and segmentations, and
- have the 'base64' encoding of the authorization header be done automatically.
Content Authors, Content Managers, Site Editors, Site Admins, and Site Developers can:
- edit a Channel to create component variants for segmentations for a certain project,
- have an overview of all Engagement projects, and
- view all campaigns and segments of a certain Engagement project.
On the Engagement side, Segmentations Exporters, Analyses Editors and Project Admins can expose segmentations to Content.
Set up your integration
Prerequisites
Before setting up your integration, follow this checklist:
- Contact your Bloomreach CSM to enable the BrX Integration feature for your Engagement account.
- Verify that you can access Integrations in Content SaaS (Set up -> Integrations) and projects in Engagement with the correct user role to manage project configuration - Project Admin.
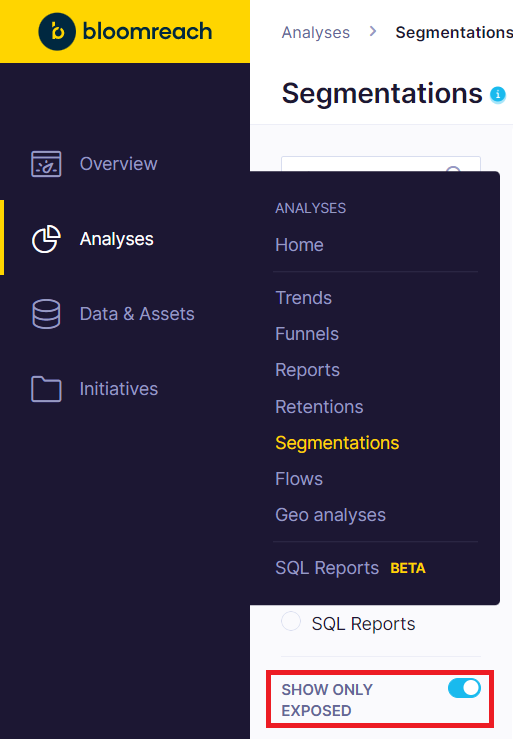
- Verify that your segments in Engagement are exposed: go to Analyses, click on Segmentations, and enable Show only exposed segmentations with the toggle (to learn more about synchronizing segmentations, click here) .
Limitation
Currently, you can expose only up to 30 segmentations from Engagement.
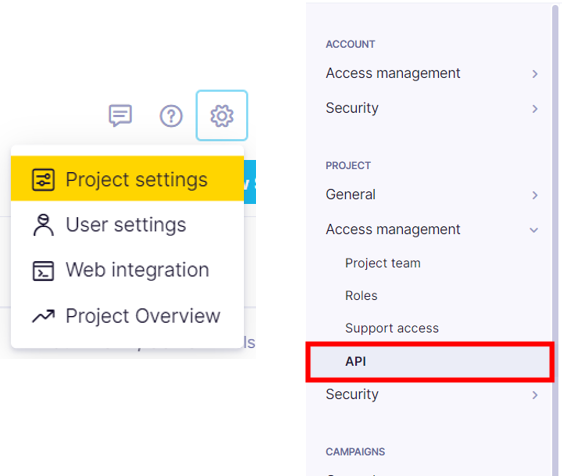
- Verify that you have access to API management in Engagement by clicking on Project settings in the top right corner and choosing Access management from the left-hand side menu where you can find API management.
Set up the integration
First, you need to create a private API group in Engagement. To do so, navigate to the API management as shown in the Prerequisites.
Click on the dropdown with API groups and select + New group. Choose the Private access option and name your new API group. Make sure to copy and store your Secret key as you will not be able to access it again!
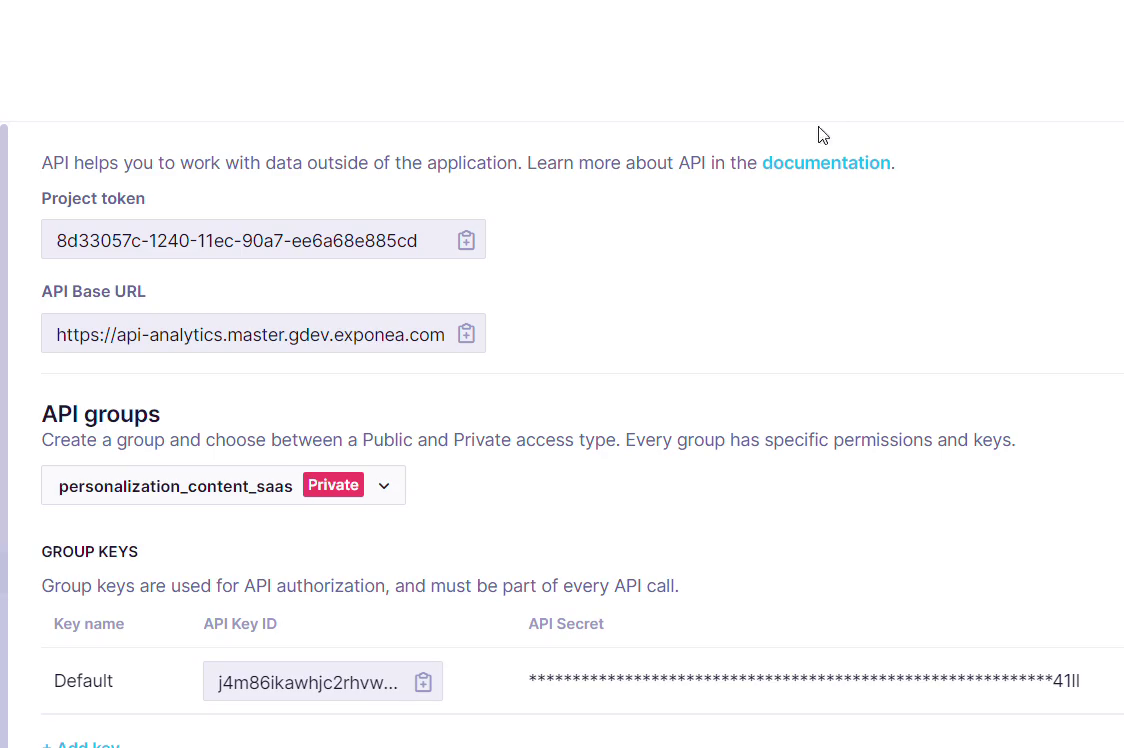
After you create your group and copy your Secret key, scroll down to Group permissions and click on the BrX tab. Select the Content integration checkbox, and Save the changes.

For the next step, open your Content SaaS environment in a new tab. Navigate to the Integrations overview by clicking on Setup -> Content integrations.
To add an Engagement integration, click on the Add icon next to the Engagement project tab under Available integrations.

Copy and paste the information provided in the Project settings in Engagement into the corresponding fields in the Add integration menu in Content SaaS.

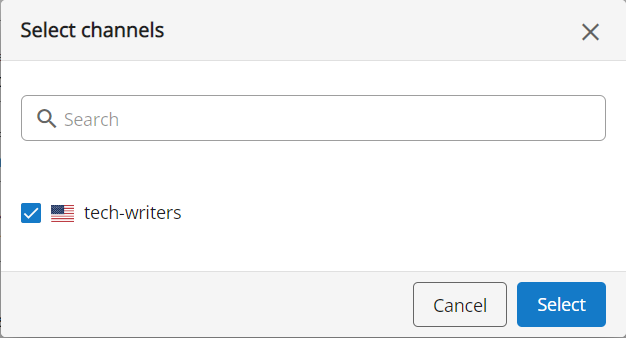
Scroll down to find the Channels selection tab. Click on Select to choose which channels you want to connect the Engagement project to. After selecting your Channel, click the Add button in the right-hand to add the integration.
It is possible to verify your connection by clicking on the Test connection button. After verifying your successful connection, Save the integration.

After saving your integration, navigate to Content audiences and choose your project to see segmentations. Integrations that have been removed will be classed as inactive.

Good to know
Engagement and Content sync every hour in the background. You can trigger the sync any time you want by clicking on the Segmentations button.
Note
Old segments that are not part of the project that you integrated will be moved to the "Unexposed segments" tab.
Updated about 1 year ago
