

Please mind that the full and exact URL of the Managed endpoint can be found in the Managed endpoint UI! The format is:POST https://<api-domain>/webxp/s/<project-id>/managed-endpoints/<managed-endpoint-id>
| Time | Status | User Agent | |
|---|---|---|---|
Retrieving recent requests… | |||
ImportantThis feature is part of the Web & App Personalization Package and needs to be enabled by your Customer Success Manager or Account Manager.
Managed endpoints, also known as server-side rendering or server-side personalization, let you use customer data in Bloomreach to personalize any customer touchpoint. They return personalized HTTP responses in a format you define, while maintaining fast load times, better page performance, and higher security.
Overview
Customers expect personalized experiences tailored to them. Personalization significantly impacts order value, purchase frequency, overall revenue, and customer loyalty.
Pre-built channels and templates, scheduled exports, rigid APIs, or webhooks can limit how far you can take personalization. Managed endpoints let you get back a personalized response in a format you define, so you can truly personalize the customer experience on any third-party application or channel. The key benefits are flexibility, enhanced security, and higher speed for advanced use cases.
How it works
Personalization
Managed endpoints return rendered templates that you can fully customize. Anything defined in the template can be retrieved in an HTTP response when the endpoint is called from a third party.
When setting up managed endpoints in the Bloomreach UI, you can use HTTP clients in the language of your choice to call the endpoint. You can also define the response format using Jinja. Three content type headers are supported: JSON, XML, and text.
All standard web personalization accessors are available, such as customer properties, attributes, and recommendations. These accessors are similar to the ones available in weblayers.
TipCreate small, targeted endpoints to get better-personalized data.
Managed endpoints also add their own metadata to available Jinja variables:
| Managed endpoint metadata | Meaning |
|---|---|
managed_endpoint.id | ID of the managed endpoint. |
managed_endpoint.name | Name of the managed endpoint. |
managed_endpoint.variant.id | ID of the selected variant when using A/B testing. |
managed_endpoint.variant.name | Name of the selected variant when using A/B testing. |
Security
Managed endpoints are accessible only via authentication. The feature supports all standard API authentication groups — public and private. You must first assign the specific API group to the specific managed endpoint in your API settings. Only keys that belong to the configured API groups can authenticate and manage endpoint HTTP calls.
NoteUse the private API group for managed endpoints that can expose private customer data. Use public API groups only when calling managed endpoints from customers' devices, such as web browsers and mobile apps. Make sure to allow the API group setting by checking Managed endpoints under Group permissions > Definitions.
Compression
Managed endpoints are compressed, along with mobile payloads such as in-app messages and App Inbox.
Set up managed endpoints
Go to Data & Assets > Managed endpoints. In the top-right corner, click + Create new.

Write your endpoint response definition code as text, XML, or JSON into the editor. For personalized content, use Jinja.
The example below shows a JSON that uses the API to render a customer's first name. Save and start your managed endpoint to generate a URL for the endpoint to run.
This URL accepts a POST request and renders the responses you specified — in this example, a JSON with the first name.

Call managed endpoints
Request body
Authentication is excluded from the request body by default. Set up the authorization header separately by following the authorization header guide.
ImportantThe maximum API request size (params in payload) is 10kB. If the request payload exceeds this limit, the API rejects the request and returns an HTTP status code 413.
POST https://<api-domain>/webxp/s/<project-id>/managed-endpoints/<managed-endpoint-id>The full and exact URL of the managed endpoint can be found in the managed endpoint UI.
Expected request body format:
{
  "customer_ids": {
    "<id-name>": "<id-value>"
  },
  "params": {}
}
ImportantThe
customer_idsfield is required and must contain at least one valid customer ID. Theparamsfield is optional. If specified, it must be a JSON object. See the request parameters section for details.
If you use a customer_id that doesn't exist in Bloomreach, it creates a new customer. This lets you show templates to new or non-existent customers directly from the managed endpoint.
Request example:
{
  "customer_ids": {
    "registered": "my-customer-1"
  },
  "params": {
    "item_id": 123,
    "item_category": "socks"
  }
}
Response
A successful call returns HTTP 200 OK. The response body renders the Jinja template configured for that specific managed endpoint.
The API sets the Content-Type HTTP response header to one of the following values, depending on your configuration: application/json, application/xml, text/plain.
NoteThe Content-Type header does not support HTML for security reasons. Only JSON, XML, and text are supported.
The possible unsuccessful HTTP status codes are:
| HTTP status code | Meaning |
|---|---|
| 400 | Invalid request body (for example, missing customer IDs or malformed JSON), or an error in the Jinja template code. |
| 401 | Missing or invalid API key. |
| 403 | API key does not have permission to access this specific managed endpoint. |
| 413 | Request payload size exceeds 10kB. |
| 502, 503 | Server errors indicating that a service is overloaded. |
The possible endpoint statuses are:
- Exposed / Started: The managed endpoint is active and responds to API requests.
- Saved / Not exposed (Stopped): The managed endpoint can be edited, but is not available for API requests. Returns HTTP 404.
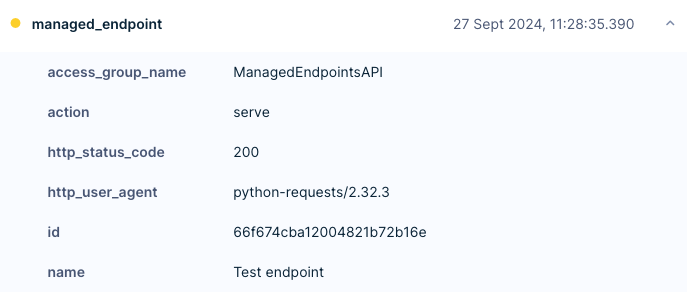
NoteAfter calling the managed endpoint, a new event is created.
Request parameters
The Managed Endpoints API accepts a params object. This object is parsed and passed into the managed endpoint Jinja code as the params variable.
This lets you use request-specific information in the Jinja template. For example, you can set up recommendations from the currently visited category by passing the category in the request parameters and then using it to call the recommendations Jinja accessor.
Request example:
{
  "params": {
    "current_category": "shirts"
  }
}
Example of using the parameter in a Jinja template to recommend items from the current category:
{% set recommendations_filter = [] %}
{% if params.current_category %}
  {% set recommendations_filter = [{"property": "category", "constraint": {"type":"string","operator":"equals","operands":[params.current_category]}}] %}
{% endif %}
recommendations("engine-id", catalog_filter=recommendations_filter)
PII data
Only users with the Personal Data Viewer role can access endpoints containing PII data. Note that this currently applies only to private customer properties, not to attributes that use private properties.
As a Personal Data Viewer, you can take the following actions when a managed endpoint template contains private customer properties:
- Start a managed endpoint.
- Edit a running managed endpoint when the new version uses private customer properties.
A/B testing
You can use A/B testing on managed endpoints to provide different responses to different groups of customers. When A/B testing is turned on, a default response for the Control group is required. It is set to an empty response by default, but you can change it.
ImportantSet up a Control group if you want personalized responses. Without it, managed endpoints return HTTP 200 with an empty response.
Once your A/B test has found a winning variant and you want to turn it fully on, copy the winning variant code into the first variant and turn off A/B testing in the A/B test tab. Avoid changing the traffic distribution of an already running A/B test. For example, if you start with a 50/50 split, don't change it to 70/30 or 100/0 later, as this can cause issues with persistent variants for returning customers.
NoteTo track your own managed endpoint "show" event for more accurate A/B test evaluation, use the
managed_endpoint.variant.idvariable in the Jinja template to get the selected variant ID.
Access roles
| Role | Permitted actions |
|---|---|
| Managed Endpoints Viewer | Can view managed endpoints. |
| Managed Endpoints Editor | Can view and edit managed endpoints. Editing a running endpoint requires the Publisher role. |
| Managed Endpoints Publisher | Can view, edit, and publish (expose/unexpose) managed endpoints. |
Limits
To ensure a consistent and expected level of service, recommendation serves via webhooks and managed endpoints count toward a yearly limit based on your contracted billable profiles. Check your current usage in the usage dashboard. If you think you may be approaching this limit, contact your Account Manager to review your options.