To start using the Engagement API, you need to create and configure relevant API accesses and permissions first.
Setting up API Groups
API accesses are handled through API Groups. API Groups are collections of API access keys that allow you to have a different set of permissions for each separate group. Read more about API Groups.
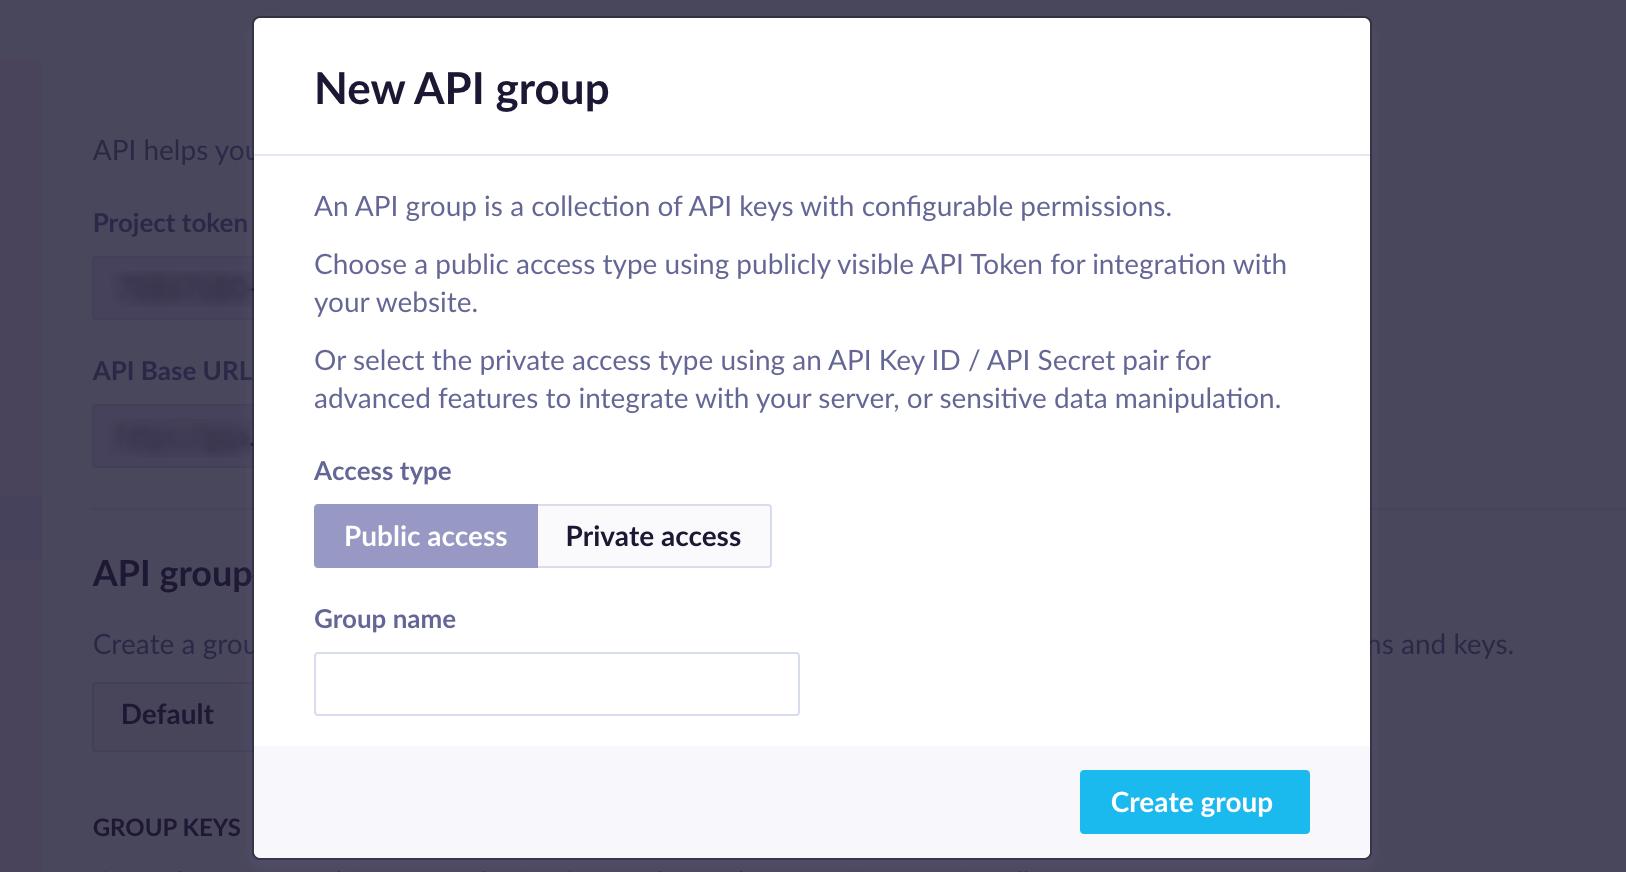
To create a new API Group, in your project, navigate to Project settings > Access management > API. Then, click on API Groups > + New group. Here, choose either the public or private group type and name your group.

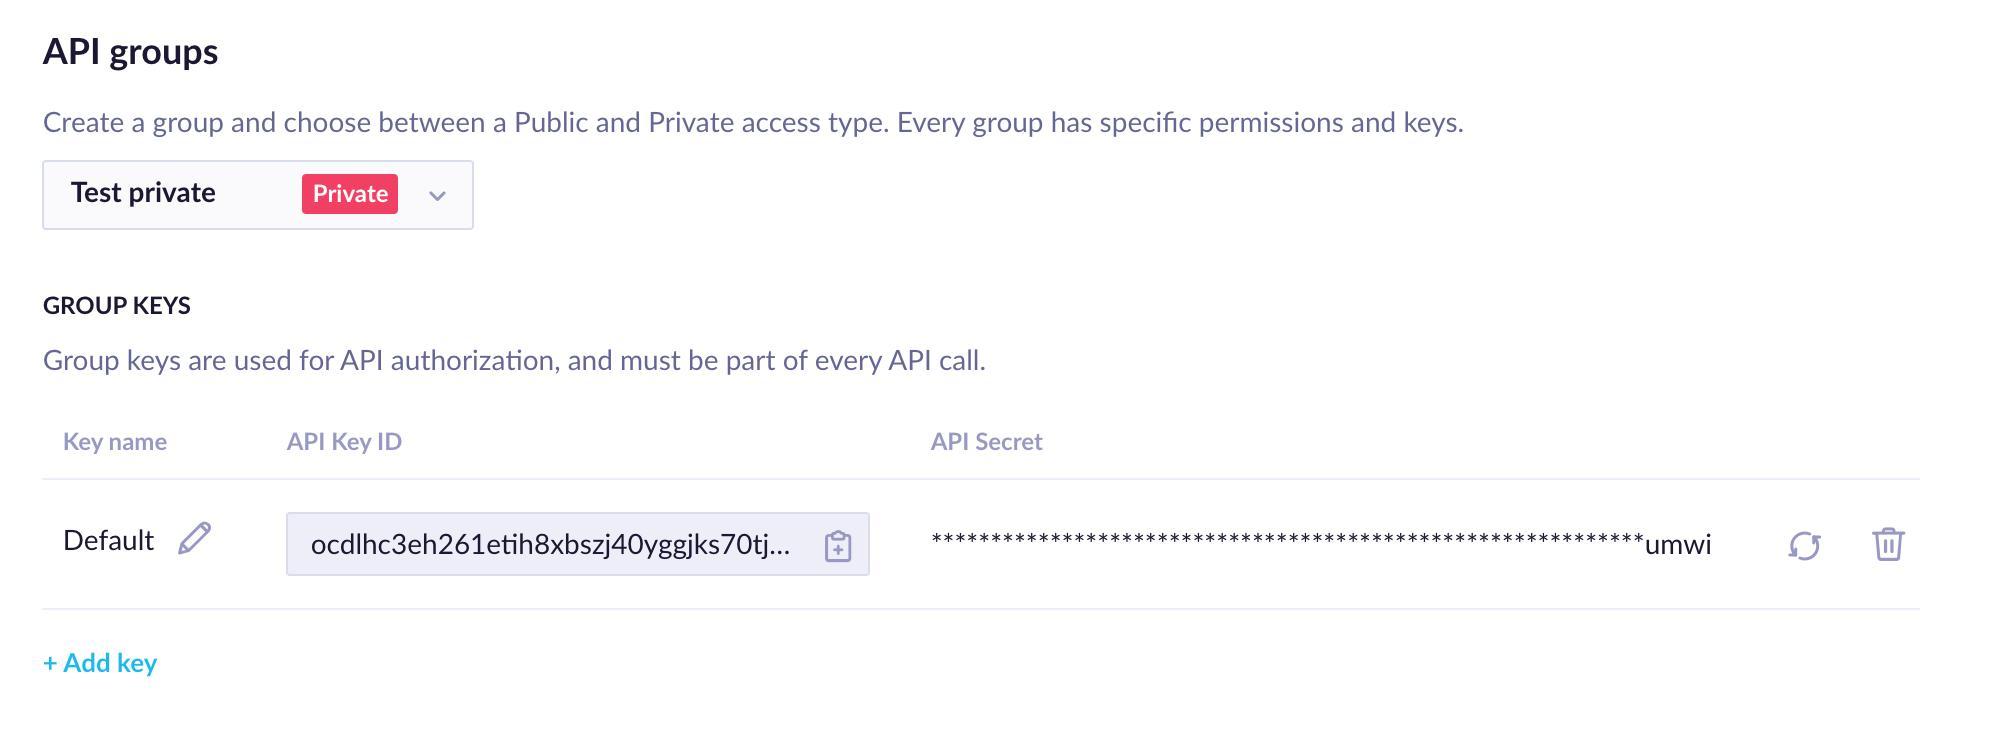
Depending on whether you created a group with a public or private API access type, you will now either see an API Token or API key consisting of an API Key ID + API Secret pair. Bloomreach Engagement will have generated one token or key automatically after creating a new group. Tip: If you create a group using private access, store the secret part of the key securely.
You can create more tokens/keys belonging to this group by clicking on the “Add key” button. You can add a custom name to each API token/key, for example, depending on the use case, or delete the token/key, by clicking on the “delete” button on the right. They can also be deleted programmatically via the Revoke API key](ref:revoke-private-key).

The private API access has one additional option, which is to rotate the API Secret in each key pair. You can do this through the Bloomreach Engagement interface as well as programmatically, using our Rotate API Secret.
After rotating, the API Secret is still accepted for the next 24 hours. During this grace period, both old and new secrets are accepted for authentication, to track data and access API.
Group permission
Now that you have set up a first API group with relevant accesses, you can configure the group’s permissions.
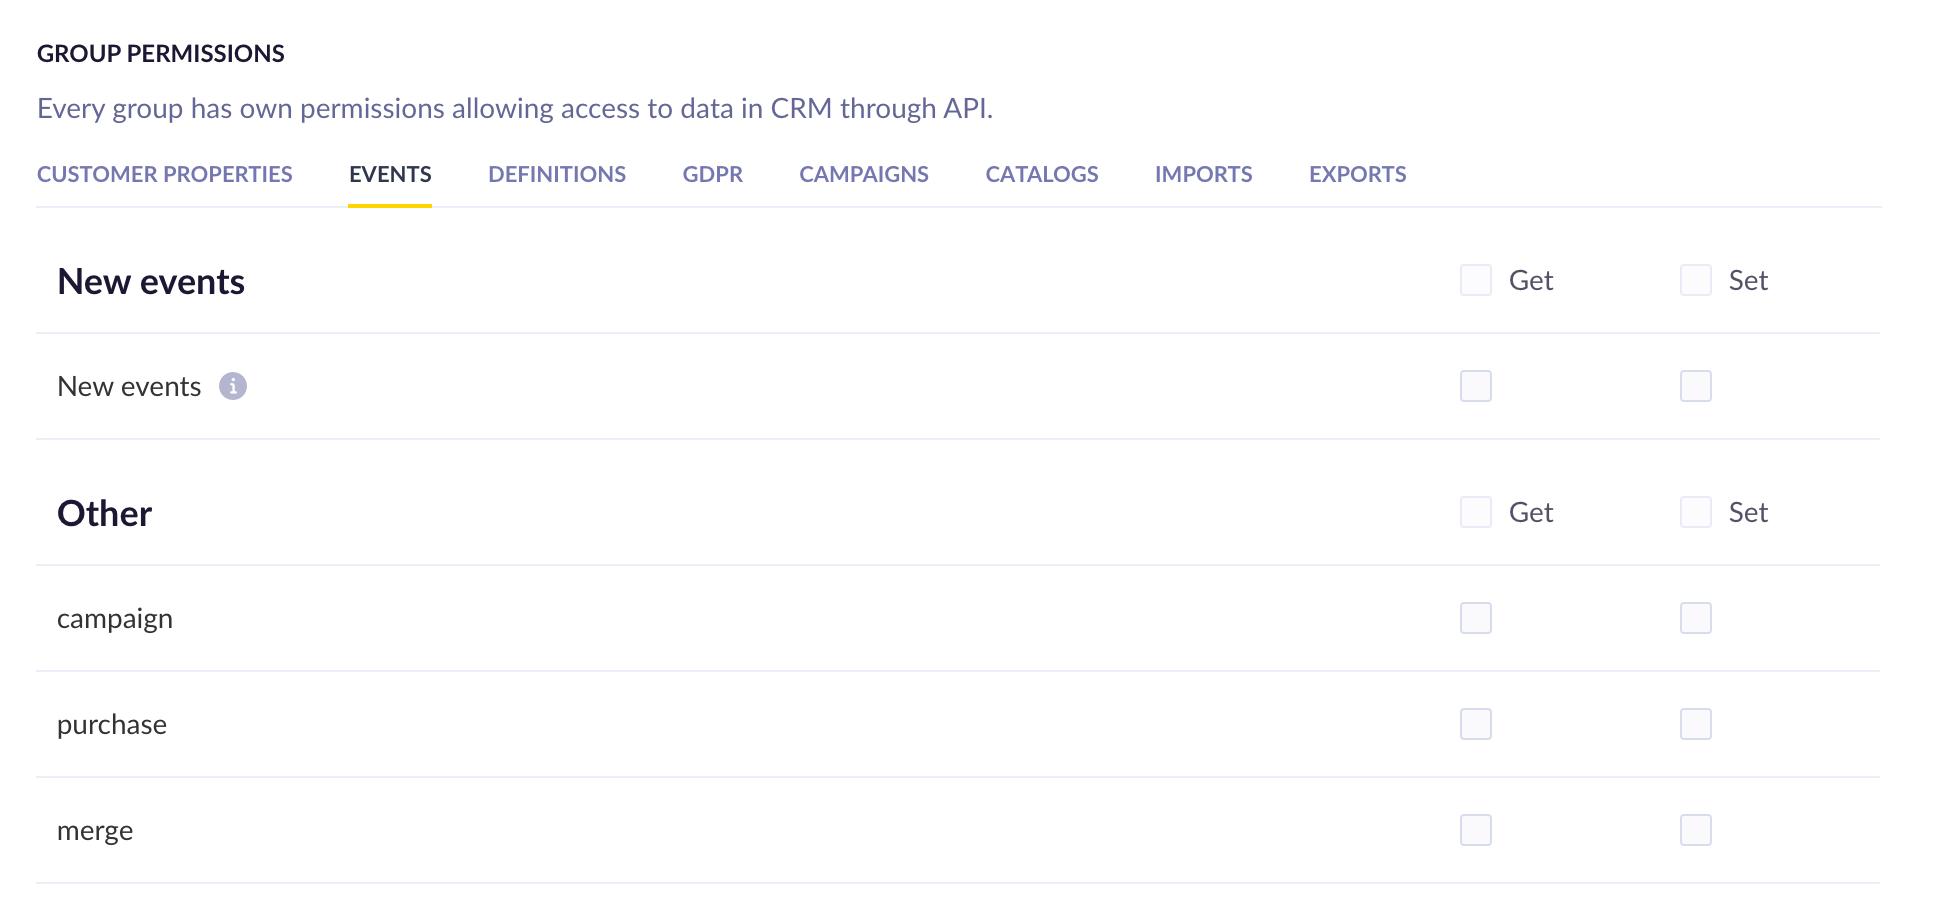
By default, the group will have no permissions, which means that in order to start using the API group, you need to allow access to the data that you want to use this group for.
The permissions are split into several categories. In most cases, you will be able to allow the API to either get or set the relevant data. You can do so by ticking the checkboxes next to the Get/Set options. In some cases, there will only be a “Get” or simply “Allowed” option.

